Archive › Journals: Log Your Ski Building Progress
Round Top skis 19/20 - Page 3
Journals: Log Your Ski Building Progress · 50 posts
WheatlpaFri Jan 22, 2021 12:23 pm
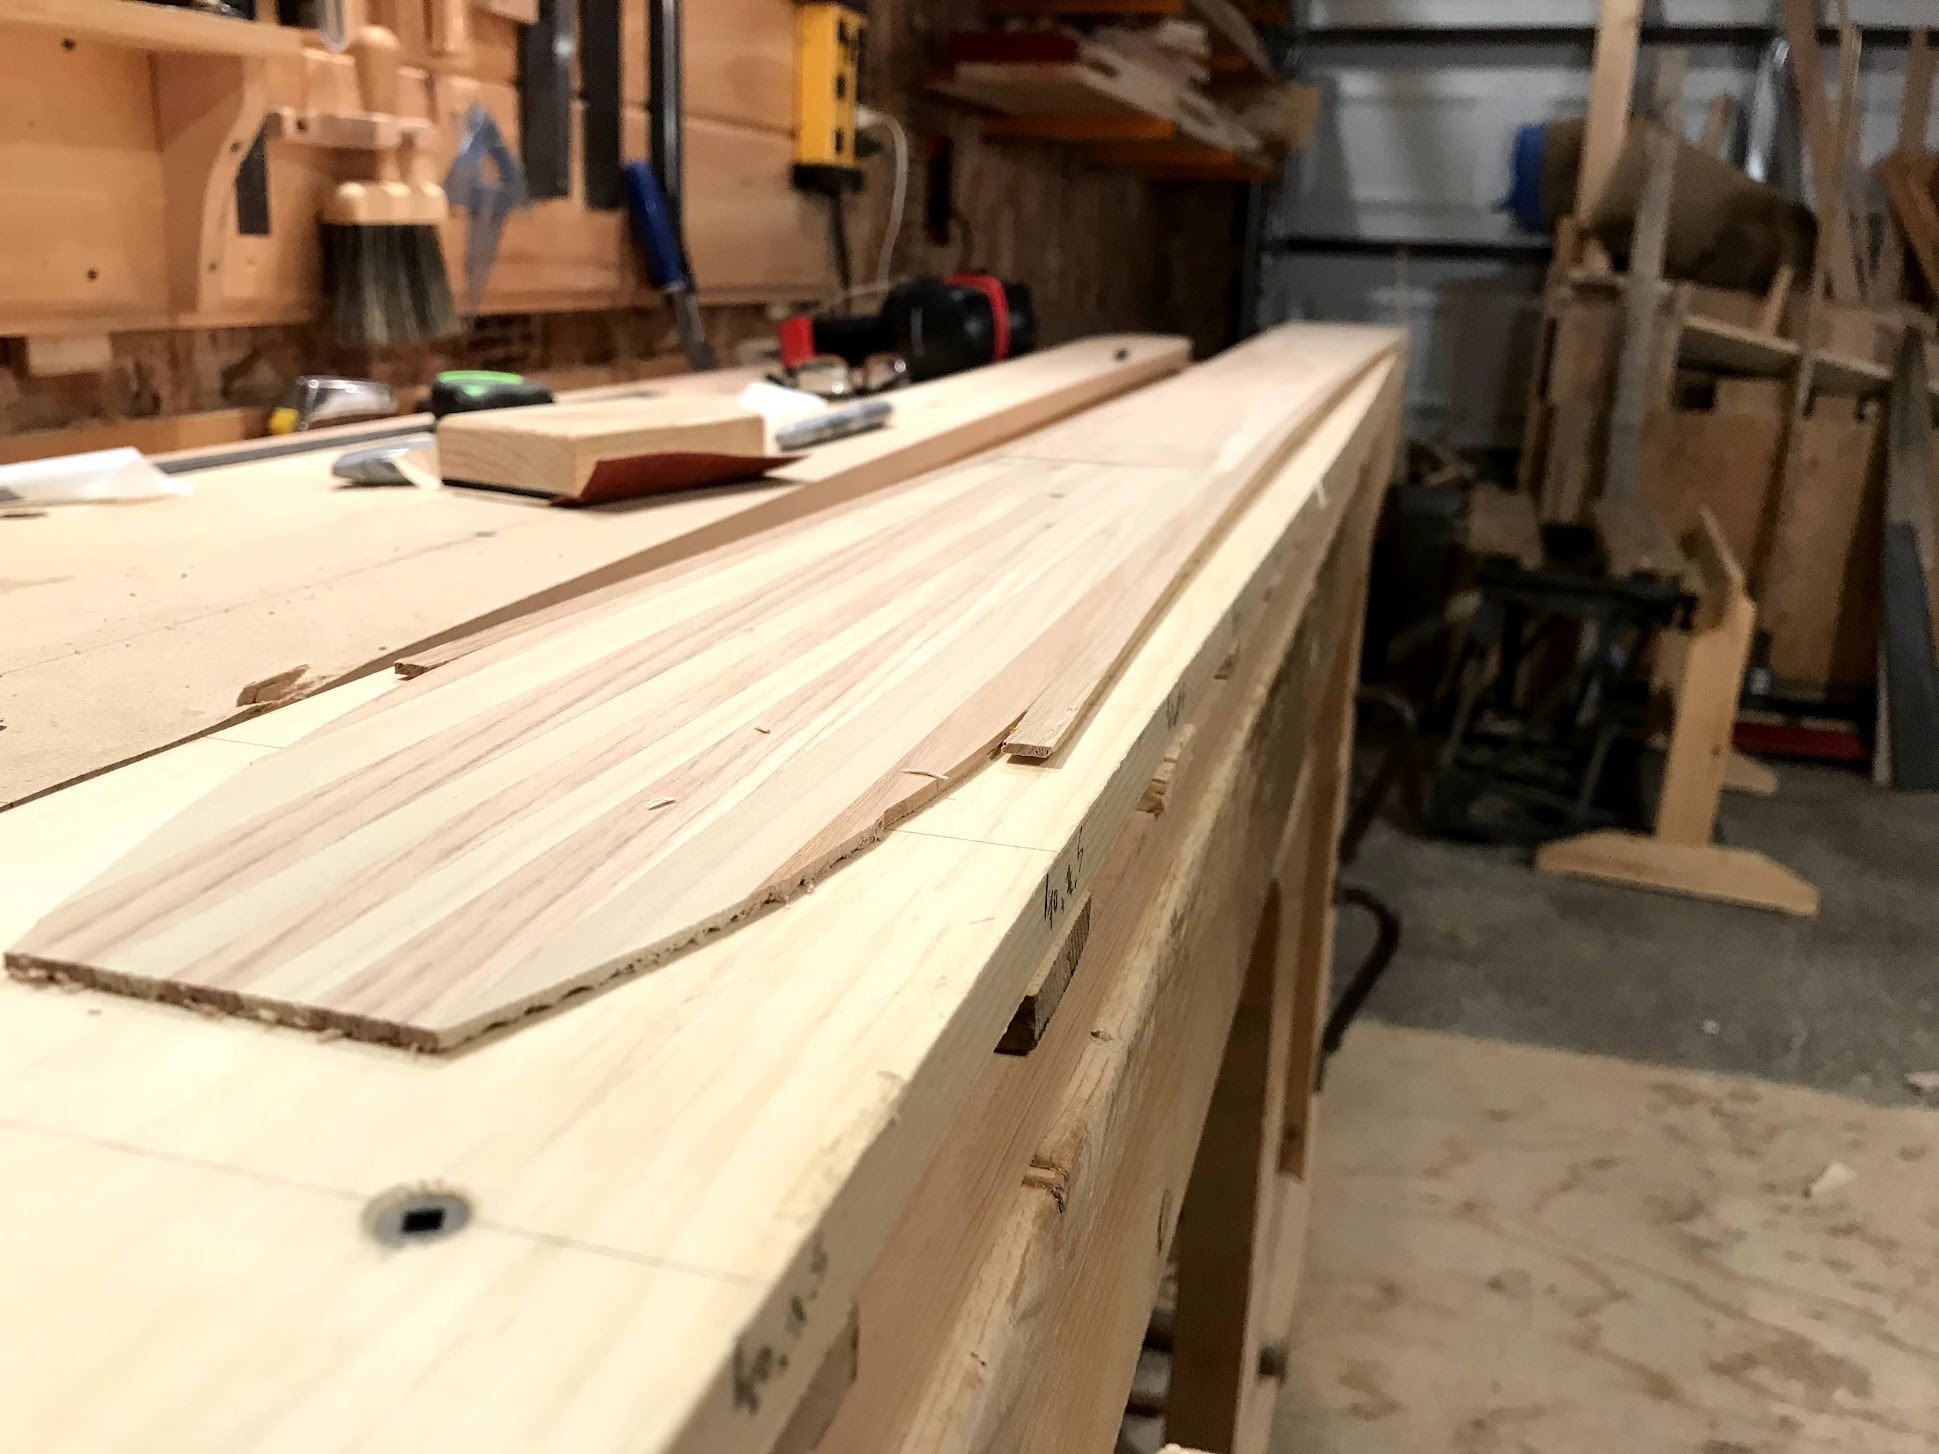
side wall glue up went well and so I sent them through the thickness planer on my cradle. I might have to run them through again as the cores are ~11mm thick in the centre with the tips being ~3mm. Unfortunately the depth gauge on the planer is in inches with only 1/8" gradient between them. So, not as precise as I would like.
Either way, edge bending and applying edges to base this weekend. then I have to make sure that plugging in two heating blankets and vacuum does not trip the breakers in the garage...
WheatlpaMon Feb 01, 2021 3:28 pm
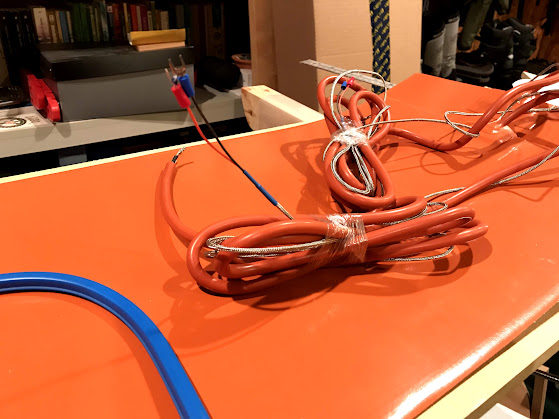
things are moving along. I have drilled the holes in the vacuum table to pass the wires from the heat blanket out to the power source. I then caulked the heck out of the wires/holes so I hope that they will hold up to the vacuum for the hour it will take to press the skis.
I have found a source for Entropy Epoxy, triaxial fibreglass, carbon fibre cloth and all sort of vacuum press supplies here in Canada. If you are interested in any of these materials I would check out Composites Canada. I have been dealing with JP and he has been very helpful with answering questions and getting me set up with my order.
I should be pressing my first pair of skis in the next week or two. Several large snow storms are heading our way so ski building will be on hold until the powder is gone.
WheatlpaMon Feb 15, 2021 6:57 am
After a lot of procrastination and self doubt i finally sucked it up and pressed my first pair of skis on my own set up. While the skis didn't turn out 100% perfect I think for a first attempt on a new system all on my own i think it was a success and i learned a bunch of lessons along the way.
1. A big pain point was the "lid" of the vacuum table. It is basically a wood frame with the silicone blanket attached to it. It is not attached to the table so i have to lift it on and off while using it which results in too much time and opportunity for things to shift on the mold.
2. Do not cut all of the materials close to final size before pressing. While fiddling with the lid i must have shifted the veneer of one ski backwards so the tip of one ski has fiberglass exposed.
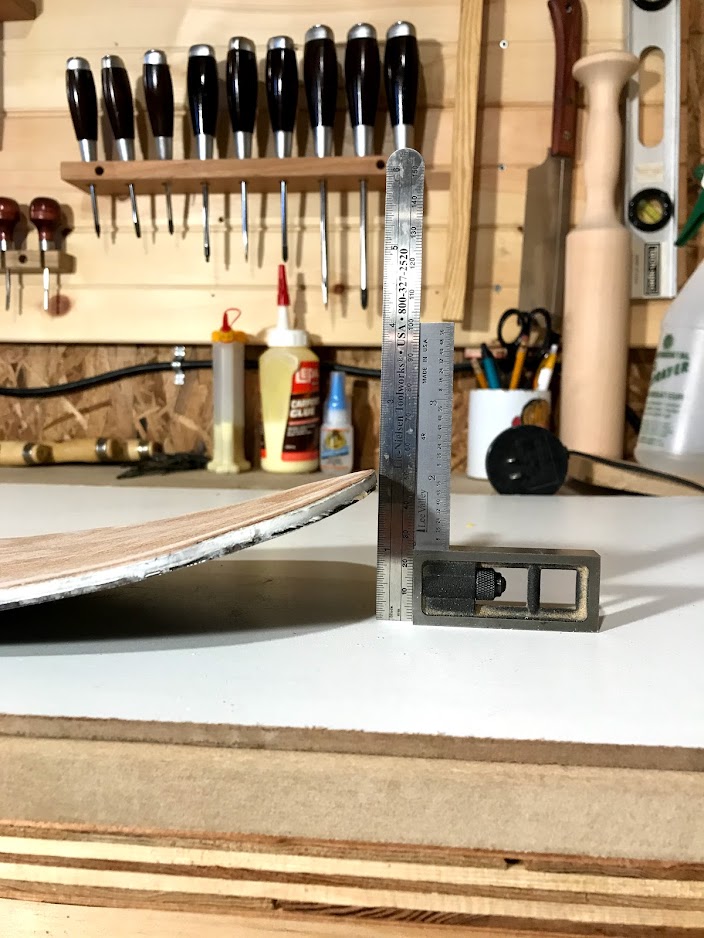
3. Regulate the temperature differential between the bottom heat blanket and the top blanket. I use a flat mold but still wanted camber so I was using a heat differential to achieve this result. For the first attempt a camber of 8mm might be a little excessive but this first pair will be used at the ski area so i am not too worried about it.
4. Mix up a little more epoxy at the start. I used a volume measurement for this pressing which seems to have worked out but it was a close thing at the end. I used 1 cup of resin and 1/2 cup of hardener for both skis, i used a foam roller to apply the epoxy which resulted in very little squeeze out but everything seems solid. I think next time i will use a little more epoxy just to be on the safe side.
I am sure there are other things I would do a little differently but on the while the whole process was pretty easy. I was worried about nothing.
So, I used the Entropy CPM with slow hardener, 22oz fiberglass and cherry veneer. The bottom heat blanket was set to 82 Celsius and the top was set to 45 celcius (the differential obviously too much). I held the heat for 60 minutes and then turned down the heat to 30 Celcius on both blankets and kept the skis under vacuum for another 2 hours just to be on the safe side. All of this resulted in a pair of flat skis with 8mm camber and a gentle early rise tip of 48mm. The final dimensions are 133-98-118, with this shape and camber they should be lively on the slopes...or really hard to keep in a straight line!
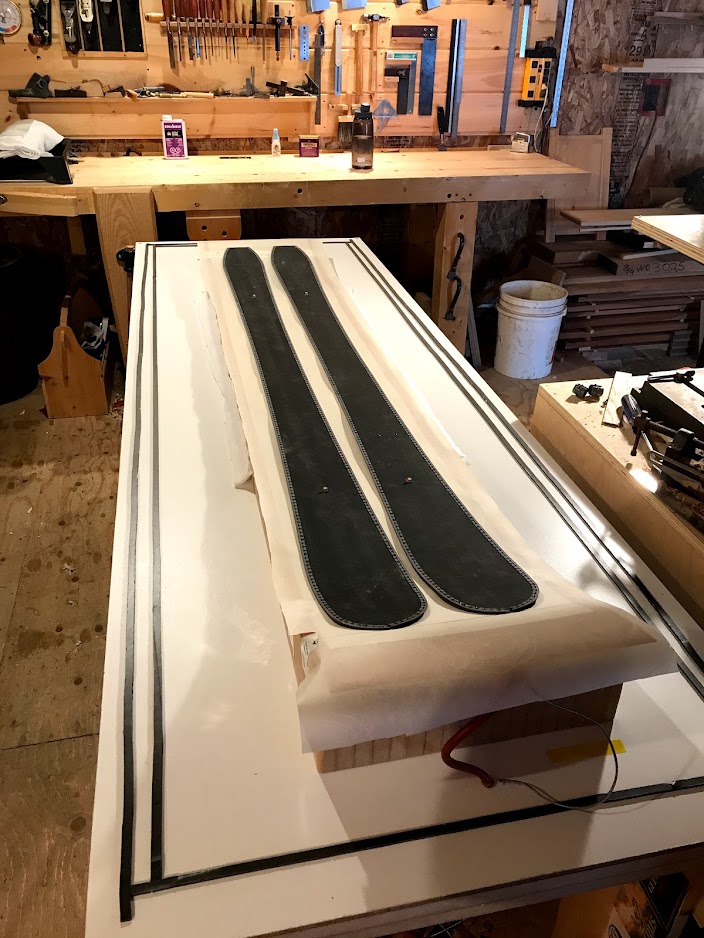
Bases in the mold:
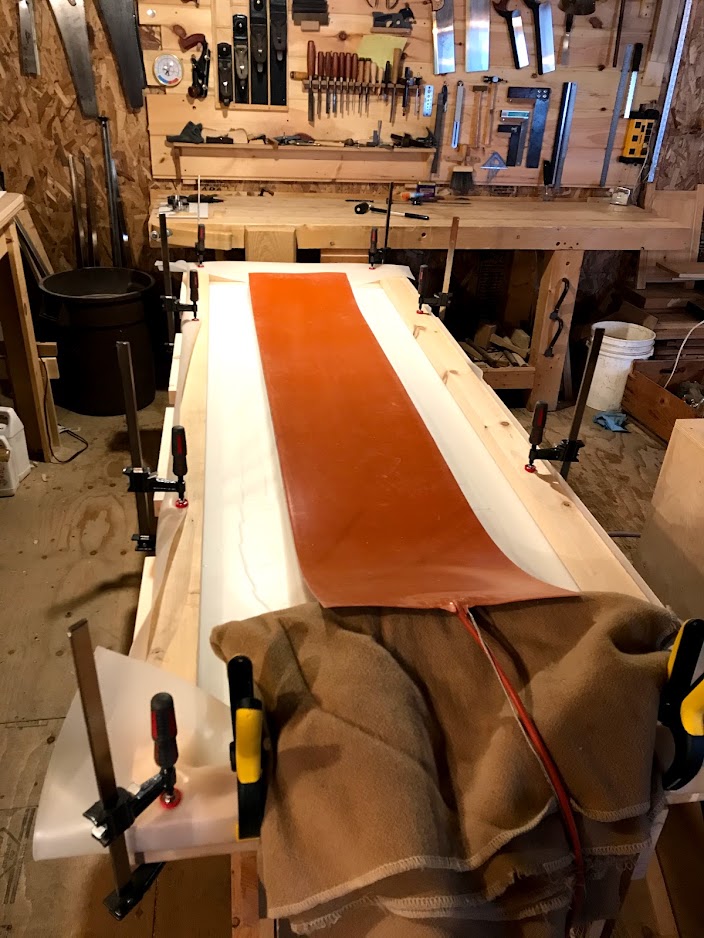
All clamped up and vacuum running:
Fresh out of the press:
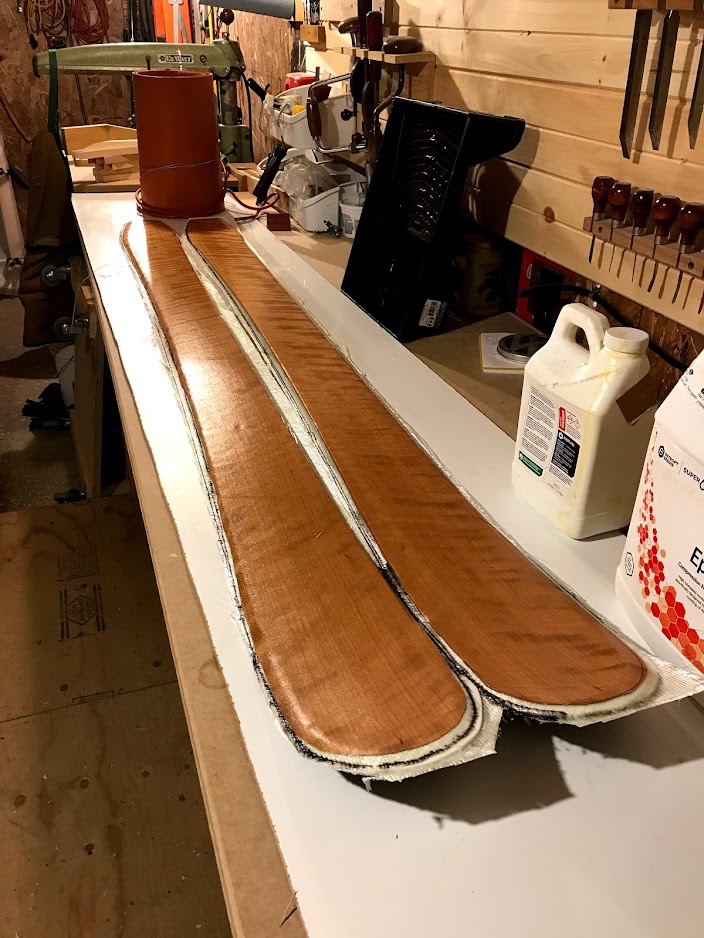
Tip shape is looking good:
mammuthTue Feb 16, 2021 3:59 am
Dont know the resin you use, but if it needs heat to cure you did create a half cured ski on one side (45 degrees....).
You dont necessarily lower the temp on one side to get camber, you can change your timing too. So one side kicks in and hardens up before the other side does.
WheatlpaTue Feb 16, 2021 5:19 am
Darn it! I didn't even think about that which is causing me a little concern for their durability. However, I will get them tuned and mounted to see how they ski, they are my first pair made solo on my own set up so I certainly wasn't expecting a perfect pressing right off the bat (although secretly I was...). Plenty of mistakes and plenty of changes for the next pair.
So, for the heating I assume I should ramp up the bottom blanket to 82C (I am using the Entropy CPM/CPS combination) and then 10/15 minutes later get the top blanket up to 82 as well. I wonder how others with vacuum tables who only heat from the top time their process.
I guess I will do some more searching/reading on heat differential and timing as it relates to camber while I make changes to the set up and get the next set of cores milled up.
JonrezzTue Feb 16, 2021 6:57 am
Congrats on your first pair! they look great!
Did you perform the layup over the mold? I would recommend performing layup on a cassette on a flat surface, then transferring the whole thing to the mold once ready. I've tried it both ways and having it all flat while stacking the layers makes it so much easier to align everything. once it's all in the mold and you're ready to pull down, I'd just press the middle of the skis down with your hand to help everything stay in place until the bag pulls the tip and tail against the mold.
Looking forward to hearing how they ski!
WheatlpaTue Feb 16, 2021 8:23 am
well, they are good from far but far from good
I am sure they will ski just fine at least for this season. Even with all of the flaws in the ski it was good to get over my fear of messing up and just doing it.
I did the lay up in the mold. It was pretty straightforward really. I had bent tip and tails of the cores so that they laid pretty flat on the bases (which were also bent to shape). Although I am not sure how it happened but one of my side walls did not quite make it out over the edge so I have a pretty exposed edge on one ski. Since I tele this will be on the outside (as I said, if they last this season I will be happy).
I think that once I mount the lid for the table on hinges it will make keeping everything aligned much easier. Also not using parchment paper over the aluminum will help with that as well. I just need to get some release wax for the mold for the next pressing.
I will be dropping them off at the ski shop today for the tune and then I will wax and mount the bindings before trying them out this weekend, although I will have to see if my old skins will fit...but that is a problem for future Pat.
pmgTue Feb 16, 2021 11:16 am
Hi,
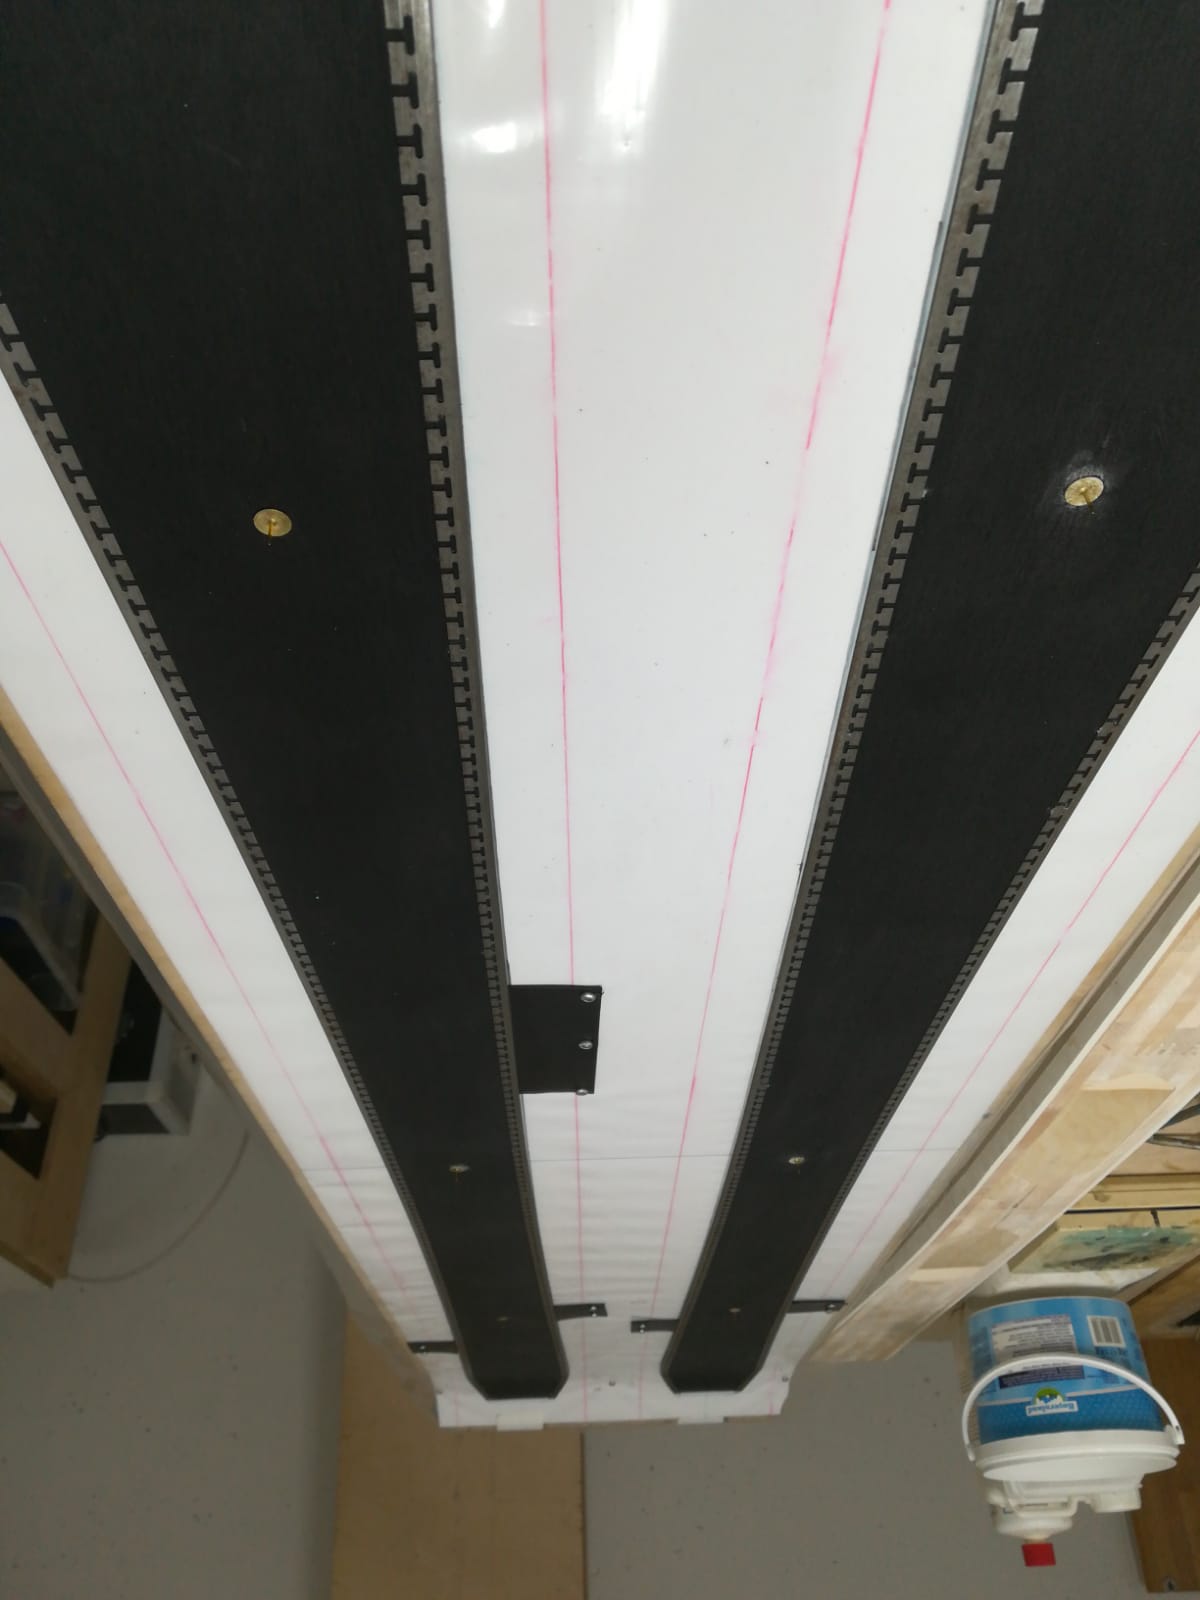
regarding core shift during layout/pressing. My method to avoid this is as follows: I use 3 thumbtacks glued to the base to keep the core in position during layup. the core then can't move more than about 0.2mm without getting resistance from the thumbtacks.
Maybe this can help you to avoid that problem in future.
WheatlpaTue Feb 16, 2021 11:26 am
Thanks for the feedback, that is a really interesting idea! I suppose you have not experienced any issues with the tacks incorporated in the ski. Although I also assume you would have to create a small recess in the cores to account for the head of the tack. I will explore trying this in a future press.
Although I honestly don't know how this happened as I was using the 2 peg method to locate the cores on the bases, through all of my dry runs it looked good and if they shifted so far the ski should have been really out of shape, so it is a mystery at the moment. I am chalking it up to another lesson learned.
Either way, I am starting to implement some of the lessons learned and get set up for my next pair of skis.
pmgTue Feb 16, 2021 11:45 am
Yes, a small recess for the thumbtack head is neccessary of course. I make this utterly simple: I take a 10mm wood drill but run it turning left (the way you would turn a screw out) so it does not really drill but just "smear" the wood of a bit.
WheatlpaWed Feb 17, 2021 1:06 pm
Another flaw and lesson learned from my first pressing. The centre of each topsheet seems to be crowned. I assume this means that the vacuum was not pulling enough or I did not use my j-roller aggressively enough to really flatten the skis. The bases are (surprisingly) over all very flat but the tops not so much.
Next time I will be clamping a steel platen on each ski to try and they them flat.
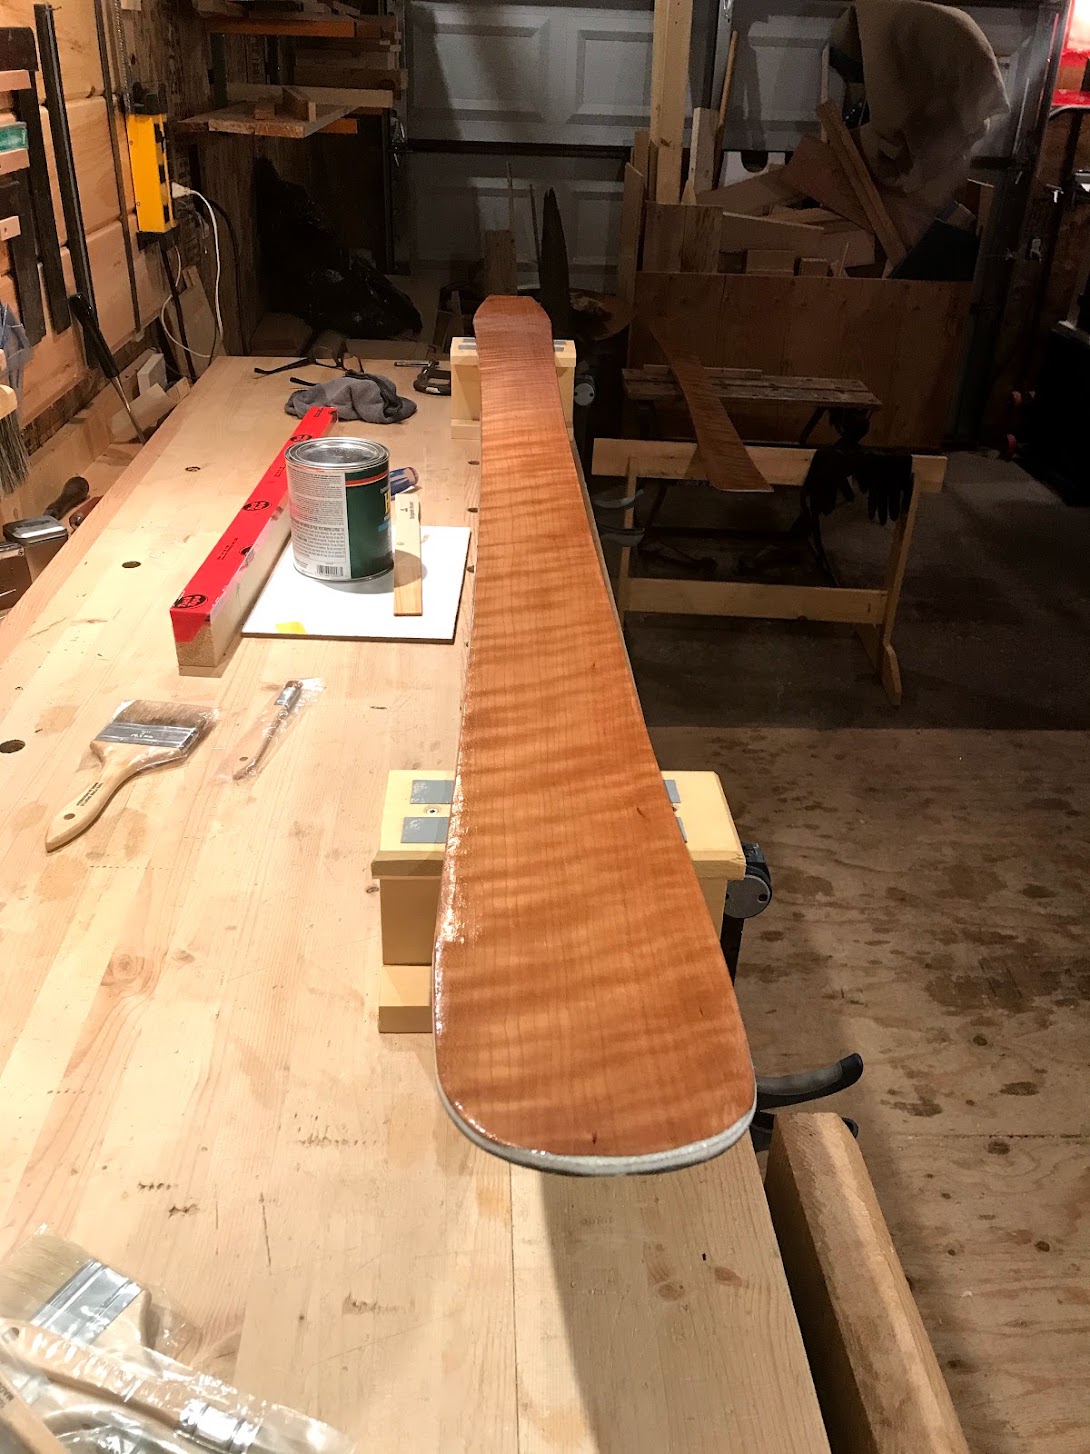
They are back from the ski shop with a nice tune and wax. I will start applying Spar Urethane to the skis tonight and they should be ready to ski by the weekend.
chrismpThu Feb 18, 2021 1:15 am
> Wheatlpa wrote: ↑Wed Feb 17, 2021 1:06 pm
I assume this means that the vacuum was not pulling enough or I did not use my j-roller aggressively enough to really flatten the skis.
Did you put a breather fabric over the skis during pressing? Just asking because it's hard to tell from your pictures and this might be a reason for the lack of pressure in the middle of the skis.
WheatlpaThu Feb 18, 2021 6:09 am
Yes, I had my skis in the press, then a sheet of perforated release film with the breather fabric on top. The breather fabric extended onto the table over the holes in the mold where the vacuum port is located. Oh well, I will pay more attention to the flatness of the top sheets when the initial vacuum is created. It seems like one ski is definitely more crowned than the other which is fairly flat aside from near the edges.
I weighed both skis last night before putting on the bindings this morning. one ski is 1.552kg and the other is 1.538kg. I don't think that is too bad for a first attempt.
I have coated them with a Spar Urethane and they look pretty good, I am only going with one coat because 1. I am impatient to try them out and 2. they are a beta test and so I don't know how they will stand up to skiing. I will be testing them out this weekend which should have some new snow and groomers which will put them through their paces.
mammuthFri Feb 19, 2021 2:10 am
You created a resin trap. Topsheet folded over the side works good to keep resin trapped with vacuum
One solution is to have the fibres still sticking out so the resin can flow along the fibres to get sucked out.
WheatlpaFri Feb 19, 2021 6:45 am
> mammuth wrote: ↑Fri Feb 19, 2021 2:10 am
You created a resin trap. Topsheet folded over the side works good to keep resin trapped with vacuum One solution is to have the fibres still sticking out so the resin can flow along the fibres to get sucked out.
Ahh, that makes sense. The last pair I pressed were on a friend pneumatic press so we cut the materials very close to the final shape. For the next try I will leave a lot more on the sides. I also think I will have to use a little more epoxy for the lay up. I applied it all with a roller and so only used 1.5 cups of epoxy for both skis.
I did get to ski my new skis this morning. We have not had any new snow lately so I stuck to the freshly groomed trails. The skis carve really nicely, it has been a while since I have been on skis with this much shape so I had to adjust my stance. The rear ski did chatter a bit and they did get tossed around when I got into the refrozen ungroomed stuff so maybe not the best for eastern hard pack but they will probably handle spring snow and powder nicely.
Changes for the next version of these skis will include a couple of layers of carbon fibre to increase the torsional rigidity and maybe use maple and ash for the core instead of ash and poplar which will add some weight and stiffness. The camber is pretty high (8mm) so I will try and get that down to 4mm and see what these changes do.
On to the Mk-II version!
mammuthFri Feb 19, 2021 8:14 am
What also helps is to glue a piece of waste wood outside of the abs/pu. Like this the topsheet and fibres dont kink down over the edge and resin gets sucked out more easily
WheatlpaFri Feb 19, 2021 8:35 am
> mammuth wrote: ↑Fri Feb 19, 2021 8:14 am
What also helps is to glue a piece of waste wood outside of the abs/pu. Like this the topsheet and fibres dont kink down over the edge and resin gets sucked out more easily
Another great tip. I use wood side walls anyway so either gluing extra on there or just making the side walls wider is a pretty easy step.
WheatlpaTue Feb 23, 2021 7:29 am
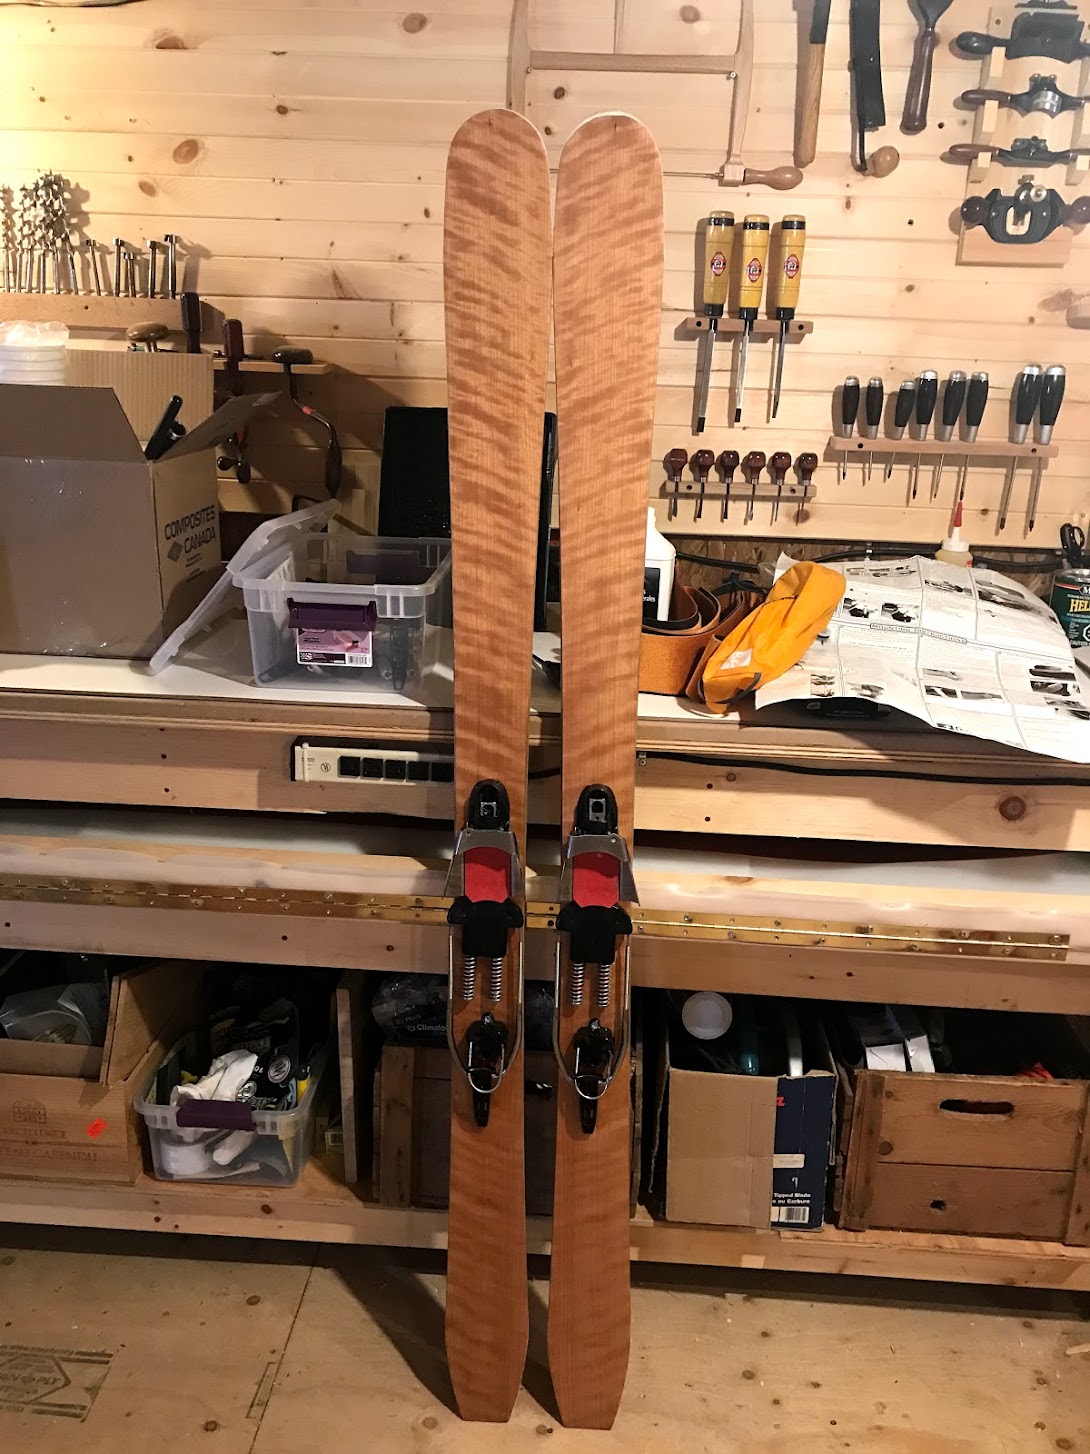
So after skiing the new skis mounted with my 22Design Axls I was having troubles. I was stepping on my tips, the rear ski was chattering because it felt like I couldn't get any weight on it. In short it was frustrating and I felt like maybe I made a mistake with the ski shape. Well, after reading a lot more about mounting location and finding the boot centre I realized that I had used the (very) old school method for tele mounts in using the cord centre and mounting the pins there.
So, I remeasured the effective edge length and it corresponds to the narrowest point on the ski. Set back 4 CM and drilled new holes. Here is a photo with the difference in binding location:
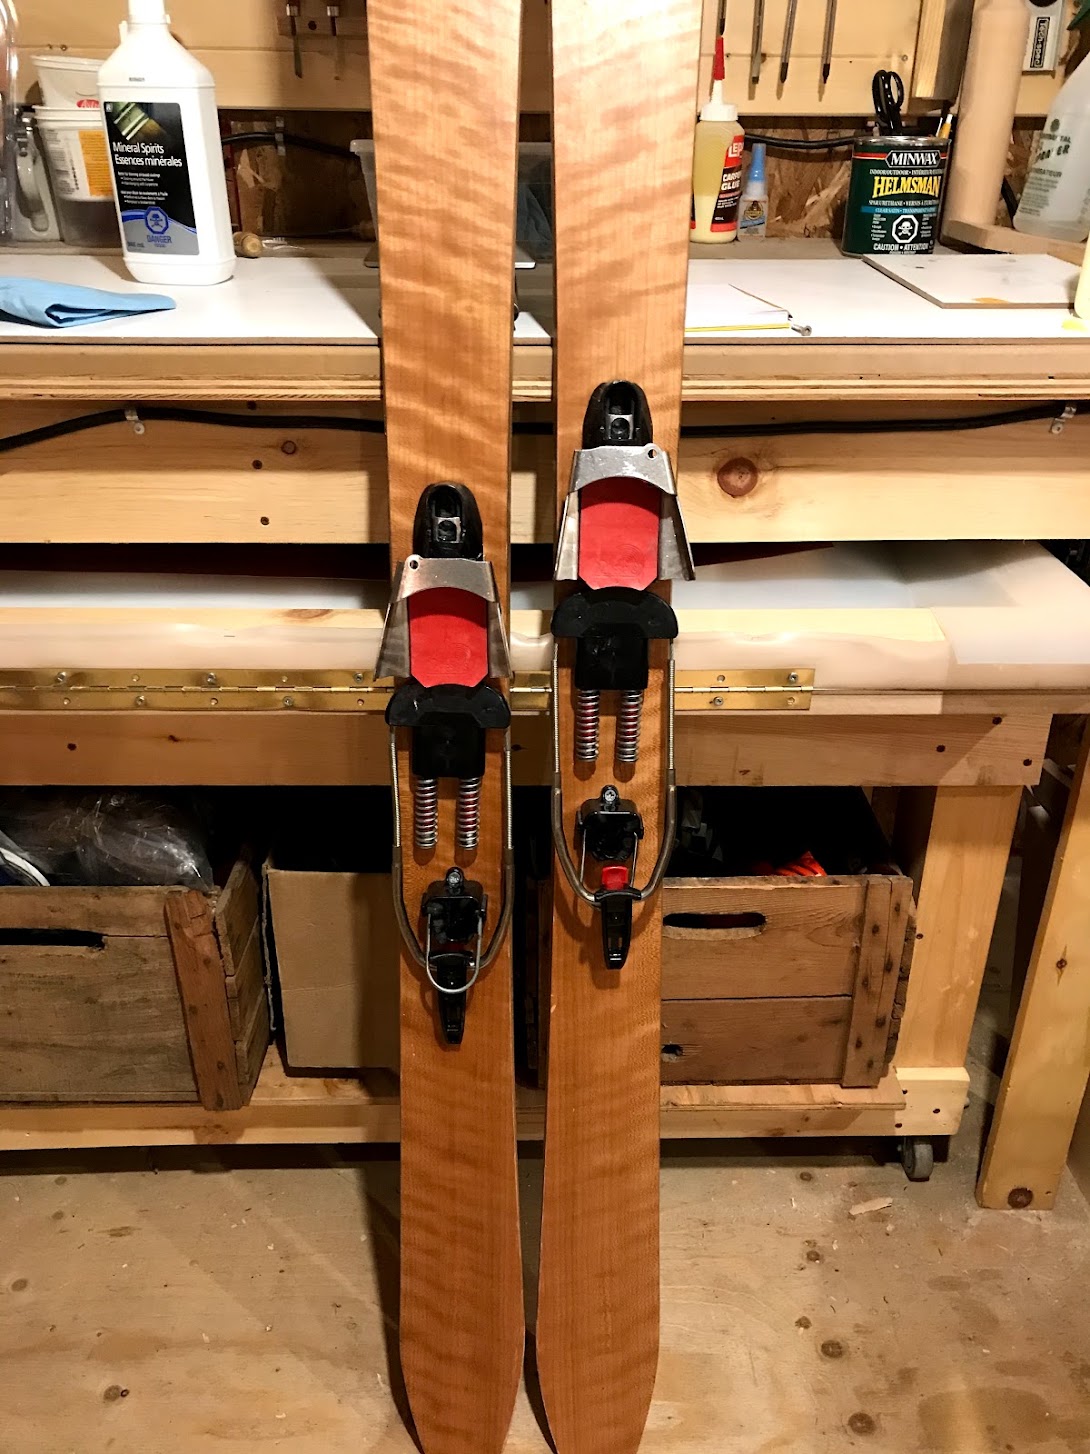
The ski on the right is the new location, this is a big difference for me. I took them out this morning before work and wow, what a difference! I was able to get them over on edge, they were quick and snappy side to side and the rear ski was no longer squirrely, it held a solid edge and made my turns super solid.
WheatlpaWed Mar 03, 2021 6:52 am
I have started the next pair of skis, they will be exactly the same as the first pair but using two layers of 6oz biaxial carbon along with the 22oz FG. I would like to see what the carbon will add to the ski characteristics. My original pair of powder skis has 2 layers of 5.8oz CF and 2 layers of 19oz FG but a fairly thin core. They are perfect in soft snow, not so much on the hard pack. I hope I get these finished before the spring rains come!
I can tell you though, I am getting frustrated with the edge bending. Maybe I am just impatient and rushing through the process but oh man I find that edges are the hardest part of this whole process.
I am using the modified nippers as my bending tool, gentle curves are no problem, but just trying to wrap the edge around the nose and getting it to fit with minimal gaps is testing my ability to remain calm and not throw it all out into the snow....
ah, that was good to get off my chest. I am sure it will get better with practice.
chrismpThu Mar 04, 2021 12:12 am
For tighter bends you could try making a second tile nipper with a smaller (maybe even rounded) "nose".
WheatlpaSat Mar 06, 2021 7:27 am
Well I guess I can try and modify my original nippers and see if that will do the trick.
In other news I was in the process of getting the cores ready for pressing tomorrow when I ran into issues while running them through the planer. It seems that my choice of kiln dried maple for the side walls was a mistake. The tips and tail sections started splintering when I was getting down to the 2mm thickness. I am a little stumped as to how I can recover from this. My thought is to smooth off the jaggedy sections and cut back the side walls to an even line and then use tip and tail filler to replace the lost maple. I figure the sidewalls at this point is so thin that they do not provide a whole lot of structure to the ski. Anybody reading this have any thoughts or experience with this?
image no longer available
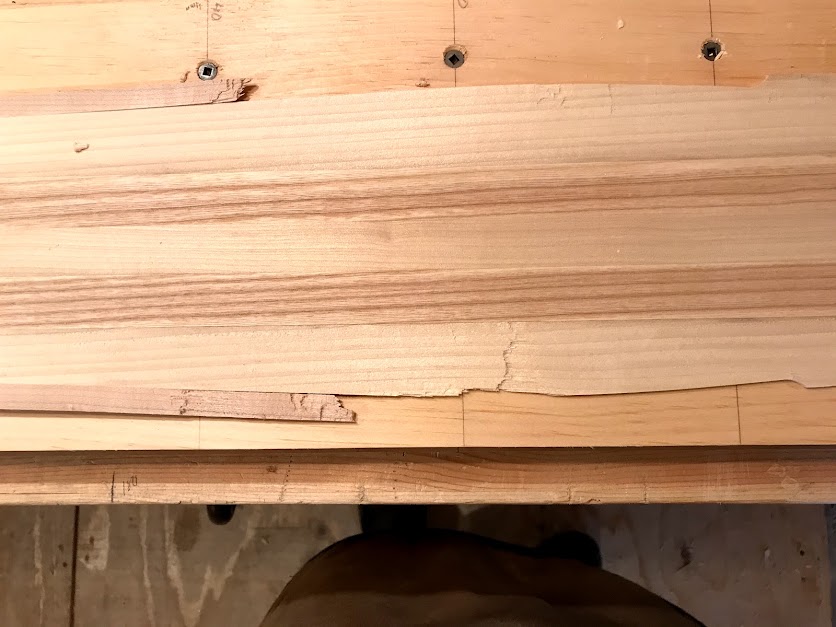
pmgSun Mar 07, 2021 2:04 am
I always have the 0.6mm rabbet already in the bottom side when going in the planer. I use this rabbet and add some double sided tape (I add some paper in between to get to 0.6mm thickness) at the tip and tail sections. This keeps the sidewalls in place and keeps them from shattering.
The other thing when getting to the end thinkness is that I never take away more than 0.1mm per run when some part of the core is less than 3mm thick.
I usually start at 1mm at full core thinkness, reduce to about 0.5mm when tip/tail is about 7mm thick, and further reduce down to 0.1mm on the last runs. Takes time but saves the core
mammuthSun Mar 07, 2021 3:55 am
Hot Glue is your friend
WheatlpaSun Mar 07, 2021 4:56 am
> pmg wrote: ↑Sun Mar 07, 2021 2:04 am
I always have the 0.6mm rabbet already in the bottom side when going in the planer. I use this rabbet and add some double sided tape (I add some paper in between to get to 0.6mm thickness) at the tip and tail sections. This keeps the sidewalls in place and keeps them from shattering.
The other thing when getting to the end thinkness is that I never take away more than 0.1mm per run when some part of the core is less than 3mm thick.
I usually start at 1mm at full core thinkness, reduce to about 0.5mm when tip/tail is about 7mm thick, and further reduce down to 0.1mm on the last runs. Takes time but saves the core
I might have been a little aggressive with the depth of cut...live and learn. My issue with the planer I have is that there are no fine measurements on the depth adjuster, they are in 1/8 inch sections so I will have to play around with the machine to figure out how much is taken off with each turn of the adjustment knob.
I also have the rabbet done before planning. I will have to try your method as I also use double sided tape on the tip but will spread it out to the edges as well.
For this build repair I was thinking of trying to glue wood back but I think that will cause more trouble when trying to get it back to the desired thickness so I will just use the tip/tail filler material and bring it down the sides. Not sure how will the ski will work but I don't think it would impact the performance all that much.
WheatlpaSat Mar 13, 2021 4:08 pm
Another great day. Dawn patrol this morning and pressed my second pair of skis. They turned out pretty well although I am having issues with the edge to base connection. When I glued them on they seemed to be very tight but when I took them out of the press there are little gaps all along each edge. Not huge gaps but enough to bother me. Photos to come after they have been tuned and epoxy removed.
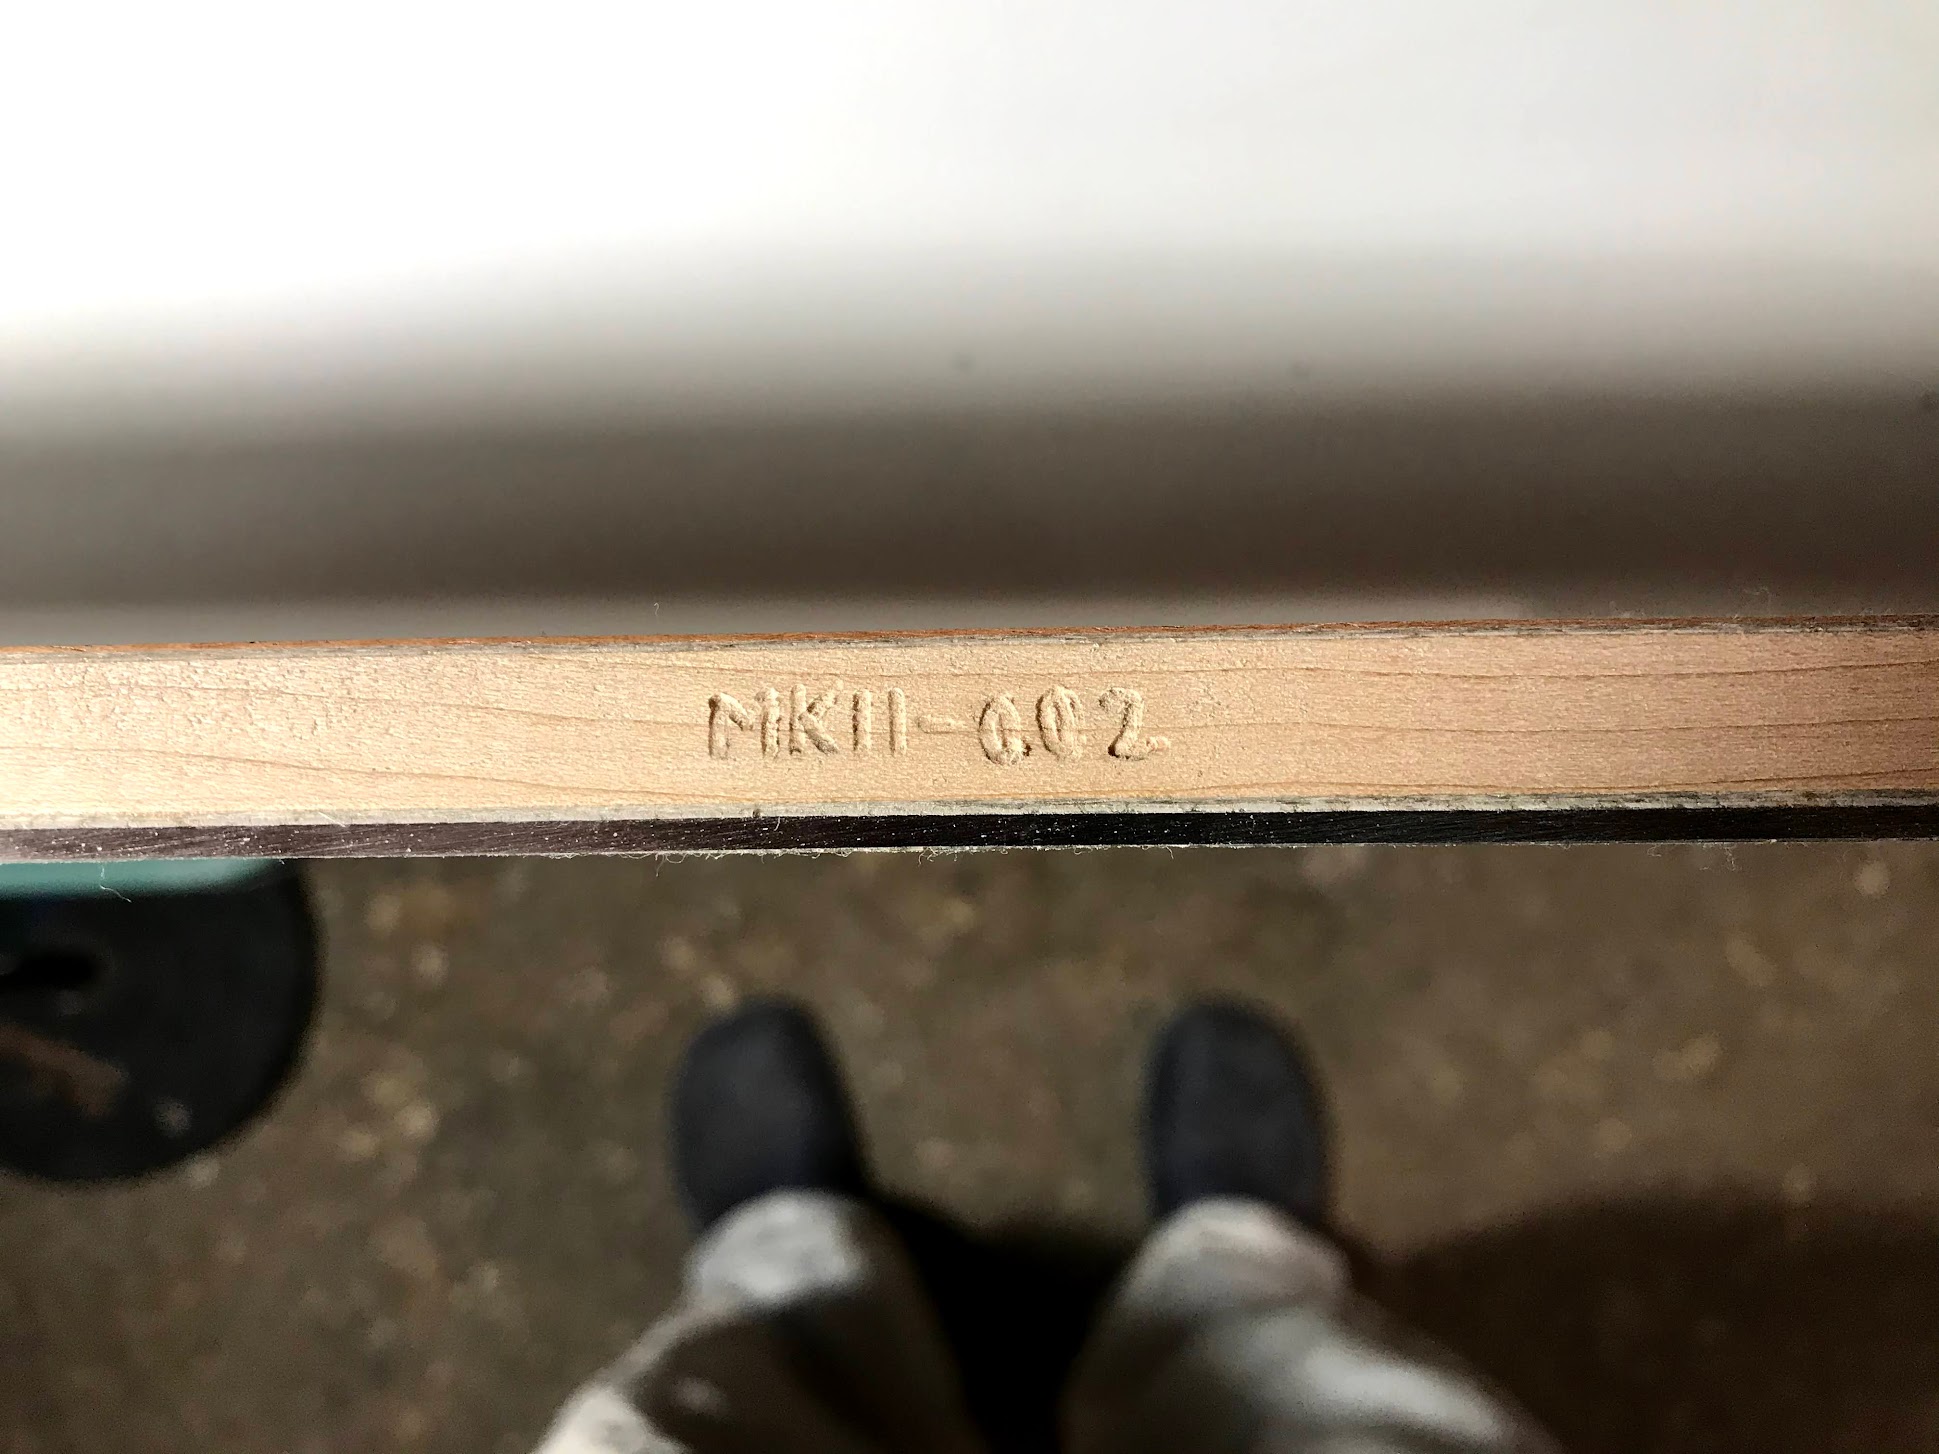
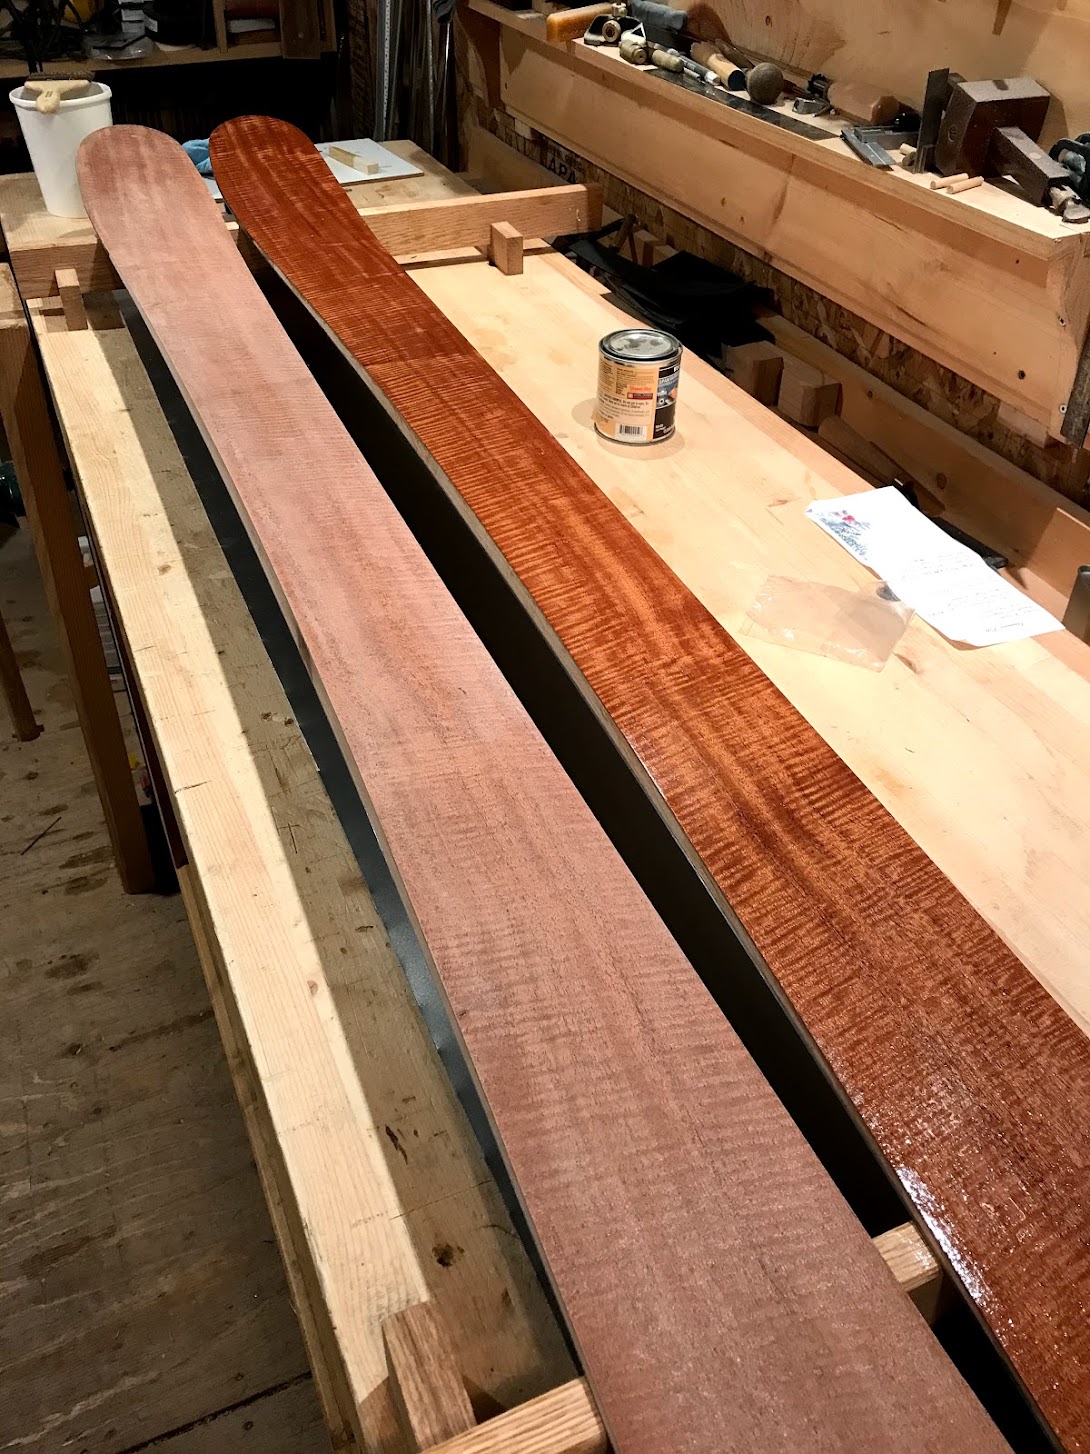
Here are a couple of shots of the before and after, I think the Honduran Mahogany used for the topsheets really turned out well, and my attempt at engraving the serial number didn't go too badly either!
Details:
Length: 175
dimensions: 132/94/117
Core: 2.5/10.5/2.5 Ash/Poplar with Maple sidewalls
Core length: 143cm
Layers (starting from top)
Wood Veneer
CF - 5.8 oz
FG - 22oz
wood core
FG - 22oz
CF - 5.8oz
started the bottom heat blanket straight to 82 degrees and kept the top blanket about 15 degrees lower until the bottom reached temperature. I held the bottom at 82 and the top at 65 for 20 minutes to get my camber. After 20 minutes I turned up the top blanket to 82 and let them run for 60 minutes at which time I turned them both down to 35 degrees and kept the vacuum running for another hour or so.
Resulting camber is 9mm with pretty flat bases.
Let them cool for another 2-3 hours and then cut the flashing, attacked them with the belt sander and then routed the sidewalls to 14 degrees. Sanded the top sheet with 220 and then 320 grit to smooth out the epoxy before putting on the first coat of Spar urethane. They are looking pretty darn sexy if I do say so myself. I hope they ski as well as the look.
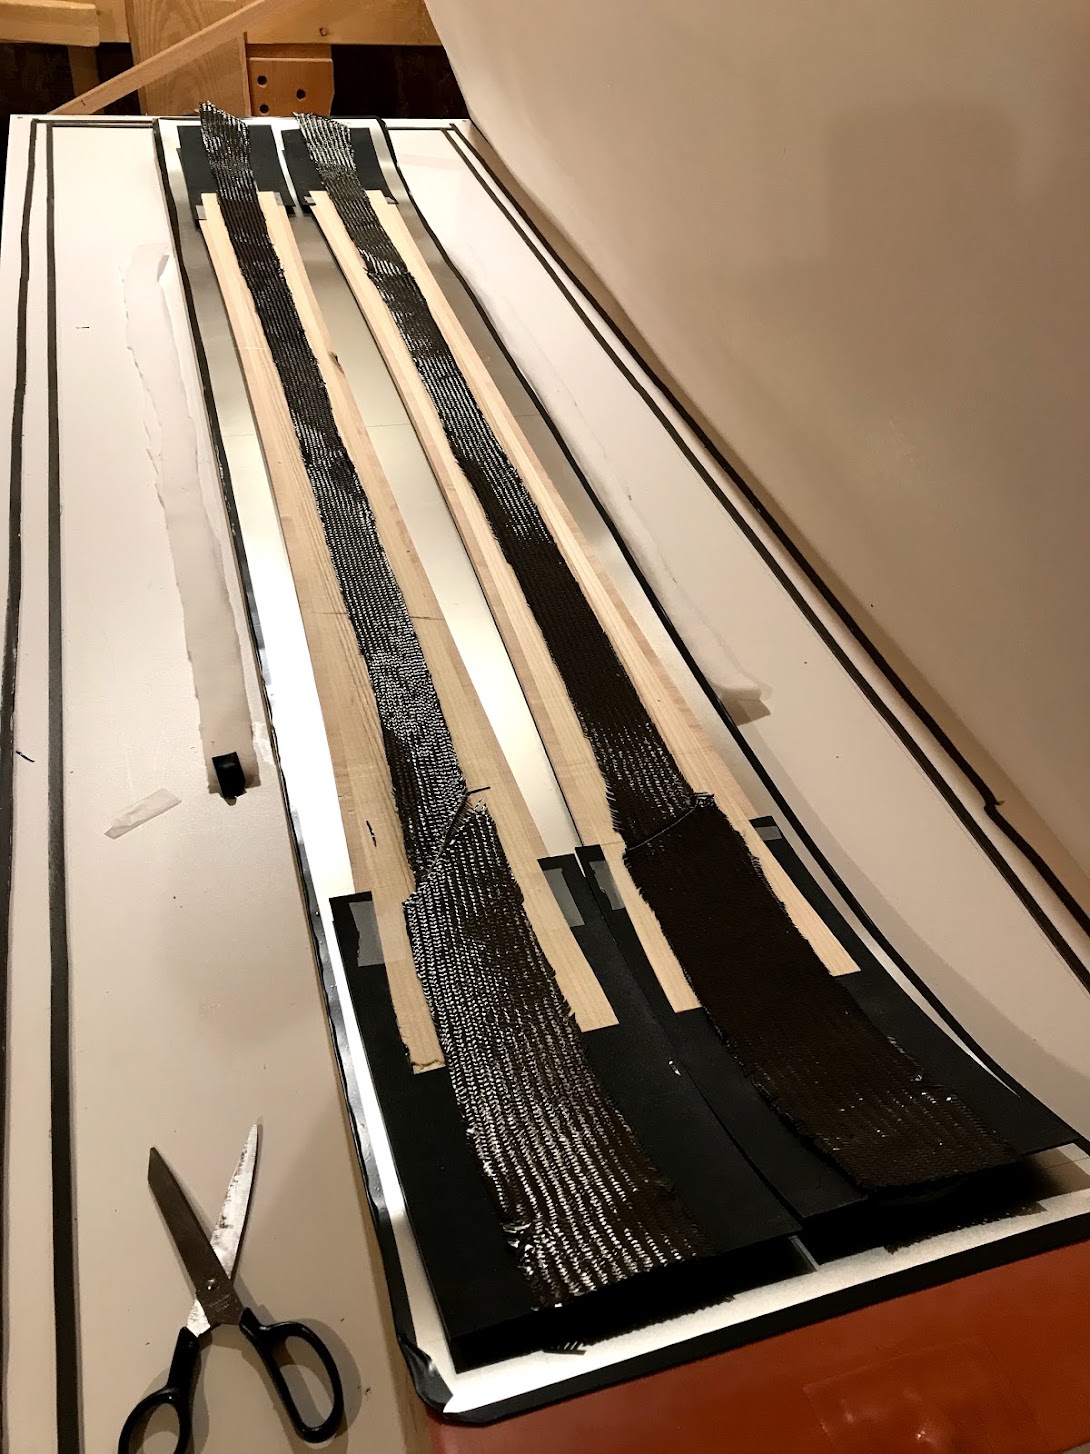
Here are the cores, bases and the carbon fibre in the press. I was just making sure the cores that I bent would sit flat before starting the lay up.
fresh out of the press.
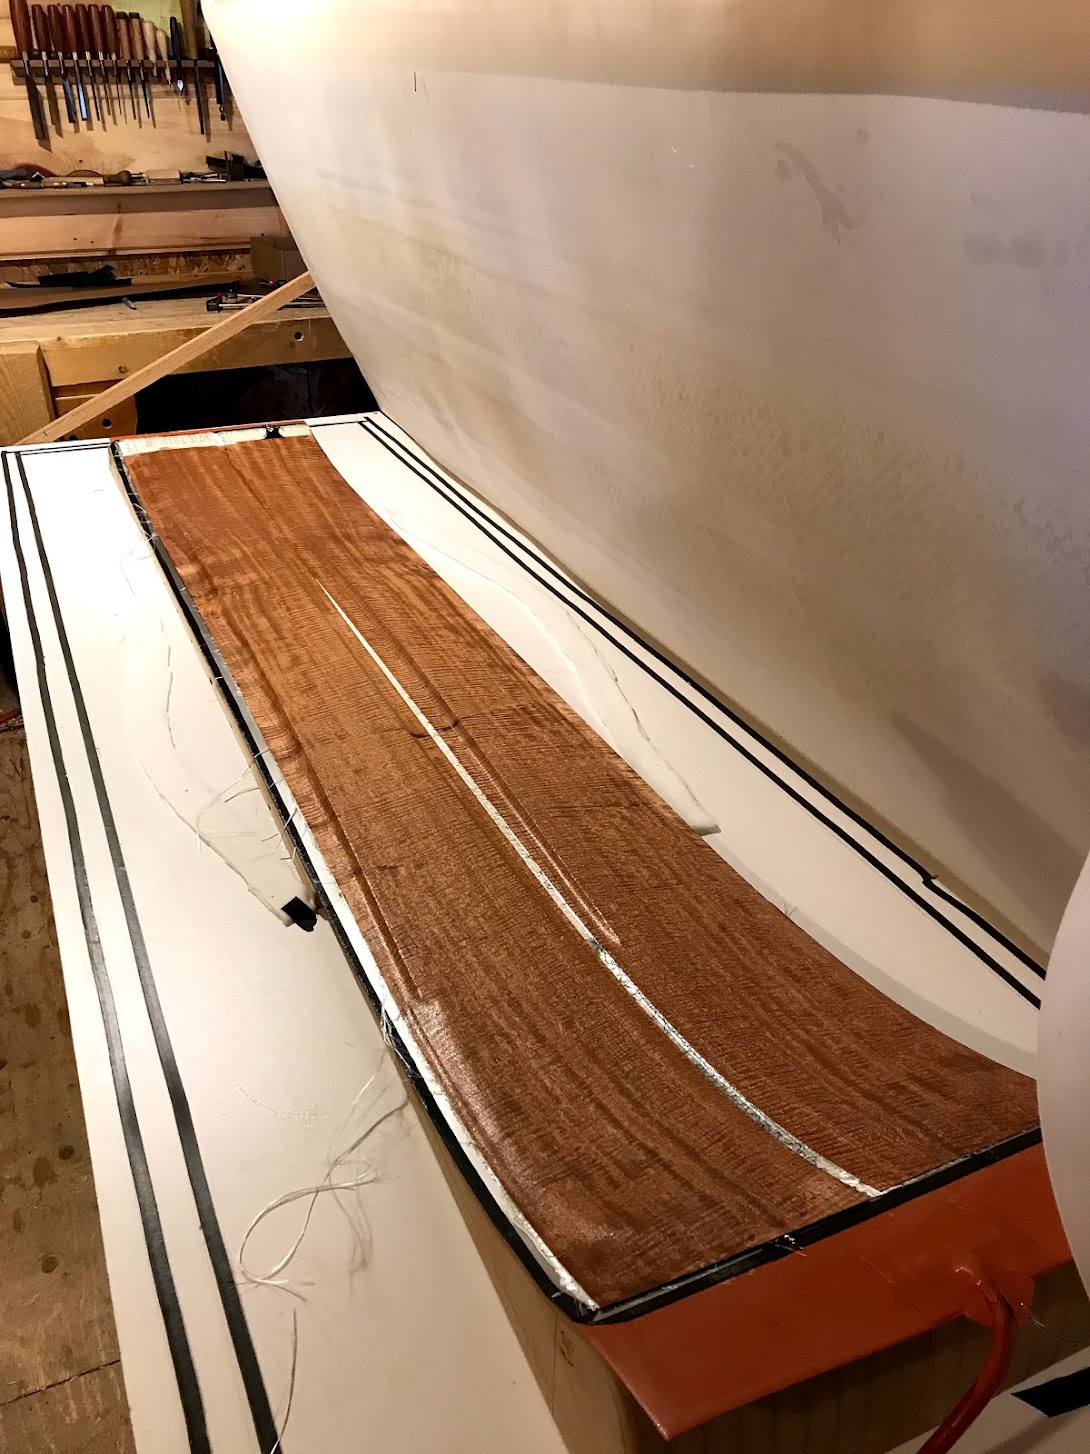
Serial Number for my second pair, cause who knows how many I might make
And finally starting to put the Spar Urethane on, before and after, the figure in the veneer is almost too much!
mammuthMon Mar 15, 2021 6:05 am
Better to start cutting and grinding after 1-2 days if there is no emergency. The epoxy needs 4-6 days to fully cure. Before that you can still influence e.g. the camber when flexing them too strong. Was written here several times....
WheatlpaMon Mar 15, 2021 10:33 am
> mammuth wrote: ↑Mon Mar 15, 2021 6:05 am
Better to start cutting and grinding after 1-2 days if there is no emergency. The epoxy needs 4-6 days to fully cure. Before that you can still influence e.g. the camber when flexing them too strong. Was written here several times....
Interesting. I definitely did not read that. I will make a note of that for the next pair which I am getting ready now. As is usually the case, I seem to be doing and then find out reasons why things are going wrong...at least those lessons will sink in
mainly because I don't know the questions I need to ask until I run into a problem.
Along those lines I did run into an issue with my base to edge connection. I am not sure if this was because the edges I was using came in a roll and I didn't realize I needed to straighten them out before use or if the bases are not cut out cleanly. I did read (after the fact) that it is a best practice to get the edges back to straight before bending them to the bases shape (thanks Vin for that write up) which I am doing for my next build. I am also taking a lot more time to get the bends to fit better and with out forcing them into shape.
My last pair just got back from the ski shop, they were able to flatten the bases on the belt grinder but there are some gaps between base and edge that I can get my thumb nail into that I probably should fill in (see photo below) but not sure if I should epoxy or simple p-tex, anyone have any thoughts on this?
image no longer available
chrismpWed Mar 17, 2021 2:26 am
I would use a thin epoxy and a small syringe to fill in those gaps.
WheatlpaWed Mar 17, 2021 6:17 am
> chrismp wrote: ↑Wed Mar 17, 2021 2:26 am
I would use a thin epoxy and a small syringe to fill in those gaps.
Thanks for the confirmation. I have ordered some syringes and I am looking up how to thin my Entropy epoxy (several drops of acetone seems to be the answer) . I will probably attempt this over the weekend assuming my package arrives by Friday.
chrismpThu Mar 18, 2021 12:20 am
Sounds like a plan! The important thing is to fill those small gaps from the bottom up. If you don't do that the epoxy might just stay on top of the gap and not fill it due to its surface tension.
WheatlpaMon Dec 09, 2019 8:40 am
Hi All, Let me introduce myself. i am a long time telemark skier living here in south eastern Quebec just above the Vermont border. I have built a couple of pair of skis in the past 2 years but those were on other peoples equipment. I have wanted to build my own skis since visiting a friends company in Jackson, WY while on a spring ski trip. It has taken a while but i am finally getting around to building my own set up.
Although i have built two pairs of skis in the past couple of years both systems are different from what i would like to build. The first was vacuum but using tube bags and steel plates for the moulds. Simple and fairly straight forward but the plastic waste was a problem and having a bunch of steel plates for the press seemed to be more hassle. The second pair was done with a friend on his pneumatic press, very straight forward but he built it many years ago and it only does one ski at a time and i do not have room for a large steel frame press.
So, i have decided to build a vacuum table with a silicone sheet. I am taking the table design from the joewoodworker, and i really like the mould built by Wvmtnbiker. For the ski design my first attempt is just going to model it off of my pair of BD Converts, i like the length and the rockered tip/tail but for spring skiing it is tough to get on edge. I will be changing the dimensions from (133/105/117) to 125/95/116, this should make it much easier to get on edge and a lot more fun on steeper terrain. Not sure if i will go with a rocker tail so i have some more reading to do on that.
Feel free to comment, point out my mistakes and maybe suggest a better way of doing things. I have been reading through the forum but it seems like a lot of information is a little stale and being new at this i have no idea if the information is still valid. I have been asking questions but it has been pointed out that every question has already been answered on the forum...
My first step is to build the table and mould. This weekend i will be rounding up the 3/4 plywood for the base and the hardboard for the top. I will also be trying to teach myself how to use nanoSoft to create DWG files for the tip and tail profiles that some one from my town has offered to manufacture on his CNC machine. Once i have something to show i will try and post some photos. The problem is that my garage/workshop is unheated and working in -10c is no fun at the best of times!
WheatlpaWed Dec 11, 2019 6:29 am
The first part of the press is on its way. I ordered a silicone sheet from SSCRubber.com. Their customer service was excellent and easy to deal with. I am getting 3 yds of the following:
ARP-T-50-062-36 Translucent FDA Grade 50 Durometer Silicone Sheet
.062” Thick x 36” Wide
at 32.69/yard which seems reasonable to me.
I am also in the process of getting a couple of heating pads from alibaba, trying to sort out the payment details which means calling the credit card company to let the transaction go through. I will post details once they have arrived.
WheatlpaMon Dec 23, 2019 8:33 am
I picked up my pump and some cheap veneer (Cuban Mahogany) over the weekend and assembled and tested the pump. It seems to work well despite my rudimentary electrical skills, although my next step is to add in a switch to the wiring so i can turn it off and on with out unplugging it. I also bought the MDF and masonite for the press table. It looks like i will be building a table to accommodate my ski partners length of 195CM so the table will be almost 2.5 meters long and 76 cm wide. I will then get to work on a frame for the silicone sheet, if we have some warm temps over christmas i might be able to get this done in the next couple of weeks.
Here is an image of the pump wired up.
[mg]https://photos.app.goo.gl/MR3naJQBwuf1ew1u7[/img]
sammerMon Dec 23, 2019 9:13 pm
Curious to see how your silicone holds up. It's time to replace my poly, and vacuum silicone is $$$$
sam
WheatlpaTue Dec 24, 2019 5:31 am
I am curious as well. i have seen a couple of methods of attaching the sheet to the frame but both of them require drilling holes through the material and at that price i really don't want to screw it up! So, still thinking about how to do it (under the frame and wrap around on top or sandwiched between two pieces of wood). I have been thinking about finding someone to weld up a simple steel/aluminium frame but that just adds more to the cost but in the long run might be easier to seal and easier to clamp to the table. I am trying to think long term and i hate wasting money....
One thing at a time, table build over the holidays and then think about the frame.
Happy holidays to all!
ben_mtlThu Dec 26, 2019 8:14 pm
I'm in Sherbrooke, curious to see your vacuum setup !
If you need Epoxy let me know ! Not that I have some for sale but I need to get some, maybe we can get a larger qty and share, I have contacts for a nice supplier in Ontario.
WheatlpaTue Dec 31, 2019 8:07 am
Hi Ben, Thanks for the offer on Epoxy, at the moment i still have a bunch left, although once i get the press operational i might go through it quickly as i experiment with the process. If you have a source for fiber glass locally let me know, ordering from the states and dealing with the border is a bit of a pain. I would also like to see how your CNC router works and maybe i can pay you for cutting out some templates for me...
project update:
This weekend i finished the table portion of the press. Two pieces of MDF with the top being ~30" wide and 7.5' long and the second piece is the off cut so same length but ~18" wide. I then made a frame underneath to support the weight out of 1x6 pine which will make it easier to attach legs to. For the top i put on a 1/4" thick layer of masonite with a hole in the centre for the vacuum port. The table itself is pretty flat although not perfect but it will do for a first try.
I have some more 2x6 pine that i will be using for the frame to hold the silicone sheet. I will be working on this part later this week with the warm temps here in Sutton.
The photos from the build are all store here on my google album. https://photos.app.goo.gl/KX1ctzDuPpw3Qiu49
ben_mtlThu Jan 02, 2020 7:36 pm
Sorry I don't have any source for fiberglass, I bought 20ish rolls of 22Oz triax from a manufacturer a few years ago, sold half of it so I still have a lifetime supply of fiberglass considering how much I build skis/boards.
I can definitely help you with CNC cut templates. PM me of you have specific questions.
WheatlpaMon Jan 06, 2020 11:37 am
It is proving hard to get my MDF table flat, so i have some aluminium angle struts that are dead flat which should hold the MDF flat and support the top at the same time. Too bad it is started snowing and the backcountry is starting to open up (this is a good thing) but it is making work on the press a little slow!
I am also going to start building the mould. i have decided to build a flat mould and work on getting the camber through heat differential. This will allow me to build a very adjustable mould which should cut down on the lead time for different sized skis.
Ben, i will PM you about the CNC template. Once i am finished with the table (and it is flat and holds a seal) i will let you know and if you feel like coming over to check it out you are more than welcome. Maybe we can get a day of backcountry in as well...
WheatlpaThu Jan 16, 2020 5:51 am
slow progress on the table. It is now as flat as i can get it (on both sides...important!) so i have moved onto the frame to hold the silicone sheet and the templates for the mould. I have also got two designs done for a spring/resort ski and a fatter powder ski. Ben has been kind enough to offer to cut them out on his CNC which is awesome!
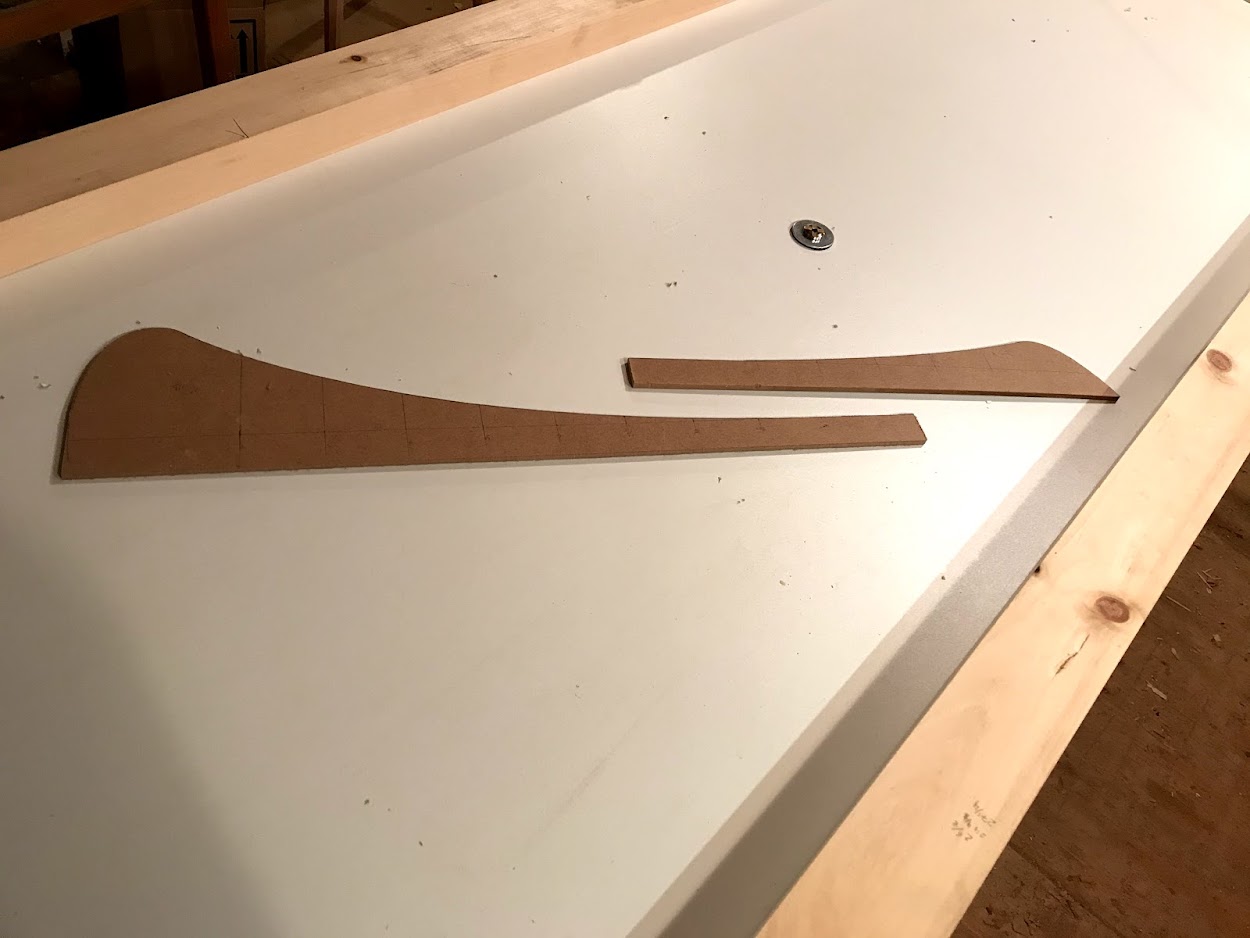
Here is a shot of the tip/tail templates rough cut out of 1/4" masonite, i still have to sand them smooth and make sure the transition portion on both templates is the same height and will match with the flat template i am going to make next. I have left roughly an inch from the bottom which will allow me to drill holes in the mould to make it adjustable. The tip/tail rise measurements were taken from my BD Converts and i used a set of french curves to draw a smooth line connecting them all as best i could.
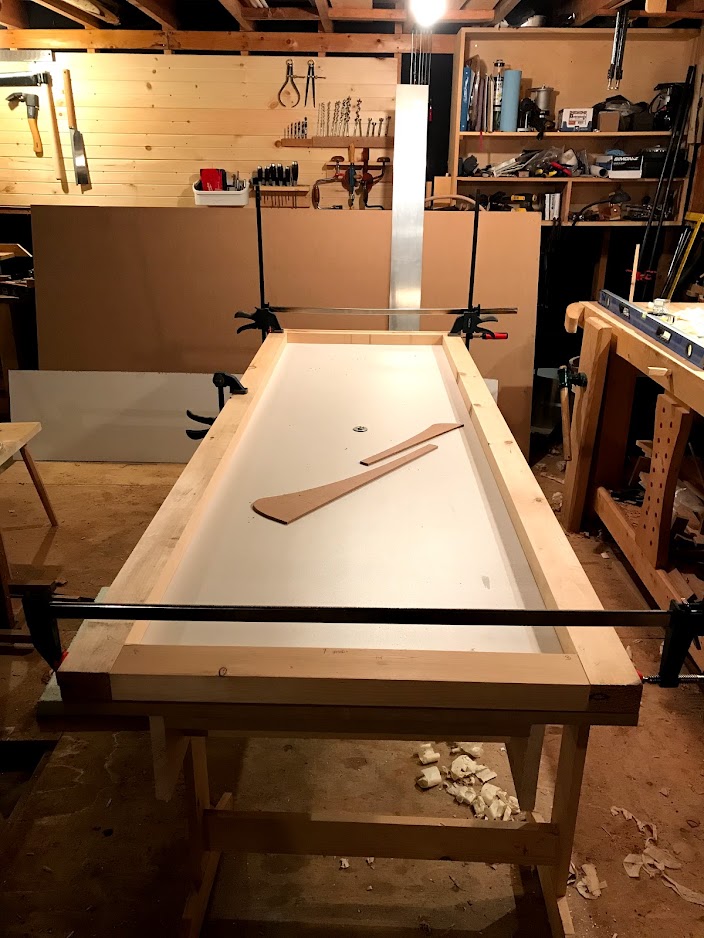
Here is a shot of the table with the frame on top. The frame is 2x6 pin ripped in half with mortice and tennon joints for the ends. I was a little sloppy on the joints but i have decided to pass the silicone under the frame and wrap it around on top to secure it so i don't have to make the actual frame airtight. I have closed cell foam gaskets to go between the table and the frame which i hope will create a strong seal. My only concern is sealing up the hole that will be used to thread the wires from the heating blanket from inside to the control box.
chrismpThu Jan 16, 2020 8:58 am
You could use so-called hermetic wire connectors or hermetic wire feedthroughs to connect the wires and keep things airtight.
WheatlpaThu Jan 16, 2020 11:27 am
Interesting. I guess there is a solution to almost every problem out there. Now, i have to do some research and figure out which connector is the one i need. Although the list on the Pave Technology site seems pretty comprehensive there is almost too much choice.
Now i just have to figure out how to connect these wires from my heating mat to the PID. I am going to assume that they are K type thermo couples which should just attach right to the PID but again i have some homework to do.
OACThu Jan 16, 2020 10:44 pm
Good job!
Just a tip/thought for the future. When you're done testing the frame consider change it to a robust steel frame. It will spare you time from searching leaks around the frame. It will not solve the issue 100%, but much better than a wooden frame.
And for the top of table, use some airtight "plastic combination". I use "paper laminate". I don't know if there is other name/type of it. I heard of phenol as one option. It handles heat better. I used PVC at first, but it just warped and was useless after one pressing. I press at 90C.
You can seal/cast it with a couple of layers epoxi also.
Cheers
WheatlpaFri Jan 17, 2020 4:59 am
OAC: steel frame is the goal, for a first try wood was easier since i already have a pretty well stocked woodworking shop and this is only table mark one. The white top is masonite and which is coated MDF and should deal with the heat with no problems...i hope. My plan is to press at 65c so not an outrageous temp but i will be watching it like a hawk.
I contacted a company that makes hermetic wire connectors for some more information, they sent me a price list and i decided that for a first go i will just stick with small diameter holes for the cables with lots of silicone to plug up the gaps. Once i figure out what i am doing then maybe i will spend 200 - 300$ on the connectors!
We finally got snow instead of rain so looking forward to making turns this weekend!
ben_mtlFri Jan 17, 2020 6:14 am
Great job !
I might have something for your wires when you come for your templates... pretty sure I have some cable glands left from when I wired the solar panel on my van... I'll check !
WheatlpaTue Mar 30, 2021 8:08 am
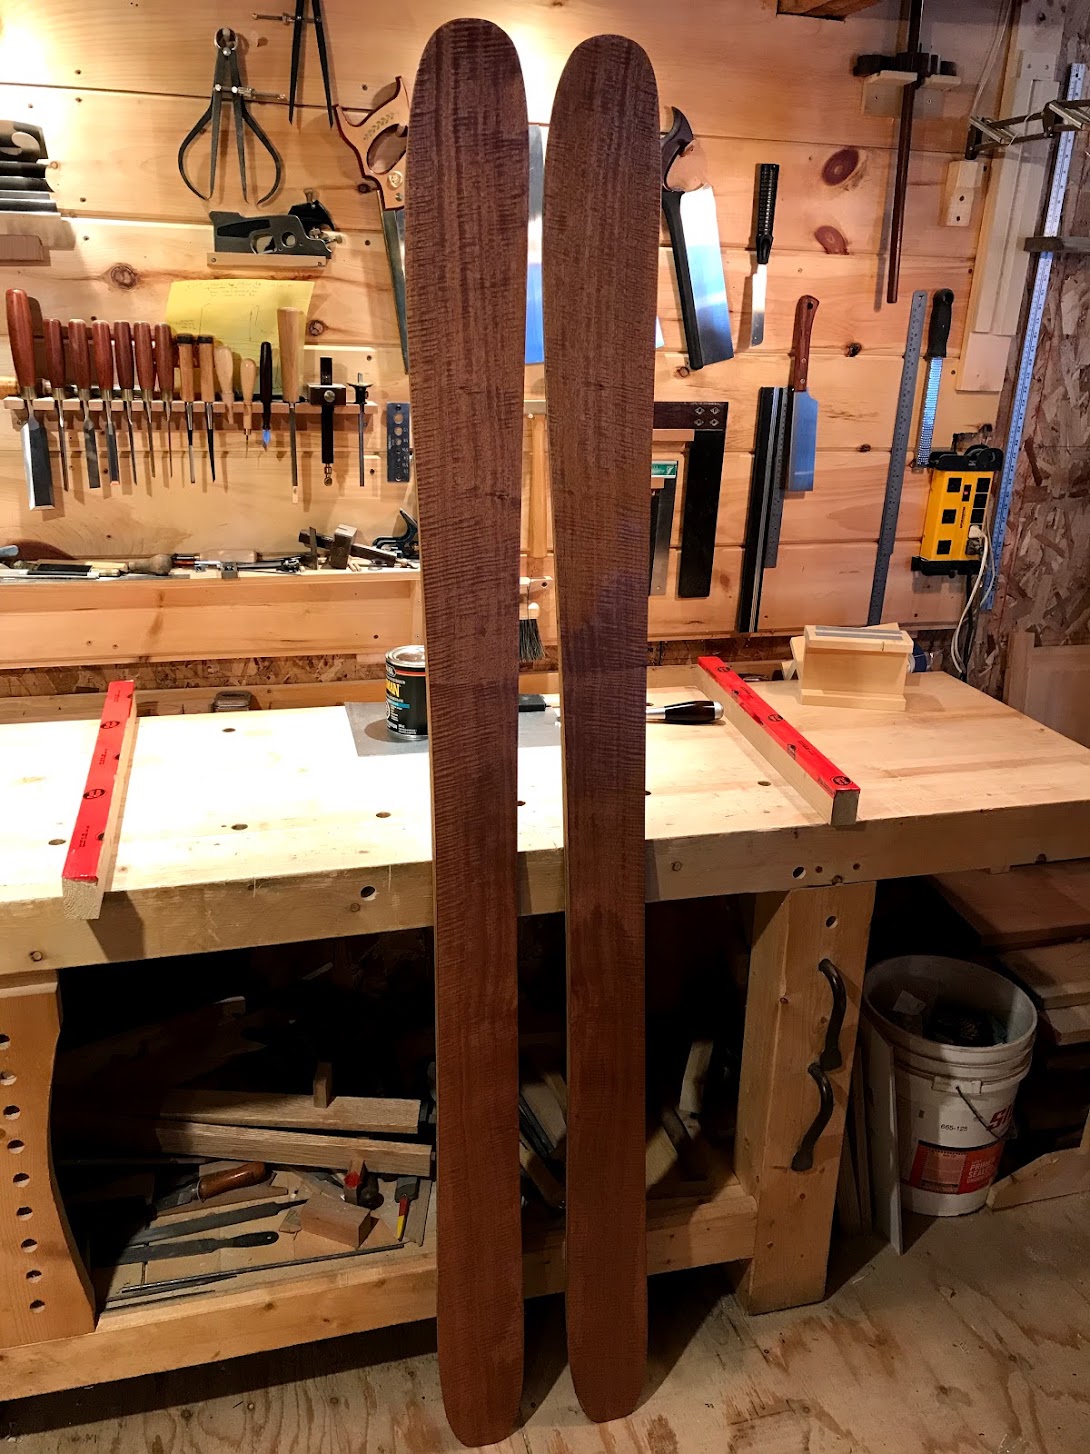
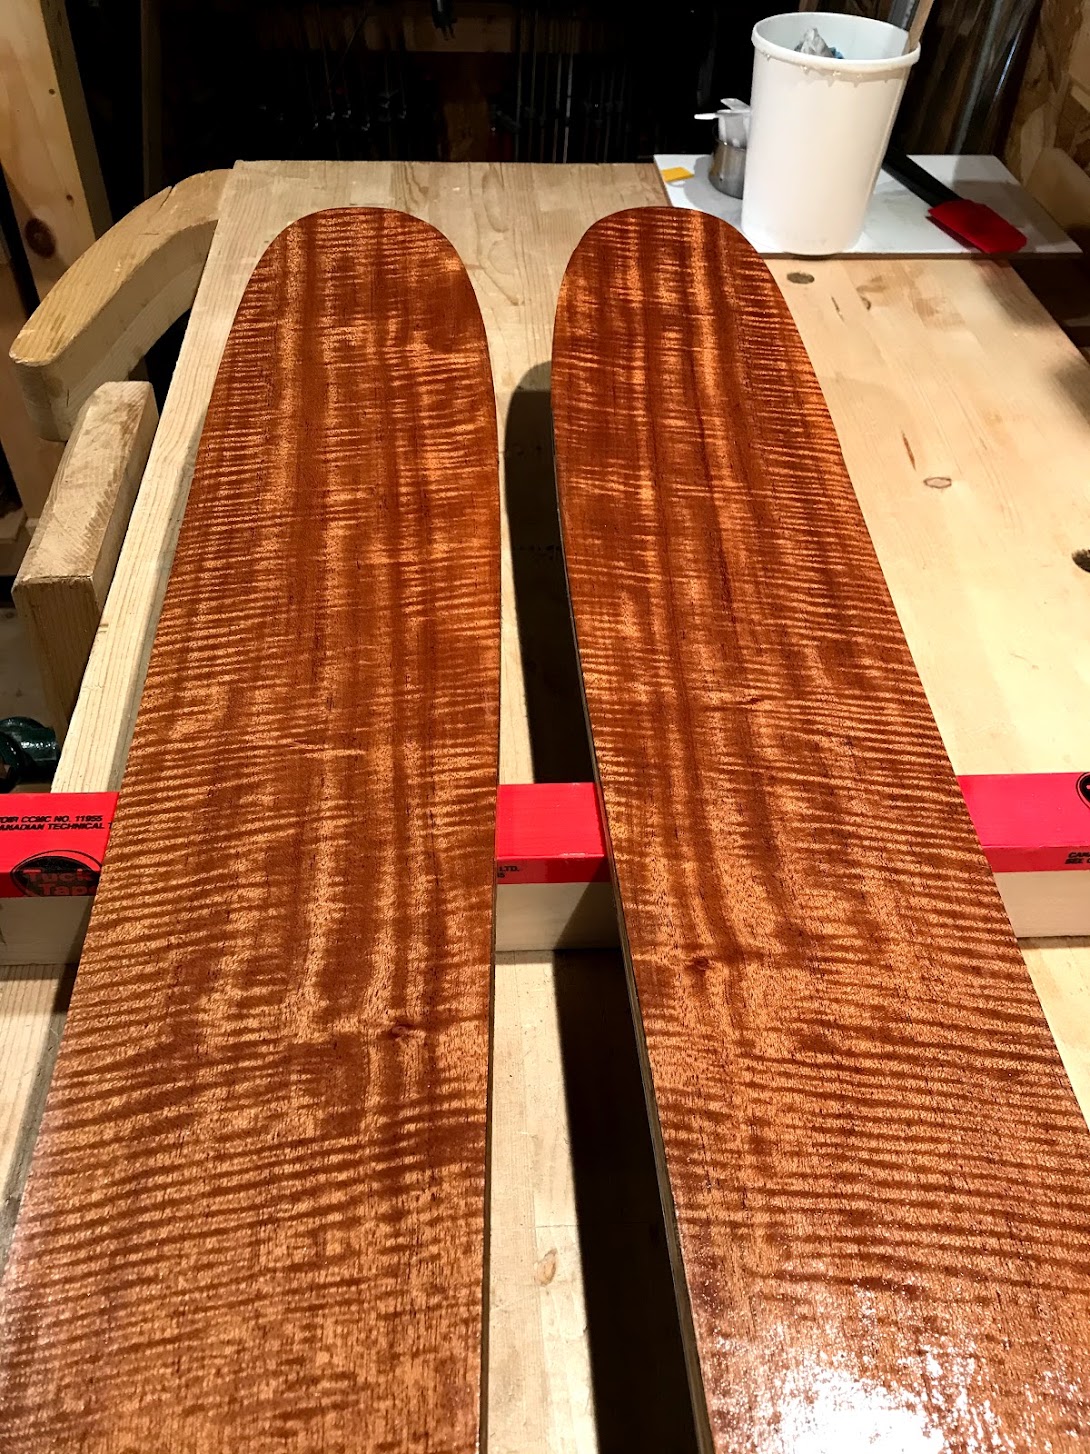
Made my final pair of skis for this season over the weekend. This time a pair of powder skis with dimensions 140/109/123 over all length of 183cm. After the base/edge gaps from the last pair I was a little nervous about how these were going to turn out but after reading one of Vinman's posts about having to straighten the coiled edges I spent time making sure they were as straight as possible before bending them to shape. It seems to have worked as I had very minimal gaps and then only near the tip and tail at the serious curves.
That is not to say there were not some issues. I finally bought a temperature gun to see if the heat blanket control temperature match the actual temperature...turns out that the top blanket was showing 82 degrees on the PID but was in fact 97 when measured with the thermometer. I assume that the bottom blanket which was inside the vacuum was the same so now I will have to adjust temps by ~15 degrees so I am not totally over shooting the mark.
Once hit the 40 minute mark I turned off the heaters but left the skis under pressure for a couple of hours until they had cooled off to garage temps. Once out of the press and the flashing cut off (which with the excess carbon fibre was a lot tougher, I went through 2 jigsaw blades!) I had a final camber of 6mm (not what I was aiming for but better than 10mm), tip height of 50mm and tail height of 20mm. The skis weighed 1.905kg and 1.899kg so not bad really. Unlike the last pair the bases were also very flat which I also think was caused by the coiled edges not being straightened out before use.
The only serious issue with this pair is that one of the skis has a twist in it. I have not started to research why this might have happened but I am assuming that they might have been a little crooked in the press, or maybe it was the CF as I have not used full sheets of this stuff in the previous two pairs of skis.
Either way, they did turn out very nicely, unfortunately I will have to wait until next year to try them out.
ski build information:
cores: poplar/ash with white oak side walls
Thickness: 2.7/10.2/2.7
two layers of 22oz FG
two layers of 3K carbon twill
Camber: 6mm
dimensions: 140/109/123
serchmanThu May 06, 2021 3:15 am
hi!! nice job man, it looks great.
from the process i think we are handling quite similar way... just i was wondering how do you apply the heating blanket from the bottom of the base. it goes everything to the vacuum bag... so i can't imagine how you do it from the base of the ski. From top it's clear, that once the bag is closed you can apply this blankets from top... but the bottom from the sk?
that would help me a lot to figure out how to do it.
would you say that hot box would do the same if envolved system=?
thanks,
Sergi
WheatlpaTue Mar 14, 2023 5:37 am
Hi Sergi,
Really sorry for the late response, I will blame the pandemic and the fact that once I built the last pair of skis I needed a year to ski on them before building more pairs.
So, adding heat in the press was pretty easy. I just drilled a hole in the table in front of the tip mold and passed the wires through. Then I filled the holes with silicone and I have not had any leaks yet.
Now, if you are also asking is this a good idea...I am reconsidering it. I press with a flat plate and was hoping to use heat to form the camber but I have discovered that the thermocouple that comes with the blankets is not accurate, or at least does not tell me what is happening in the middle of the blanket. All four skis I have made (I just pressed my first pair in 2 years last week, more on that later) have a whole lot of camber. for the 2 pairs I made specifically for groomed runs, spring corn and steeper chutes it wasn't a huge deal. The powder skis on the other hand...a 7mm camber not what I was aiming for. So for the next pair that I am in the process of making I will limit the heat from the bottom blanket to roughly 40c and generate most of the heat from the top blanket (I am still using Entropy CPM/CPS with an 82c curing temp).
Again, sorry for the long gap in updates I hope you were able to take the leap and start making skis.
WheatlpaTue Mar 14, 2023 5:57 am
After a 2 year gap I am making skis again. The first three pairs that I made on my new set up all had some issues but for the most part ski well and served as great learning opportunities. The first pair that I made I am still skiing on and they performed very well in the spring corn last May while on a 2 week trip through Colorado and Idaho. The second pair I used a different weight of carbon fibre which resulted in a pair that were way too stiff for my telemarking needs, I have given them to a friend to ski on and provide some feedback. The last pair were supposed to be powder skis but also way too stiff and the early rise tips did not rise enough for comfortable backcountry fun. The MDF tail mold also cupped due to the heat of the press resulting in a slight twist in the skis. These have been sent off to my brother who is bigger than me and skis resorts so he should be just fine with them.
The latest project was using the same powder ski template but different material. Now that the borders are opened again I can source much better fibre glass and carbon fibre (not to mention all the other stuff). I have also rebuilt the tip and tail molds out of plywood with a different geometry trying to get a better rise for tips and tails which I think I succeeded at. I also rebuilt the planer sled which I think resulted in better thickness control. So here is the run down:
Finished Length: 183
Dimensions: 143/111/123
Core: 2/10.5/2 mm
Core Material: Ash/Poplar with Ash side walls
Core length: 142.7cm
Core weight, 702 g and 706 g
Topsheet: Bubinga wood veneer
Ski weight: 1.940kg / 1.951kg
Boot centre = 54% of running edge of 135 which is 73cm
19oz Fibreglass
5.8oz Carbon fibre 0-90 Plain weave
Epoxy: Entropy CPM/CPS 2 cups/1 cup (way too much epoxy for this press)
Press time: 50m after the 82c was reached. Then the skis were taken out immediately but still resulted in too much camber
Resulting camber: 7mm
Tip rise: 50mm
Tail rise: 15mm
I was not happy with the camber but on the plus side the flex was really nice and smooth. As chance would have it the last big dump in Vermont was last weekend so my ski partners and I were out last Sunday searching for untracked snow. I took a chance with the new skis and was very happy with the way they skied. the front of the skis had a great flex which floated me up and the tails have a nice pop to get me in to the next turn. Helpful in the tight trees we were skiing. They will do nicely in rogers pass next week!
image no longer available
WheatlpaWed Apr 05, 2023 12:24 pm
I took my latest pair of skis out to the Canadian Rockies for a week long ski trip. My ski partner and I spent 3 days a sled accessible cabin south of Golden BC where we found powder every day. We then headed up into Rogers Pass to ski the Youngs Traverse and 7 steps of Paradise followed that the next day with a long tour up towards Vulture Peak off the Icefields Parkway. The new skis were awesome in the powder, soft enough to keep the tips up and when pressed really popped me out of my turns. Hardpack, not so much but they were not made for that.
Last weekend I pressed my 5th pair of skis. These are a copy of the first pair I made with my friend Oliver in Northern Vermont. I liked that first ski as they were just the right size and flexibility for skiing the tight trees we find in the backcountry up here in the north east. I have not skied them yet but I have high hopes. Here are the details.
Length: 174
Dimensions: 130/106/120
Core: 2.1/11.5/2 mm
Core Material: Ash/Poplar with Cherry side walls
Core length: 146cm this does not include the triangle sections tip and tail
Core weight, 703 g and 689 g
Topsheet: White Oak veneer
Ski1
1.704 grams
Tip rise 59mm
Camber 3mm
Tail rise 19mm
Ski2
1.725 grams
Tip rise 55mm
Camber 2.5 mm
Tail rise 21.5 mm
19oz Fibreglass
5.8oz Carbon fibre 0-90 Plain weave
Epoxy: Entropy CPM/CPS 1.5 cups/.750 cup (Just enough epoxy for this press)
I heated the press mostly from the top keeping the bottom blanket at 40c (according to the PID but it was probably closer to 56c in the vacuum) while the top blanket was set to 80c for the duration of the curing time which was 55 minutes. At that point I turned off the heat and kept the vacuum press running for another 2.5 hours.
I am happy with the tip and tail rise and especially the 2-3mm camber. It was exactly what I was aiming for. The differences in measurements is due to one ski shifting back slightly while I was applying epoxy and getting everything ready for pressing. So I will have to figure out an easy method to prevent this. I am thinking about hot gluing off cut base material at the tip and tail to stop the shift from happening. I also had issues with the edges at the tips and tails, which I think is due to poor bending, something else I am also going to have to work on over the summer.
Photos will be posted when they are back from the shop getting the bases and edges tuned.
