Archive › Journals: Log Your Ski Building Progress
WRONG 2017
Journals: Log Your Ski Building Progress · 64 posts
gav wa
Well I decided to start a new journal (the old one was Kampai custom). I've changed the name on the boards to WRONG Snowboards.
The name is sort of a long story and was suggested by some mates.
Things have been going pretty well. The homemade CNC has been working well and I can now go from a simple idea for something new, to drawing it up on my laptop, to creating programs and then grab a core and have it trenched waiting for the sealer to dry so I can pour the sidewalls, all in about 4 hours.
I've done a few boards the last few months and even had 2 people ask to buy vouchers for boards to give as presents.
Not really anything new to report on ways to do things though, pretty much trying to keep things pretty standard and just fine tuning everything to make consistency the main target I guess.
I have though started putting quite a large double angle on my sidewalls. I have the usual angled sidewall but then instead of a small 45 degree at the topsheet I make that 45 degree about 3mm along the sidecut and about 2mm at the tip and tail. I haven't tested it enough to confirm yet but I'm hoping it helps stop the common damage along the edges. Especially in lift lines, nothing will stop people on rentals destroying everything in sight of a lift line but it might help minimize it.
gav wa
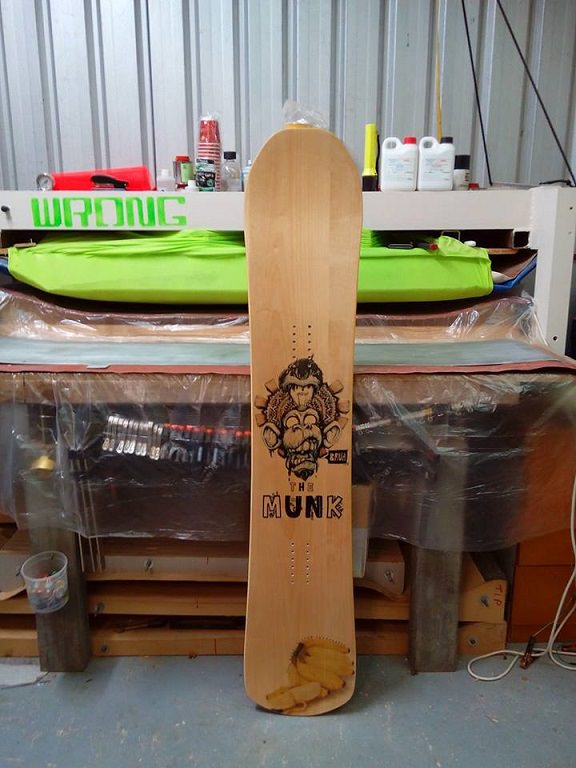
One new shape for me has been a short fatty snowboard.
This one is a 152cm
308mm tip
263 waist
297mm tail.
Birch veneer with a print to suit my mate Monkey who it was built for.
It's mostly camber hybrid profile. The inserts are dead center of the camber and the waist, the nose rocker and sidecut just continues further than the tail so it creates the taper. This way you don't feel the taper on hardpack and it turns just like a twin, but in powder you get the big nose giving lift.
gav wa
Oh one thing I have been doing a bit differently lately is using a long length of non-stick Teflon sheet instead of baking paper.
I've done about 10 boards with it so far and it works great. Dried resin just wipes off and it doesn't crease like baking paper can.
I'm about to order another length and I'm going to try roughing one side a little so I can glue it to my aluminum plates that go either side of my lay-up. At the moment I just sit them in like baking paper. Oh and spray adhesive works great on it too, it holds but when you pull the board out the old glue just wipes off ready for the next board.
It's cheap as on ebay too.
http://www.ebay.com.au/itm/BBQ-MAT-Nons ... G_eS5NI3GA
gav wa
Most of you won't remember but ages ago I posted a picture of my homemade base grinder in another thread. Most people were skeptical at the time.
Well it's still going strong.
This old girl made from an old wood lathe I bought for $50AUD at a school auction.
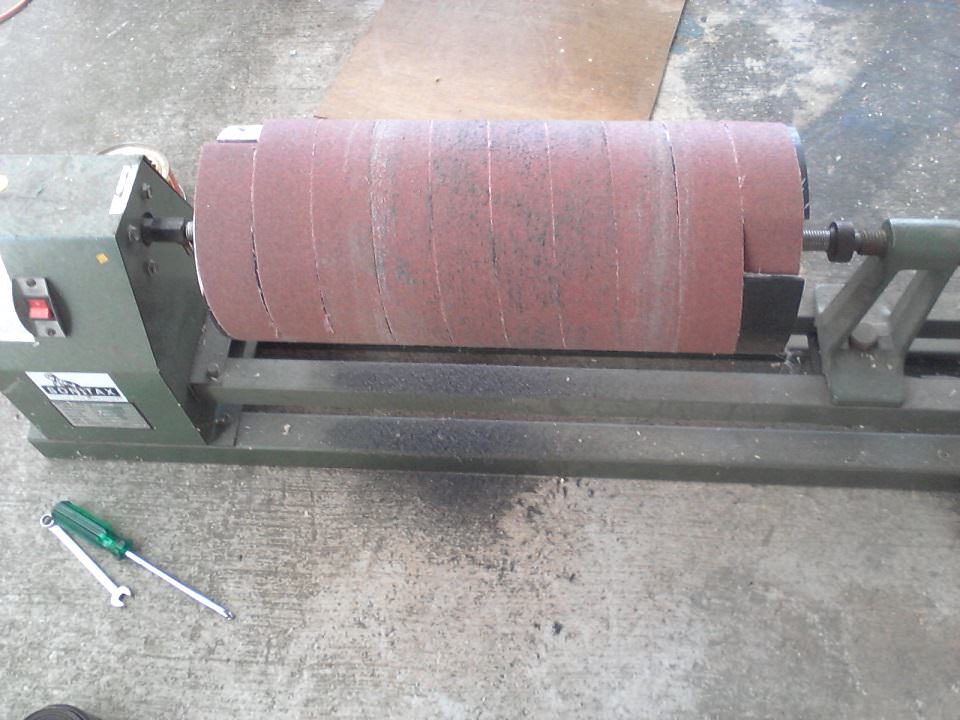
And it does a pretty decent grind considering what it cost to build.
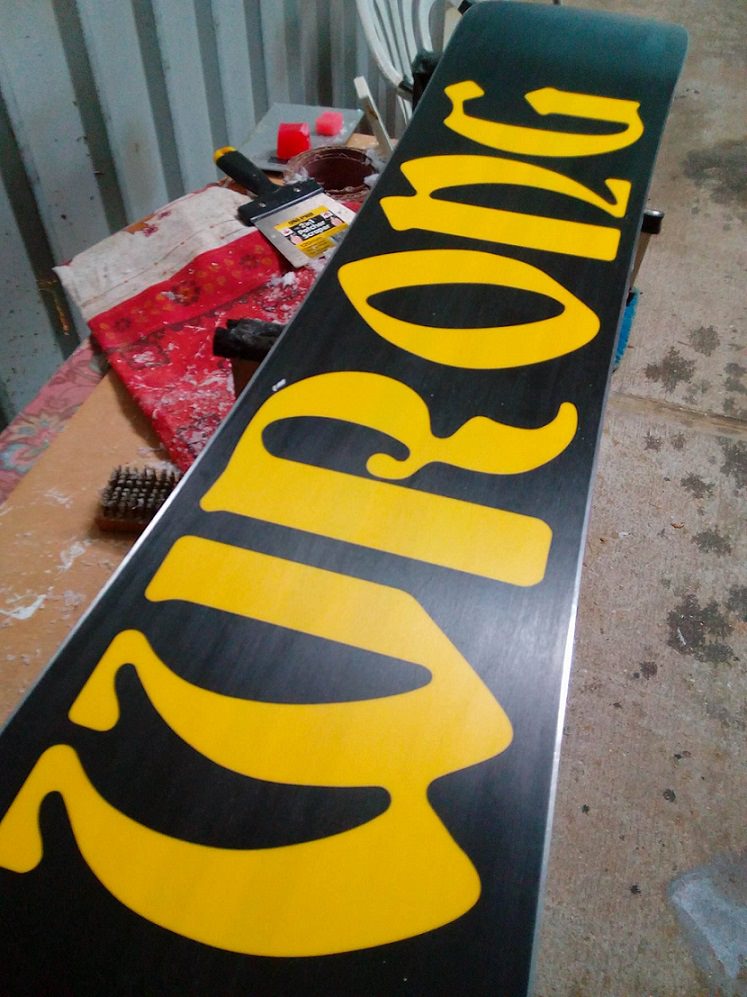
I might add a fine water mist sprayer and catch tray this year so I don't have to keep the spray bottle handy to spray it every pass.
mammuth
Nice! I dig the new name!
Think i asked it in the past, but forgot it. Do you sublim on the veneer or a topsheet?
Gilo
Hello Gav - all looks very good and together
I am sure we have had this conversation before but equally we may not have done - can you give a few details about printing on veneer?
what sort of printer?
paper backed or plain veneer
Pitfalls and pratfalls
Thanks
Also I line all my moulds (I use a vacuum system) with sticky backed silicone tape and then a further coating of spray release on that - keeps everything nice and clean and as you say things just wipe off.
Gilo
gav wa
A silicon sheet is something I have thought about before. Nothing really sticks to well to silicon so should work well. I nearly even made another silicon mat like my heat mats but without the heating wire. I'll google the sticky backed stuff and check it out.
My veneers are just pure timber veneer, no paper backing as it doubles the price around here.
I have an A3+ printer with rear paper roll feed ability which allows for manual paper feed. The little paper guide inside had some raised ridges on it which effected how weĺl it handled the thickness of the 0.6mm veneers so i took to them with a pencil grinder and rotary buff wheel, works sweet.
I just use normal ink and print on the veneer just like a sheet of paper. I leave it to really dry and vapor off the ink for 2 days then its ready to press.
No real secret techniques or anything. Its all pretty simple really. I find simple techniques turn out the best.
24Dave
Hey Gav,
I have an open drum sander like that, what grits do you start and finish with and do you mist the base each pass. Thanks,
Dave
gav wa
If I want to rip a bit off quickly I'll start with 40 grit, but usually I just start with 60. Then I use 100 grit to finish. I usually do a couple of boards at a time, or if I'm only doing one I use one of the old rolls that I keep depending on their sharpness.
I find the garnet cloth dulls a bit over time and as it does it gives a better finish, so it works well, the new stuff cuts in a new base nicely but then as it dulls it leaves a good finish.
I spray water a lot. I've just made a small mist bar but haven't tested it yet.
I spray the wheel as it's spinning and also spray the base of the board about every second pass. I slide the board back and forth over it quite quickly for a few seconds and then spray water again.
I'd suggest grabbing an old stuffed board or ski and just giving it a go.
gav wa
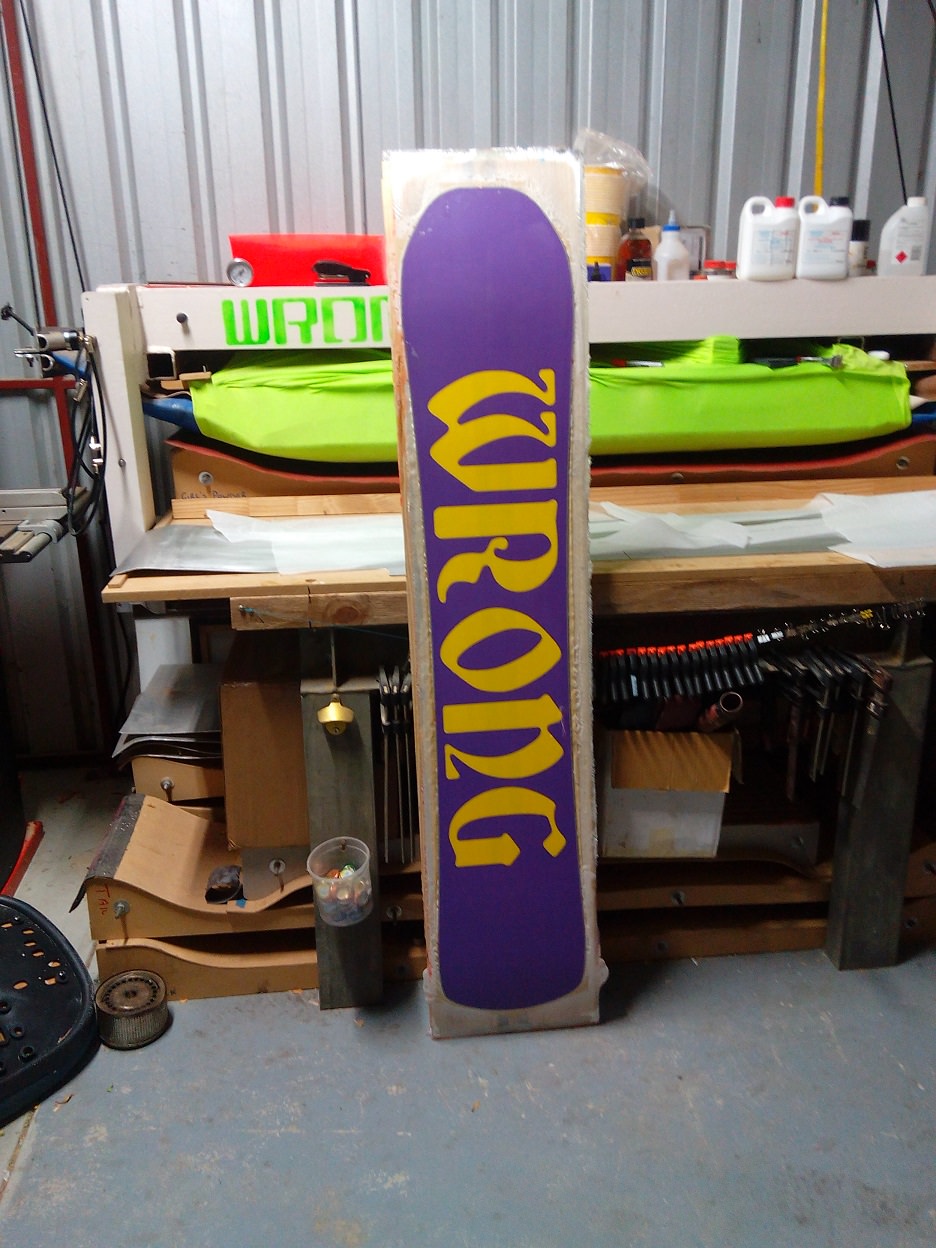
Pressed a new board for the missus last night.
The base straight out of the press, just before laying it over on its side for the night.
gav wa
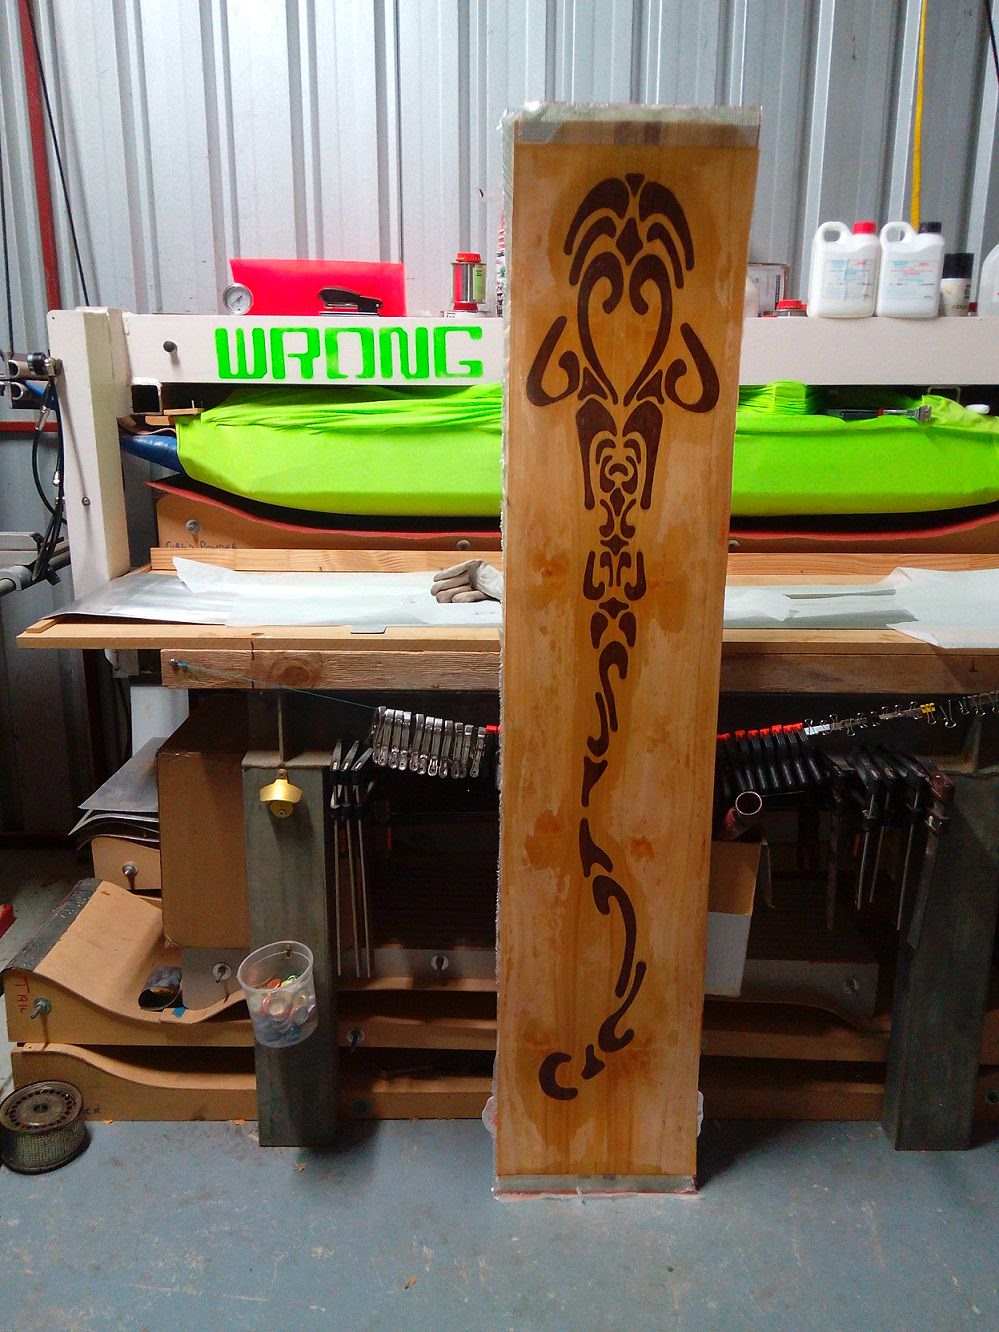
The topsheet side straight out of the press.
Another veneer inlayed topsheet. Local pine veneer and American Walnut for all the small pieces.
This is the most involved veneer inlay work I have done to date. Went quite well.
gav wa
This board is going to look beautiful when it's finished.
I put the first finish coat on the top tonight. I'll leave that now for a day or two and then trim the flashing off.
It has a bright pink sidewall which should hopefully look killer against that pine veneer.
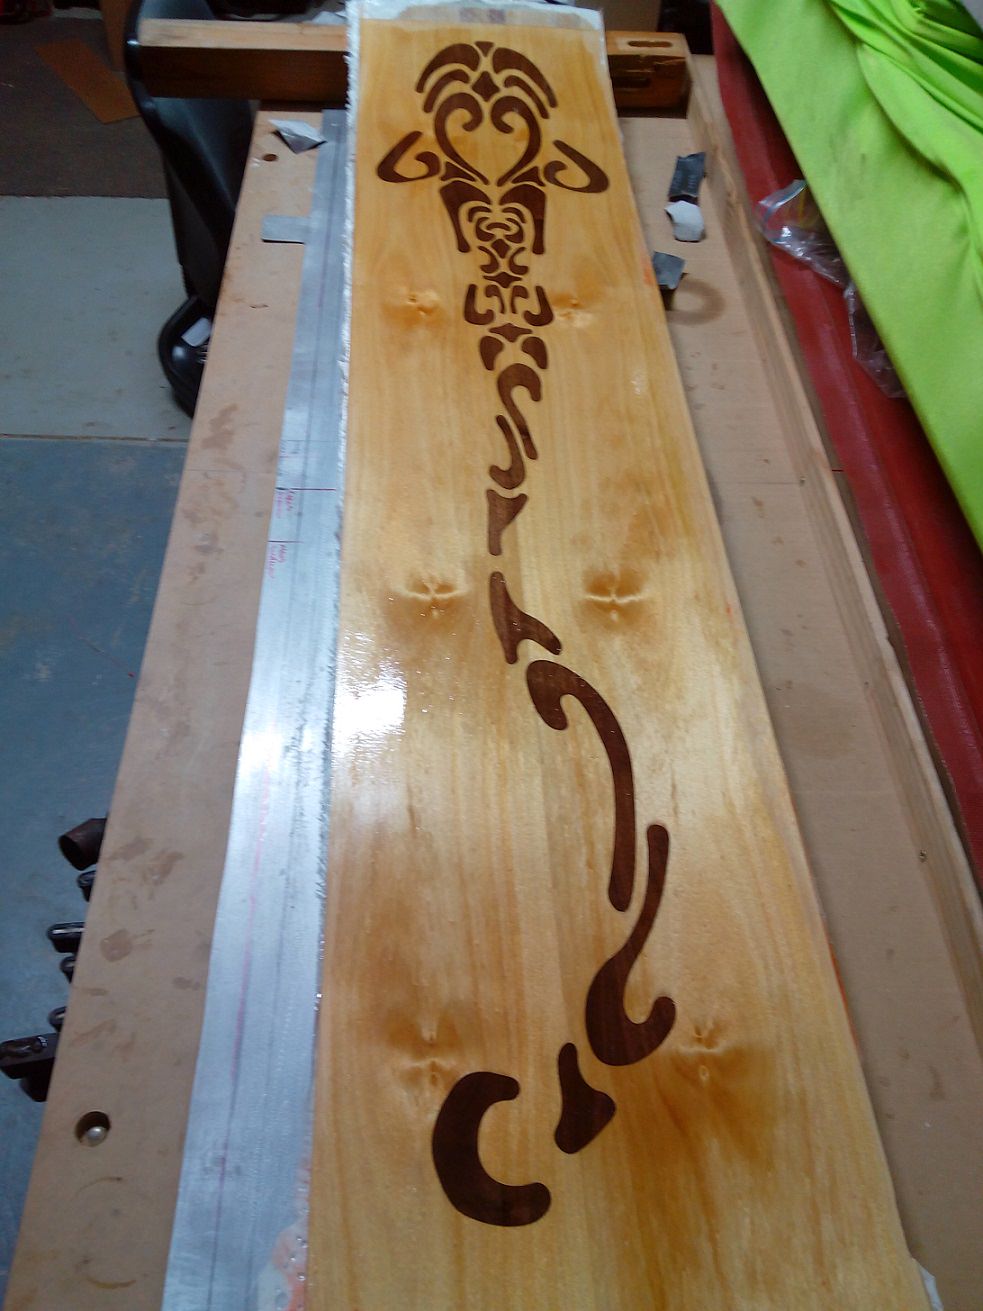
As per usual the photo doesn't do it any justice at all, the pine veneer has a real light pink reflection to it. I've used pine before and it always looks OK but not really spectacular, this is the nicest pine veneer I've worked with.
Akiwi
Looks Beautifull.
Do you cut the veneer with a scalpel?
gav wa
Nah, i use a drag knife in my CNC. I've seen the kindred video of them doing it all by hand and that is pretty impressive, I'm not as patient so i guess I'm cheating a little but it works.
gav wa
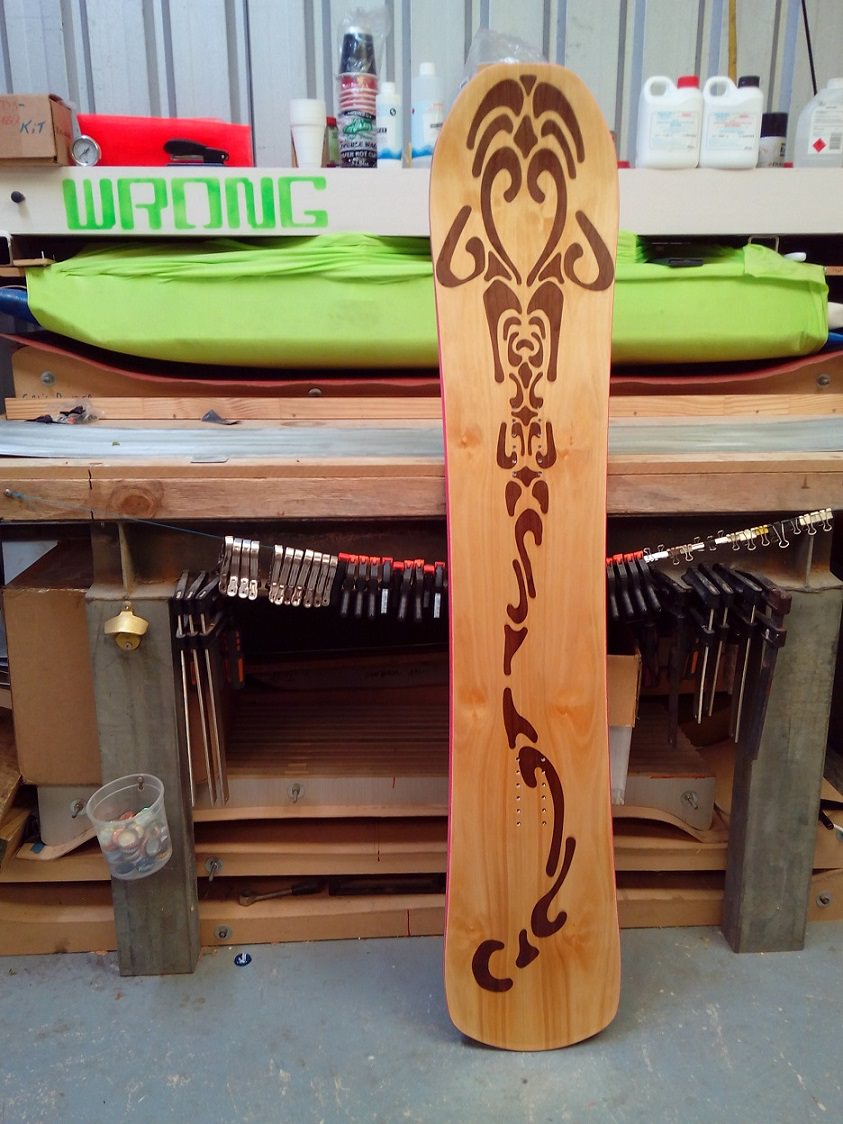
Trimmed up the latest board and cleaned up the edges and inserts.
Looks pretty awesome, even if I do say so myself.
Pretty damn happy with the finished product. A bit stiffer than I was expecting. I tried out a new resin and it has resulted in figures that would normally result in a very soft flex has actually come out a solid mid flex board.
148cm long. core profile 1.6- 6.7- 6.3- 6.7- 1.6
Waist width of the board is only 244mm, tip 288, tail 278
Glass is 600gsm Triax top and bottom. These specs would normally turn out a really flexible board that would be super easy to ride, especially considering this is a women's board. The flex it has ended up is more a men's mid flex.
I'll do a straight comparison of two strips in the press together, two strips of triax with the two different resins and I'll test the two outcomes.
I think less resin squeezed out than with my other resin too as the board is about 100 grams heavier than the same board with the old resin.
gav wa
I would agree about applying stain before lay up. I suggest thinning it down heaps with acetone so it soaks deep into the veneer. Use softer wood for the same reason.
I thin it right down then do multiple coats to build up the colour. Work it in with a rag and you get the stain going all the way through the veneer.
After a few day I then press it with some resin worked into it and some heat so it soaks up resin and comes out flat and tough.
You don’t get any surprises out of the press then either.
I also sand the back a bit before layup. Use a course grit to really key it in so it bonds really well.
I’ve had issues with hard wood like walnut cracking during riding hard, so this is why I’m trying the stains, I can then use soft wood like pine for everything
gav wa
Hey does anyone know why my photobucket images don’t seem to show here anymore?
kit
Looks like your photobucket account got locked or disabled.
gav wa
So looks like I just caught up with the photobucket rubbish of them killing off free third party sharing.
So I've now got imgur and have replaced the images on this thread. Just got to get the sizes right now, they end up bigger from Imgur.
gav wa
So it seems the spoon base of the latest build (the red veneer swallowtail) was definitely not a problem on firm snow.
I received a screenshot from the owner of his ski tracker app.
He hit a top speed of 94 Kph.
Not bad for a little 149cm swallowtail powder board.
gav wa
I've been really keen to make a pair of foldable approach skis for quite a while now. The MTN Approach stuff always looked a bit weak around the hinges and backwards folding so the hinges took all the weight. Turns out I was right, they have a bad rep for falling apart. It's unfortunate because I like the idea.
So anyway I have had a few ideas floating around in my head for the last few years and just lately I got into some prep work.
A big part is the hinge so I have built a carbon fibre/Kevlar hinge. The Kevlar is impregnated with Shore 95A polyurethane and then I bonded it to some stiff carbon fibre pieces I pre-pressed with the usual epoxy resin.
I had a small video of the hinge flexing but I can't work out how to load it.
I'll get a photo.
gav wa
image no longer available
mammuth
Kevlar hinge
Very smart!
24Dave
hey Gav, the red board looks great!
Regarding approach skis, We rode every approach ski - snowshoe variation we could think of for the decade before splits came out here in Utah in the mid 90s. If you are climbing and breaking trail in good snow they really make little sense. It is just too redundant to have wide approach skis on your feet with a board on the back. Especially since you can make your own sub 6 pound splitboards. I'm not trying to rain on your parade, but I think that you might quickly put a pair of well-engineered approach skis in a dusty corner after comparing a day with them versus a day on a really light split.
Maybe the cloth hinge could be a part of a superlight 3 or four piece split like Phenix makes.
The exception might be if you have superlight, narrow approach skis and are climbing in firm to shallow snow like the guys in Italy do, they are probably pretty good. But if they are superlight Balsa-Paulownia-carbon deals, will the swing weight be so bad to require folding? Also you really don't need length in those kids of conditions.
There are a few touring routes here in Utah with a longer low angle approach that puts you right at the foot of a steep wall where you could argue it is more efficient to get there on superlight skinny xc skis, then leave those at the base and put in a vert track if you repeat the climb three times or more on the vert track. Back when we had altimeter watches we probably had our fastest ascent rates over the whole day from re-using a vert staircase several times. That may have changed since splitboards got into the five pound range, we don't know.
But generally we go from place to place and break more trails that aren't all super steep all the way and want the freedom to not go back to the same spot where skis may have been left on the way out. The guy behind Mountain approach had a prototype out there with fabric hinges, but my guess is the market doesn't want it because it's just more weight and expense.
gav wa
Thanks for the feedback Dave.
You are one of very few people i know who even got around to trying approach skis.
The points you raise are definitely things that have slowed down the build a lot, do i just build snow skate type skis for aussie conditions or something that can handle powder.
I dont usually hike with my board on my back though. I prefer multi day trips so i can get further out. So my board becomes a pulk sled with my heavy pack on it and i snowshoe to my camp spot.
This is my reasoning behind wanting to try something new.
falls
Try something new?
image no longer available
It's called ski touring!
You can thank me later
gav wa
Yeah Falls thats the old fashioned way of doing it mate.
Its similar to my set up, but i dont have to take a sled with me everywhere i go, i already have a snowboard that works perfect as a sled.
I dont really like the pole connections when using snowshoes as you feel the sled pull and jolt with each step. I have a bit of a bungy type section to smooth out the bumps. I think skinning along on skis will help smoothen it even further.
Even straight up steepish terrain with snowshoes is quite comfortable with the sled. Much more comfy than 25 kilos on your back.
gav wa
I've also got a matching pair of boards I have had here slowly progressing for ages.
I have really dragged my feet on these. They are a proper freeride type board and a swallowtail with matching base and topsheet designs.
They are for a family member who has his own drag racing team. Nothing too full on but he is pretty passionate about it.
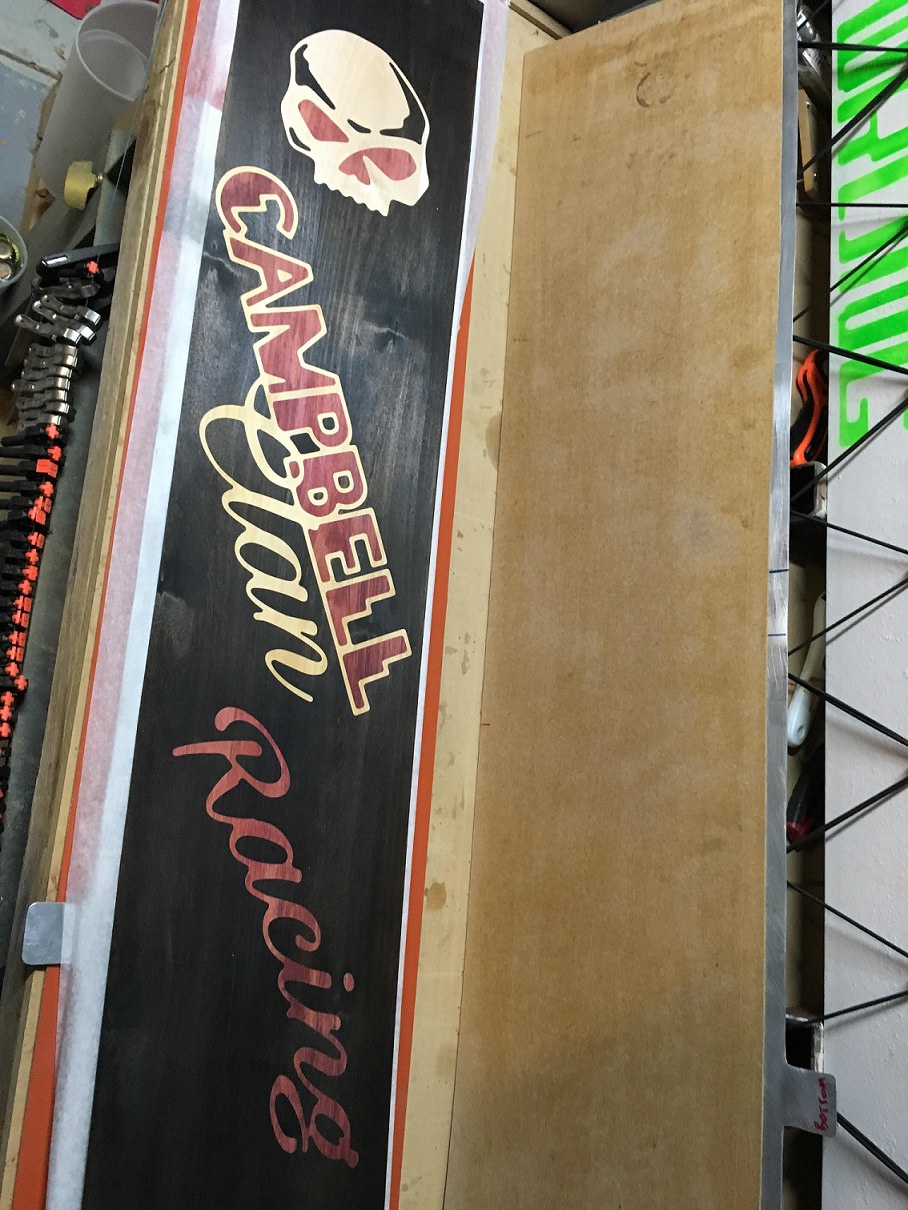
The problem has been the detail in the topsheet. It is three different veneers all cut to jigsaw together into his logo.
So I grew a pair lately and got one done. Well almost done. Still need to trim the sidewalls, buff the topsheet and grind/tune the base.
This is the topsheet put together before layup.
gav wa
After trim of flashing and a few coats of gloss. It still needs a cut and buff in this photo but I think it is gonna come out pretty nice in the end.
The sidewalls are a deep blood red so that should really make the red veneer pop out a heap.
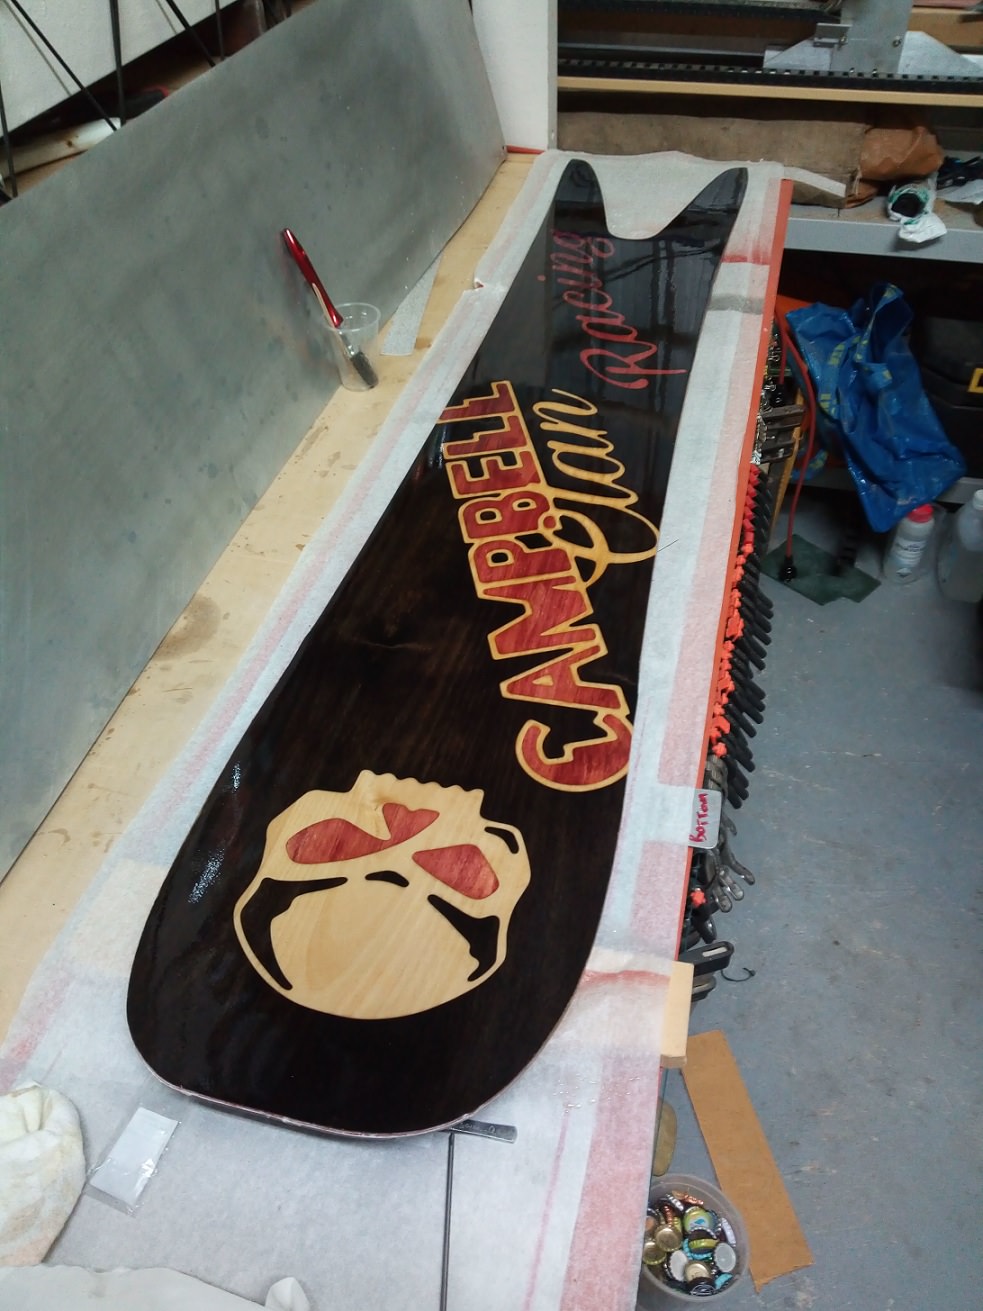
If you hadn't already noticed this is the swallow tail version
It's a 157cm board with a lot of surface area but still some really well behaved groomer style to it.
I love this shape. People always think a swallow tail is really restrictive but I have quite a few that are just so much fun banging around bashing up resort stuff. Obviously not the first choice on ice that hasn't seen fresh in a month, but fresh cord on decent snow is crazy fun on a good swallowtail, you can have heaps of camber and still get awesome float in powder.
Hannes
The veneerwork is just incredible! It must habe taken quite a few nights and bottles of beer. Those bottles caps in the cup can tell...
Gilo
The finish looks really great Gav - what's your recipe on veneer? I use a 3 coat wet epoxy on wet epoxy. I then polish it using various grades of wet and dry. I get an absolute mirror finish. I tend to make skis, and the problem I have is that they chip very badly - any views?
Gilo
gav wa
Yeah veneer durability isn't as good as the plastic type topsheets.
I have found a couple of ways to improve it a bit.
I mix up about 50 grams of resin and then thin it right down with about 10% ( so 5 grams) of acetone and then brush it into the veneer. Work it in so it soaks right through it. Can add more acetone if you need it to soak through more.
I then put it in my press and press it flat with light pressure and normal epoxy cure heat. When you pull it from the press leave it in the cassette to cool, otherwise it will curl right up out of shape. You can let it cool in the press if you want.
You will end up with a much tougher veneer that is nice and flat and really easy to work with.
If you are finding the epoxy topcoat is chipping you are using an epoxy that is too hard or the coat is too thick maybe.
What resin do you use? It's not West System is it? Boat resin is usually really hard.
gav wa
Oh and i grind the sidewall with two angles.
The first angle is the normal angle then i add a nice sized 45 degree all around. The flatter angle around the top seems to protect the edge of the veneer a lot more.
The topcoat on that latest board is a polyurethane clear coat. I've used epoxy and polyurethane. I prefer the polyurethane.
gav wa
> 24Dave wrote:hey Gav, the red board looks great!
Regarding approach skis, We rode every approach ski - snowshoe variation we could think of for the decade before splits came out here in Utah in the mid 90s. If you are climbing and breaking trail in good snow they really make little sense. It is just too redundant to have wide approach skis on your feet with a board on the back. Especially since you can make your own sub 6 pound splitboards. I'm not trying to rain on your parade, but I think that you might quickly put a pair of well-engineered approach skis in a dusty corner after comparing a day with them versus a day on a really light split.
Maybe the cloth hinge could be a part of a superlight 3 or four piece split like Phenix makes.
The exception might be if you have superlight, narrow approach skis and are climbing in firm to shallow snow like the guys in Italy do, they are probably pretty good. But if they are superlight Balsa-Paulownia-carbon deals, will the swing weight be so bad to require folding? Also you really don't need length in those kids of conditions.
There are a few touring routes here in Utah with a longer low angle approach that puts you right at the foot of a steep wall where you could argue it is more efficient to get there on superlight skinny xc skis, then leave those at the base and put in a vert track if you repeat the climb three times or more on the vert track. Back when we had altimeter watches we probably had our fastest ascent rates over the whole day from re-using a vert staircase several times. That may have changed since splitboards got into the five pound range, we don't know.
But generally we go from place to place and break more trails that aren't all super steep all the way and want the freedom to not go back to the same spot where skis may have been left on the way out. The guy behind Mountain approach had a prototype out there with fabric hinges, but my guess is the market doesn't want it because it's just more weight and expense.
Hey Dave I tried to message you but it won't go through. Is your inbox full?
falls
The drag racing board looks great!
When you do the 2 sidewall angles are you doing the first with the router base running on the base of the board and the second running the router base along the top of the board to get the 45 chamfer all the way around the board, or just doing both with the router running on the base?
I've started doing the first one at 7.5 degrees with the router running on the base and a top bearing trim bit then doing the next at 15 or 25 degrees the same way, but around the tip and tail you don't get a good bevel. I've been thinking about using a bottom bearing 45 chamfer bit after the initial 7.5 or 15 degree full sidewall bevel and running the bottom bearing along the sidewall and the router on the top of the ski to get an even 45 bevel all the way along, but worried the contour of the top of the ski might make this difficult. It's hard to experiment at the last step because noone wants to stuff up a ski/board after all that work.
gav wa
To be honest dude I do it all by hand. I have some flap discs I fit to my 5 inch angle grinder and I do the whole job holding the grinder in one hand.
I spent quite a bit of my time with a grinder in my hand cutting or shaping steel for work and it becomes quite normal to pick an angle and be able to get a pretty accurate finish all the way around.
I do the whole sidewall at 20 degrees and then cut the top 1 third at about 40 degrees.
I have stuffed up a board very early in the journey doing exactly like you describe and never again bro. If I had a nice little trim router I would probably give it another go, but trim most of it back with the grinder first so the trim router is an easy little clean up and doesn't catch and grab trying to ruin my finished piece. HAHA
falls
Yeah the old slip with the router on the final sidewall pass is a fairly brutal moment to swallow.
mammuth
LOL, these are the famous 2 adrenaline kicks you get with building:
1. The moment you open the press
2. The moment you do the last finishing touches
gav wa
Finished off a couple of surf inspired Pintails.
They both killed it in Japan last month.
They are fairly soft flex compared to most boards I build for myself but it was fun to try something different. I kept a decent amount of torsional flex so that at least allowed a bit of grunt into the edges.
I reversed the cut-outs on both the veneer topsheet and base P-tex.
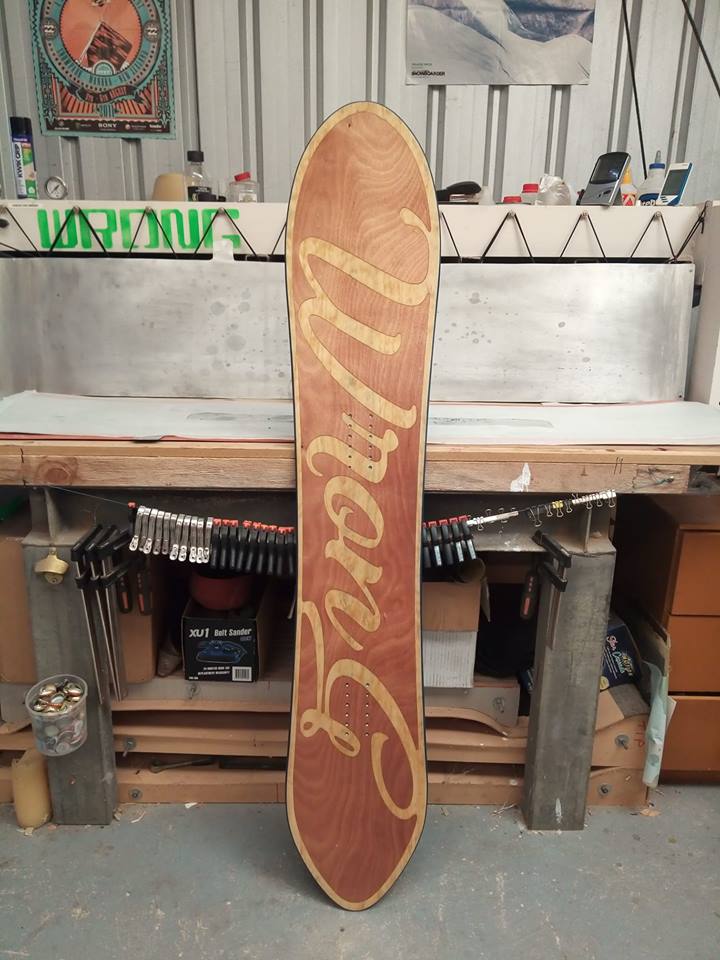
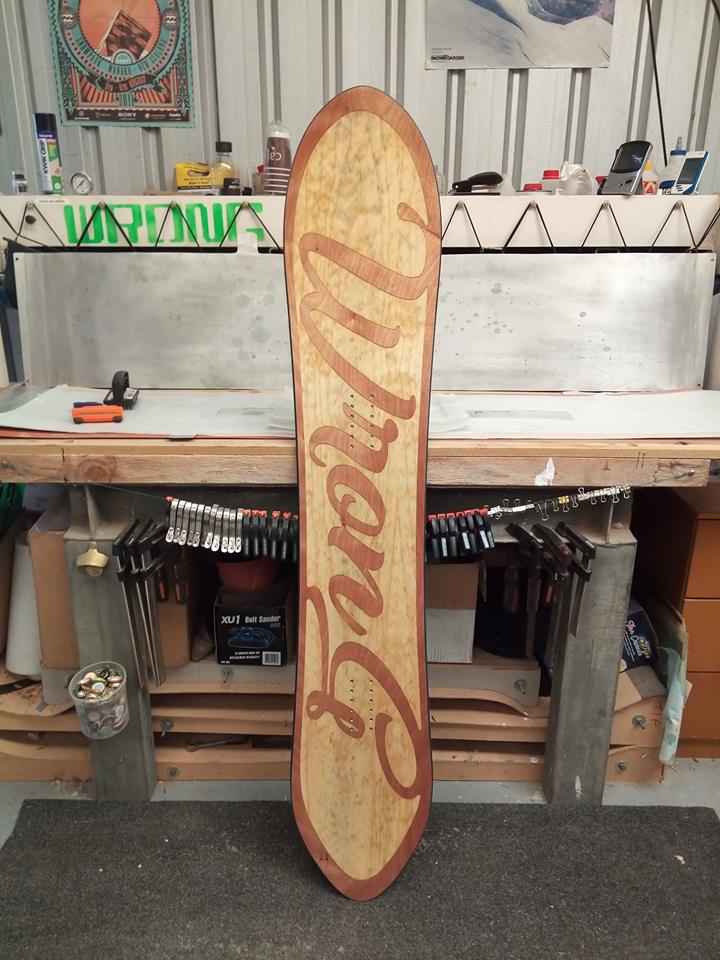
gav wa
One is a 160cm board the other is only a 154cm. The shorter one is also a fair bit narrower, this is why the veneers look a little different around the edges, it's just the board dimensions.
gav wa
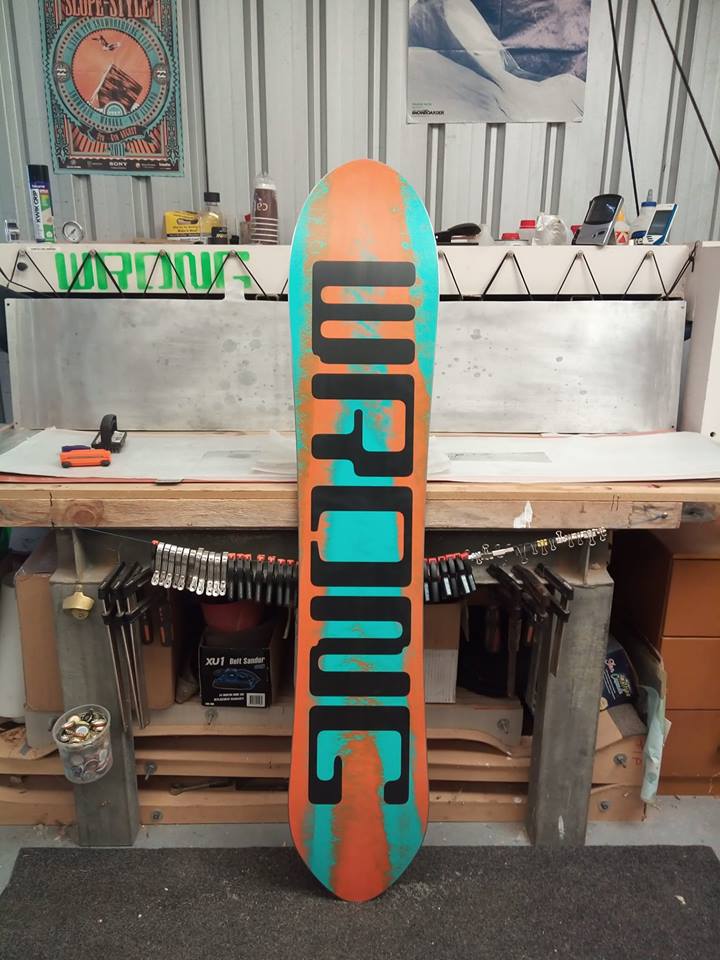
The two bases.
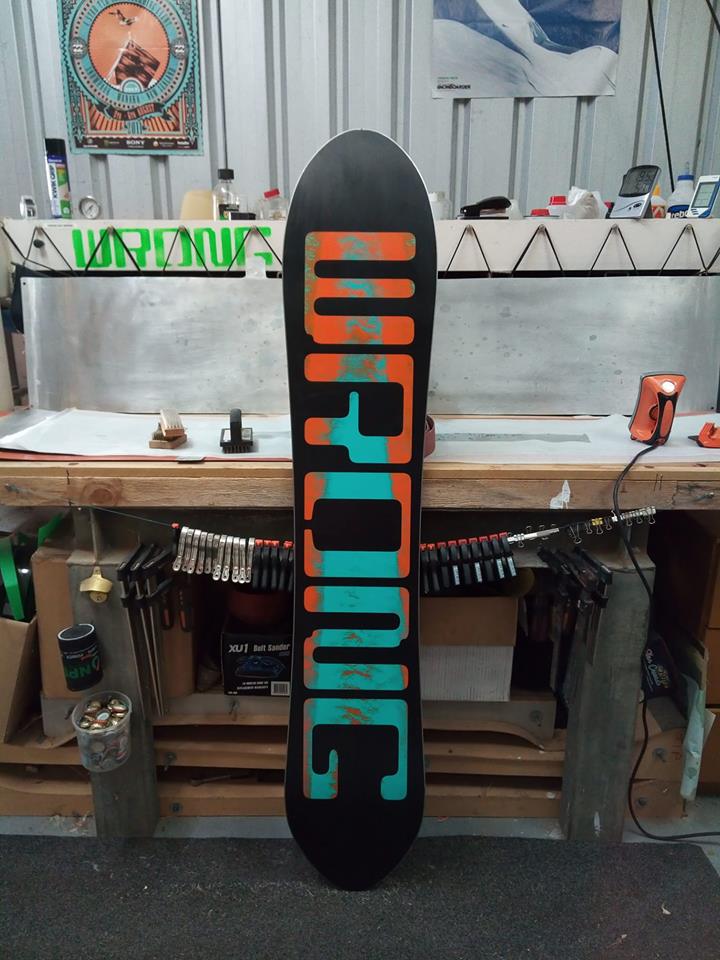
chrismp
Both look amazing! Can you post more detailed specs?
gav wa
Chris, I'll get the specs when I get home from work on Monday.
They are both mid-wide boards. Nothing crazy but a little extra float.
Heaps of rocker in the nose and a short running length, I think the bigger one is still only a 900mm running length.
The sidecut is fairly progressive and the width across the rear bindings is heaps more then across the front bindings. It helps it hold on in a carve on hard pack a little better than boards like this normally would. They don't carve as hard as my swallowtail boards do but they also aren't as stiff as most boards I build.
The 160cm is only 2750 grams. I used only 450gsm biax (0, 90) glass top and bottom plus a carbon fiber 45/45 surf mat to add some extra torsional stiffness.
Its ended up a very interesting flex and something I will definitely use again if I want to make a softer board with just enough grunt to hold on if needed.
The first board I put the carbon on the top but it came through the topsheet veneer a little so on the smaller board I put it under the core. I expected the carbon on the bottom would cause it to be even softer flex but was happily surprised to find that board to be a tiny bit stiffer. Not sure whats going on there, the cores were built slightly different though.
fred
Hi Gavin,
those boards look amazing!
Thanks for posting, I need a bit of motivation like this once in a while, in order to keep up my motivation to finish my press and get things working..
gav wa
Hey guys, I just got given a roll of chopped strand glass because nobody else wanted it. Before I hand it on to whoever wants it I'm just wondering if anybody here has actually used chopped strand in a board before and how did it go?
Layed up with some light uni it might be an interesting result.
mammuth
If its very lightweight (30-50 grams) you can use it as a bonding layer. Otherwise you can use it for boats, speaker enclosures, itch your skin,....
chrismp
If it's lightweight you could also use it right under a plastic topsheet to avoid the texture of the non-woven fiberglass layers to print through.
gav waTue Jan 28, 2020 8:22 pm
So I made my first set of skis recently. Just finished a month in Japan (pretty crappy season in Japan though) and the missus loved them. I was aiming for easy turning and a smooth easy ride in some softer snow so she could progress a little in her off piste skiing. They worked perfectly as planned so that was a bit of a relief.
I fitted Marker touring bindings and trimmed up a set of skins to suit them too, so she is ready to go.
fallsMon Feb 17, 2020 2:13 am
Looking good. Sorry the month in Japan wasn't as good as usual.
Akiwi
Realy realy nice!
I guess the resin was a little thicker, or started to harden sooner and therefore not squeezing out as much. You could try warming the epoxy a little to make it a bit thinner. OTOH if it was hardening too soon, then warming might make it worse.
24Dave
Gav, thanks for the start point on the drum sanding, and what a gorgeous little board that one is! stunning veneer work.
gav wa
So I had a small problem with a board recently.
A board I built for a mate (the one with the monkey image just recently) came with him on a trip to Japan over the last month.
Well day 3 into the trip he starts complaining about his board falling apart, some other crap about maybe "proper built" boards are just stronger and the "glue" works better. (what a wanker)
So anyway I go down to the dry room to check out what has happened, expecting to find a delam or something.
This is his complaint;
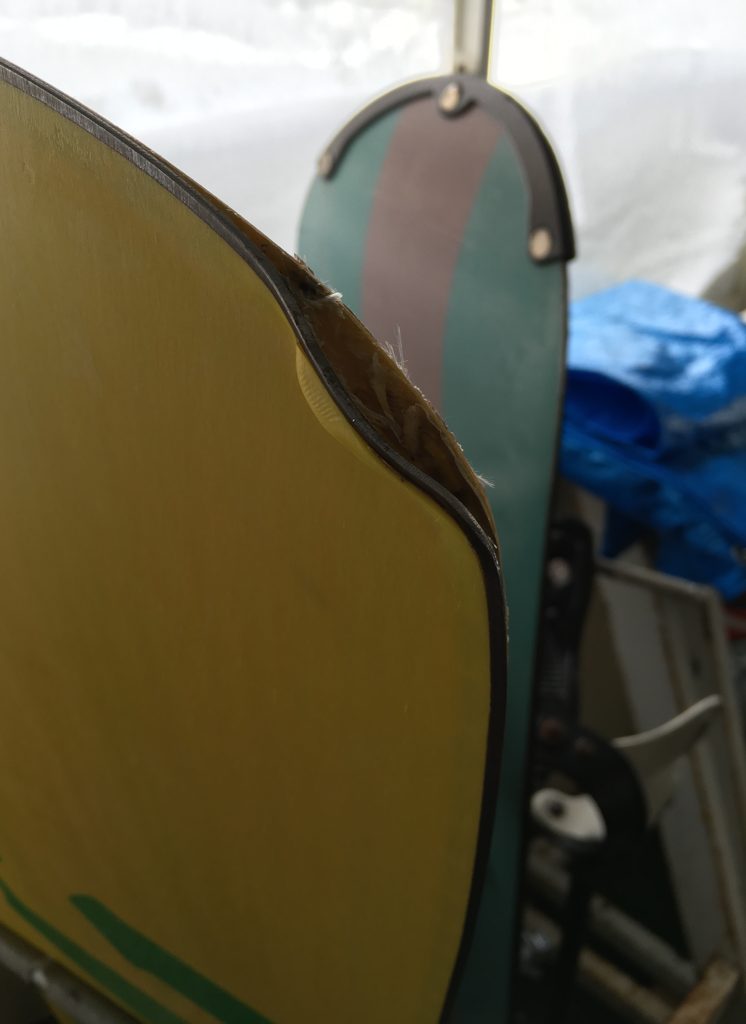
So yeah this is apparently a build quality issue, any ideas how to prevent it? HAHA.
Even after a week or so he was still putting out theories of how my builds might be faulty compared to big brand boards. As you can imagine I was very diplomatic after a week of hearing how a massive edge slam must be because of bad build techniques.
burnside
There's some sort of irony here that you can see a rubber capped monstrosity right behind your buddy's board.
Maybe he needs one of those....
vinman
Annealed edge material?
gav wa
burnside - yeah I think that might be more his pace
Vinman - no, I don't anneal any of my edges. That edge is full hardness and in person you can see a definite shape to it, something solid has been impacted.
vinman
� then he really doesn't have anything to complain about
richie
had it been a "real board" I wonder if it would be even rideable now - more like totally destroyed. And your mate, is he carrying any sort of injury after hitting the tree or rail ?
gav wa
Yeah Richie, he was pretty sore for a while from two decent off's he had.
Plus after a week he mentioned that one included a pipe in the ground. I sat there dumbfounded that after talking about hitting a solid steel pipe he was still discussing build quality.
Interesting point, I had made him the board for free, not even cost of materials. He had just split up with his Fiancée and I thought it might help him take his mind off things and move forward. The thanks you get eh HAHA.
I'll still cut out the edge and repair it if he brings it around, mainly just for the practice and I don't like one of my boards out there looking like that.
SleepingAwake
> gav wa wrote:Interesting point, I had made him the board for free, not even cost of materials. He had just split up with his Fiancée and I thought it might help him take his mind off things and move forward. The thanks you get eh HAHA.
I'll still cut out the edge and repair it if he brings it around, mainly just for the practice and I don't like one of my boards out there looking like that.
You sir deserve better friends
richie
> gav wa wrote:Yeah Richie, he was pretty sore for a while from two decent off's he had.
Plus after a week he mentioned that one included a pipe in the ground. I sat there dumbfounded that after talking about hitting a solid steel pipe he was still discussing build quality.
Interesting point, I had made him the board for free, not even cost of materials. He had just split up with his Fiancée and I thought it might help him take his mind off things and move forward. The thanks you get eh HAHA.
I'll still cut out the edge and repair it if he brings it around, mainly just for the practice and I don't like one of my boards out there looking like that.
I'm not surprised he's sore! Yes those edges we all use are damn tough, one of my boards I built went for a wee solo mission without me when I tripped and did the total dick move and lost my grip on the board while taking a short side hike outside the field, luckily it was a fairly deserted basin. Well I watched the board take off at mach speed right down to the snow line where its grand finale was a huge air and nose first landing into some very chunky bedrock. I was debating the merits of even bothering getting it, maybe salvage the bindings but I was not expecting the board to survive - yet the front of the board only had a very minor delam and ever so slight edge deformation and was a 5 minute repair - so what ever your mate hit yeah I bet he felt it!!!!!! Tell him to stop being miserable too and be grateful to have a legend mate like you to build him a board that is super generous of you. Cheers
vinman
I once had a buddy who I built a ski for who mounted them with binding freedom inserts. He claimed my core was bad because the inserts kept coming out. I took the skis back and made him new ones. Turns out the inserts had not been cleaned after being machined and were contaminated with metal cutting fluid which caused the epoxy in his mount to not bond to the insert. But of course it was my core that was the problem......
I remounted them with normal screws and skied for a couple years after, many times with that friend so he knew it was not the skis of my fault.
gav wa
Hey first build in just over a year. Can't belief it has been that long. Well until I saw how rusty I was putting this board together
In the end it turned out ok. I was not too sold on the bright orange edge with such a red veneer topsheet but it actually looks sweet.
It's a short board for a short guy, it's only a 150cm
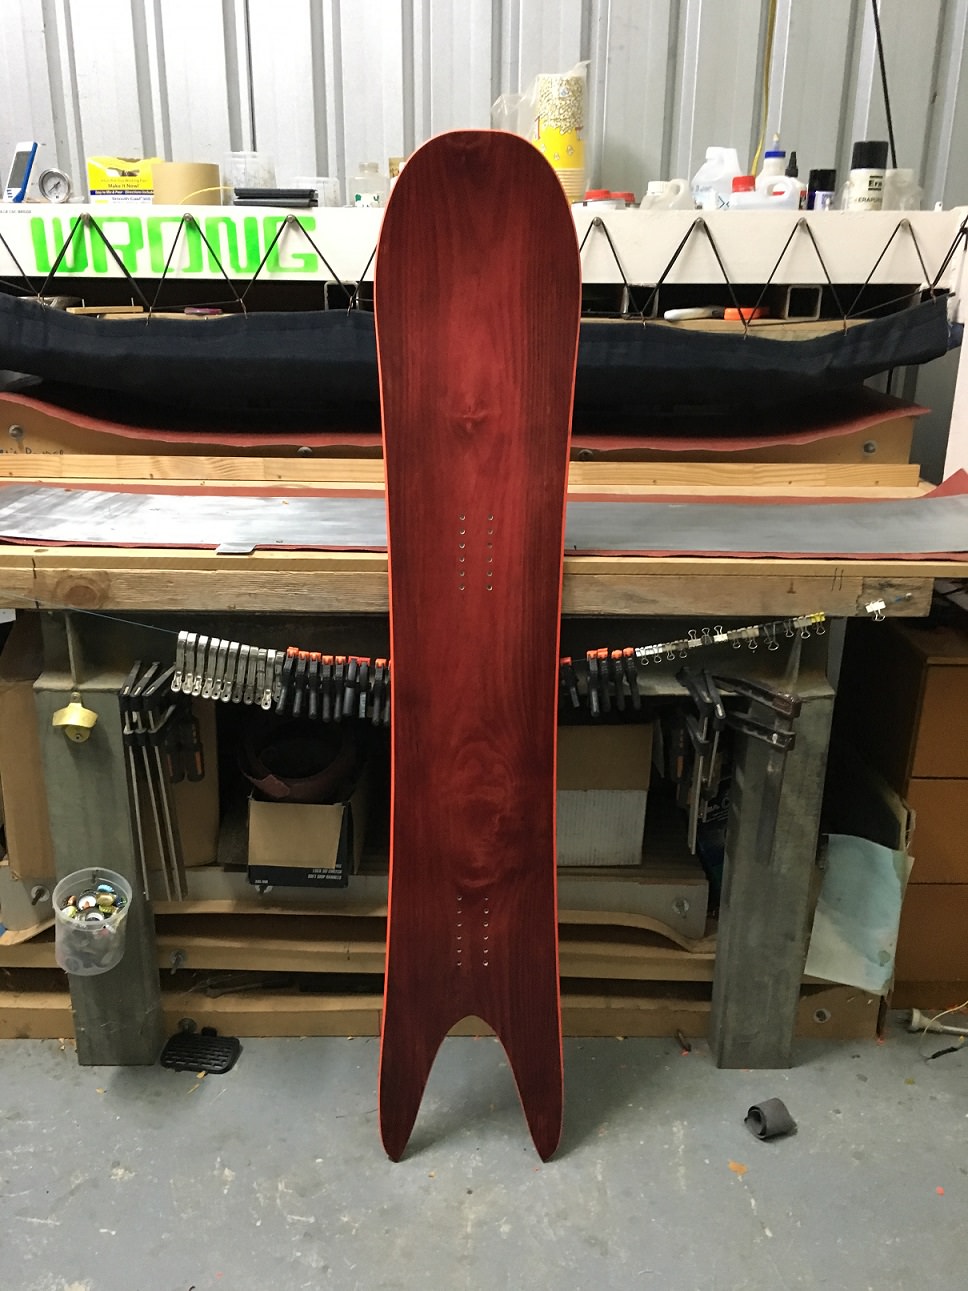
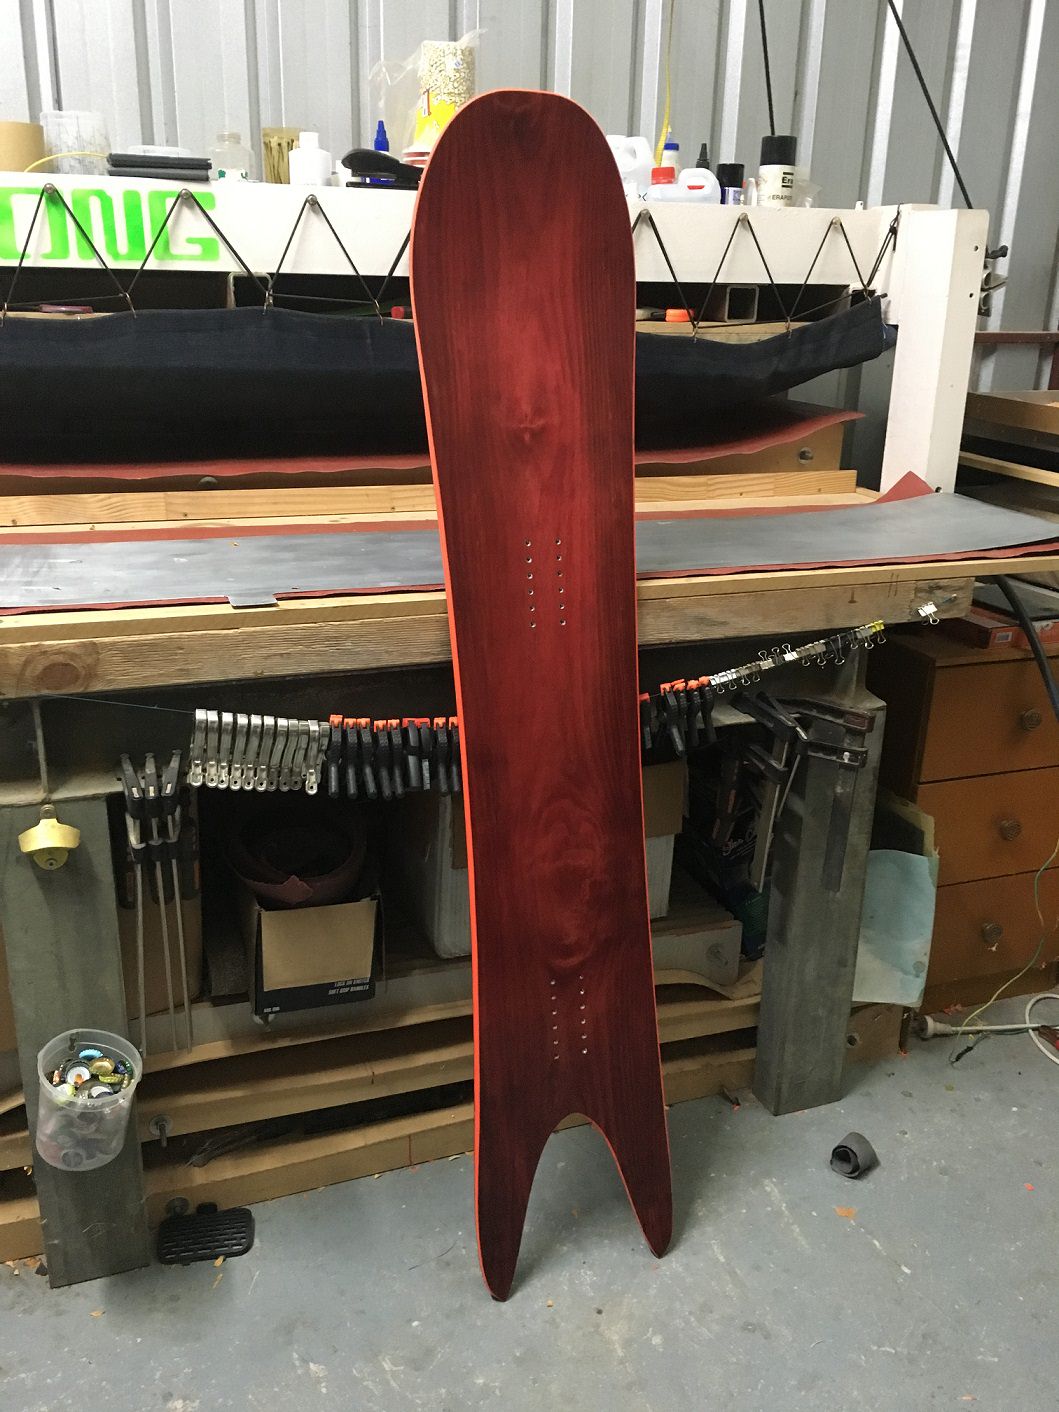
The top is actually pine veneer that I stained to look like a redwood. Looks really nice in person. I added a bit of thinned black stain around the edges to darken it a bit.
gav wa
Pretty happy with the new resin I tried out. I stuffed up the heat ramping a little and ended up with a bit of spoon in the base, but for a powder board it might work out pretty good.
The flex is very similar to how my old resin would have worked with this layup, maybe a little stiffer, so that is cool. This board is a mid-stiff flex so should be a fun and lively board to ride.
Weight is about right for this size board, 2650 grams. Maybe just on the light side, but hopefully it still has a bit of damp feel to it, I used 1 inch wide VDS so maybe that will help.
burnside
That board looks awesome. That redwood stain with the orange sidewalls turned out great.
Do you have any tips on staining veneer for topsheets? The advice I've gotten in the past is to stain before pressing so that epoxy on the veneer doesn't create a splotchy pattern.
