
Hey gav.
All smooth-on product in au comes through rowe trading who are the ones selling on ebay. ebay price is the same as the website so you might as well just use that.
Good luck with the wood chamber ;-)
Hey gav.
All smooth-on product in au comes through rowe trading who are the ones selling on ebay. ebay price is the same as the website so you might as well just use that.
Good luck with the wood chamber ;-)
^^^
What he said:)
evening AU chaps. Is this the stuff on ebay? http://www.ebay.com.au/itm/Polyurethane ... 0799166100
I like in the video when it turns white. Pretty cool. Are you colouring it?
DC
thats the stuff. The other guys here have heaps more experience with it than me but 1 thing I will say is make sure you have wide mixing pots. Last time I mixed it in a 1 litre mixing pot and pot life was shortened by about 50%
I dont colour mine, I love the clean white look. Also I mix about 600ml total in a 1litre container without any dramas, plenty of pot life to pour and get my pressure chamber sealed up ;-)
White with veneer looks great IMO
> gav wa wrote:thats the stuff. The other guys here have heaps more experience with it than me but 1 thing I will say is make sure you have wide mixing pots. Last time I mixed it in a 1 litre mixing pot and pot life was shortened by about 50%
Are you making skis or boards or something else?
The white PU (325 I think) does not work with pigments, 327 does.
dbabicwa - I'm making boards mate.
I only got a pot life of about 4 minutes before it started to thicken very quickly. My pot was about 4-5 inches across at the bottom and I mix by the weight recommended on the included instructions, measured on a very accurate set of digital scales.
I've checked out your blogs and those kite boards are very impressive.
One thing I was going to ask you though, considering you are premolding your edges, have you tried simply letting it cure at atmospheric pressure?
Without the moisture coming through from a wood core you shouldn't get any foaming. In the test batches I've done in plastic containers not a single sample has had any bubbles at all.
This is the reason I am going to try lightly sealing a channel with the same epoxy I'm using in the lay-up and seeing if after this dries smooth cast 305 doesn't bubble when hardened at atmospheric pressure.
Might not work but worth a try.
Thx Gav
305 I did not try, but like with any I think it expands first and than it shrinks. Quite a bit with both. That is the problem and a nightmare to clean after. At least for me.
With premoled if I could get the exact thickness every time (which I don't yet), placing and finishing edges would be really fast. Like a minute or two.
The idea is to have almost perfect size, ready to go when glassing. More and more I think the only way to achieve this is to machine the edges to the needed size. But how to, I do not know?!
D.
PS
And premolded mate, coz I use all PU in about 1 day after opening. Once you open it it will go off really fast...Even with Argon or Nitrogen on top.
Thx for the alu info as well.
Gav. I mix by volume, 1:1 and seem to get a longer pot life than you are. Maybe check yourwights and see if they work out to 1:1 by volume.
I have often experienced bubbles in the mixing container
The problem with a premolded edges is how to cut it for bonding together:
The idea is to make a 45 degrees cut. Hm, not easy task tho...
Any ideas?
looks like just another "skill" that you have to teach yourself..... get a real good knife or whatever, take a good educated guess, and go for it!
> gav wa wrote:dbabicwa - I'm making boards mate.
.
.
This is the reason I am going to try lightly sealing a channel with the same epoxy I'm using in the lay-up and seeing if after this dries smooth cast 305 doesn't bubble when hardened at atmospheric pressure.
Might not work but worth a try.
How did you go?
Sorry mate I have been busy working on building my heat mats. I will try it this weekend though.
> gav wa wrote:Sorry mate I have been busy working on building my heat mats. I will try it this weekend though.
I've just burned 2 3A fuses on 55-60C, luckily I've got them...
Hi again gav
I got some of the erapol cc60D and my test so far is looking better than the smooth-on 305.
Just wondering whether you are using a vacuum to degas after mixing. It is pretty thick and I seemed to introduce bubbles when mixing that wouldn't dissipate during the pot life.
Secondly with the pigment are you just doing it by eye or as a % of total weight?
thanks
Nah i just stir the hell out it and pour it. If you have a degassing pot set up you could give it a go, especially if you are adding pigment, you can stir in the pigment to part A, degas, then stir in the hardener.
I just mix pigment by eye, just keep it under 10% by weight of your polyurethane. 10% is heaps though, im usually closer to about 5%.
There is some paste pigments that work really well, especially if you use a little bit of white pigment with your colours, makes them really solid color and nice and bright.
I recently had my metal wizard friend build me a pressure chamber based on Goz' design. I have been fighting air bubbles since last season and I am so stoked that they will not be a problem anymore. Also, new product that I am in the middle of testing and it is half the price of smooth-on.
http://specialtyresin.homestead.com/castingresins.html
Model pro slow. Comes in off white and black plus it accepts color. Keep you posted on the results but promising so far.
I have to thank everyone on here especially Goz, Dtrain, and Head Monkey for really paving the way for me. Because of thier knowledge and ingenuity, it really takes a lot of the leg work of trial and error for new people getting into this craft. Cheers guys!
Please do!
After fighting UHMW sidewalls for the past year or two, I decided to throw in the towel and move on with my life. The UHMW was expensive, a pain to bond (both for core profiling and in the final product), created a pile of nasty plastic waste, put up a fight to achieve a nice finish on the tips and tails, and I was horribly allergic to the stuff when it was cut with a router bit, like I would sneeze for days and my respiratory tract would get all plugged up. Gnarly.
These poured urethane sidewalls look like the way to go, thanks to those who pioneered this technique and shared their experiences! I read through this thread a few times and hatched a plan, ordered up a vac chamber and a few different resins to try, thought I'd share my results.
I ran tests on 4 different polyurethanes; Smooth-Cast 305, Smooth-Cast 61D, Smooth Cast 65D, and AlumaLite Water Clear. I degassed all the resins and poured them into some test cores that had been sealed with a variety of wood sealers; epoxy, oil based one-part polyurethane finish, water based poly finish, wood glue, acrylic paint, penetrating wood sealer and plain wood. I found the oil based poly was one of the easiest to apply, stopped the resin from bubbling, and bonded to the 2 part polyurethane sidewalls as good or better than any of the others. The penetrating wood sealer made a foamy mess of everything.
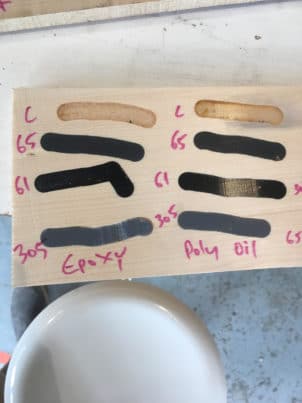
The smooth cast 305 and alumalite showed the greatest tendancy to react with the humidity in the wood and turn to foam (with the exception of the oil based poly wood sealant which worked pretty well). Both the 61D and 65D stayed fairly bubble free in most of the tests (except plain wood and acrylic paint). Some bubbles formed on the surface but after the top was smoothed off with the thickness planer, they were mostly bubble free.
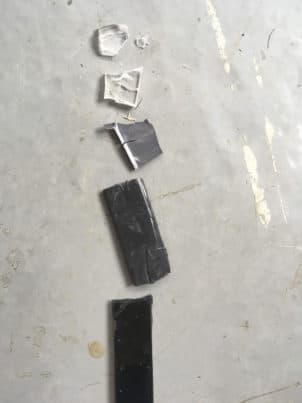
I poured some straight urethane test strips to check impact and flexural strength at room temperature and out of the freezer. The Smooth Cast 61D was surprisingly rubbery and was virtually impossible to tear, scratch or smash at any temperature, but it did feel a little bit soft for ski sidewalls, kind of awkwardly soft and I'd worry about it not supporting the metal edge in a rock impact. My sample of Smooth Cast 65D was significantly harder, and really had the hand feel of a commercial ski sidewall. Solid, but with a hint of give when pressed with a fingernail. The 65D was also fairly resistant to cracking when smashed with a hammer on the concrete floor. It did develop some cracks and eventually broke after a number of hits with the edg, but it put up a pretty good fight. It was slightly more brittle when frozen, but still performed relatively well in my opinion (especially compared to the next two). The Smooth Cast 305 was significantly worse in the hammer and flex tests, especially when frozen, it was quite brittle and snapped relatively easily when flexed by hand. It also cracked easier with the hammer than the 61D and 65D. Lastly, the Alumalite Water-Clear squeaked through the room temperature flex and impact tests and I had really high hopes for a see-through ski. Alas, when I tested the frozen samples, the Alumalite was insanely brittle and shattered like glass when I hit it with the hammer or flexed it by hand.
Next test was a quick and dirty bond test in the press. I found that sanding the surface that had been through the thickness planer noticeably improved the bond, and all the samples seemed to stick to the epoxy and triaxial glass equally as well as the wood around them. That was a welcome relief after fighting with UHMW. dded that stuff!
To summarize, I plan to give the Smooth Cast 65D a shot on a few pairs of skis because it seemed the best suited to our purposes. Its the same price as the Smooth Cast 305 and readily available on the internet. Furthermore, all the specs in the technical data sheet look superior to the smooth cast 305 series. The stuff does kick like a banshee after its 2.5 minute pot life. You definitely have to work fast to get the resin degassed and poured before it goes off. Degassing part A and B before mixing seemed to help. It also gets whiter as it cures. Im tinting it black, and its hard to gauge how much pigment to add because the liquid resin was jet black and it cured to a medium grey. I also found that it was helpful to seal not only the sides and bottom of the channel, but about a cm around the rim as well so any overflow doesnt react with the moisture in the wood and cause bubbles in the final product. It also looks like there exists a smooth cast 66D which has a 7 minute pot life but I couldn't find any trial sizes. If I start doing larger volume with urethane sidewalls, I'll probably give the 66D a shot because it would be nice to have a bit more work time.
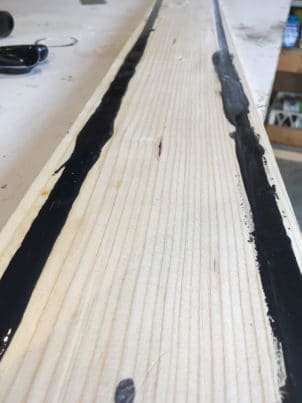
Ill try to update this post with some photos of the sticks once they're done. Thanks again for all the help everybody!
Nice one! It's always great to see people using and experimenting with polyurethane.
If you're located in Europe, you can get smaller batches of the 66D from www.kaupo.de
What grit sandpaper did you abrade the urethane with?
Just built a vacuum chamber for vacuuming urethane with board. I was impressed with pressure box and thought that it will be nice alternative.
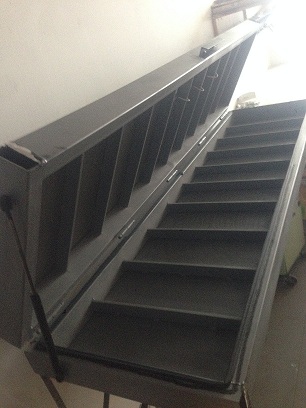
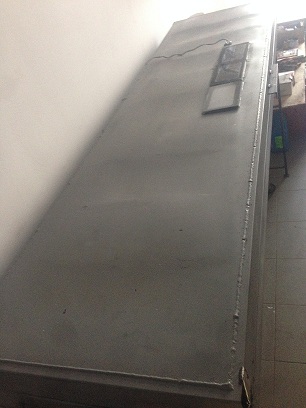
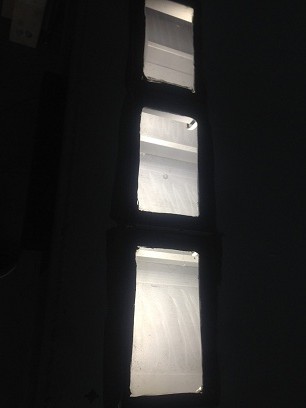
I really hope you are wrapping some serious harnesses around that thing bro.
That does not look like any pressure vessel I have ever built. They look like garden gate hinges.
Have you calculated the load on those hinges and panels?
Lets say that thing is 1.8 meters long and 400mm wide, that is a surface area on the lid of 1116 square inches.
So at 15 psi (a bit over 1 atmosphere) those five hinges are holding onto about 7600 kg. So over 7 tonne.
And I reckon that thing is probably even bigger than I suggested above.
I'm not trying to rain on your parade mate, I'm just a bit concerned for your health. Pressure vessels are nearly always round for a reason, square corners split and blow apart, plus anything built like that is usually a restricted class vessel which requires fatigue cycle counts. because every single time you use it the thing gets weaker by a decent margin.
Edited (doubled up post)
The first thing is that it is not pressure box. It is vacuum. All that can happen is that this box will compress inside.
The second thing is that it is already tested.
Yes, there are some sounds, but they appear only, because 2.5 mm metal sheet in between steel ribs deforms. It is much safer than pressure box.
Forget everything I said. Hahahaha.
I need to pay more attention bro. Yep vacuum is a little different from pressure.
Keen to see the results. Clever thinking too, it might degas really well while curing plus being heaps safer.
ahahah. this sometimes happens!
I will add soon some pictures with results.
For completeness sake, I just wanted to add my results, since I use a product not mentioned before.
I used Xencast PX90 (90 Shore A hardness), distributed through www.easycomposites.co.uk.
I sealed the channel with one layer of epoxy resin, however tests with an untreated test channel on the same core showed that it is not necessary; I could not see a difference between epoxy sealed and non-sealed strips. There were some small bubbles, but for the first try I'm pretty happy with the result.
Pot time is only 4,5 - 5,5 minutes, which is just about enough to mix, degas and pour before it starts to jelly.
Sidewall_1.jpg (124.15 KiB) Viewed 473 times
Sidewall_2.jpg (105.53 KiB) Viewed 473 times
Hey Fred, what's the viscosity like of this product you are using?
Results look good but that pot life is damn short, I think I would need something that pours pretty easily and levels from one end to be that quick.
Oh and great results mate, really nice pigment too.
Yeah, looks good. But 4 minutes including degassing is tough ...
yep, four minutes go really fast. Next time I will need something or somebody to give me split times.
the supplier rates the viscosity with 600-900mPas. For comparison, Erapol CC60D is rated with 4500mPas (like Honey or Syrup?), Smooth-Cast 305 with 80mPas (like Olive oil). You have the experience to judge if those comparisons are valid...
As for the color: well, I wanted to get a clear blue, since the technical data sheet in the internet had a picture of a nice skateboard wheel in translucent blue. But due to the amber color of the PU itself, the thing turned out greenish. I wonder how they got that blue in the picture. So apparently 15 drops of those blue translucent tinting pigments added to 500 grams of PU is not enough to get something like blue
BlueWheel.jpg (6.07 KiB) Viewed 1603 times
I was wondering what shore hardness of urethane people using to pour sidewalls with? Also are people using rubber foil in the layup when building skis or snowboards with urethane sidewalls?
If you look through this whole thread and google the datasheets for the different PU resins people use, you will get an idea what hardnesses work. From what I'm aware of around 90A is on the softer side of whats regularly used and around 70D is on the harder side.
VDS rubber should still be used with PU sidewalls as it is there to act as a shear layer between the edges and the sidewall due to their different thermal expansion properties.
I thought I would start this thread so that info on pouring urethane sidewalls can all be found in one place. If you pour your sidewalls please post up.
Ill start.
I used smooth-on product smooth-cast 305. It works very well and machines up easily. It is also quite hard and impact resistant. It cures in a bright white which is nice too.
I have put around 40 days on one of my boards and have had no issues at all. I even forgot to put vds rubber on that board and have experienced no delamination at all.
My biggest issue was bubbles forming as it cured so I built a pressure chamber and put the cores in that while they cure, this has solved the bubble problem.
Data sheet
http://www.smooth-on.com/tb/files/Smoot ... ___310.pdf
any surface preparation on the 305 prior to layup (sand/flame?)
i have mine sitting around waiting for time to experiment. 40 days seems like good enough feedback to try it in some skis.
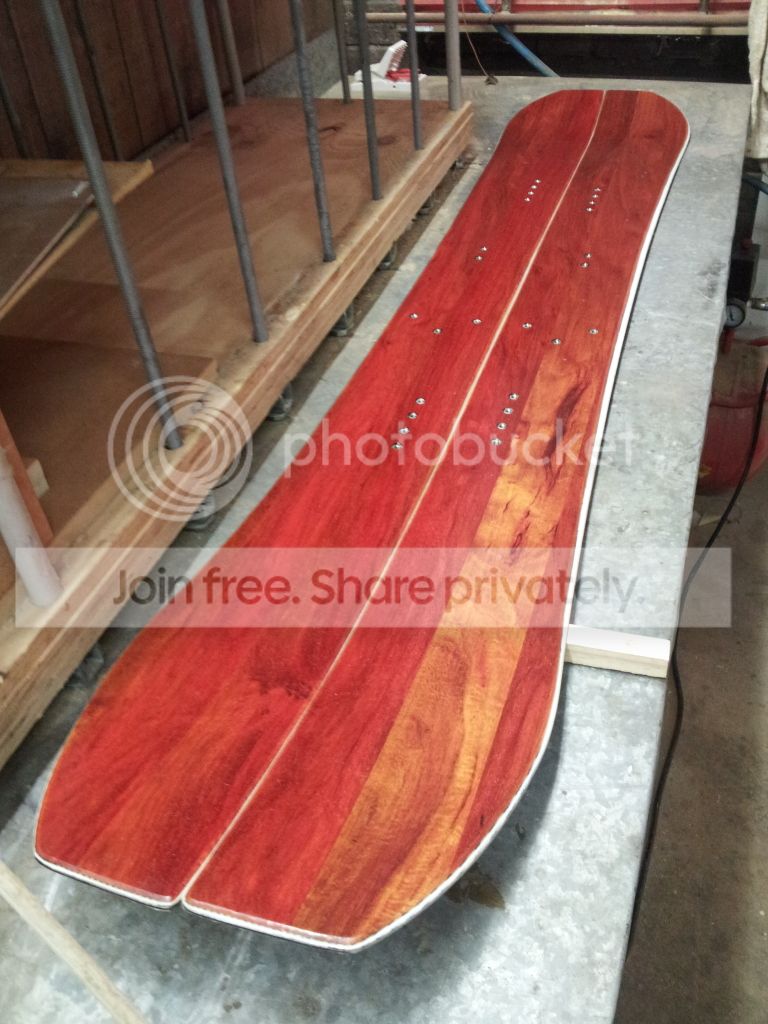
Some pics of my efforts.
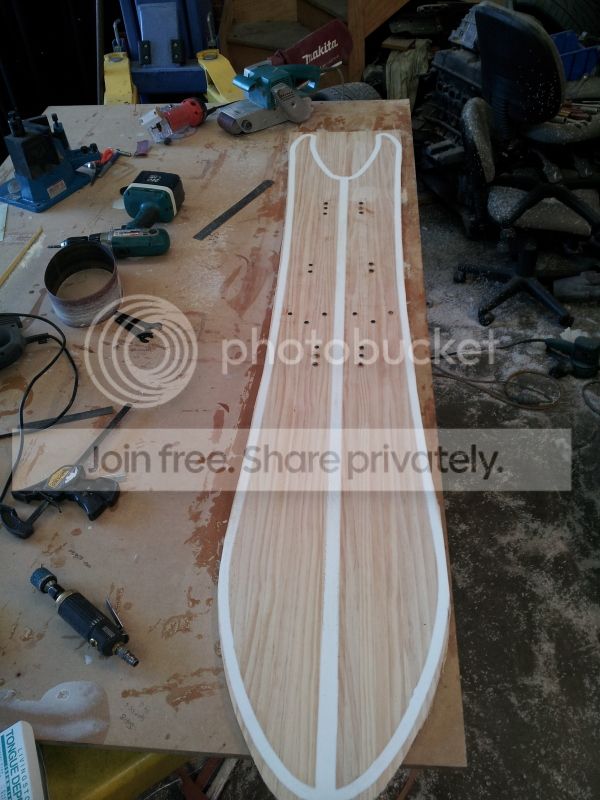
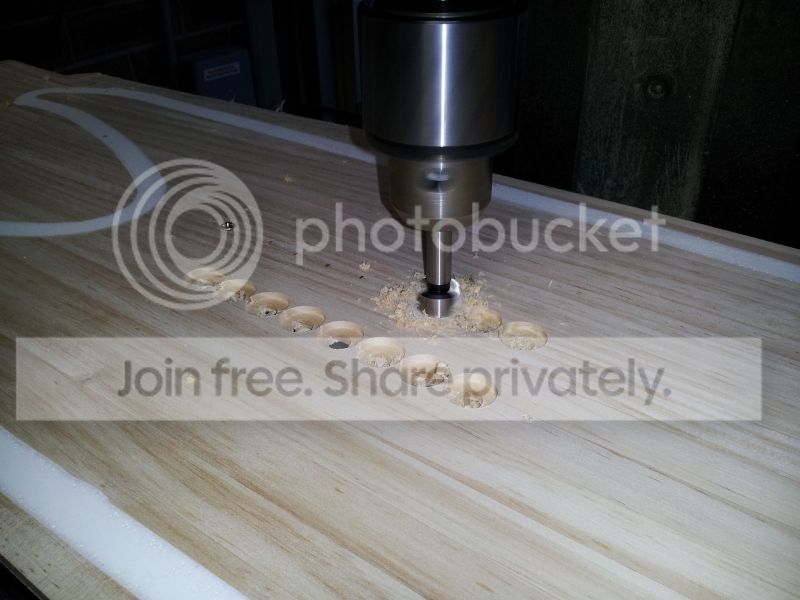
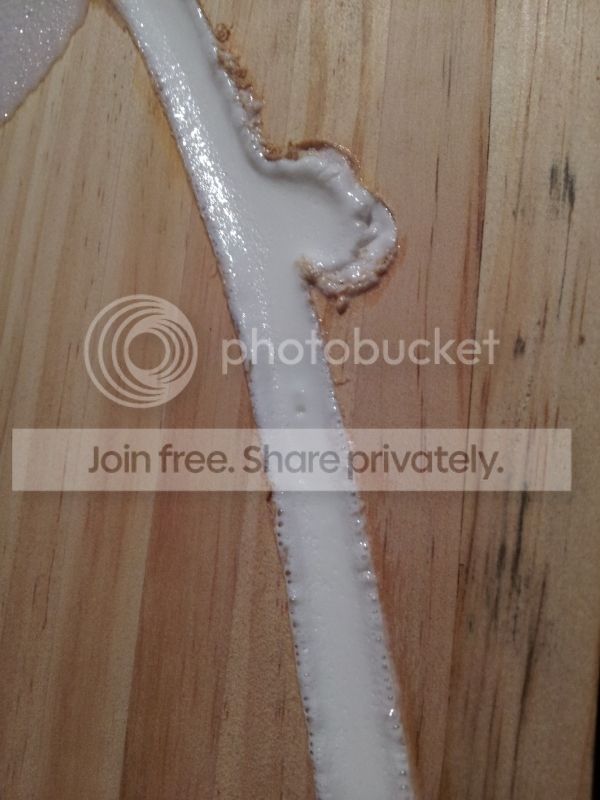
You can see some of the bubbles in this pic
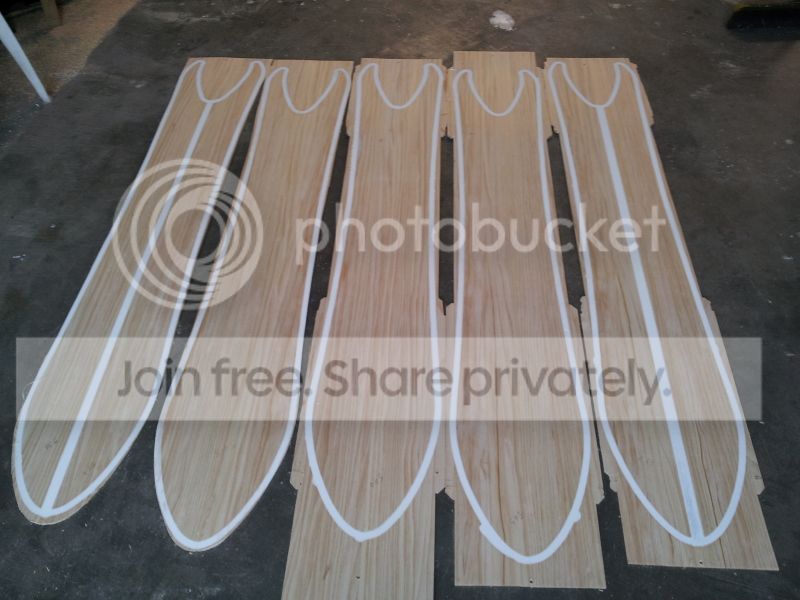
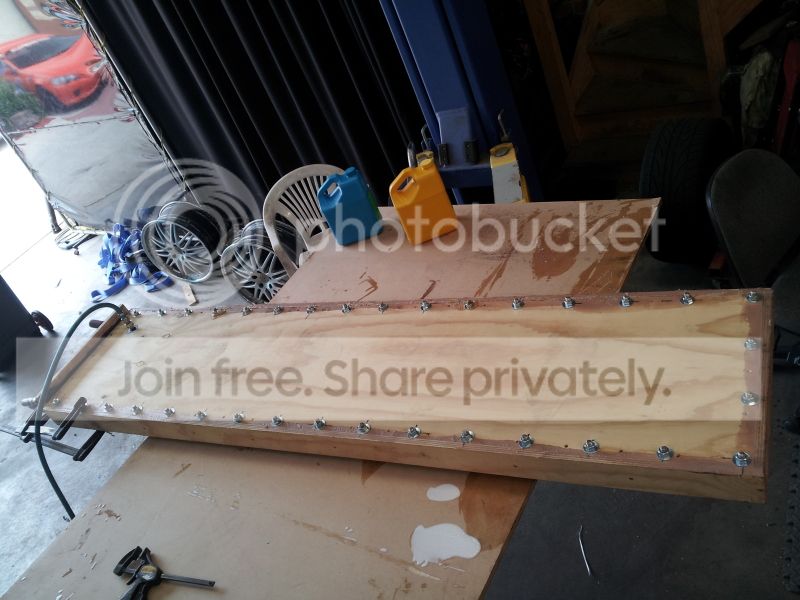
The pressure box
The first one I did at atmospheric pressure
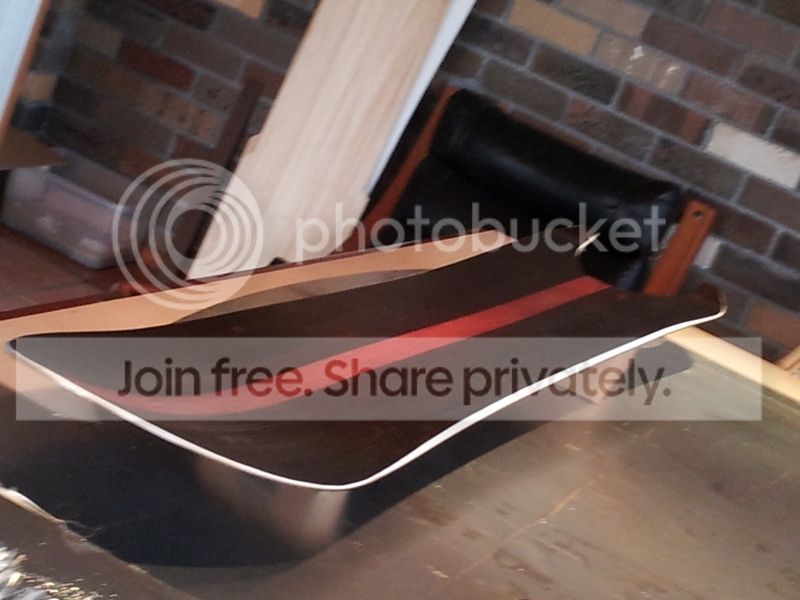
> falls wrote:any surface preparation on the 305 prior to layup (sand/flame?)
i have mine sitting around waiting for time to experiment. 40 days seems like good enough feedback to try it in some skis.
mine is just finished with a belt sander. There is definately no need to flame it, like I said I even forgot the vds rubber on the board I put 40 days on.
Lesson learned: Don't try tinting poly with acrylic paint, stick to pigments suited for the purpose. "only a couple drops" is enough to turn your polyurethane into spray foam. oops.
Two or three colours part mixed and poured to give marbling. The board looks sweat man!
Hey gozaimaas. Can you tell me more about your pressure chamber? I've tried putting the smoothcast in a vacuum chamber before pouring and passing a flame over it while it cures. I still can't get rid of all the bubbles. What sort of pressures are you using? Are you running into time constaints pressurizing it in time before is cures? Thanks.
I've been using Adiprene LF950A with Ethacure 300 with very good results. Only downer is that it has an amber tint to it so it's not the best resin to use for bright colors. I use a diy vacuum chamber to degas the resin. It's an old pressure cooking pot with a thick acrylic plate as a lid. We routed a channel into the acrylic plate and filled it with sanitary silicone as a sealant. Add a vacuum port and you're there.
It would be great if you could tell us more about your pressure chamber and maybe post a few pics!
Im thinkin the 70 shore d material is the ticket. In my tests the adeprine was softer than uhmw and deformed easier than uhmw., but bonded easier but was a pita to machine.
The elongation at break of the smooth on material is half the uhmw but it might not matterthe tensile strength is there and bonding would be better i bet. The bubbles are a problem however.
Ok, with the smooth-on product I find the bubbles dont form until right at the end as the heat increases, just before it hardens so trying to degas etc simply wont work.
I read on the smooth-on site that if you experience bubbles simply put it in a pressure chamber at 60psi. Easy for some, not so easy for what I was doing but I decided to give it a go as I really like pouring urethane for sidewalls. I think its the ultimate way of doing the job.
So I built that box from 17mm plywood and 30mmx50mm pine sides so I had some meat to screw into. I glued it all up with construction glue, put in a heap of big screws and let the glue cure. I also made an end plug that screws in with a silicone seal.
When I pumped it up one of the pine sides split along the grain at about 15 psi making a sound like a gunshot. I then put threaded rod and nuts all the way around and it held up fine but leaks a fair bit from the end cap. With the compressor running flat out it maintains 30psi in the chamber and the results are excellent compared to atmo but there are still some bubbles.
I didnt have time to correct the issue as I was flying out to japan in like 5 days and had 4 more boards to build so I did the rest at 30psi with not perfect but very acceptable results.
I am now going to fabricate a steel sleeve that will glue into the end and have some threads tapped into it so I can use a steel end plate with silicone oring to achieve a 100% seal on the end and hopefully achieve the 60psi smooth-on recommends.
I have no trouble getting it in the chamber and up to pressure before it starts to kick. I pull after about 30 mins from mixing.
For skis if you had a wide enough diameter fire hose you could seal one end and slide the core with poured polyurethane in. If you could then quickly seal the other end and have it in a narrow space in your press when you inflated the hose it would get to 60psi but the hose would stay flat enough so the core would still just sit on the bottom of the hose.
(Or even put a steel rectangular thick walled section in a piece of hose and slide the core inside it then seal the end and inflate?)
Interesting concept but from my experience you would end up with liquid urethane everywhere. If you tilt it even the slightest amount it pours out real fast.
You could easily make a pressure chamber for a single ski core from some steel rectangle tube
How about using either an 8" or 10" dia. PVC pipe for a single ski's pressure chamber? It should give you enough more than enough space to make a small shelf within the pipe to place the core level. An 8” pipe should give you at least 7 ½” of usable width and a 10” pipe 9 ½” (Assuming 1 ½” tall working space)
One side with a glued cap and the other a threaded cap you should be able to slide the core in and thread the cap onto the pipe with plenty of time to pump the chamber up to pressure. Assuming you used schedule 40 pipe, it has a max pressure of 160 psi (water).
Would it be possible to sandwich a piece of plastic (none stick) between two cores. Place the stack in the press, pressurise and pump the urethane in under pressure?
The urethane would be in a pressurised pot, open the tap and the fluid runs in. The pressured bead would flow around a circuit. The compromise would be a 2mm section - a dividing wall, so that the bead of urethane flowed from point A to point B, passes through the plastic into the top layer (second core) and exit via the bleeder hole. Both cores would have this 2mm compromise.
Thinking there would need to be a thin none stick film - polyprop, silicon paper etc, between the core and the plastic or hardboard or whatever. When it come out of the press, peel back the film
I use a 5/8 bit
@ PMG - I have a few questions about this method. Bit unclear in my mind on how this is working exactly;
1/ My understanding is that you channel out one shape which is the same shape as the ski core plus width of the sidewall. The mold also has the same profile, but reversed. You clamp the profiled and shaped core up-side-down in the middle of the shape and pour the PU. Right?
2/ After you pour the PU and its cured, you thickness plane the top of the mold (bottom of core) removing any extra PU material. If this is the case I dont understand how you are getting the edge rabbeting? I can see that you use 0.8mm piece of white polystyrol but if you are pouring with the core upside down wouldn't the rabbet be on the top of the core? What am I missing?
3/ What are you spraying on the mold to ensure that the PU releases after cured?
Hi switzch,
the core is not upside down in the mold. Bottom is on the bottom, top on top. That should untwist your thoughts :)
3) normal mold release which has to be removed completely after all this, otherwise it may harm bonding when pressing. So if using a mold release that stays liquid, the best is to seal the whole bottom of the core to prevent the wood sucking mold release.
Have my first sample of poured Smooth On Task 12 here. The difference to 3xx series is huge: Its much more rubberlike regarding bending it. Offers less resistance to bending, but you can bend it like hell without it breaking.
I just took it out of the freezer, the low temperatures don't seem to bother the material at all - I do not have the smallest doubt this material won't break when used as sidewall. At room temperature, you can imprint it just a little bit with the fingernail, when its out of the freezer too, but the imprint is gone in seconds.
Will leave in in the freezer overnight, and then take a video of bending and hammering it.
Ok,
a video of my Task 12 test piece, directly out of the freezer after being in there for 16 hours.
The video quality sucks, but you can see enough - especially me making a little hole in the kitchen working space :)
http://www.spame.de/skibau/task12test.MOV
Cheers
Philipp
Hey gozaimaas
I''ve sent you an PM...Sorry, off topic.
D.
> pmg
PostPosted: Mon Sep 22, 2014 3:44 pm Post subject:
Ok,
a video of my Task 12 test piece, directly out of the freezer after being in there for 16 hours.
The video quality sucks, but you can see enough - especially me making a little hole in the kitchen working space :)
http://www.spame.de/skibau/task12test.MOV
Cheers
Philipp
scheiße !!! :)))))))
> pavelbozak wrote:
scheiße !!! :)))))))
Really forgot to put an extra board under it - thought of it but in my eagerness to see the result I forgot...
What's the size of this *.mov file?
Or better, what's the verdict?
The file is 96mb.
The verdict is that this stuff really is nearly undestroyable :)
but still deformable and thats the problem, 95 shore a isnt tough enough to prevent edge compressions and delaminations, and the uhmw is so much cheaper. The task 12 doesnt meet the durometer in my tests. I still cant find a liquid plastic or urethane with the elongation and hardness that the uhmw has.
The only one I have found in a polyether has a 2 min pot life at 150F, that sounds like it will be vary hard to work with.
uhmwpe only has a shore hardness of around 65D from all the testing I can find.
Finding an equivalent shore to janka is almost impossible.
The only thing I could find was that ebony might have a shore equivalent of 90D.
That would lead me to think hard maple is probably only 50-60D, perhaps less.
I think there is more to this than just how hard the material is.
It has to recover from the impact and the speed of the recovery probably plays a significant roll.
A heavy impact between a rock and your edge (rockwell 50?) is going to deform your edge if not supported by a hard substance, but if both deform an equal amount your edge is probably hooped.
If the substrate can recover as the impact is removed maybe your edge will show less effect?
Your edge is hard enough it's not going to recover from a major hit.
If your substrate is hard enough to stop the deformation it will probably break away from the rest of the ski.
If the substrate is more elastic and recovers, can it absorb enough of the force to prevent major edge deformation?
I know there are technical terms for all this but I don't have that ring.
If I did I wouldn't be using the term "hooped" ;-)
Bottom line... don't huck cliffs onto rocks or I'm not going to warranty your ski!
sam
The 95a urethane still alows the edge to deform and deform more than uhmw under the same load but the delam potential is much less with the urethane it would seem. Its a trade off. The wood explodes. Its hard but it flakes out after impact. Same you see with certain abs, cracks falls away slowly.
We dont aim for rocks but some years it would look like that.
I have heard board repairers say Ride Slimewalls (shore 95A) do have more edge breakages than other boards, but at the same time Ride boards have a great reputation and I haven't seen any complaints by people who own them, so who do you listen to. If they were inferior it would quickly become common knowledge.
I can say one thing though, Ride snowboards ride DAMP! I don't know if its all because of the 95A sidewalls but they are definitely one of the dampest rides going.
I've been using 65D polyurethane but have bought some 95A to try and have poured a swallowtail with it. But I put some milled glass fibre into the urethane to add a heap of strength to it.
Milled glass fibre adds tensile strength, flexural strength and impact strength.
If I was making boards for mass production and the retail market I would be more concerned with it all but making a few for me and my mates I'm not too as I know both styles of edge are being used by large companies and they both work.
I have a question for you guys who pour polyurethane sidewalls.
So I am currently using polyurethane sidewalls for the first time. I understand the process of what I am doing I just want to know about what actual polyurethane I should buy. I was also wondering if I could use the resin that I already have for lamination (I use super sap) and mix it with regular polyurethane so that I would not have to order special resin polyurethane online.
Thanks a bunch.
If you mean dumping polyurethane varnish in supersap and using for a sidewall, that's a no go
haha I know that I'm just wondering if there is a place that I can find polyurethane or if I must order it.
Read this entire thread and you'll have an idea what to get! Most people in the US order the stuff from smooth-on.
I've started using Erapol products. They have every hardness you could think of using, 85A, 95A, 60D, 70D and I can get a 1.1kilo kit for about $38.
The only negative is you really need to add a pigment as they are just your usual light amber resin color. The smooth on stuff has a very cool bright white.
Damn, that stuff is expensive...I pay about 15 USD for a kilo of adiprene! I buy them in batches of 40kg at a time though.
I'm sure if I bought 40kg I might be able to get a better deal than i currently do chris
Materials can be expensive here, a smooth on trial size kit is nearly $50
I use about 550 grams per board. How many 40kg orders are you making a year mate.
Haven't really kept track...we build skis as well and they use about 1.2kg of resin.
Chris, being a a cnc guy you def. need to start dong the inverse profile channel. Saves half the poly. We just do it 2mm deeper for wiggle room.Skim plane the bottom flat. Flip over and profile down to the poly. Have not wrecked one yet. But I'm sure we will
boards don't waste a ton with full channels , but skis waste a ton.
> Dtrain wrote:Chris, being a a cnc guy you def. need to start dong the inverse profile channel. Saves half the poly. We just do it 2mm deeper for wiggle room.Skim plane the bottom flat. Flip over and profile down to the poly. Have not wrecked one yet. But I'm sure we will
boards don't waste a ton with full channels , but skis waste a ton.
I do that without cnc by making the routing template the reverse profile.
Works perfectly
That's f@&king genius. Straight up!
Id love to see a picture.
Ok, firstly I profile my cores through a drum sander on a profiling bed.
To create the appropriate profile I run a board through the sander on my profiling jig, this will come out the same profile as a finished core. I keep this to use on future routing templates.
Now I run the actual routing template through the sander on top of the previous board, the result is the routing template has the reverse profile, thin in the middle and thick on the ends which obviously translates when using it to rout as deep in the middle and shallow on the ends.
It works a charm.
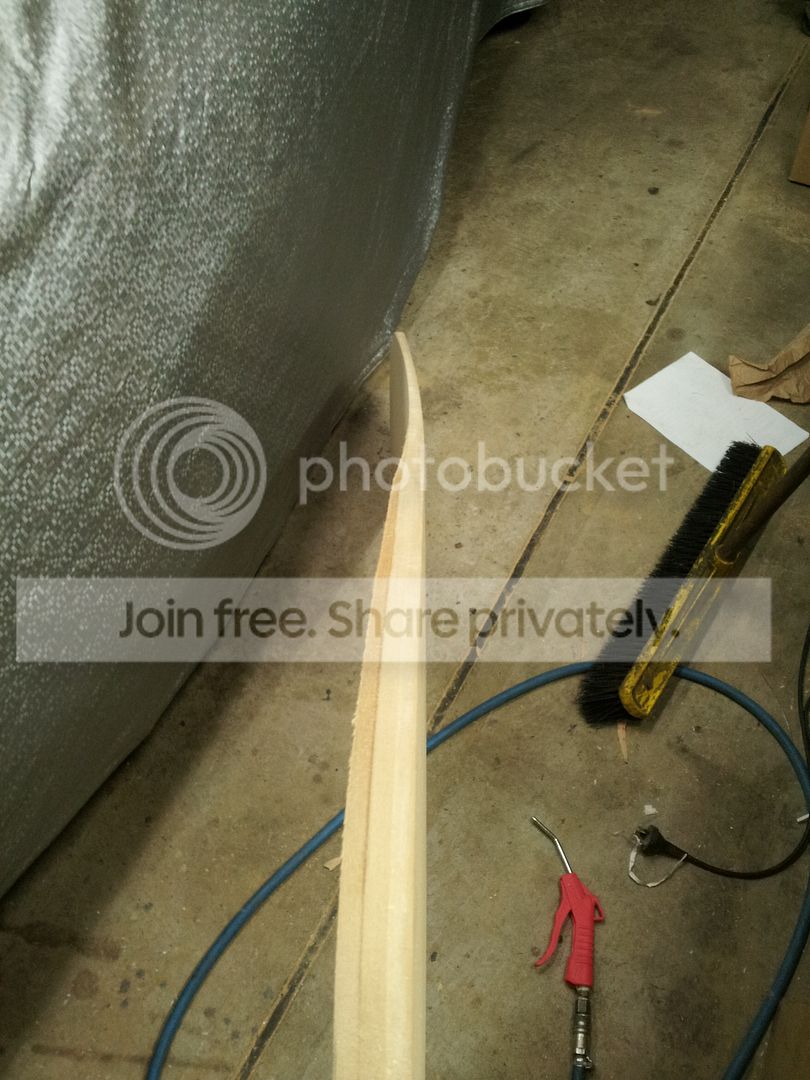
Genius indeed!
Haven't been on here in a while, but had a quick search and didn't find anything:
Anyone used a pour gun for sidewalls? Could pull the air out of both part a and b in separate pots, heat it somewhat and push the material through to a mixing tip. I know of some major manufacturers using similar setups, but unfortunately all of the equipment I've found is very pricey, but not terribly complicated looking. I'd love to come up with another solution.
Michael Engineering has a lot of good looking stuff for inspiration. All seems pretty straight forward too. Silica gel canisters to suck out as much moisture as possible!
Some fancier looking options at Nordson
Some guy also made a cordless drill attachment and called it the Dra-gun. Seems to be that he wasn't that successful with it though, and I think sold the idea. It is available at Fiberlay, but still costs over 1300 bucks!
There's gotta be a better solution.
Not sure how easy it would be to controll your mixing values in 2 seperate tubes up to a disposable mixing tip.
Like this.
http://www.amazon.com/Adhesive-Applicat ... ixing+tips
At $1.00 per tip you don't have the hassle of cleaning up afterwards.
Ya, those are promising. Issue I've had is finding a wide enough nozzle to get good flow, as well as the ratio, as you mentioned. Typically the ratio is set within the nozzle itself and can't be tweaked.
Also, how to push the material through? Pressurizing the material containers is the obvious choice, but this could introduce unwanted air into the solution.
I think this nozzles are good if you have a 1:1 ratio with your mix. A different ratio like 1:20 will not mix well enough ... dunno if there are nozzles for ratios like that.
This is genius, wish I'd thought of it.
Tubes are ~$5-10 a piece, reusable
http://g01.s.alicdn.com/kf/HTB1mcydGXXX ... XFXXX7.jpg
Put it in one of these
http://ecx.images-amazon.com/images/I/4 ... SX342_.jpg
Add a $1 static mixing tip. No more urethane going off in the cup, no more spilling all over the place trying to get it in the channel. Will pay for itself after a couple uses in reduced waste, just mix and use exactly how much you need.
Or ready made for $80.
http://www.ebay.com/itm/Manual-two-comp ... Sw5ZBWPAWn
I've ordered some shit, will report back on how it works.
Looks sweet. I hadn't seen those mixing tubes before
Poured my first polyurethane sidewalls today. Didn't really go well.
I was using smooth on smoothcast 305 as gozaimas has used (full disclosure is that I bought it 3 years ago and hadn't opened it - probably not ideal for polyurethane, but the air tight seals were still intact on top of the bottles).
Temp according to local weather station was 30C and humidity 29%.
Routered a trench stepped at 3 heights. Bamboo.
Sealed channel with one coat of a penetrating wood sealer (largely turpentine with some white spirit and synthetic polymers). Had left it to dry 24 hours (recommended 12hrs) and has been pretty hot so drying wasn't as issue I don't think.
Anyway mixed up the part A and B for 1 minute. Let is sit for 1 minute then poured it into the channel. Visually looked clear and bubble free as it ran out into the channel. Then as goz described as it heated up many bubbles started coming from the bottom of the liquid and rising up. It may have even foamed a bit as the liquid was level with the top of the channel but when set was higher than the channel.
Interestingly the unused stuff in the mixing pots cured virtually bubble free and glossy. Also at one end in the first channel it was a little low so I added a bit extra on the second pour and this cured bubble free and glassy (where it was added on top of already cured polyu rather than into the primed channel).
So my synopsis is:
1. It was capable of bubble free curing so the long time in storage probably didn't make it junk from the start.
2. The timber primer is incompatible with the smooth on 305 and induced the bubbles (one thing I was noting was that it does get very hot when it cures and whether this did something to the primer)
3. A single coat on primer still left the wood that has some moisture exposed and this is where the bubbles came from.
Anyway have been meaning to give this a go and rather than spending another $50 on a new pack I thought I should use what I had.
I will post a few pics
Interested to know if gozaimas reads this whether you junked your atmospheric pressure poured core blanks or whether you laid them up.
I will plane the core blank flat to remove the excess and see what it looks like before giving up. Might try pouring the other ski without the timber sealer.
Pressure chamber looks like it is necessary from my first impression.
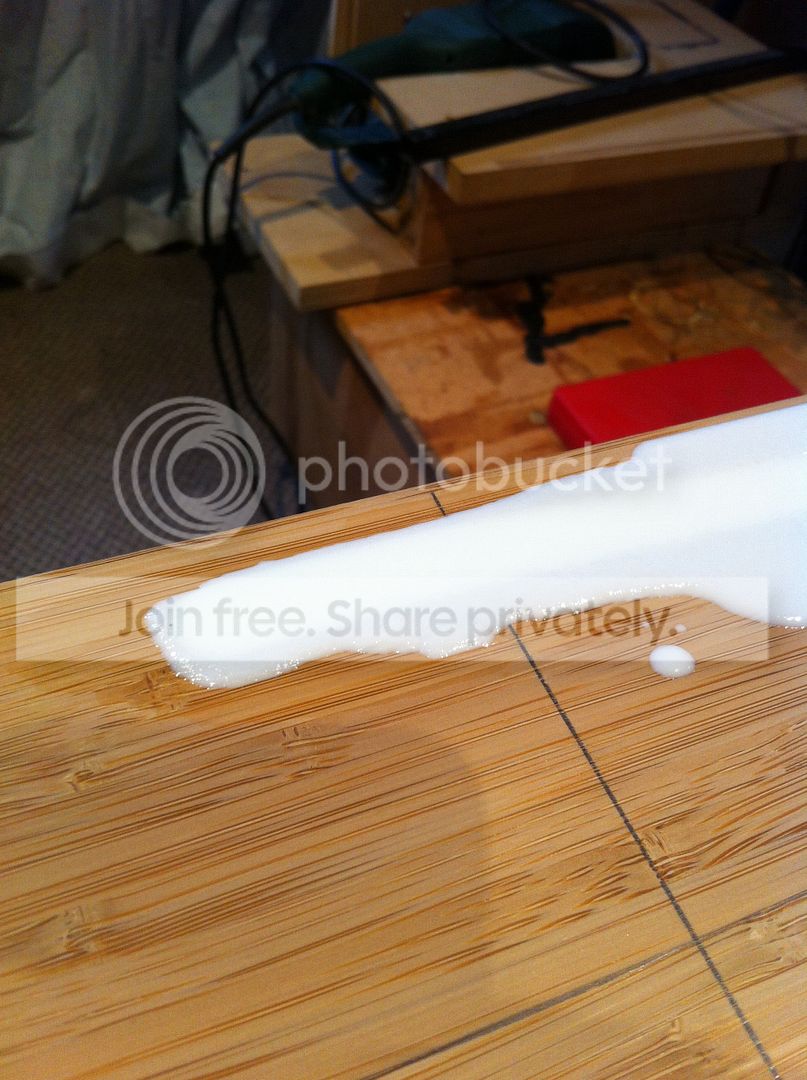
Cured smooth on 305
Interestingly on the far channel end the furthest out overflow has cured pretty glossy and bubble free.
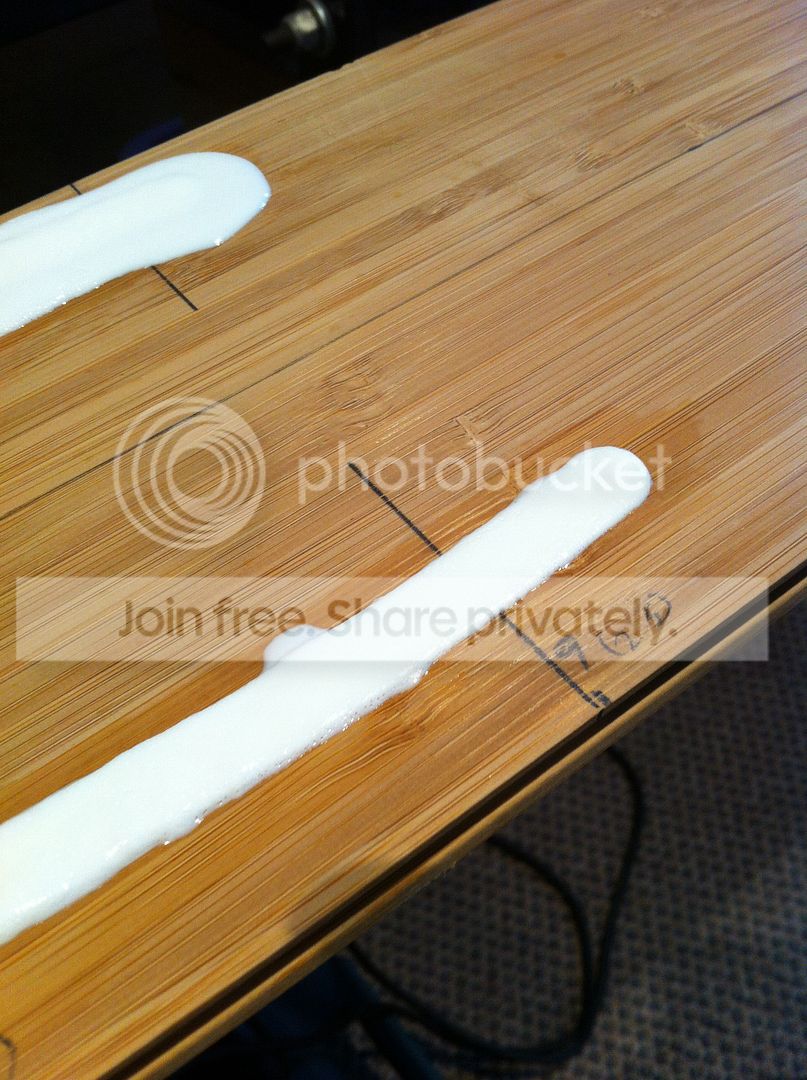
Looking a bit foamy
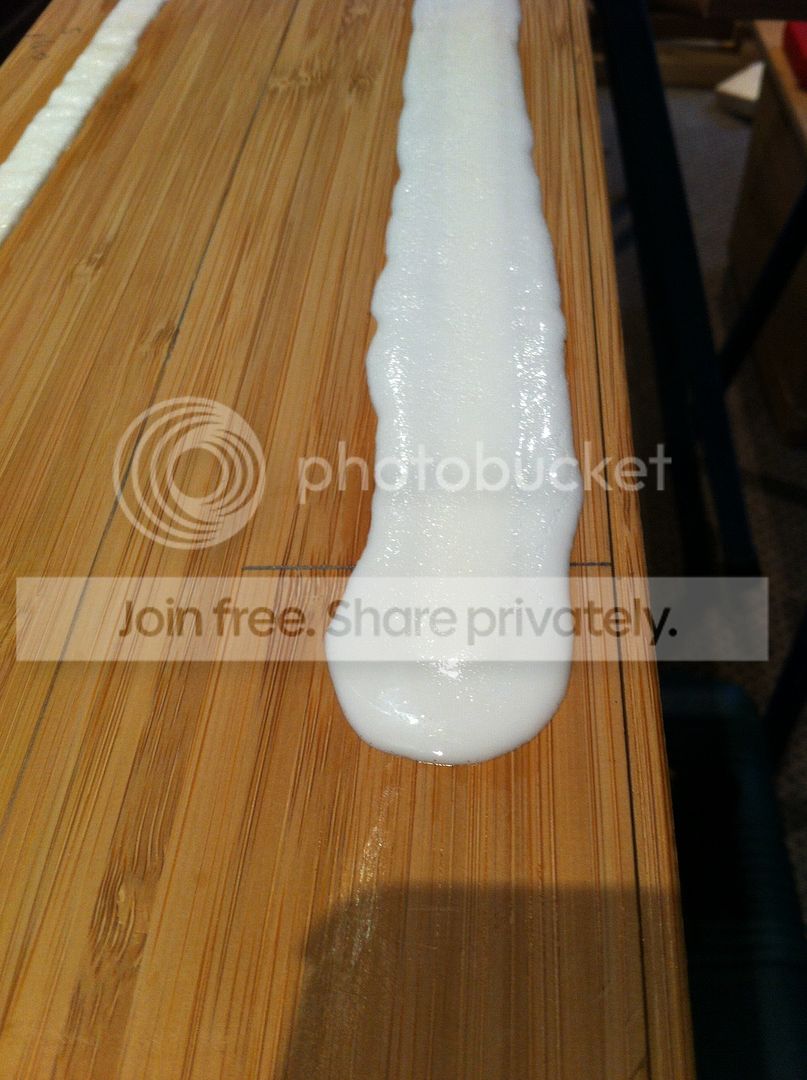
Glossy cure when poured over the cured bubbly under-layer
> falls wrote:
Pressure chamber looks like it is necessary from my first impression.
Exactly my result when trying :) That's why I gave up. Wish you more luck.
I've always had more issue with smooth-on that with other brands like Era, which is heaps cheaper too plus can add colors.
I seal my channel with a thin coat of epoxy resin. It's the same as what's going in the lay-up later so I know it won't effect the finished product. Plus it seals quite nicely, just takes 24hrs to dry. I've also used plain old wood glue with good results.
The temp and humidity where pretty good so it isn't that, plus like you said the left over in the pot cured fine. That exact point is the reason I started sealing my channels since my second board.
Keep a little heating torch (like a plumbers torch) handy if you can, after pouring give it a few minutes to start to react and cure and then quickly wave the flame along the poly and it will drag out most of the bubbles.
Just so you don't think I'm full of it, here are a couple I did 2 weeks ago.
[/img]
It is possible to get decent results with channel pouring, it just takes a bit of practice and a warm dry environment. Don't give up too quickly. Do small test pieces. Get a piece of timber you use for cores and router a heap of 6 inch long channels in it. Seal each channel a different way, try multiple coats in some, etc. Then you don't use heaps on poly trying to get it right.
Well that's the way I practiced anyway.
From your description this sounds and looks a lot like a reaction from too much moisture. As gav suggested, try different methods of sealing your channels with small samples until you find something that works. Generally epoxies or PU based paints are a good tip.
thanks for the tips.
I used a torch on the second pour and it did pop all the surface bubbles, but they just kept bubbling up from the depths after the flame moved on.
I think it is either an incompatible sealer or poor sealing.
I also blew the channels out with compressed air a few minutes before pouring (but over 30 minutes on the second one) which could have added moisture?
Which product from Era are you using Gav? I had a look at their range and just came away confused!
Def looks like a moisture issue to me. There will be water in your compressed air supply, but I doubt that's the issue. You need to create a completely inert barrier between the wood and the urethane and it will work the same as it does in the pot.
I use the Erapol CC60D.
They do a full range and the title is the shore hardness.
CC60D = shore 60D
CC95A = shore 95A
They are a fair bit thicker than smooth-on so you have to move around the groove as you pour the mix out. It can work to your advantage though as you can pour more along the sides and less at the tips if you want. It's thinner than honey but you can still pour a little more in spots and it levels nicely but stays in that zone a bit.
One thing with it is that you want to mix it thoroughly. A lot of people shy from mixing too hard as they don't want to add too much air, but the only issue I've ever had with the stuff is when I went a bit shy with stirring it and I ended up with sections of it that just didn't set. So I had to router it back out and do it again.
the stuff takes pigments really well. it has a shelf life just like all polyurethane. I use their Era-purge which comes in a spray can, which you use to purge out air when you are closing the tin after use. It still goes darker in tint color after about 4 months though.
Fresh polyurethane is always the best.
thanks gav
I didn't get that far down the list - kept reading about having to heat part A to 65C and part B to 80C and then keep it heated to cure and it all seemed too hard.
It looks like it is available from Adelaide casting/moulding supplies so i might check it out and have another go.
Are you using a heated cure epoxy in layup?
Just wondering about the polyu melting at the 80C I press at.
I press at 80°c and haven't had any issues. I've also never heated either part of the polyurethane. I might have to read up on their website more, the instructions on the product itself doesn't mention any of that.
the one you are using says 20-30C is appropriate for both part A and B. It recommends 24 hrs at 20C for a full cure.
Yeah I leave it a day after pouring before machining it.
It's never had any troubles in the press tho.