:: View topic - Cornice Skis
Posts: 46 · 46 posts
unknownMon Sep 10, 2012 10:33 pm
Cornice skis... uhhh because the lady thinks i need a name for these shenanigans. so there. taken yet?
What was i thinking?!!!!
I hope i can add something to the forum as it has been crucial so far. The workmanship and dedication that some folks put into this hobby, business, whatever amazes the hell out of me the more i read and i can only hope to come anywhere near duplicating it.
The goal is to build skis! Still no skis at this point but i am learning wood working and ski tooling building. They should rename this site skitoolers not skibuilders. When do i get to build skis already?
I started this madness January 2012. No time for skibuilding this summer but i just started up again last week. Muhaha sick days... Maybe this winter will suck but in Anchorage, Alaska the winters really never suck.
I dont really know where this is all going. I have yet to press a ski. Will post some pictures soon.
Thanks world of SKI/ BOARD builders...
unknownMon Sep 10, 2012 11:24 pm
We know where it's going!
Welcome!
unknownTue Sep 11, 2012 2:49 am
As has been said before - welcome to the asylum
unknownTue Sep 11, 2012 3:23 am
hehe.... another one got sucked in. This is like a big therapy group, we're here for ya. But honestly good luck, looking forward to seeing your progress. Everything you need to know is here, some where.
unknownTue Sep 11, 2012 7:07 am
Welcome! You'll love it, there's no turning back!
And you're absolutely right, probably 50% of the time is spent just building tooling, gathering materials, and planning things. 5% is spent doing the layup. 35% is spent fixing your mistakes, questioning why you got into this, gasping at the amount of money you've spent, and crying in the corner.
But skiing on your own skis? Always worth it.
unknownTue Sep 11, 2012 10:33 am
hey i Lived in anchorage for the past 15 years i just moved to reno but if you want i may know some people that would be happy to help you out for your first pair.
unknownTue Sep 11, 2012 12:20 pm
unknownTue Sep 11, 2012 11:52 pm
... and then you still have 10% for reading the skibuilders forum. :-)
Cheers and good luck!
Christoph
unknownWed Sep 12, 2012 8:50 am
Thanks for the welcome!
ACE- Are there others building skis in the area? Its too late for help now they should have talked me out of it in about January when i started. MUHAHA
Will post pictures as soon as the admin no longer thinks im an spamer.
unknownSun Sep 16, 2012 11:41 pm
oh thought this was a new post my bad but yes i know a few send me a pm if your interested
unknownFri Sep 21, 2012 11:23 am
skibuilding is like brewing beer.
Cleanliness is close to godliness and 90% is prep.
Actually assembling the ski and pressing it is drinking time for fun and enjoyment.
Icing on the cake basically.
unknownFri Sep 21, 2012 5:33 pm
Where to start where to start....
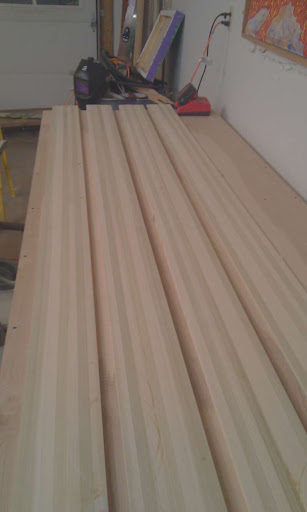
To start i had to buy wood working tools. I did not even have tools to build a bench. Wow table saws, routers, and planers are dangerous. If i can get through the first pair of skis with all my fingers i will be amazed. Building cores seamed like the eas
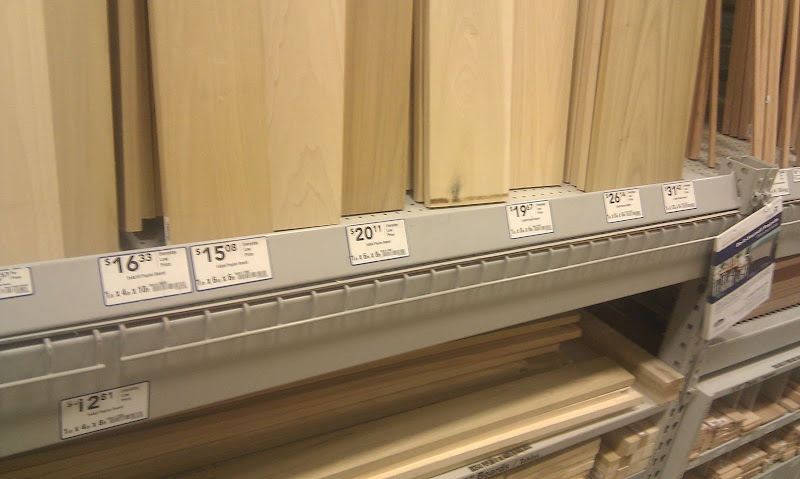
Lowes was a convenient place to buy Poplar but expensive. I also had to visit the two stores and sift through everything to find some decent ski lumber.
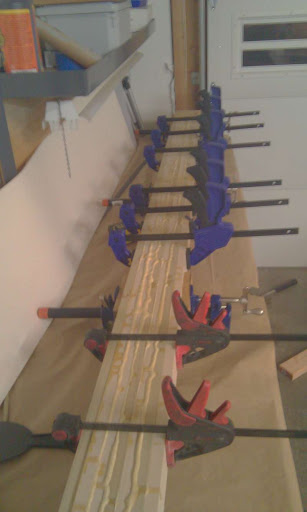
I only had a few pipe clamps and a load of quick clamps. I have since purchased more of the pipe clamps. The pipes keep everything square and get WAY tighter.
I poly glued the whole mess and wet one side pre glue up. It is worth wetting both sides?
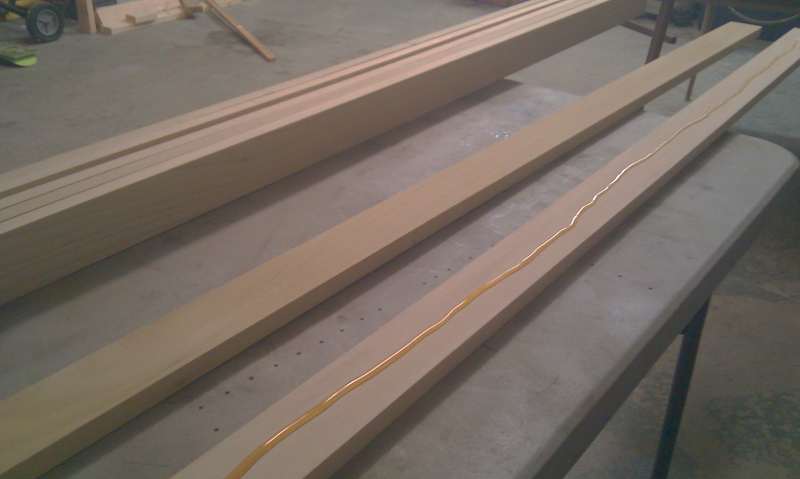
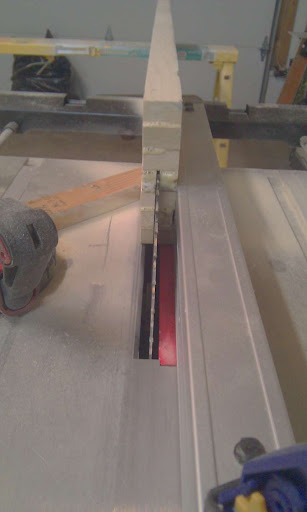
Re sawing cores was not very easy. I cut all the way through the second pass and did not end up with very flat cuts. I ended up with three good cores. I planed on sacrificing the first two for test setup anyways.
unknownSat Sep 22, 2012 1:18 am
After building cores i gave up on that process. Profiling the cores seemed very difficult. I didn't own a router or planer yet, so i moved on to the press build.
I made a quick video of the press build.
http://youtu.be/pbDA5O2rMk0
.
unknown
Wow, after reading you say things like you've never used wood tools before, I was expecting a pretty dodgy press. But quite to the contrary, that's one of the cleanest and most well built presses I've seen! Nice work!
And perhaps more importantly... You have snow already?????
unknown
Thanks twiz!! Yeah don't know jack about wood but work on aircraft full time so know a bit about building metal stuffs.
No snow yet. I started the press in February 2012 and finished it in April 2012. I am just now getting to document this all.
unknown
Nice.
Man you've had that press sitting idle since april! That would be killing you
unknownSat Sep 22, 2012 3:44 am
Nice press! What a way to learn about kick-back. At least you were standing in the right place, out of the way!
unknownSat Sep 22, 2012 3:51 am
You went with the mag drill I see.. Those things kick ass.
Great looking press too! Looking forward to see your first build.
unknownSat Sep 22, 2012 10:12 am
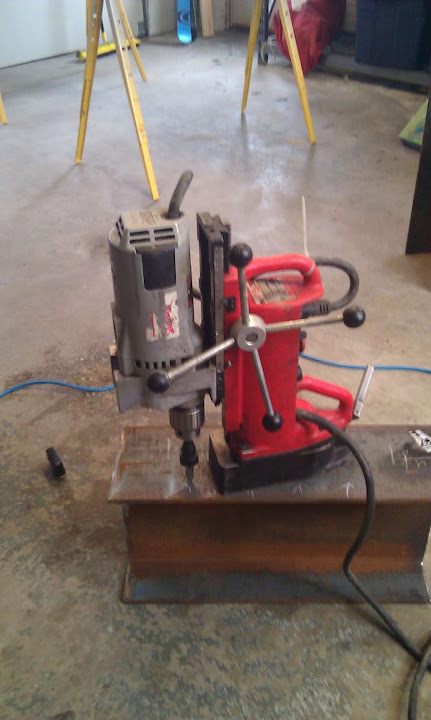
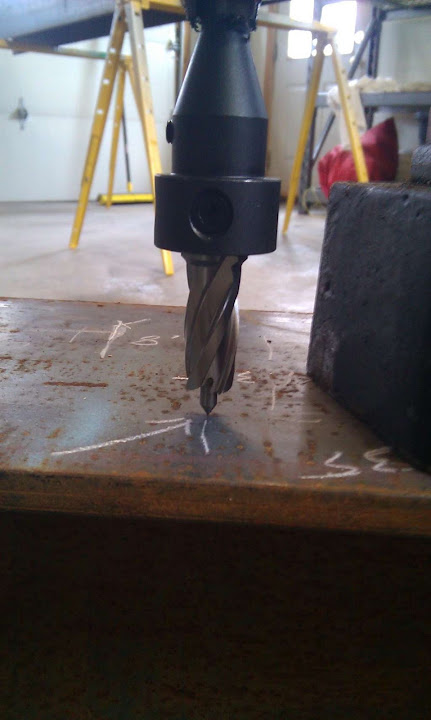
Yeah the mag drill is the ONLY way to go. I had twist drill bits in hand and the fellow below the counter convinced me to get a drill bit called a Rotabroach. These things are amazing for those who dont know. I drilled almost 90 5/8' holes without even sharpening. They are expensive and i had to buy the adapted as well. Some Mag drills will chuck a Rotabroach with no adapter but this one had a regular drill chuck so i had to purchase the $67 adapter. Use lots of drill fluid.
unknownSat Sep 22, 2012 10:32 am
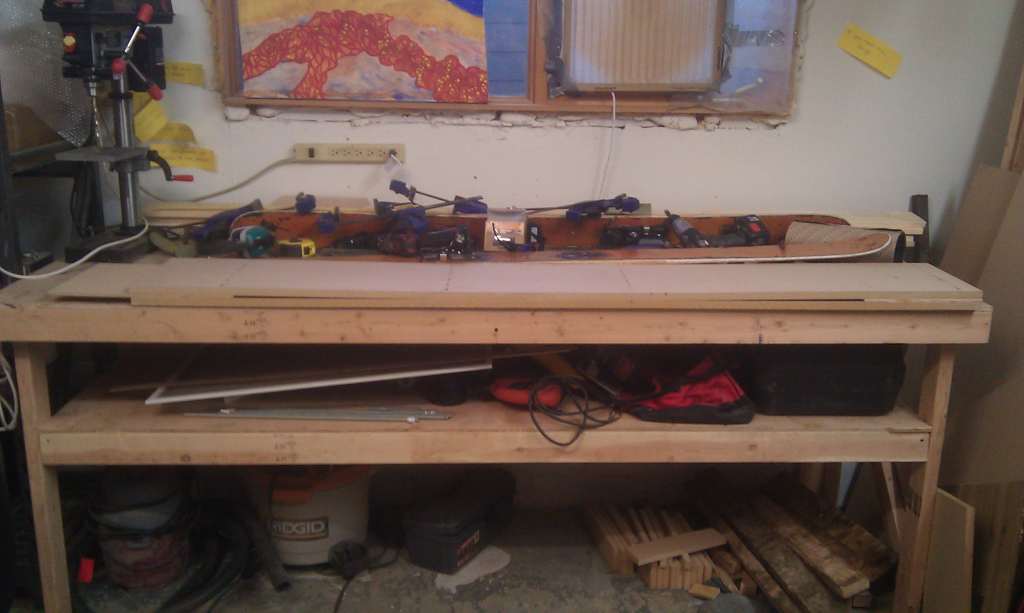
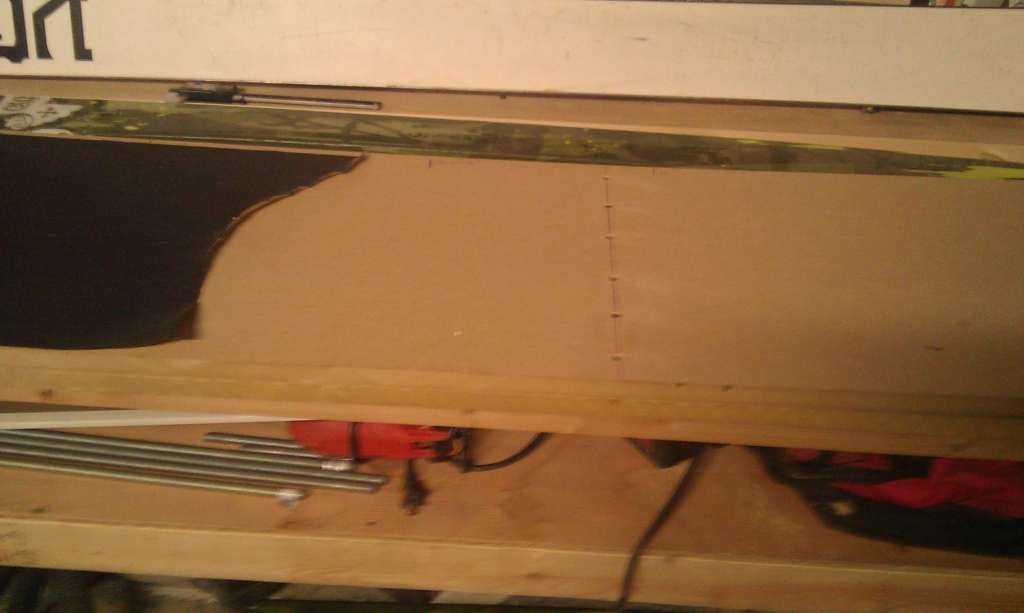
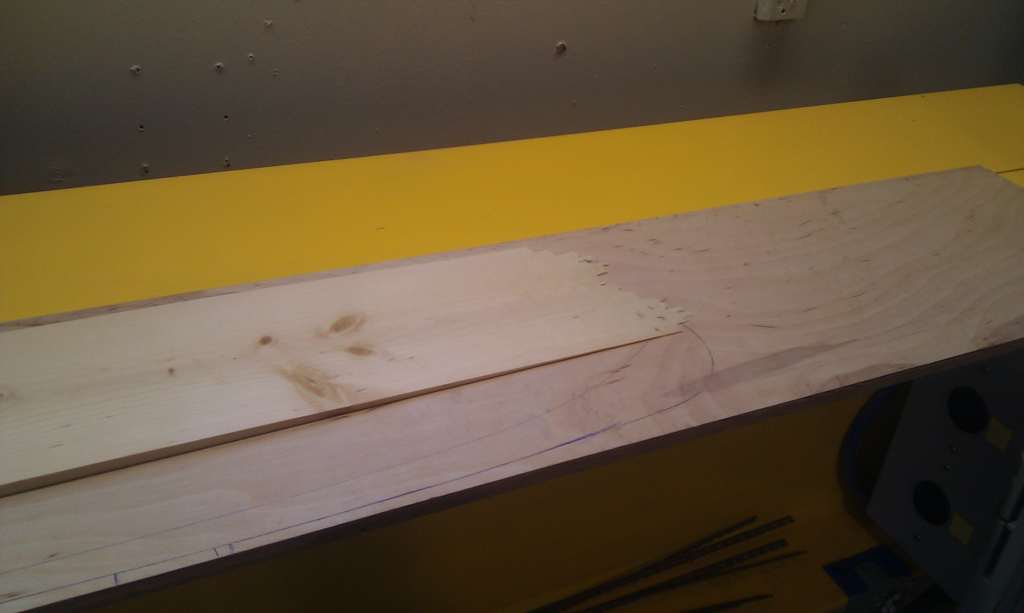
I decided to go with the planer jig method of profiling cores. This has been the MOST frustrating part of the whole process. I made the jig out of MDF. Oh did i mention that im still shaking MDF dust out of all my camping gear HATE that stuff. Anywho The jig was simple to build. It came out super heavy, i would use thinner material next time.
I first tried the grip tape/ anti skid stuff. DISASTER. I dont think i stuck it down very well because it got sucked in. The planner makes a horrific noise when it eats 3m grip tape and obliterates $55 blades. Lucky for me i was just using a test piece.
After this mess i gave up for the summer it pissed me off so much.
unknownSat Sep 22, 2012 11:31 am
So... after breaking all summer i started back with the core disaster. I decided on UHMW sidewalls for some reason. I knew i would end up there so i figerd i might as well start there even with its difficulties.
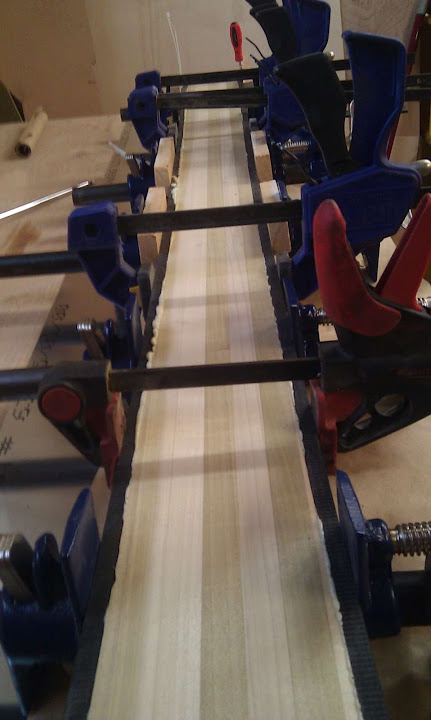
After a ton of test samples i got the flaming/glue up process down. I can now tear a side wall off with vice grips and it will take the wood with it.
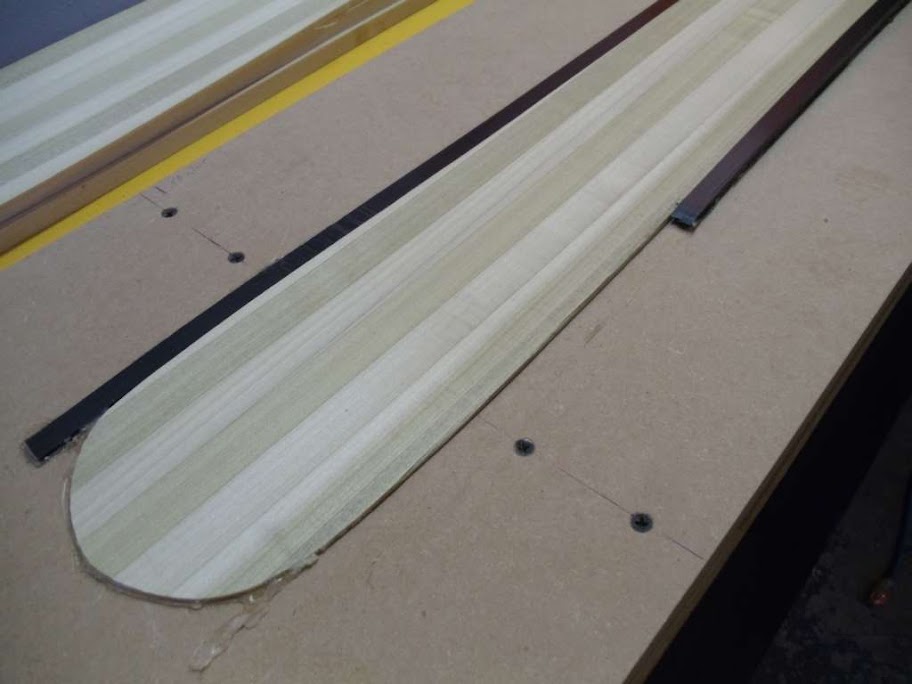
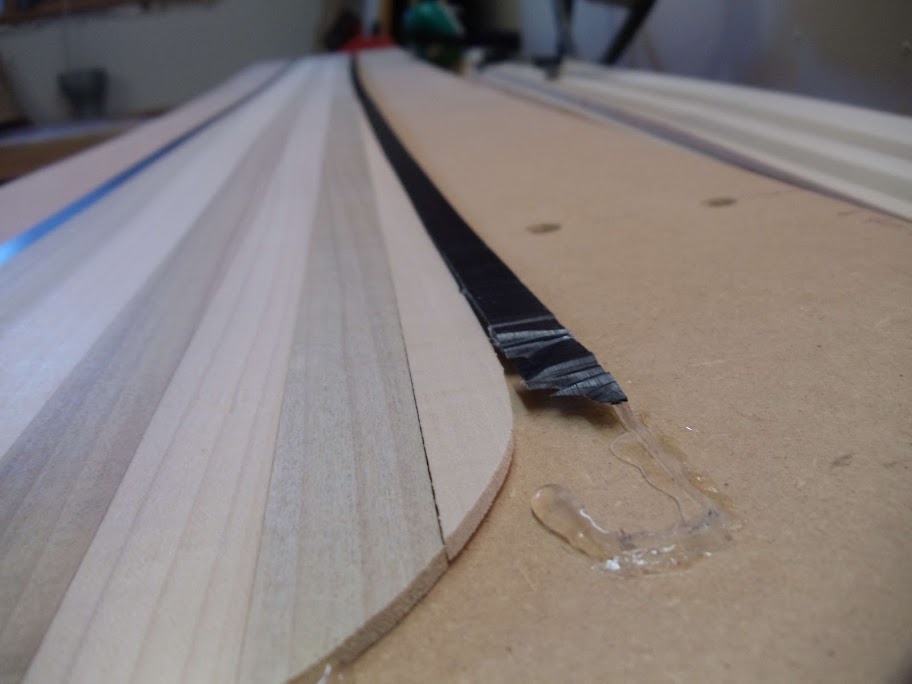
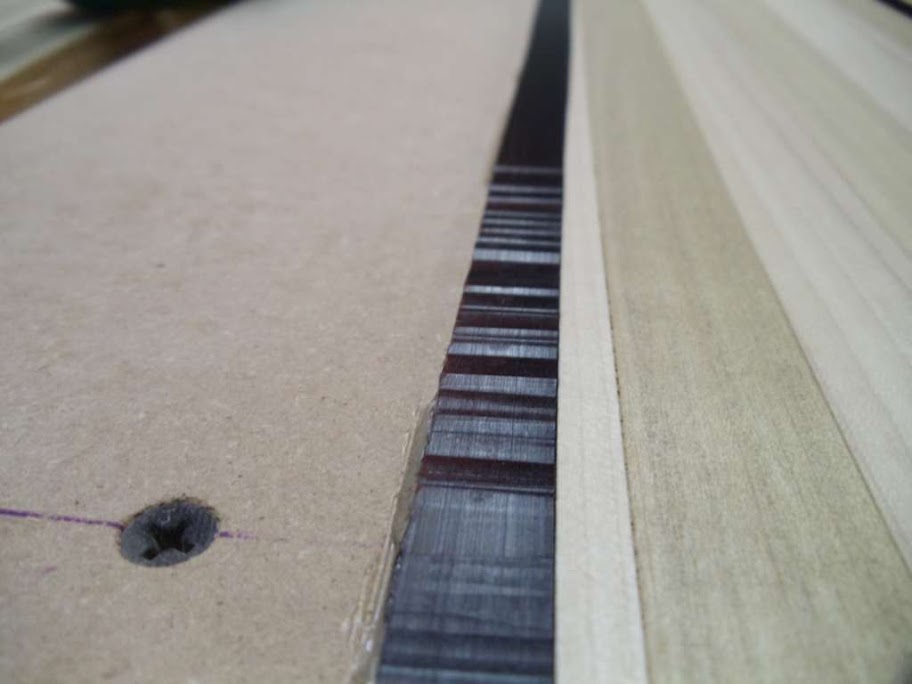
I have no idea how people get hot glue to work. It works ok for just wood but there is no sticking to UHMW. The planer would just yank that crap right off. I finally used double sided tape. That works great but GDAM how the hell do you get it off the jig???!!!!!! I love the planer. It leaves the smoothest flattest finish but OMG i hate this part. Its always the last pass and WAAAAHAHAHA CHATA CHATA ERRRRRR GRIND EEEEK there go's days of work. F this project i need a whiskey.
unknownSat Sep 22, 2012 1:04 pm
Hi Cornice!
Use pices of double sided tape under the core and a stop piece in the end of the sidewall. Forget the hot glue..
unknownSat Sep 22, 2012 3:17 pm
Are you rabbeting the sidewalls for the edge tines before you plane?
If you are, do it after.
Have like a 3-4" sacrificial piece on each end of the crib.
unknownSat Sep 22, 2012 4:00 pm
I use grip tape now. I used hot glue before. It worked ok but sometimes hard to get it off. Take shallow pass with the planer. Keep the blades sharp. A stop block on the end helps. I leave and extra inch or so of sacrificial wood on each end to account for tear out or sniping.
As for the sidewalls jut need o be careful. Also you may get debris under the core. You want to make to keep that area clean. I use an air hose to blow out the material on the last few passes.
unknownSat Sep 22, 2012 4:19 pm
I use Grip tape and hot glue. If you rabbet first make sure to get a good amount of glue around the tip and tail to. Prevent things from vibrating and causing the sidewall damage you had. Be sure to take no more than .25mm for those final passes. Inspect the tip and tail after each pass, if you start seeing things get wavy that means you are getting some vibration and lifting of the core off the sled. When I see this I stop and usually add more glue to make sure things stay firmly attached to your sled. Some double sided mounting foam tape might also work well under the rabbet near the tip and tail to prevent vibration.
unknownSat Sep 22, 2012 5:17 pm
I've had so many problems and failures trying to plane with sidewalls. It is always ALWAYS the last pass, when you need another 0.0001" off, and RIP.
Stay strong, this part always sucks.
unknownSat Sep 22, 2012 11:42 pm
the way your sidewall is diverging from the rounded core tip leaves a very narrow piece of plastic that the planer is just grabbing at. In deep's photo above you can see the core has the sidewall flush against it the whole way to the end so the sidewall is planed as an extension of the core. The support at the end helps also. I think it's best as the others say to leave some sacrificial core at the tip an tail and cut this off after profiling. Any sidewall detachment when trimming the core at the end can just be glued back on.
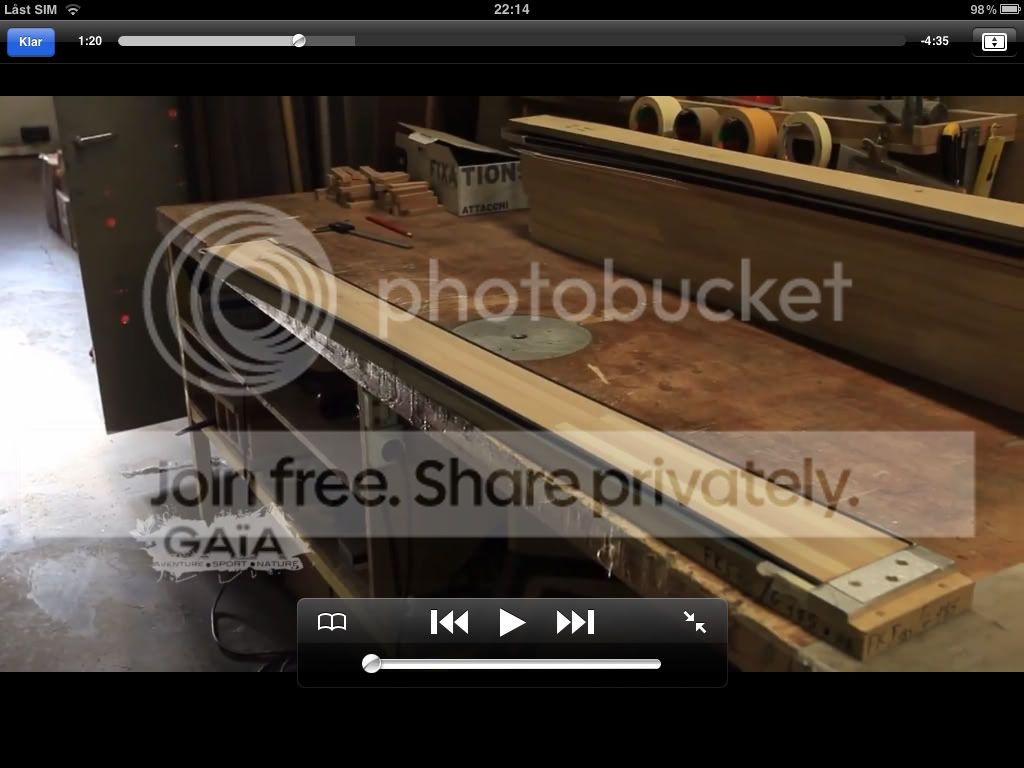
an old pic from SHIF showing MDF used as an end supprt for the planer to run out on.
image no longer available
PS. Deep, that still looks to be from a video that I think I would like to watch
any chance of a link?
unknownSun Sep 23, 2012 12:18 am
Here's the link Falls!
http://www.youtube.com/watch?v=ZHi1FJ4UwOM
unknownSun Sep 23, 2012 3:15 am
It's a sander...
unknownMon Sep 24, 2012 12:32 am
thanks
unknown
Ok S canned the hot glue and went with double sided tape. I also got rid of the excess sidewall where it diverges the core. As suggested. I also took allot less material off on each pass. These cores are going to be my first pair of skis i hope. IT WENT PERFECT! The only problem is getting the core off the tape. I was able to plane the tips to 2mm with zero issues.
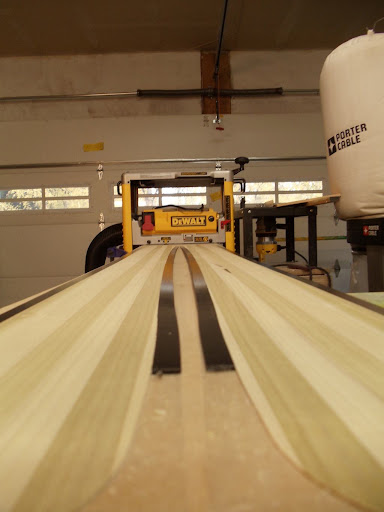
I decided to repair the messed up core and press it as my first test ski. It went way better then expected but had allot of problems that should be easy to fix next time.
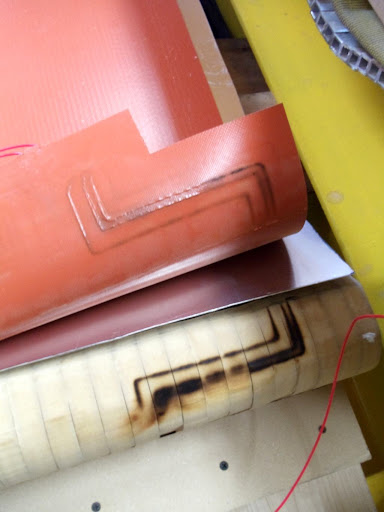
I intended to extend my aluminum skins beyond the heat pad but for some reason i forgot about that until the fuses burnt and the smoke came out. It still works once i removed it but pretty stupid mistake.
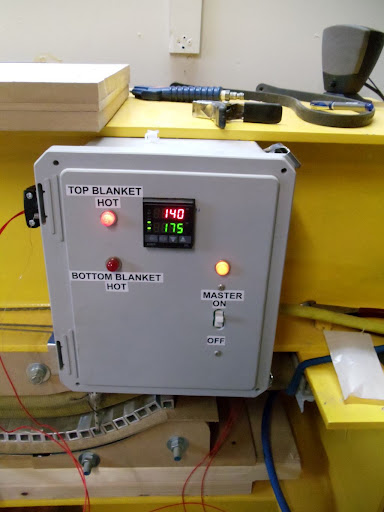
I lost heat at about 160degrees while ramping up the heat. I Left the ski in the press to cure.
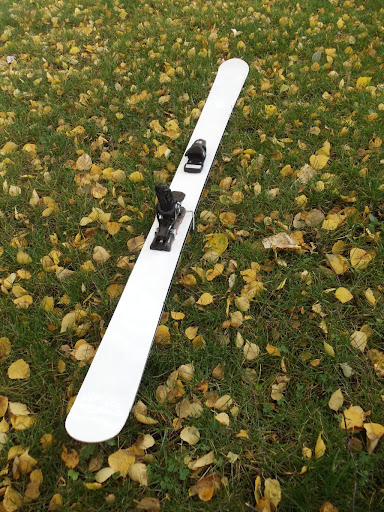
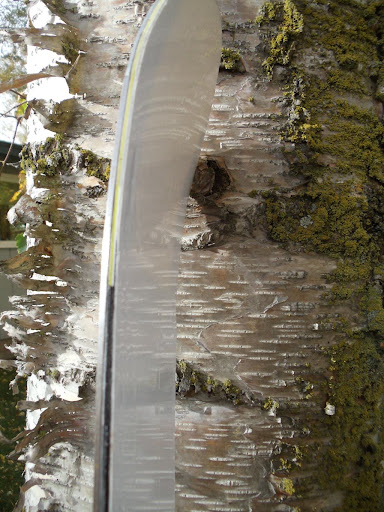
PROBLEMS
1. Lost heat. Need to adjust alum skins.
2. Used packaging tape over the top sheet. Every seam and bubble got pressed into the top sheet leaving dents and lines. ??????
3. Some air pockets near edges. Brush epoxy into edges??????
OH and i cant forget. Thanks!!! So happy to finally have a ski. I am going to try to press this pair soon but arggggg i need to go to work again.
unknownMon Sep 24, 2012 4:41 am
You need masking tape as wide as your topsheet. It's much like masking tape only wider. Usually called application tape (often used to apply vinyl stickers). Comes in clear or the masking tape papery yellow colour.
Well done on the first press.
Protect those heat blankets! They're tough if you look after them right but very fragile if you don't.
unknownMon Sep 24, 2012 6:02 am
Hi Cornice, what glue did you used to bond the UHMW sidewalls to your wood core ? epoxy ?
For you final crib did you go with double sided tape only or grip tape + double sided tape ? Personnaly I just glue son sheets of 80 grit sand paper onto the crib surface and nothing moves when profiling excepts maybe the tips could benefit more support when they're close to the "2mm thin" target... I'll dig the tape for this area !
Also, regarding the "Boheme profiler crib", the stopper at the tips looks like it's aluminum (and maybe you've noticed the stopper also prevents the core to move side-to-side). I'm a bit perplex about it, I would be scared to risk "planning" this piece of Aluminum ! (they use a sander though.. might be less of a concern for them...) An MDF stopper would have to be changed quite often I guess (with snipe and all that on a planer)
unknownThu Sep 27, 2012 10:33 pm
Falls- Thanks ordered some of the tape you suggested.
ben_mtl- I used double sided carpet tape only. Actually it was permanent laminate tape and it was WAY too strong. It was a pain in the A to get the core off. The sidewalls were glued on with poly. glue. I tried the grip tape only but the tips kept getting sucked into the planer. It seems allot of people use just grip tape, maybe its just my planer?
Update-
I intended to press my first pair of skis today. The cores are prepped and looking mighty fine. All my materials are cut. The press metal sheets are extended to save the heat pad. The bases have edges glued on.
OOOPPPSSS Major F UP. How did i cut one base goofy? The bases were double sided taped against my wood template and cut out. I some how stuck one down skewed. That was my last bit of base so until i get some new base material this project is on hold. Thinking of building a vacuum table now.
unknownThu Sep 27, 2012 11:46 pm
it warped.
unknownFri Sep 28, 2012 4:18 am
It can warp and or you didn't have it truly flat. To make sure it is flat, I usually cut the base material off the tool about a day before I want to cut them to shape. I leave the material under some MDF or hard wood to help it flatten and relax.
When I go to stick the template to the base I put the base material on top of some MDF, on the workbench , apply the tape to the template and then press the template down on the base material. I feel like this way I can't lay the base material down funny and get some sort of minor bubble in there that causes the bases to be wonky.
unknownFri Sep 28, 2012 6:12 am
I've had the same issue on the fist few pairs. The p-tex can warp. Of course I didn't know this until I had pressed the skis and finished them. When I put the skis together the middle was off by a 2-3mm. I skied them anyway. Now they stand in the corner of the basement.
Do what Vinman suggests. I also put the edges on asap after I cut the base. So have the edges already shaped. I also leave the base w/ edges on the template until I'm ready to press.
unknownFri Sep 28, 2012 2:10 pm
You still have to be very careful with the vacuum table. I have found that it's almost easier to suck the material down crooked using vacuum. It almost pulls too hard on the material and can easily twist it. It really helps to let the base material relax and lay flat on it's own first. You also have to be careful to avoid temperature fluctuations. If I cut out some bases in my garage and leave them in there overnight (and the temp drops 30 degrees) they will warp by the next day. There is a reason most places layup the skis shortly after the base material is cut out. You can still salvage the base material if it isn't too bad. Just make sure you use the base template to glue your edges on. You can kind of force the base back into shape. You might need to heat up the material a tiny bit and you probably need to use more super glue to hold the edges on than you should.
unknownFri Sep 28, 2012 2:45 pm
I've just found local guy that will CNC cut my bases. $30 for a the first pair of a certain shape, $15 for the next pair of the same shape. The extra $15 is for him making the cut file. Seems pretty reasonable.
unknownFri Sep 28, 2012 8:18 pm
Why not just get a template cut for $30? You would save a bunch of money. You can still end up with warped bases even if they are perfectly cut out. The only reason I would consider this is because it makes such a mess cutting out the base material.
unknownSat Sep 29, 2012 7:38 am
"router dust collection system" is your friend ! I'll take pics of my high tech plastic chips collector next time I use it !
unknownSun Sep 30, 2012 6:34 am
I can get the template cut CNC for about 40 plus material, but for the guys I'm building for, it is just easier to have the bases cut and have them pay for it instead of me. I may have some select shapes CNCd but it is too much right now to have the number of shapes I'm building this year to get done this way.
unknown
Wow that makes sense. One base is perfectly to shape of the template and the test ski. The other warped one i let sit for a week before i put edges on. I tried to remove the edges but they are glued on amazingly well. Looking at the other base i cut about a month ago i see its all wacky wavy tube man.
Is it even good enough to attach edges to bases right when they are cut out? Or do the bases warp from stress relief right when they are cut out? Hmmm i guess they probably do but results must be acceptable since thats what yall do.
It probably does not help that i dont heat the shop all day.
unknown
DOH!
last step is cut base and edge. then layup.
warpage is immediate.
clamp to template after cutting with many clamps and let stabilize. edge soon.
clamp other ski to similar template and keep straight while edging each ski.
clamp to template when done.
glue to casstte and align right before layup.
unknown
THIS^ is why I wouldn't pay to have bases cnc cut offsite.
Out of the cnc shop, into your car, to your shop, store for a couple days.
It seems to me bases would be pretzels by the time you were ready to use them.
Consistent temperature is your friend when it comes to base material.
This is why I no longer heat my work area in the dungeon.
The temp down there varies from 15c in the summer, down to about 12c in the winter.
Over all the temps stay pretty consistent. (day to day, day to night)
sam
unknown
I've brought my base material (with edges attached) into the garage from inside, taped them to my aluminum cassette (which was freezing), and watched the bases warp so much the edges pulled away. This took about 60 seconds.
