:: View topic - How to make urethane sidewalls
Posts: 33 · 33 posts
unknownWed Jul 11, 2012 10:15 am
I built a trough to make profiled urethane sidewalls. I'm getting some pretty good results.
The trough is just some angle iron with abs plastic as the bed. Supports to give the profile are a few scrap peices of base material and paint stir sticks.
I have the profile pretty close to my core although it needs some small adjustments. The goal here is to make it 5mm in the middle and 1mm on the ends. I found it tough to go that thin on the ends so It really ends up more like 8mm in the middle extended out to 3mm on the ends.
in the pic I have some shrink wrap to create a leak proof basin. You can see there are some wrinkles that transfer into the end product. I've got a couple ideas on what I can do to flatten it out. I'll post later...
image no longer available
The next step is to pour the mix in the trough and let it hang out for a while...
image no longer available
image no longer available
To get the bubbles out takes some work. Careful mixing helps. Warm temps help. After pouring, the flame torch is gold. Do some flame passes over the material to pull the bubbles to the surface.
image no longer available
I then cut out the slabs into strips with at utility knife narrowly avoiding stitches, but plenty of blood. A good sanding and flame treatment make the sidewalls bond well to the core.
At this point I'm sanding down the high spots, which sucks. Once I dial in the depth and get the wrinkles out it should minimize the work.
Some downsides, it isn't really all that cheap. After time and labor, it gets pricey. upside is that this material is seriously durable and bash resistant.
I'll plan to have these available for everyone here. Hit me with a PM at the moment. I'll put them up on the website soon as well...
http://prospectsnowboards.com/the-shop/snowboard-building-materials/
unknownWed Jul 11, 2012 2:01 pm
The one thing im curious about, how does it bond?
unknownWed Jul 11, 2012 2:35 pm
Testing is promising.
The material tears before the bond tears.
Expect to sand and flame it.
I actually tore out some sidewalls on a few older boards and poured. Got tested out at hood by some guys and they said it survived a good beat down.
unknownThu Aug 09, 2012 8:29 am
Looks pretty good, what type of urethane are you using?
What i was thinking of doing was milling out some sort of thick sheet of mdf etc then pouring in some urethane into the mold. Most of the urethane manufactures i contacted though said their products would be to brittle for that type of application. another option would be to just mill individual pieces so you wouldn't need to rip a large piece down into smaller pieces.
unknownMon Aug 13, 2012 9:10 am
What are they saying is brittle? The cold or the mold process?
I'm using smooth on because it is really easy. Other guys are using other stuff that has better mechanical properties, but requires some setup.
An MDF mold would work as long as you have a proper nonstick layer. One hurdle is making thickness to spec because the liquid is and cures quickly. I go a little thicker and sand it down to the core profile.
In the pics I was using shrink wrap which caused some funk in the surface. I switched to Mylar and get a better result for my nonstick surface.
unknownTue Sep 11, 2012 11:47 am
Where did you get the urethane mix?
unknownTue Sep 11, 2012 1:20 pm
Smooth-on.com is the place to go.
This stuff is pretty awesome. easy to color, I even ripped out some old sidewalls on boards and poured in urethane to repair.
Talked to tech support, they said it holds its properties at 0F.
I'm a proponent.
unknownMon Sep 17, 2012 2:36 pm
Are you using urathane rubber from smooth-on? if so which one? I just browsed all of them and never read anything about bound-ability
-Jacob
unknownTue Sep 18, 2012 3:15 am
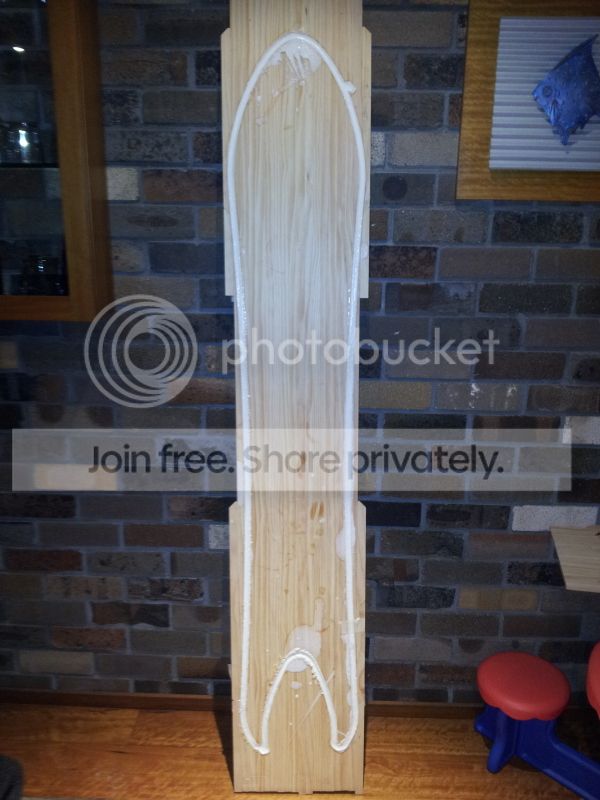
I just poured one of my cores with smooth on 305, one of the most basic urethane plastics they offer. I will report my findings.
unknownTue Sep 18, 2012 3:46 am
40 mins after pouring the urethane is set hard, bond is excellent and it flexes beautifully. Looks like a winner so far.
unknownTue Sep 18, 2012 3:55 am
Nice. Been following this thread. Another guy in SB was pouring urethane sidewalls directly into a channel in the wood wore. Any problems with air bubbles or does it look solid throughout?
unknownTue Sep 18, 2012 4:28 am
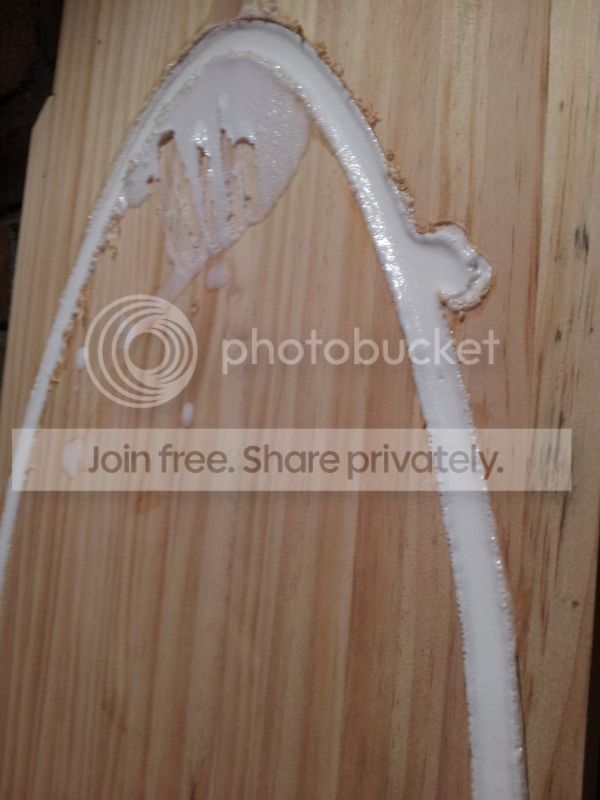
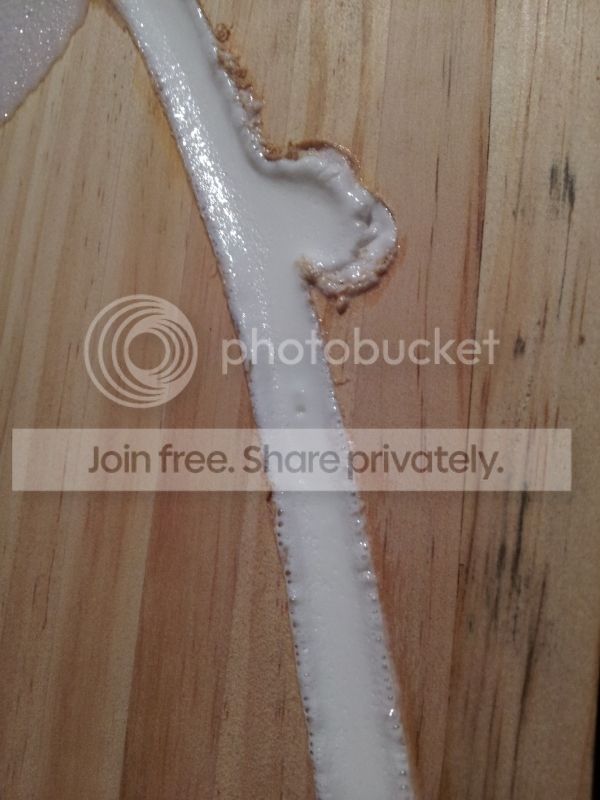
Looks solid, some foaming and expansion occurred on the surface in areas but most of it is very dense and extremely flexible.
Please excuse the mess, this was a late night spur of the moment operation :-)
unknownTue Sep 18, 2012 4:33 am
unknownTue Sep 18, 2012 5:52 am
that other guy was me! i think i was the first one on this forum to try this method and i still think it's the best way to make sidewalls especially if you have access to a cnc to make the channel.
pouring the sidewalls takes less time than having to profile sidewall slabs, attach them to the core and make tipspacers.
adhesion to any of the materials used in a ski is better than with uhmw even without sanding and flaming. the slightly rough surface i get from profiling the cores is enough to achieve a good bond.
the only downside of polyurethane are the air bubbles and that it's hard to machine. i cut the flashing on a bandsaw with a fine metal-cutting blade and do a rough finish of the sidewalls with a stone grinder like this one:
image no longer available
then i finish the sidewalls with a router.
unknownTue Sep 18, 2012 2:08 pm
I just rout my channel from a template.
unknownTue Nov 13, 2012 10:30 am
I have noticed that a number of snowboard companies use "pre-tensioned" or Pre-Cured Glass. And I was wondering where people get this or do you pre cure it yourself?
unknownTue Nov 13, 2012 1:39 am
[p]T
unknownThu Sep 20, 2012 8:23 pm
One thing that I find interesting is the elongation at break for the chemtura is 350% and the smooth on 305 is only about 6%.
Will await your results eagerly.
unknownThu Sep 20, 2012 10:36 pm
Its still very flexible nearly 48 hours later. Looks good so far.
unknownSat Oct 06, 2012 4:40 pm
I'm using task 16 plastic. They market it as their durable product. I also like a softer sidewall, it is 80A hardness.
Freezing, I don't see much change in properties.
Bonding, after toying with it, my results aren't quite as consistent as I want. I think they need to be sanded rougher and flamed more than the alternatives?
Finishing, on dark colors is hazed. Maybe a buffing wheel would help?
It also doesn't stick to hot glue, but does stick well to CA glue.
unknownSat Oct 06, 2012 10:00 pm
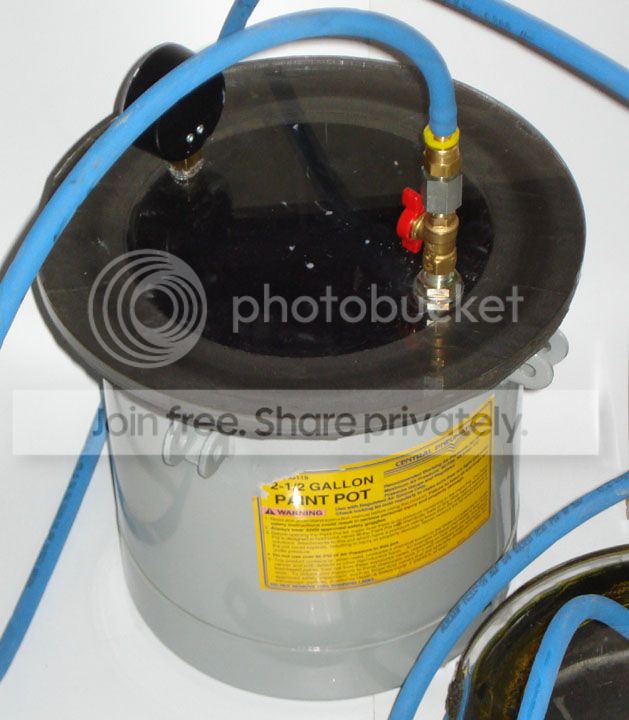
I wonder if you could de-gas the air bubbles out of the polyurethane just like I do with silicone for heat mats? I put the silicone in a vacuum pot for about 10 minutes and it pulls all the air bubbles out.
unknownSun Oct 07, 2012 2:42 am
the instructions for the smooth-on I used said that if you can let it set in a pressure chamber. I assume this would remove any bubbles from the mix.
unknownSun Oct 07, 2012 5:26 am
any resin can benefit from degassing in a vacuum chamber. commercial chambers are pretty expensive though. thats why i built one out of an old pressure cooking pot and a sheet of thick acrylic as a lid.
unknownSun Oct 07, 2012 8:33 am
A pressure cooker would work great! Probably get one at a garage sale or second hand store cheap.
http://www.harborfreight.com/air-tools/paint/2-1-2-half-gallon-pressure-paint-tank-66839.html
unknownSun Oct 07, 2012 12:41 pm
10 minuts would be along time with a short pot life.
unknownThu Oct 11, 2012 4:18 pm
unknownFri Oct 12, 2012 3:19 am
I'm passing a flame over my setup to pull out the air bubbles, it works really well.
I don't think the vac setup is the absolute fix Plus 10 min in a pot with a 6 min pot life doesn't add up. I think it is the wood surface that is causes the air bubbles.
For a wood channel, I've heard the same from other guys outside of the forum having the same problem. What if you put a coating or release film to get rid of the surface with air gaps?
Maybe even sand the channel smooth and coat with some poly?
I just did a smooth on order and am going to try a few different products. I might give the channel method a try. I'll post some results.
unknownFri Oct 12, 2012 5:13 pm
I've thought of using a flame as well, although I have not used the urethane sidewall yet. I've used Mirror Coat epoxy for top sheet protection and the directions say to use a flame/torch to remove the air bubbles. But Mirror Coat takes a very long time to set up so you have a very long working time.
unknownWed Oct 31, 2012 5:04 pm
Mine only seemed to bubble on the top and just as the stuff was going off.
unknownSun Nov 04, 2012 3:28 am
Is Guest a new feature to Skibuildiers? I thought something was a bit strange.
unknown
I changed up the smooth on product I use from task 16 plastic to pmc 780 dry urethane rubber. Way better bonding in our testing. The rubber has transparency compared to the plastic was opaque. These both have the same 80a duro.
I used their florescent colors for some of these too. They come out looking pretty amazing.
My testing shows that the material actually compresses a fair amount. A little concerning in the long term that this stuff might deform. I'm also thinking I can get rid of the edge step because of this as well. hmm.
What do you guys think will be the best way to get a finished look on this after cutting out with a router?
image no longer available
image no longer available
image no longer available
unknown
I think its too soft for sidewall material.
The edge will be able to deform to much.
You are essentially removing the main purpose of a sidewall, in my opinion, and making something softer for the edge to sit on.
When you hit something hard it will allow the edge to bend and dent.
Perhaps its edge cracking you are more concerned with?
Riding metal rails and not slamming into unseen rocks?
I want a super hard sidewall to prevent edge compressions, which will affect tunability and turnability on piste.
unknown
I profiled my core with the smooth-on today and unfortunately there were bubbles through the urethane. It will be ok for this (my first) build but its definately not a perfect job. Perhaps if it were put in a pressure chamber like they recommend everything would be fine but that defeats the purpose IMO.
It did machine perfectly though and has an excellent bond to the core.
