:: View topic - cnc profiling core incl sidewalls, trouble sw ripping off
Posts: 38 · 38 posts
unknownWed Apr 11, 2012 9:10 am
hi everyone,
haven't contributed much until now, my bad..been busy sortin out all that devlish little details
..maybe this pic of my press will get me even, giving someone some ideas;)...... there's still some little things to do but it works and resists 8bars with a factor of safety of 1.5 (not the mdf, not the aluminium cattrack)
not sure how to insert pics though....
https://secure.flickr.com/photos/78949149@N03/7068158739/in/photostream
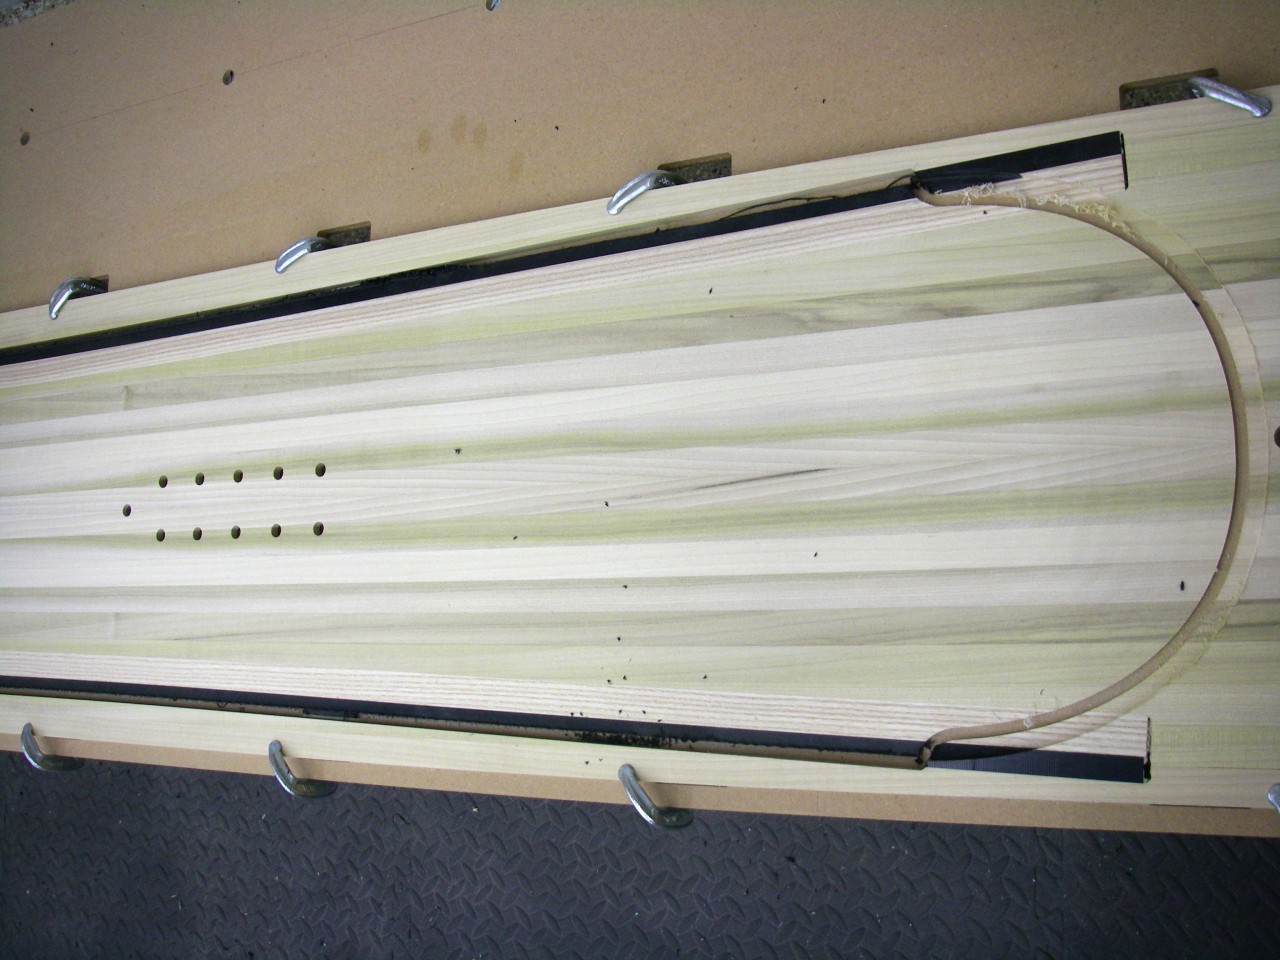
at the moment i am tryin' to figure out how to prevent the abs sidewalls from ripping off the core during profiling with my cnc. this happened the third time now, always in the thinner area towards the nose and tail, centre is ok.
https://secure.flickr.com/photos/78949149@N03/6922077866/in/photostream/
https://secure.flickr.com/photos/78949149@N03/6922077700/in/photostream/
sidwalls sandeds and flamed, used standard epoxy from sicomin and quick clamps, worked well.. cnc setup is vakuum holddown through mdf, works nicely as long as the core ist flat.
https://secure.flickr.com/photos/78949149@N03/7068158599/in/photostream/
sorry was too pissed off to cklean up.
first try i have been using a 20mm router bit to do it all in one hit....next time tried a 6mm dwncut and profiled just the sidewalls, same result.
headmonkey seems to first route a recess glue them in and then profile
http://www.happymonkeysnowboards.com/MonkeyWiki/File:CoreShaping_Cutout2.JPG
i had hoped there was a quicker way. unfortunately my cam software does not allow to change toolpaths so easily, otherwise some changes here might do the trick.
any ideas, any one???[img][/img]
unknownWed Apr 11, 2012 9:56 am
i think your best bet is to do it the way happy monkey does it...quite a few people have this problem.
i switched to profiling with a planer and pouring my own polyurethane sidewalls.
what are those silvery parts in your press right above and below the molds?
unknownWed Apr 11, 2012 10:44 am
Cheers, might have found something in my CAM to make different toolpaths/change the direction so that the router bit des not 'pull' anymore. Lets see. Might try monkey's version, after all it might not be more work to do on the pc.
Silvery bits.. these are vertical aluminium 'sheets', sort of guiderails for the mold.
Done for today it's snowing. World will be better after some powruns tmrrw.
unknownWed Apr 11, 2012 10:50 am
i tried to go the router bridge route before using the planer and had the exact same problem. even the wood would get pulled up by the router bit and the tips would become too thin.
one more question on your press. whats behind those aluminum sheets? (you might have seen my thread on my new press design...i'm in the process of building a new press and i'm trying to look at as many press designs as possible)
unknownWed Apr 11, 2012 12:07 pm
I might be wrong but i might have found a solution by making the toolpaths so that the router bit does only move in one direction/clockwise around the core so that the first contact blade of the clockwise turning bit does push the sidewall versus the core/does not pull horizontally.. and starts frm outwards not inwards like my 2nd try... Not sure will try tmrrw.
Try a vakuum holddown using LDF, quite porous. Seal it below and on the sides and remove the harder top layer. You can 'suck' trough it with two strong shopvacs. This should hold the tips of the core as long as its flat enough.
How does your planer system look like?
Behind are just a couple of horizontal mdf sheets.. i had rather let the press cavity be bigger vertically and then adjust by adding/taking out mdf.
unknownWed Apr 11, 2012 12:13 pm
the planer core profiling works like a breeze! here's a thread with a lot of info on that topic: http://www.skibuilders.com/phpBB2/viewtopic.php?t=537
unknownWed Apr 11, 2012 12:16 pm
I'm convinced a drum sander is the only way to go. I've never had success with a planer either. On the last two pairs I did, I actually did a few passes on the planer just to start, then did the rest of the profiling on my base grinder with the autofeed. Worked great, I just didn't use any dust collection so it covered my ENTIRE shop in a thick layer of dust. Dumbest thing I've ever done.
Your CNC looks great. I'm about to start building mine in the next couple of weeks, I've been collecting all of the parts over the last few months and polishing up the design.
unknownWed Apr 11, 2012 12:29 pm
i love the drum sanders too, but they wouldn't even scratch my polyurethane sidewalls
i've found the small portable planers to work best for this application. we started out on a huge 32" width planer and that monster ate half our cores! the problem was to hold the core down on the crib. even with double sided tape and hotglue the planer knives ripped the core right off the crib.
now we're using a 13" Delta benchtop model and it works like a charm. we don't even have to attach the core to the crib. a bit of sandpaper does the trick.
unknownWed Apr 11, 2012 12:38 pm
one last question (really!). what size and wall thickness are the hollow tubes you used for your press?
unknownWed Apr 11, 2012 1:22 pm
Just lost my post..grrrrr....
What do you mean with hollow tubes?
Not sure about all the dims now.
Girders should be something between around 80-120 x 40-60 mm thicknesses around 6mm, bolts ca 20 or 22mm ?? Press dims ca 2200x400mm.
However don't get me wrong here, i certainly would like to help, but if your press dims are different in only one little bit, your loads will be different and my dims might not be strong enough!!!! As an engineer it's a bit of a liability problem and i don't have the time to do all the calcs for you;)
unknownThu Apr 12, 2012 5:25 pm
Hi. I have always done exactly what you are suggesting - follow the outer contour of the board towards the centre and climb cut so that the rotation of the cutter is in effect 'pushing' the edges onto the core. I have been using Alphacam to do the toolpaths and when the post processor is working OK I can get the results I want. I usually use a 40mm diameter TOK cutter in a 3 axis CNC and I get good results. I use MDF but skim both sides and seal with sanding sealer the edges and the area beyond the edge of the core/sidwalls. For making a lot of different core shapes or 3d cores a CNC can't be beaten, for lots of the same a planner or drum/widebelt sander is the go. C.
unknownFri Apr 13, 2012 1:08 am
thanks carnold.
so you're saying that way you're not having any sw ripping off during profiling? u do it in one hit or a couple of runs till you reach final thickness? quite a big router bit you're using there, i had a 30mm but for some reason (probably quality/sharpness of the bit) it had trouble makin the profiling in one hit, sort of 'burned' the core no matter what rpms/travel speed i used.
now used a 20mm took longer but worked better, apart frm the sw.
by the way, have you seen wolle nyvelt and his aesmo shapes?
http://www.servustv.com/cs/Satellite/Search?c=Page&pagename=ServusTVWrapper&childpagename=servustv%2FLayout&cid=1259088496182&site=servustv&searchkey=slideways&search-form-submit=Suche&_charset_=UTF-8&form-to-process=SearchResults
may be something for your snowboat project.
cheers mate
unknownFri Apr 13, 2012 6:26 pm
Let me save you a lot of time. It doesnt work and it never will! I tried for months to figure out a tool path that wouldnt rip off the ptex. The problem is the minimal bond at the end of the effective edge. You will never be able to attach is well enough of the vibration to keep from ripping it off. I profile the core and sidewalls separately and then attach with double stick tape. Its only a temp connection until you press.
unknownFri Apr 13, 2012 8:53 pm
Doh!
unknownSat Apr 14, 2012 12:51 am
unknown
@montucky: id rather quit and drink duffs? Or do i have to give you a medal before you may share your wisdom?
@cosurfer: thanks, have you tried monkeys system, doin a recess in the core? Actually im using abs and the problem has not really been the epoxy bond but more the wood next to it splintering in the thin part close to the tips. Problem is only there, the thicker middle section works alright..............So i guess youre develloping the sidewalls in CAD to have the correct lenght to thickness then profile ca 10-20mm of a whole ptexsheet with the cnc (no similar problems?) then strip the profiled bit of the sheet with a circular saw (no trouble here due to reduced thickness?) and then bond them to the core?
I thought of maybe somehow fastening or glueing the sidewalls to the mdftable temporarily for profiling, has anyone tried this? or maybe fasten a strip of thin wood (not thicker than min thickness of sw) or similar next to the sidewalls on the table to support them during profiling?
had a lazy day yesterday but now back to the workshop to sort this shit out. one more week until the lifts close.
unknownSat Apr 14, 2012 5:37 am
I have tried the happy monkey method. The ptex always pulls away at the ends and rips the Ptex apart. The problem is you cant get the Ptex to have a solid attachment to the wood.
I profile the core and than I profile stock ptex with the same tool path. I than use my table saw to rip the ptex into .5" strips. I resand all bonding edges, flame treat and attach to the core with super thin double stick tape. It Works like a charm and that is the way many manufacturers do it. The only other method is to use a drum sander but you either need a CNC drum sander or have a profile jig.
unknownSat Apr 14, 2012 9:55 am
just tried the other toolpaths, worked sweet as. i even could profile the loose bit of sidewall on my last core!!!!
i was pretty stoked until later some bloody error in my core profiling-toothpath made the core splinter at the tips..actually it also left some bits unprofiled which you could'nt see in the simulation before. F/&%&% ..
one step fwd, half step back...enough for today..
unknownTue Apr 17, 2012 6:08 pm
Hey A, hope you remember who gave you that one..
unknownTue Apr 17, 2012 8:49 pm
Yes, Montucky. You deserve full credit!
unknownWed Apr 18, 2012 9:14 am
Give that man a medal
sam
unknownThu Apr 19, 2012 10:39 am
Give that man a medal
sam
In all fairness the tape came from iggykinda.
I did put 2 and 2 togather.
I only told one person! Now they all know!!
unknownMon Apr 23, 2012 12:41 pm
?? montucky don't get it? what did you give me?
anyway new toolpaths work. so thinking out loud helped me find the solution nearly myself. so i keep whatever medal. hehe.
unknownThu May 17, 2012 9:21 pm
This interesting as hell to me. I'm getting brain-melt trying to figure out how you make a jig for it, though!
I feel like sanding the profile will get you the best possible bonding surface.
unknownFri May 18, 2012 10:10 am
twizz, what planer model are you using? just asking because i get great results with my planer.
unknown
Ryobi 13". Even with brand new razor sharp blades, I get great results down to the last few passes. Once the tips are nearing 3-4mm tips, it starts ripping off sidewalls. I use a CNC'd profile board, with skateboard grip tape, and hot glue at the tips to hold the core in place.
When I used my base grinder, like I said first I used the planer and cut down until I was removing material along the entire length of the core. This meant that the correct profile shape was there, just the overall thickness was too much. Then I just kept running it through the base grinder with the autofeed, under the assumption that it was removing a constant amount along the entire length for each pass.
My only hiccup was that the motor on my autofeed (this is my home-built autofeed mind you) would overheat after running for a long time, and just stop. Having the core stop suddenly while doing a pass you can imagine was not a good thing. Only happened a couple of times, and I was able to pull the core out fast enough that it didn't sand in too much of a divot.
I'd buy a drum sander to replace the planer, if they weren't so damn expensive. But since I'm starting construction on my CNC router here very soon, hopefully I can just move to that for everything.
unknown
twizz, have you tried putting some small wood pieces at the ends of the core as runn-off pieces? SHIF does this to prevent sniping.
here's a pic from SHIF to illustrate:
image no longer available
unknown
My friends..
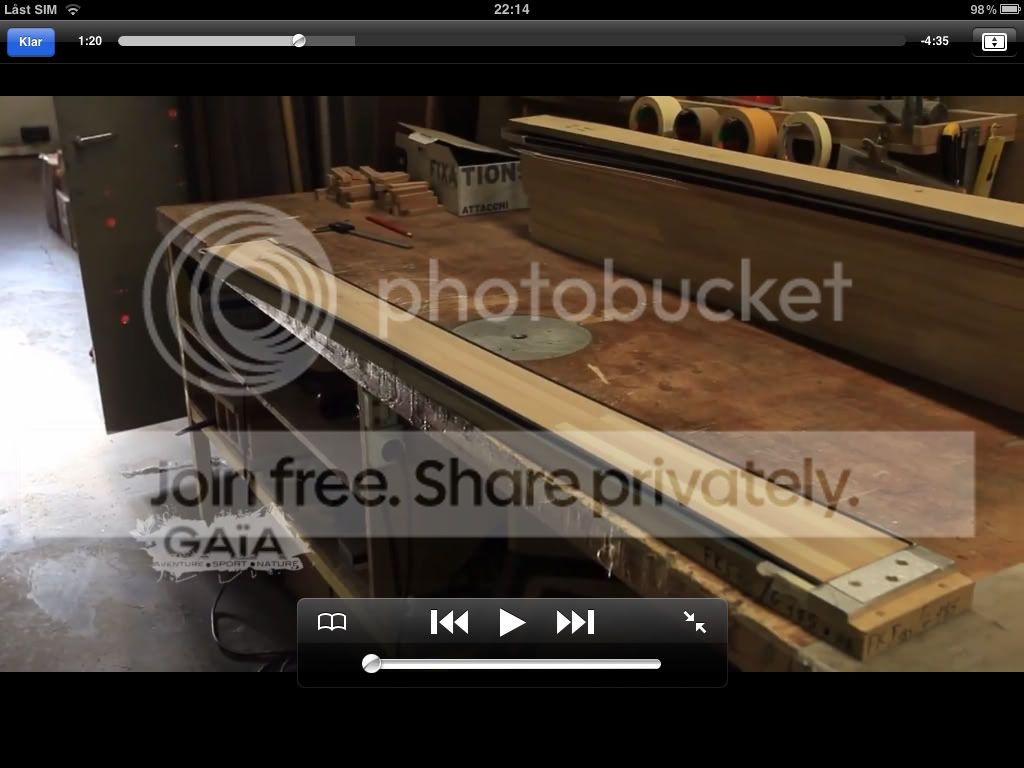
These guys seem to have it all figured out
unknown
Havent been on in a while, so Im just seeing this. I also have a problem with the sidewalls coming off while cutting my cores on the CNC machine. It doesnt happen during profiling for me, which I attribute to the overall method I use of sandwiching the sidewall material in the trench the way I do. But it does happen to me sometimes when cutting out the final shape. Not every time, but most times. I have created a highly technical solution to the problem which has yielded fool-proof results, which I will now share with you
I use a thin stick of wood and apply pressure by hand to the ends of the sidewall just as the cutter approaches.
Told you it was highly technical
Its not an automated solution, but it works for my process. If Im not paying attention and the program runs past that part then I seem to have about a 1 in 4 chance of getting some tear out, but since the sidewall is already profiled at that point I can just glue it back on quite easily.
Hope that helps!
unknown
This has probably been done by somebody in skibuilders but, has anyone taken a wide piece sidewall material and shaped it separately from the core, then rip it to width, then attach to the core? Masking tape might be strong enough to hold the sidewall areas on until the glue dries.
unknown
staples tape chewing gum on my leg all the same works.
unknownWed Jul 11, 2012 3:36 pm
If you profile with a router to all but the first and last 20mm of sidewall the remaining sidewall will provide all the integrity needed to stop sidewalls becoming detatched. Of course this means a full width tip and tail spacer.
unknownThu Sep 06, 2012 6:17 am
for all you guys having trouble with holding down the cores on a cnc or router bridge profiler, i think this might help:
http://www.widgetworksunlimited.com/CNC_Pressure_Foot_Clamping_Attachment_p/cnc-pressure.htm
shouldn't be too hard to build a copy.
unknownThu Sep 06, 2012 6:34 am
The only trouble I've always seen with this (never tried it) is passing the end of the material then having it move/lift whatever's on the table. Did you try one of these?
unknownThu Sep 06, 2012 6:55 am
nope, never tried one, but i think i'll build one soon. i guess i'll either chamfer or round off the edge of the pressure foot so it easily slides onto the workpiece (sth like the pressure foot of a sewing machine).
edit: found a video of the thing in action http://www.youtube.com/watch?v=H8smFVGdXKk
unknownThu Sep 06, 2012 8:46 am
here's another design for a pressure foot
image no longer available
unknownThu Sep 06, 2012 10:12 am
I'm a bit lost. Do these things have rollers on the bottom so they can move around while they cut?
unknownThu Sep 06, 2012 10:55 am
nope, they're just some kind of smooth plastic that slides on top of the workpiece.