:: View topic - "you building what? Are you mad?"
Posts: 58 · 58 posts
unknownSat Sep 17, 2011 5:26 pm
Time to start a journal.
Last summer I stumbled on this website. For several months after that I read and read. About this time a year ago I decided to go for it. As my wife put it "from addictions men can have this is a good one. Go for it if that is what you want to do"
Looking back this project wouldn't be be happening if not for an incredible opportunity.... One day driving on the dirt road behind an industrial park, I found several I-beams and my new friend who owns a BIG welding rig with a crane
. After two days of welding a press was in my garage. At that point I had no tools needed for ski building. Except for dust collectors, and a couple drills, that's about it. All of the tools I had at that time were mostly auto-mechanical. If not for Craigslist tool buying would be VERY EXPENSIVE. Downside of this route is time. It took a long time to get everything I needed.
That's about it, to summarize my progress. Press is made, tools and most of materials are bought. Tomorrow I will start working on a router core profiler.
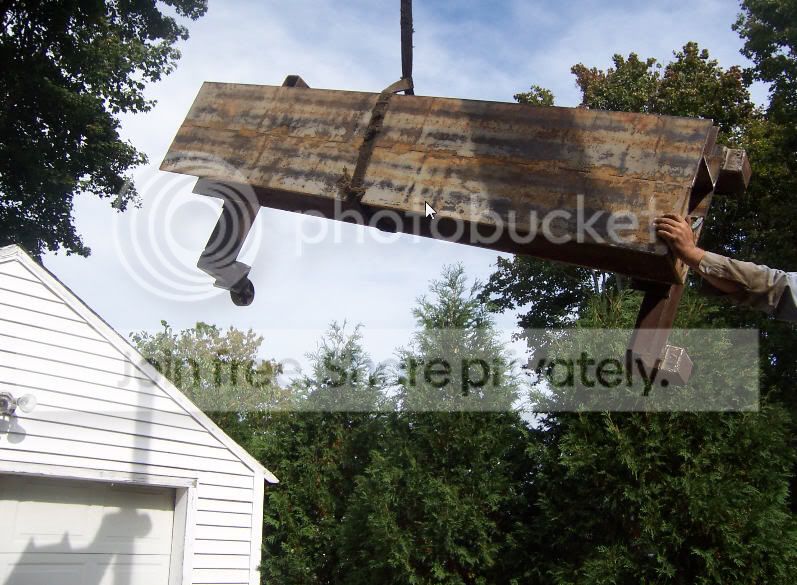
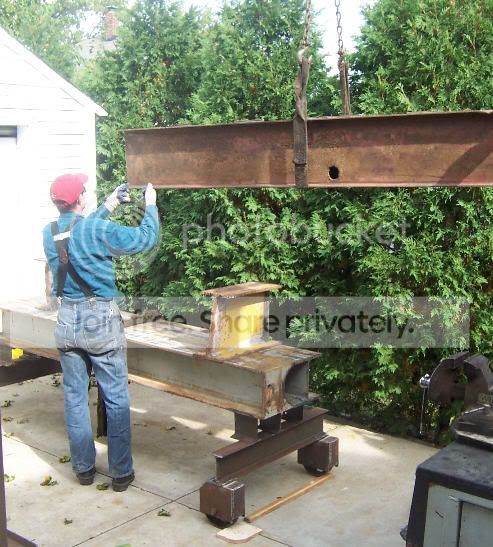
few pictures of press being build:
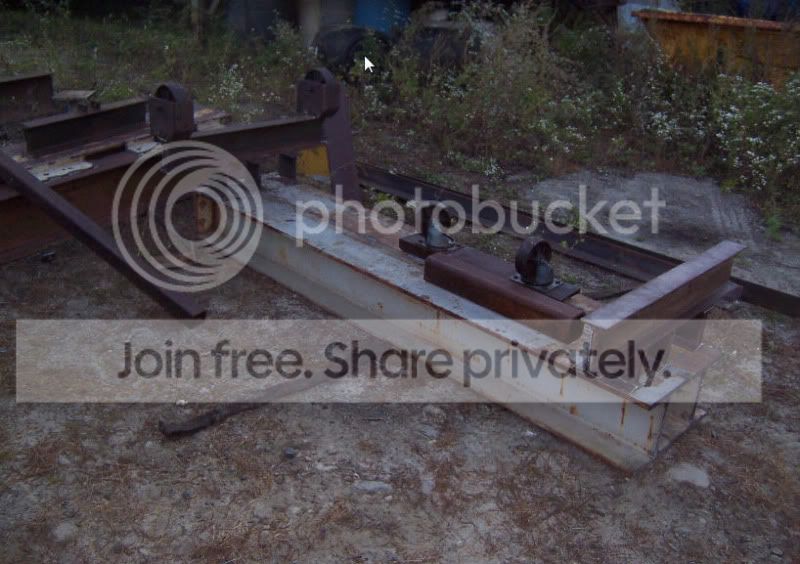
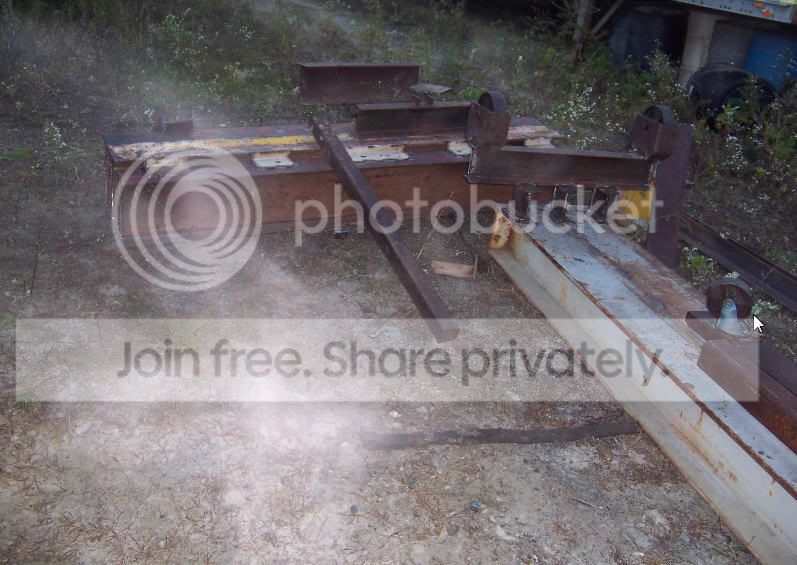
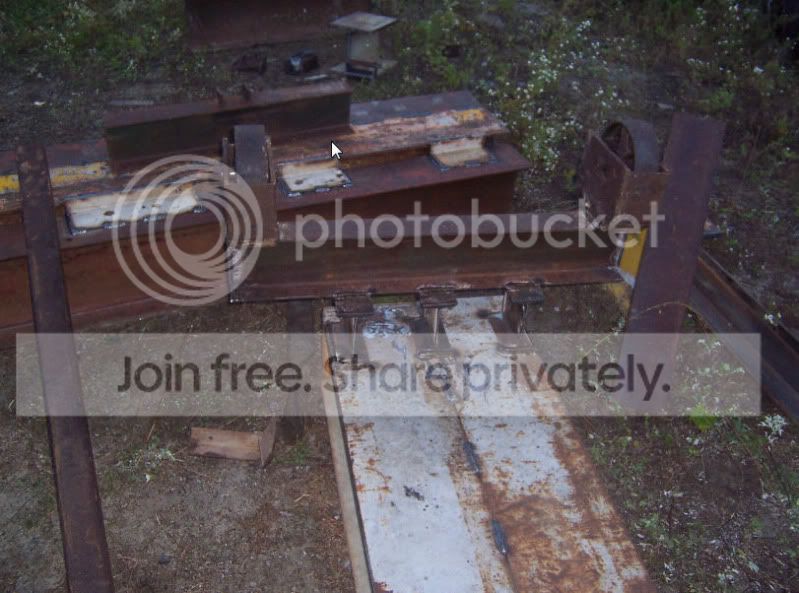
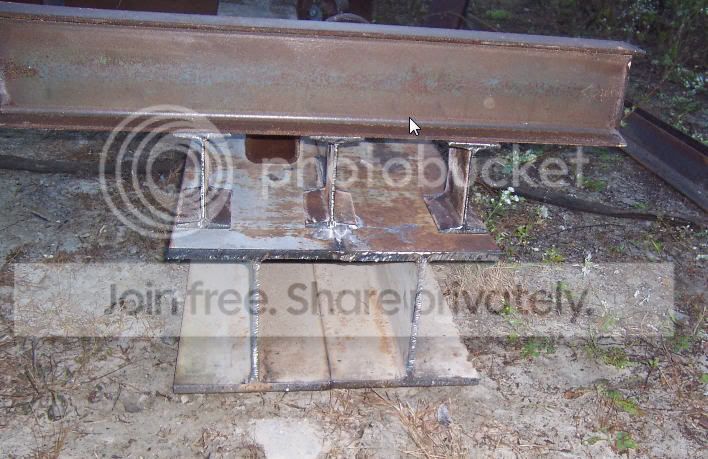
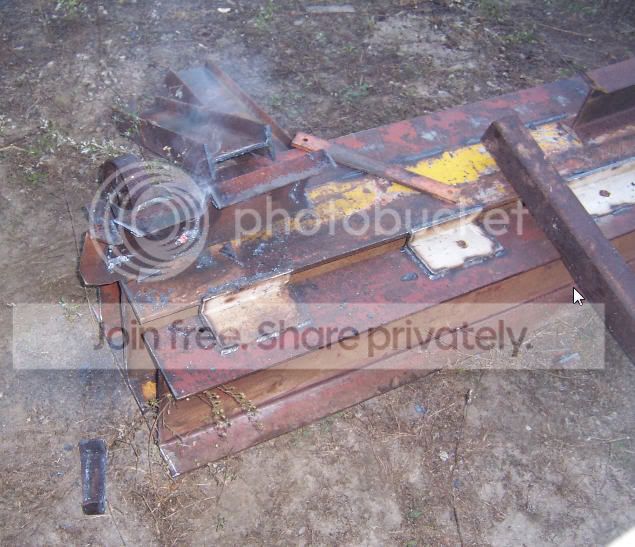
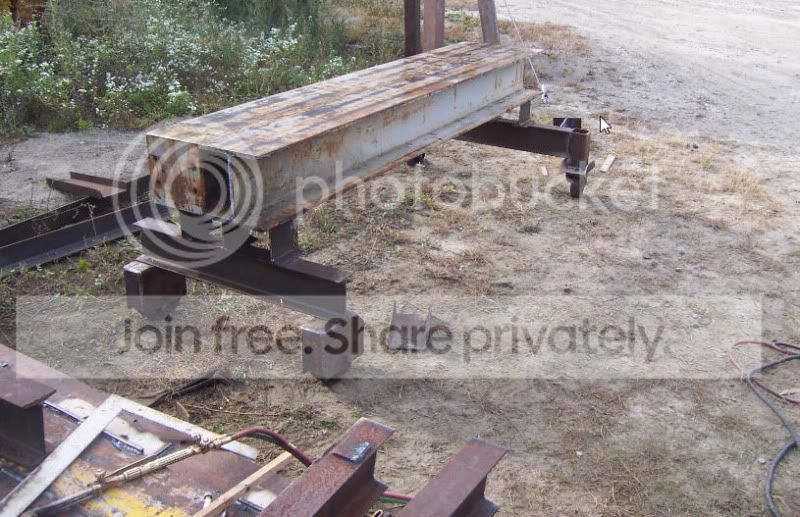
press had to be brought here top and bottom separately because of size.
Unloaded
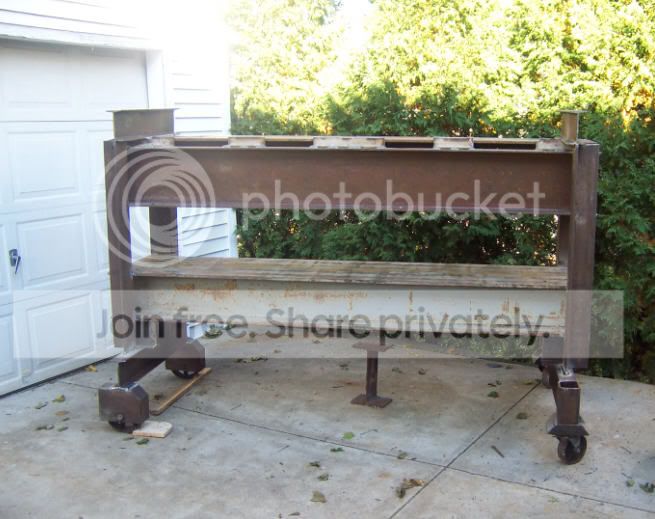
press finished
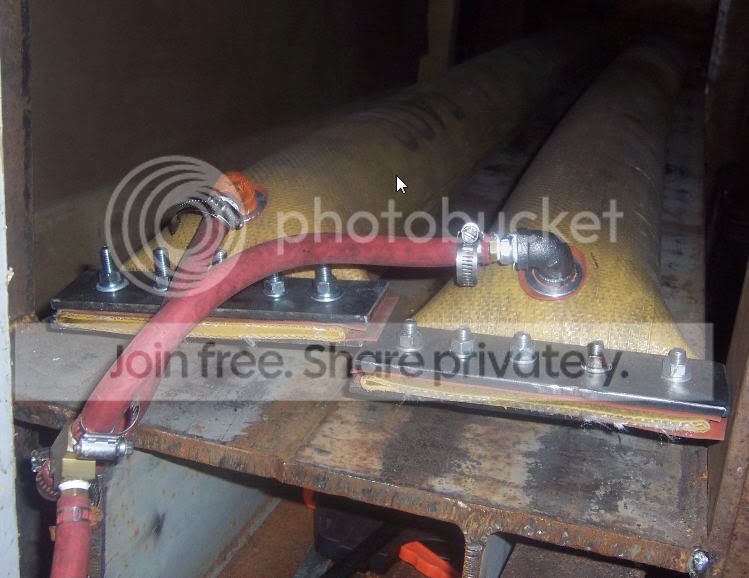
not so long ago I finally got around to do firehose and test it
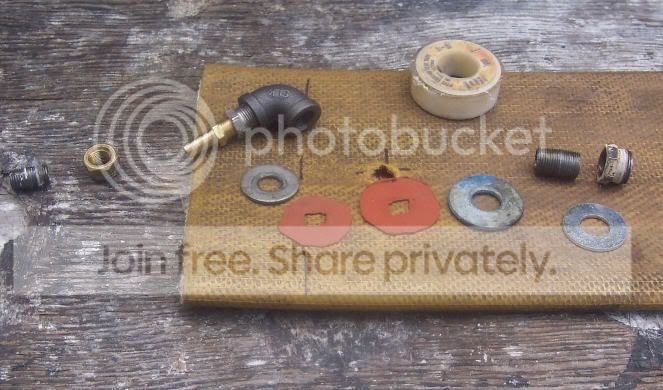
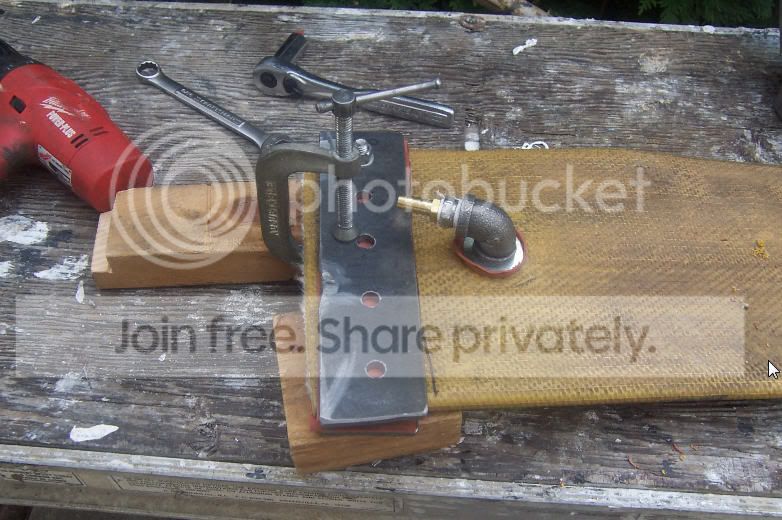
It took about a day of work with the firehose I had to take it apart 5 times to change and add gaskets. Finally no leaks up to 75psi.
First successful overnight test
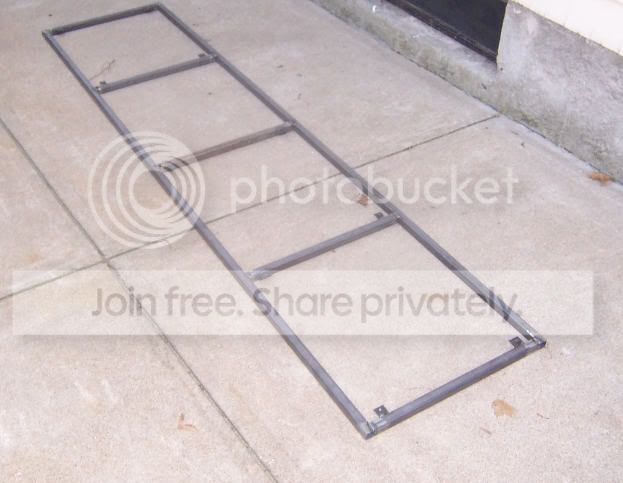
Frame for profiler
unknownSat Sep 17, 2011 6:01 pm
nice!
unknownSat Sep 17, 2011 8:32 pm
Now THAT is a press!!! Awesome!
unknownSat Sep 17, 2011 9:05 pm
That is a beast! The front fenders rip!
unknownSun Sep 18, 2011 4:35 am
unknownTue Sep 20, 2011 3:41 pm
casters and 6" I-beams was from huge engine hoist I saved from destruction. "Fenders" was on them already. Actually I regret to put those wheels on the press, it looks nice, but difficult to move around small shop like mine. Someday I need to paint it, but not on priority list
unknownThu Sep 22, 2011 12:22 pm
Sunday had time to put together profiler table and rails. came out nice and sturdy. unfortunately 1/4" steel I got for the rails not strong enough. Some deflection between supporting points, okay for now, in the future will have to replace it with 3/8" or 1/2" thick stuff.
I wasn't sure for the size and decide to make little bit longer and wider.... On the up side I will be able to do 2 core at the same time on the downside it's very heavy even without bridge.
Next I am going to do fabrication so bridge can be welded.
unknownFri Sep 23, 2011 3:48 am
The press looks very powerfully
unknownFri Sep 23, 2011 3:21 pm
any chance you could post pics for your finished profiler ?
unknownSat Sep 24, 2011 10:07 pm
I am not building anything special. Somewhat similar to Kingswood's in his video. Metal rails and mental bridge instead of wood from steel leftovers I got in my garage
unknownSun Sep 25, 2011 5:10 pm
spasibo. Mne prosto ochen' povezlo. takoi' press ya daje ne planiroval.
unknownSun Sep 25, 2011 6:18 pm
kakie razmery u pressa i chto planiruesh na nem delat` - doski ili lyzhi? =) s neterpeniem budu zhdat` prodolzhenija)))
unknownMon Sep 26, 2011 2:46 pm
worked on bridge for profiler today. Get done less I would've wanted to but at least something done. To see results how profiler will be working I have to attach a dust collection and figure out something to hold core down. Experiment with double-faced tape and hot glue far from acceptable. Probably will have to bite the bullet and get vacuum pump when I find one cheap enough on craigslist.
unknown
press is BIG. Cavity 20" wide 14" high long enough for 200 cm skis.
Bottom H-beams 55 pounds a foot top middle I-beam 75 pound per foot IIRC other 2 I-beams fairly light in comparison just to make up width. Weight probably 2000 pound plus but can be easily wheeled around by two people.
Dvigaetsy vce tygo i medlenno k sojaleniu
unknown
Beast. I ran with 40/12 and I laugh. That thing is amazing!
unknown
bigger not always better. I tried several different router bits yesterday and today. 3/4" straight, 1 1/4" ball and tray and 1 1/2 bottom cleaning. so far best cut from ball and tray bit.
unknownTue Mar 27, 2012 7:53 pm
Looks like a ski! Build it!
unknownFri Mar 30, 2012 12:48 pm
If I understand the design correctly I would suggest it was a little short - probably best to ask what did you have in mind MR and who's the rider?
unknownSat Mar 31, 2012 5:30 am
rider is me
I usually ride 170--175. I wanted skis for tight places not too wide as a powder specific skis, at the same time not too narrow for the groomer (under 80). More like all mountains skis New England style
For the first skis I don't want to make something big or wide. in any event will be replaceable tip/ tail sections of the mold so big rocker will be later
:
to all honesty I don't know how this design will turn out. Designing first pair of skis very frustrated
unknownSat Mar 31, 2012 6:54 am
I wonder whether the running length is a little short and more could be taken from the tip. If the tip remains the current length, you may find it starts to steer the ski more than you might like?
Another tool for analysis might be to calculate the bearing surface of the ski you have designed. If you transfer your design into DraftSight, you'll be able to complete this calculation.
Looking forward to reading the test report.
unknownSat Mar 31, 2012 3:40 pm
IIRC running length equals 160--165 skis which is average length around here.
I spoke with local shop manager he made a few suggestions like early rise no more than 50 --70 mm, sidecut radios extend into the tips and different tip/tale thickness of the core to make tales stiffer
unknownSat Mar 31, 2012 4:23 pm
I'm not a designer. Swimming in unfamiliar territory here.
I don't know what to say except ask for help
unknownSat Mar 31, 2012 4:38 pm
For rocker lengths on a mixed camber ski I usually go with 12-20% of total length and for tail rocker 11-16%. I don't like to have more than 1/3 of the overall length taken up by the rockers or it make the running length much too short for my liking.
On 185 cm ski this gives you an approximate range of 22 cm to 40 cm of tip rocker and 20-30 cm of tail rocker. I try to keep the running length at ~2/3 of the overall length. If I'm going with a mixed camber ski.
unknownSat Mar 31, 2012 4:47 pm
I usually make my tip 140-160 in length. Tail between 60-80. The tip (left side) looks more like a tail design and the tail (right side) looks more like a tip design. Are you using SnoCad-X?
unknownSat Mar 31, 2012 4:52 pm
Your camber is set way back also. Most folks go with 55% of the ski length as a place to put the camber apex and ski waist.
unknownSat Mar 31, 2012 6:03 pm
I wanted to try something a little bit longer in tip and tail. Early rise about 100mm on tip and 50 on tale. Also sidecut extends into the tip
Yes I design skis this way. Don't know how it will work. Is there any problem in this design?
Yes on snocad-x
unknown
55% of overall length or Running length? What happen if you put too far back?
unknown
Problem...no. It might just be the next best thing. No way to tell until you ski it. It does have a very "unique" shape though.
If you place your camber too far back it won't be as effective for you in spinging u into the next turn. Plus placing the side cut that far back will probably make the radius seem longer tha calculated, as you'd have a lot of side cut up front and very little side cut in the tail.
Since this seems like a groomer type of ski this doesn't make a whole lot of sense to me.
For 55% of overall length vs 55% running length....I still debate this. 55% RL will usually place the camber a bit farther back. My best advise is do the math and see what looks right.
unknown
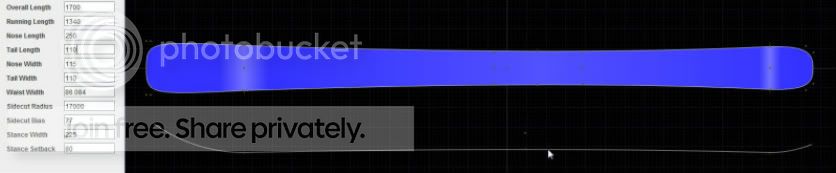
some modifications
unknown
looks like I'm going to change sidecut setback to 0
unknown
86mm by south New England standards almost considered pow skis
unknown
honestly I don't know much about ski designs and what parameters to change to achieve certain characteristics.
Thoughts on this design... what to expect from it. I understand it's my bit difficult but any input will be helpful and better than nothing at all
unknown
86 under the foot is barely a mid-fat by VT standards and might be more of an all Mtn carver at a 16m turn radius. But I'm partially to fat skis and long turns.my narrowest ski is 105 under foot and my powder ski is 122...
But this is all very subjective and those skis work well for me in the conditions that I ski in. That's the beauty of making your own skis, you can make anything you want. You'll probably love them no matter what.
unknown
I say go for it and let us know how it performs. I made a pair of 86mm wide skis this year and loved them. About the same side cut, around 16.5. Great for big carving turns, and super smooth and stable.
What's you core dims going to be?
unknownSun Apr 01, 2012 5:17 am
2.5 tip; 7mm at220mm; 10mm at center; 9 at 450 from tale and 3 tale
unknownSun Apr 01, 2012 5:21 am
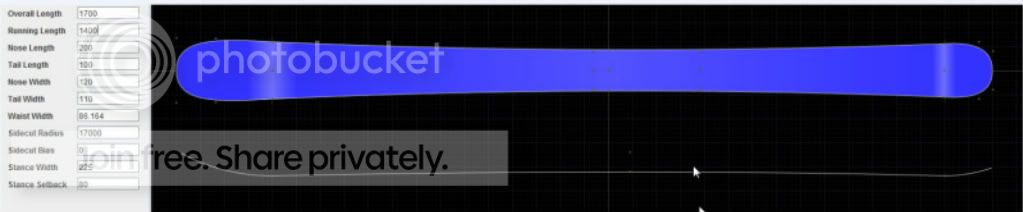
more changes
Overall Length 1700
Running Length 1400
Nose Length 200
Tail Length 100
Nose Width 120
Tail Width 110
Waist Width 86.164
Sidecut Radius 17000
Sidecut Bias 0
Stance Width 225
Stance Setback 80
Nose Height 49
Tail Height 17
Camber 8
Camber Setback 46
unknownSun Apr 01, 2012 4:38 pm
Looks better, more traditional shape. camber might be set back a bit too far still. I'm not sure the 55% formula works that well for shorter skis... But you can go with it I guess. It just seems like 8cm behind the center is a lot on a 170 cm ski.
But unless you want a soft ski I'd think about beefing up your core to something like 2-11-2.
I personally dislike soft skis and make my cores 2.2-12-2.2 with a maple-poplar laminate. Tis gives a fairly stiff ski hen using 22 oz glass.
unknownSun Apr 01, 2012 4:55 pm
started to work on bottom mold.
MDF creating enormous amount of dust, even outside respirator is a must. definitely this hobby not the easy one... should have try checkers first
cut first piece for the template
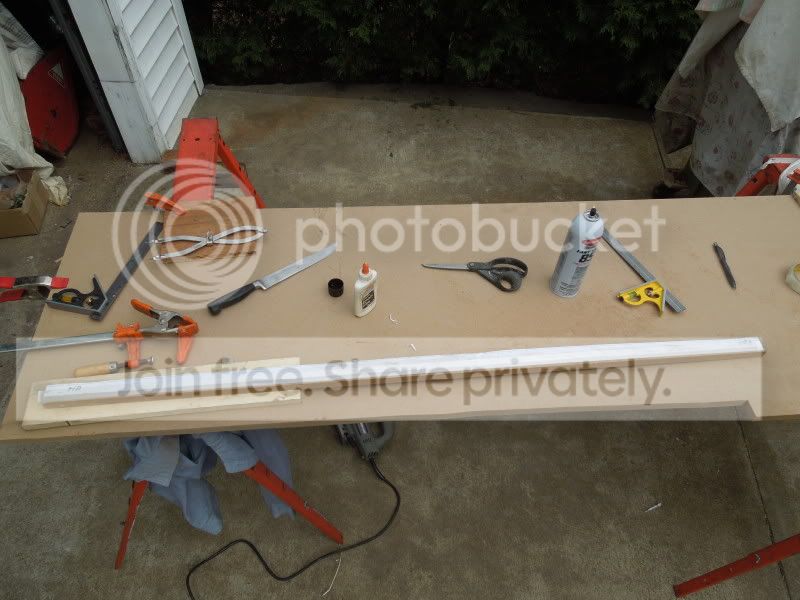
cutting whole bunch
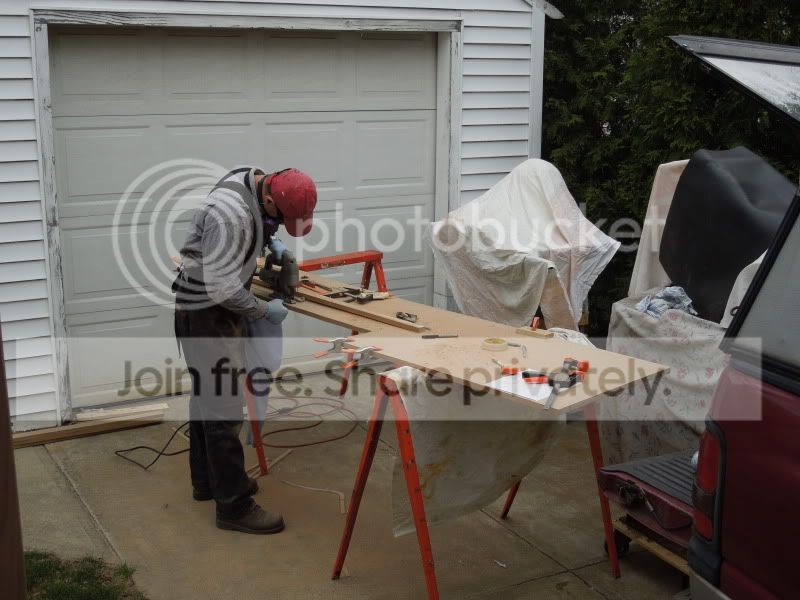
unknownMon Jul 16, 2012 3:13 pm
I'll change it for 30 mm for the final version
unknownMon Jul 16, 2012 5:26 pm
most of my skis are fairly stiff.
My plans to make core not with even taper more like in two steps which would create thicker middle section longer but without flat space
2.5 tip; 7mm at 220mm; 10mm at center; 9 at 450 from tale and 3 tale
unknownMon Aug 13, 2012 3:16 pm
Last a few days worked on mold almost complete top and bottom. Need little bit more sending to do and the top need only filler in the middle
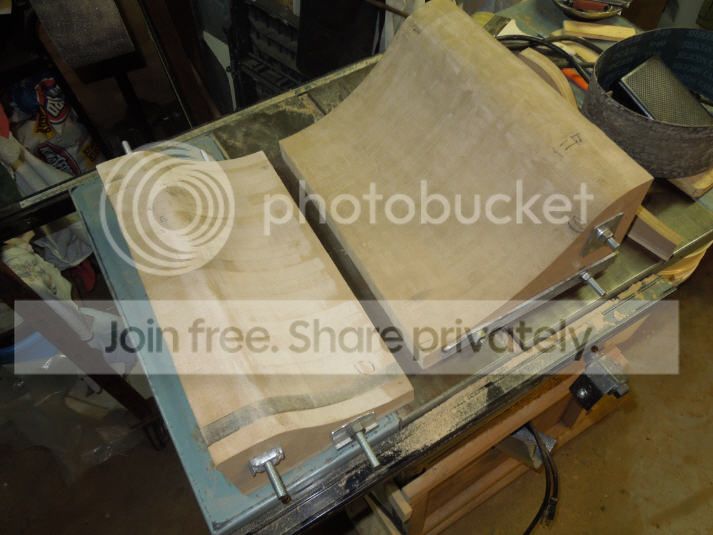
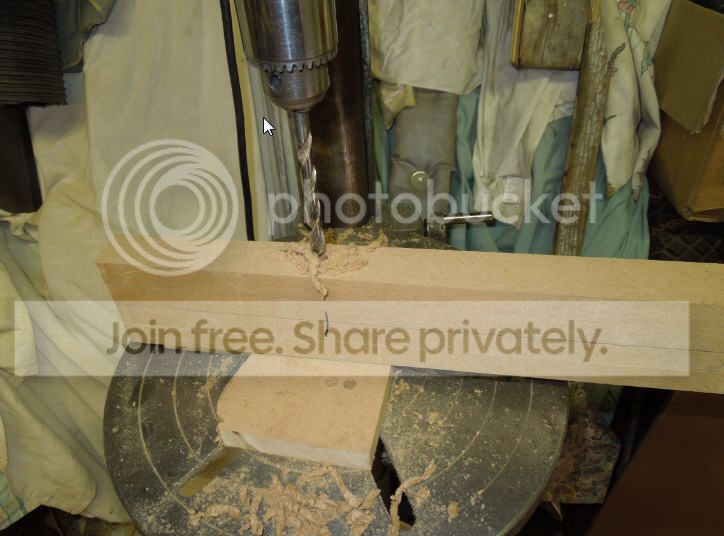
drilling camber section 4 ribs at the time
Top was easy to do compared to bottom one
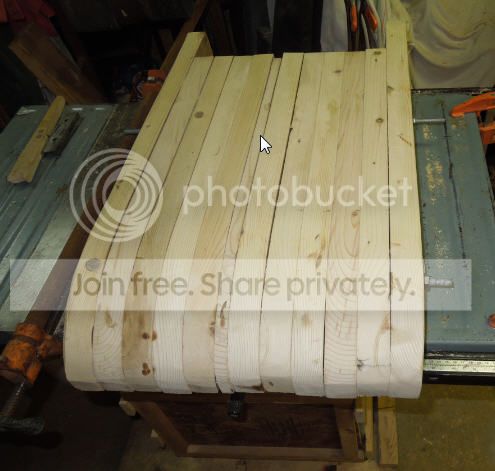
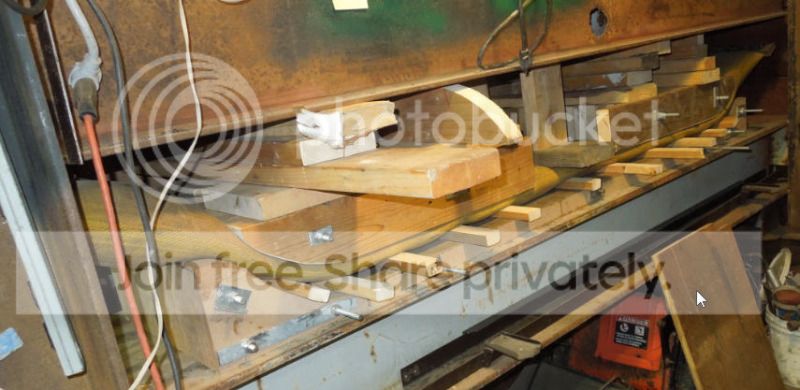
First time inflated with molds only 5 to 10 psi just to keep camber section straight. For some reason it got curled up and twisted and very uneven after ribs got bolted together. After couple hours under pressure look so much better
unknownFri Aug 31, 2012 1:25 am
can i make a suggestion? see all those wood pieces you have above your top mold... all the 2x4 pieces and what not? To me, and i'm just going by what i see first glance, that looks like a giant frag grenade waiting to go off. I highly suggest you come up with something flat/solid to put in place of all those pieces to take up the slack.
We stacked about 6 sheets of 1/2" mdf under our bottom mold to take up the extra cavity space, and i'm nervous about that as it's not glued/bolted together.
unknownFri Aug 31, 2012 4:47 am
This is temporary and only up to 5 PSI because my camber section didn't come out too well, after ribs got bolted together. It's start twisted a little but it gets flats under pressure. Got to figure out what to do with this problem. Last thing I want to make a new one
unknownFri Aug 31, 2012 10:55 am
1 step forward 2 step backwards.
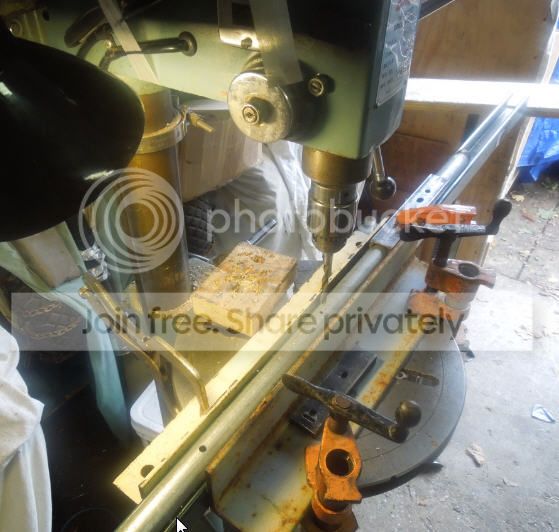
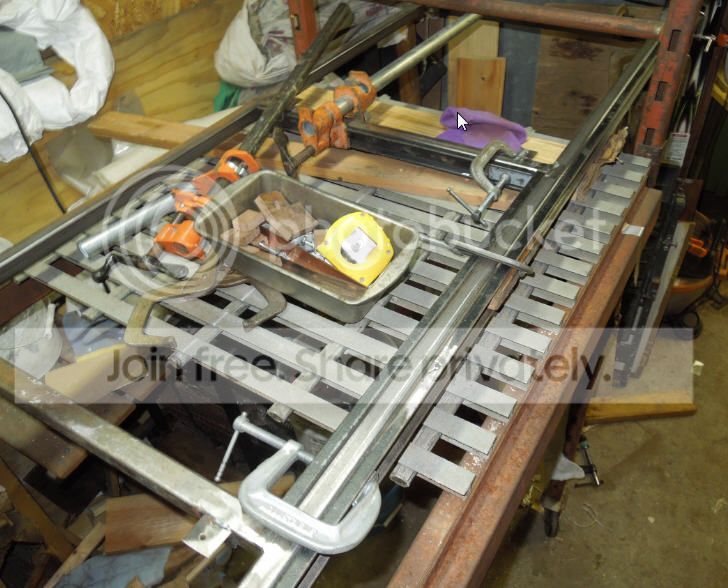
After long thought decided to rebuild my profiling table to build it all including tabletop from metal. First step reinforcing frame. original frame was made from 1/8" wall 1" square tubing. Definitely not strong enough. This time I going to reinforce that with 1 inch U-channel. No welded only bolts to make sure all components stay in place. First time around frame got twisted like propeller after welding before cools off and get straight This time I don't want to take chances. Tabletop will be made from 1" thick steel plate. dimensions 8 foot long and 27 inches wide
unknownFri Aug 31, 2012 3:05 pm
I need advise.
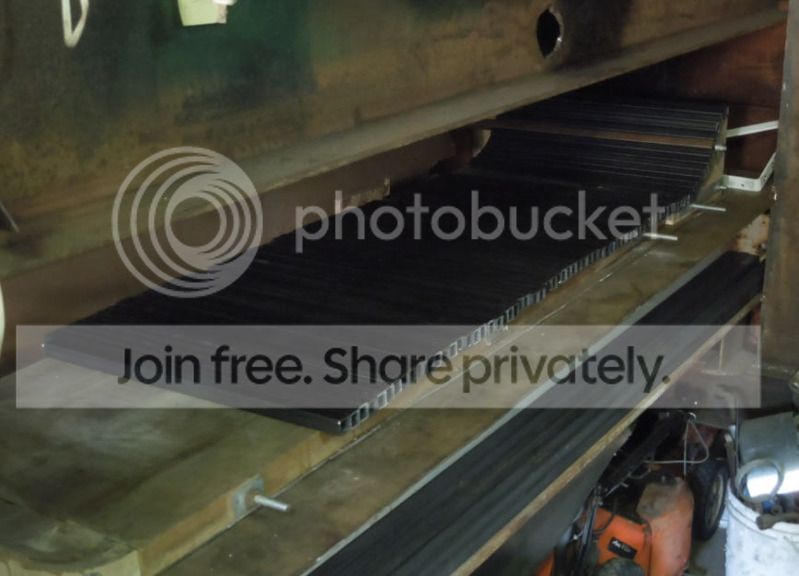
This weekend going to cut cattracks.
How long? My mold 17 inches wide I am planning to make cattracks about 18" or maybe 19".Press 20" wide but I think this is too long.
How long is too long (wide)? 18 should be enough.... Building for the first time very frustrating
how wide cattracks and cassette should be in relation to the mold?
unknown
I'd go with just barely wider than your molds, maybe 18 inches.
unknown
My mold is 17" wide, so is my cat-track. My casettes however are 16" wide (so I can have 3 pieces cut out of a 4x8 sheet.
Actually if I could I would make my casettes wider than the mold so I'm sure I don't have any excess epoxy squezzed out of the layup and ending up on the mold..
unknown
My press is 16inches wide and my cat track is 20inches wide. Remember you need some extra width on the cat track to be able to suspend (using bungy chords or springs..) the cat track when the hose is not inflated.
unknown
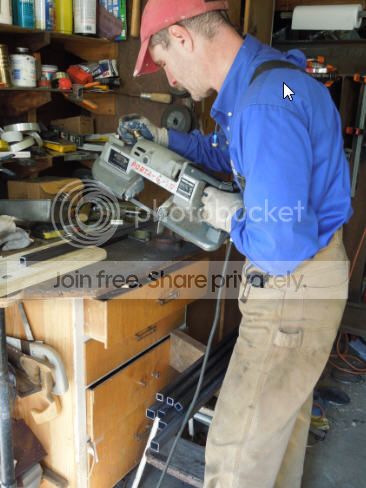
Decided to go middle-of-the-road 19". Should be enough room to connect suspension system. It might be some problem here because steel supplier carry only 14gauge tubing. Going to need to go to get springs out of trampoline. Hope I need only one lol.
Had a few hours of free time today, cutting went faster than I expected almost finish all of it. Will have more time to work on profiling table
unknownSun Sep 02, 2012 10:38 pm
Interesting post!!
unknownSat Oct 27, 2012 5:04 am
Couple weeks ago I had close call on safety. First time in a very long time.
Routers most dangerous tool we got.
unknownSat Oct 27, 2012 5:39 am
I've had some close calls. That's about as close as they get. I'm glad your okay.
unknownSat Oct 27, 2012 9:15 pm
Yikes that is close! I've ran my thumb into a router bit on a router table before, took off a good 1/4" of my thumb. (it grew back
)
unknownSun Oct 28, 2012 3:38 am
I had a similar incident with my trim router. Index finger hit the lock nut that hold the bit. I built a small plastic gaurd to prevent this.
unknownSun Oct 28, 2012 10:18 pm
I was always taught not to wear gloves when using tools like this. The glove usually has the effect to pull your hands and fingers more into the tool rather then protect it. Lucky dude!
unknownMon Oct 29, 2012 2:55 pm
agreed!!!
unknownTue Oct 30, 2012 4:29 pm
I fear my router. It threw a bit on me about 3 years ago that lodged into my wall. Only then did I realize I almost always route with the bit at groin level. Stepping up to 1/2" shank bits should help in theory but I shiver a little every time that thing gets up to speed.
unknown
I can consider myself very fortunate with this incident.
I also was thought not to wear gloves but this day's I wear gloves all the time when working and they definitely save me finger from big injury this time. Have to be very careful working freehand with router
Worked on my profiler. Almost done ....finally
work in progress on new table
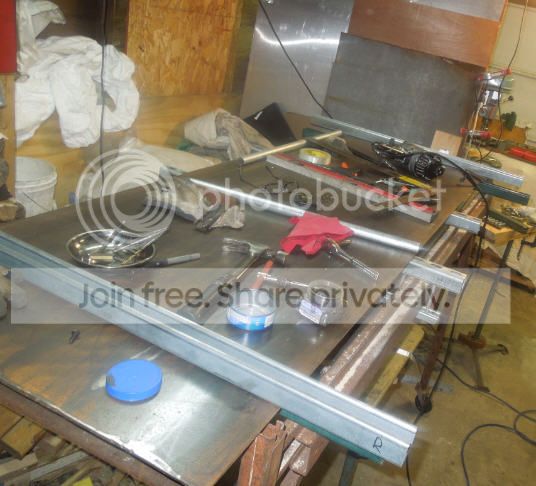
drilling new rails