:: View topic - WhiteRooom 11/12
Posts: 46 · 46 posts
unknownSun Sep 04, 2011 5:35 pm
Skis for a friend
Big rocker fatty out of the press
185cm
dimms: 130/142/122/132/122
40cm tip with 7 cm rise, 5 mm camber under foot, 35 cm tail with 3 cm rise
core profile 2.5-12-2.3. maple and poplar laminate, veneer topsheet
pressed 180F for 30 min at 55 psi, super sap CPM epoxy.
I'm wicked pumped right now. These came out of the press looking great. bases and tops look flat. Heaters and electronics worked great. The tips/camber and tail profiles came out as expected. Camber was slight more than projected at 5-6mm. I was shooting for 4mm.
I really did a better job of thinking out the layup and placement of the thermocouples, which was my problem last time.
Had a minor issue with the epoxy. we mixed 3 batches of epoxy 250g resin and 125 g hardener. The first 2 batches were fine but kicked quickly in the containers. I was a bit nervous that we'd screwed the pooch but everything seemed to cure nicely.
But, this left us a bit short on epoxy but we ended up with just enough to finish the layup. Not quite enough to do the full top coat on the veneer. But we'll mix a small batch and coat the tops and put them in the press to finish them off.
I also need to do some more sanding on my tip mold, there is a bit of a flat spot in the tip rocker but it won't effect performance.
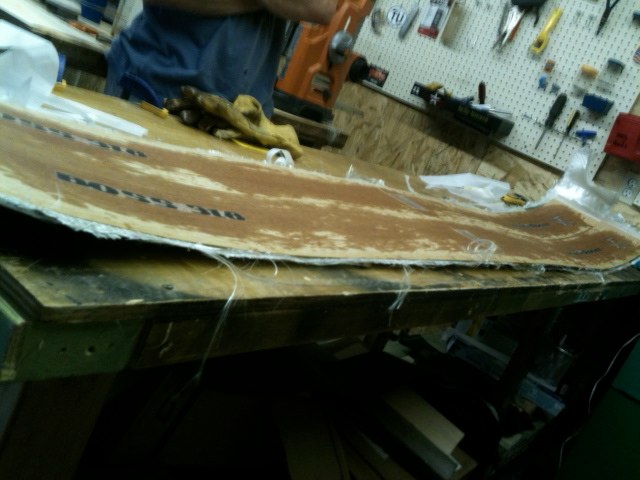
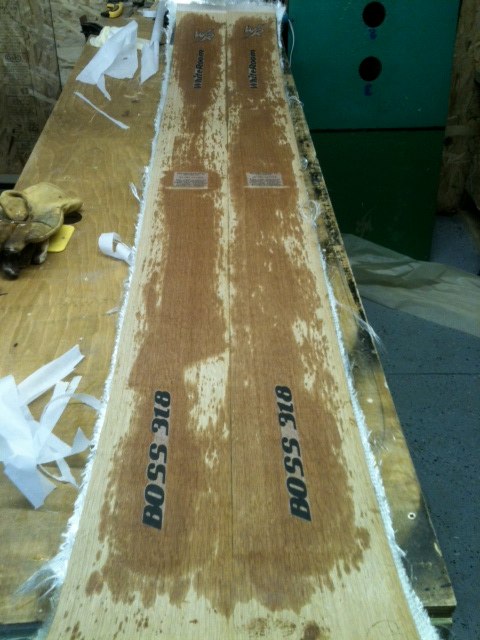
we let them cool to ~140F and then took them out. One they cooled some more we cut them in half. and placed them on their sides for overnight. We'll trim flash tomorrow. FKNA!!!! This pair definitely came out better than the first pair. No major pressure issues in the tail or tips like in the first pair.
I'll post more once they get some finishing work done.
unknownMon Sep 05, 2011 8:14 am
The best experience. Own experience =)
Well done
unknownMon Sep 05, 2011 12:37 pm
^ (Like he said)
Nice job!!!
unknownMon Sep 05, 2011 1:10 pm
Didnt get to flash this pair out, honeydo list was too long today. The next 3 weeks should be productive. I have a goal of a pair per week. Then I have 2 more pair after that for the fall.
unknownMon Sep 05, 2011 1:15 pm
If you are making a fair few, you might want to have a word the MM about whether applying a PU coating in advance makes the topsheet less prone to showing edge strike.
Just a thought.
unknownMon Sep 05, 2011 2:02 pm
I have pretty good results just putting an epoxy topcoat on during layup. I used spray adhesive to stick the parchment to the top Alu skin. This prevents the parchment from slumping down the the tip and tail causing wrinkles.
Foe this pair I'll just mix a small batch of epoxy for a top
Coat then thrown them back in the press to cure.
unknownSat Sep 10, 2011 2:02 pm
Did a bit of jointing of veneers today for the first time. I had some strips of what looks like oak or ash (unsure as it came from the misc /unmarked section of the store) and the makore I used for my first ski
After reading and watching some vids on how to join veneers I decided to give it a go.
Basically I used a long piece of MDF as a straight edge to score the veneer. The the 2 halves of the large sheet and the small strip get stacked and taped to the MDF straight edge.
Another piece of MDF gets clamped on top with ~1mm of veneer edge showing. The belt sander gets passed over the edge and trim the veneer for a nice smooth edge.
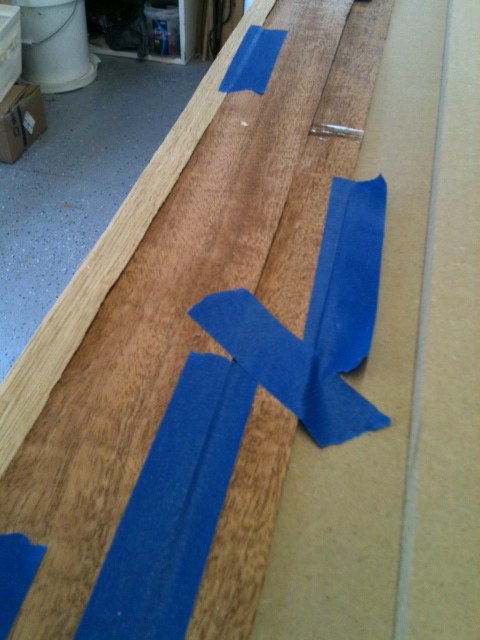
After this it is as simple as using some porous paper first aid tape to fit the three pieces together.
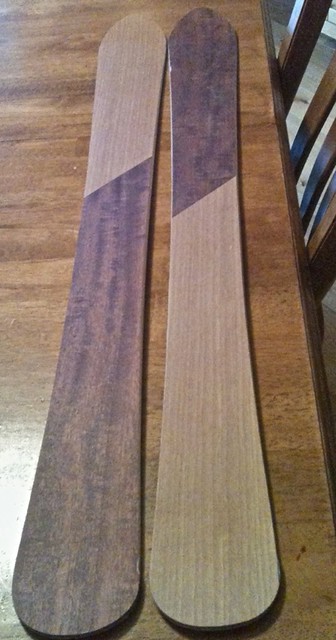
The result was better than I hoped but not exactly 100% perfect just like the rest of this project in fact. Here is what it looks like.
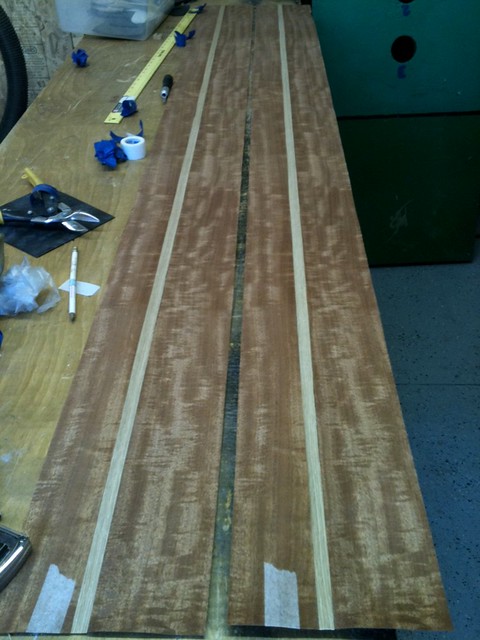
I was going for a surf style look with an off center stripe. These will be the tops for the pair I'm pressing on Monday. All in all it took about an hour to do both sheets. Stoked to see them turn into skis.
unknownSat Sep 10, 2011 2:16 pm
Very nice
unknownSat Sep 10, 2011 7:53 pm
I like the makore veneer. I bet the contrast of makore and ash/oak will look great. Post pics after the pressing.
unknownSun Sep 11, 2011 4:12 pm
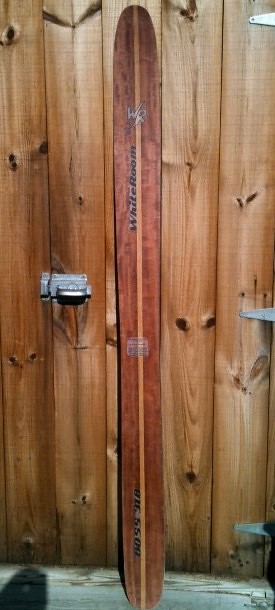
WhiteRoom BOSS 318 per dimensions in first post of this thread
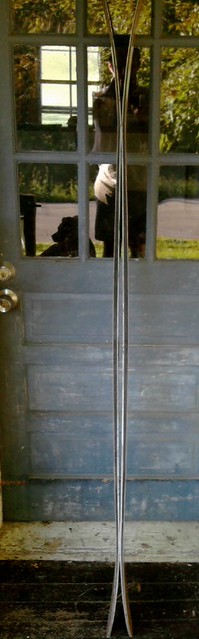
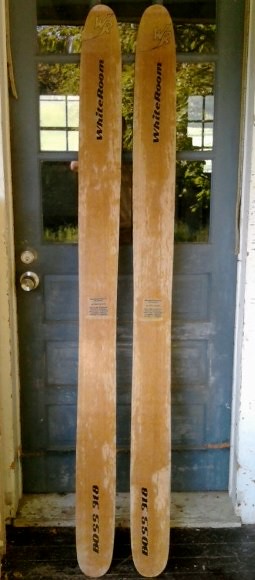
The graphics were off center and my buddy put a coat of poly on tops instead of letting me epoxy top coat them so they look blothchy. I haven't been able to inspect them after they got flashed out but I'll get a hold of them tomorrow.
I am pretty happy with the rocker/camber profiles though. Can't wait to lay up the next pair tomorrow. I'm sure this next pair will be even better after fixing some minor mold issues.
unknownMon Sep 12, 2011 11:08 am
Looking good Vinman! After seeing some of the veneer top sheets people have used, its really making want to try one.
Did you make the contact points of your ski also the widest points?
unknownMon Sep 12, 2011 1:01 pm
Yes. More pics to come pressed another pair today.
unknownMon Sep 12, 2011 1:53 pm
3rd pair pressed today. Layup went even better after gaining some experience and fixing some minor mold issues.
I had to cut out a small section of sidewall that got ripped off in the planer. I replaced it with a small piece of tip spacer and taped it into place with the same paper tape I use in the tips and tail. I think I have to either sharpen or replace my blades
out of the press
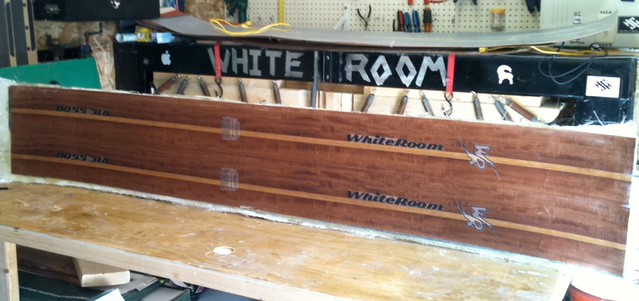
tip spacer joint
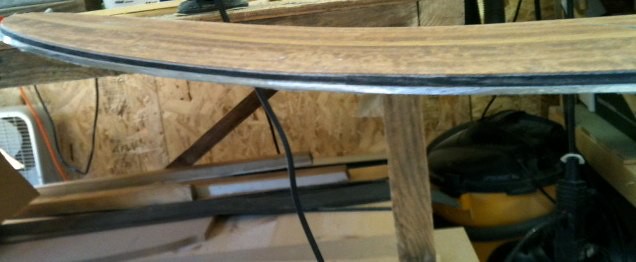
trim work done on one ski. Burnt the motor out of my 10 year old jig saw. It was way underpowered for this type of work. Well at least I get to buy a new tool. Trim router and bosch bench mounted belt sander worked great. 10 deg bevel on the sidewall.
The biggest problem with this layup was that the top sheets got misaligned while loading the press due to a tight fit. I think I need to take a bit off the tip section of the top mold.
I measured 6 small batches of epoxy this time and no early exotherm kick.
To reduce denting and waviness of the top sheets from my ghetto hockey stick cat track I used a compression layer. Which is basically a foam mesh used to line shelves or tool boxes. It worked well but is definitely a single use only product as the heat and compression pretty much destroy it. But I think it did reduce some of the waves in comparison to the first 2 sets that don't have it
Bases look pretty good but there is a couple spots that the edge tines caused some raised spots. I think they'll grind out.
All in all more success and more lessons learned with the top sheets.
unknownMon Sep 12, 2011 3:06 pm
Nice work
it's always something haha...
unknownMon Sep 12, 2011 8:52 pm
Very nice! I like the look of the second pair, with the string in the middle!
unknownThu Oct 27, 2011 1:19 pm
Beautiful! I love all the wood veneer topsheets that seem to be common throughout this site. Something I have to try when the time comes no doubt.
unknownFri Oct 28, 2011 9:01 am
Common! Is the new guys calling our work common ; )
It's nice to work with the veneer, I'm sure you've looked at co's website.
unknownSun Oct 30, 2011 5:13 pm
Tested a new graphic application tonight. I tried using the rub on graphics that I mentioned a few posts ago.
It seems to work nicely but is very delicate, if you wrinkle it, it will be shot and you have to re-print.
The result is a nice clean look. You will be able to see it when looking at an angle.
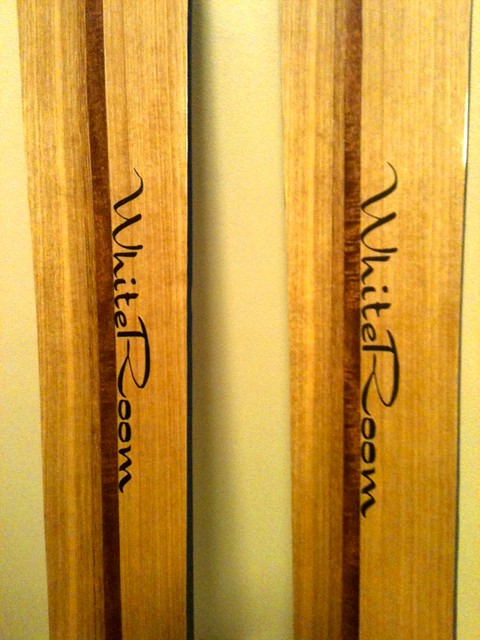
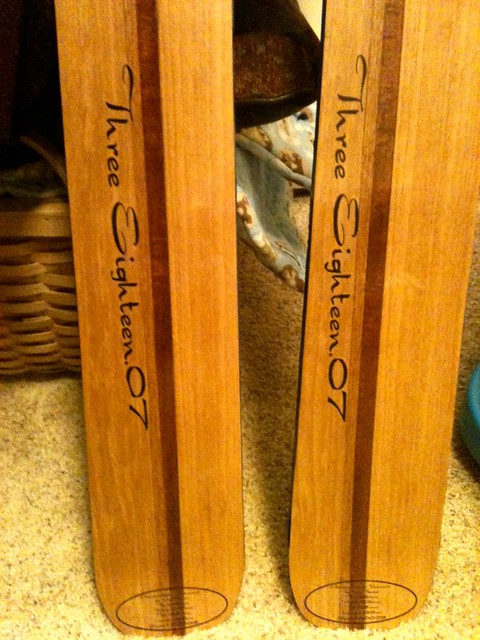
These go one coat of poly then graphics. They'll get 3 more coats to seal the graphic in place.
I also taped the sidewalls with painters tape to try and keep most of the poly off and cut down on some of the clean up time. It seems to be working well.
unknownThu Nov 03, 2011 10:27 am
So stoked right now. I had 2 of my recent builds get base grinds yesterday. The bases and edges came out perfect. The smaller race ski are perfectly flat after the grind and the three eighteen.07 model is nearly perfect with only some minor con cavity I the tip. The guys t the shop did a great job and the bases look pancake flat. I'll post a pic or two later.
unknownSat Nov 05, 2011 1:45 pm
unknownSat Nov 05, 2011 2:02 pm
I guess I should have said 'popular' instead of 'common'.
So the board I am trying to reverse engineer has what looks like veneer laminated to the profiled core with a layer of unidirectional carbon fiber between the core and bottom veneer.
Anyone ever try or seen anything like this??
unknownSun Nov 06, 2011 1:16 pm
Wow Vin, those do look great!! I ordered new belts for the grinder this week...
unknownSun Nov 06, 2011 2:14 pm
mixed camber, mixed sidecut. 183cm, 4 mm camber. 7cm rise over 40 cm tip, 3 cm rise over 30 cm tip.
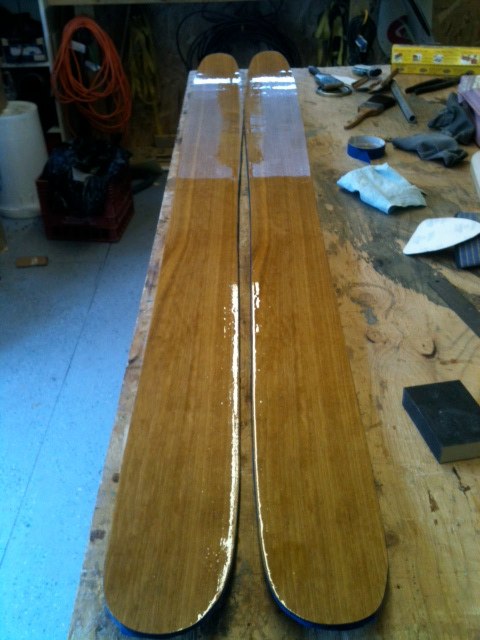
Unfortunately one ski has a shifted core. I fixed it with epoxy and I think it will be skiable but I have no idea how durable it will be. I'm going to make a replacement for this ski since it was a build for a good friend.
unknownSun Nov 06, 2011 2:29 pm
how to you put the poly on vinman?
spray gun, just in your workshop?
unknownMon Nov 14, 2011 11:55 am
I just brush it on. It's still wet in that pic. I lightly sand with 220 then 320 and 400 grit. Each coat gets finer grit sanding.
unknownMon Nov 14, 2011 2:34 pm
Skis for my 5 year old son. They will get some Super Mario graphics since he's a Mario junky. They also have red bases since that is his favorite color.
dimms
97/69/86
lenght 94cm
core and sidewall: left over floor boards from our bamboo floor installations this fall
2/8.5/2
veneers is makore and alder scraps leftover from other builds.
This layup went quick since it is such a small ski. Everything went smoothly except for the tip rise turned out a bit lower than i had planned. I guess I didn't get them pushed up into the tip mold very well. They feel stiff. I went with 8.5mm because that's what his skis from last year measure and there needs to be enough to screw into. guess we'll find out in a couple weeks.
Crappy cell phone pic
This was my 7th pair since March. With ski season around the corner, it will also likely be my last full pair for the year. I am doing a single ski re-uild for a buddy since we screwed up his sidewall but that will be the end of my active building for the year I think.
All in all a good building year, I learned a ton.
unknownMon Nov 14, 2011 5:24 pm
cool. My freind and I are making some for his 7 yo. Most likely any kids ski is made of foam with a monocoque/cap construction where the BINDING is really held in place with the topsheet mostly.
He is going 9 mm in the middle at 130cm I think. Tough to make skis soft enough wit this heavy glass and stiff epoxy we have access to.
Ski building really gets going for us in the winter unfortunately. Everyone wants skis when the snow flies.
edit cause im done
unknown
I agree MM. Kids skis are hard to make soft. Can't make them too thin or you'll drill through them when mounting the bindings. Try gorilla glue instead of epoxy. It will bond everything but makes it a little bit softer. I'll be making a ski with it.
unknown
haha I could never convince my freind to use PU glue for anything. He considers it the scourge of everything wood working.
I dunno just him.
haha
I would use aspen but he made a polar/maple one.
unknown
some pics of the finished product
image no longer available
image no longer available
image no longer available
unknownSun Nov 20, 2011 8:16 pm
Nice! Kids' skis are hard to get right!
Who's the guy on the skis and socks?
sam
unknownMon Nov 21, 2011 8:22 am
My kid is a Mario junky. Skiing Super Mario is on the ski tip and tail.
unknownSun Dec 04, 2011 10:49 am
Polyu-glue?, really? In general I don't like how it expands for wood working. When it expands in a 90 degree joint it's a pain to clean the joint. Can be a bit messy and is a PITA to get off your skin. I prefer exterior wood glue. Actually I've used it mostly for ski building in place of epoxy
unknownSat Jan 14, 2012 5:53 pm
I just got my first 1/2 dozen runs or so on the the BOSS 318 model. It was basic white ribbon of death skiing today on all manmade snow.
Considering these skis are not exactly a groomer type of ski they did fine as long I was on top of them and keeping them on edge. These are not a ski that you want to let wander at least not on groomers. I found that I had to keep my weight centered over the camber portion of the ski, which is only 108 cm. Too far forward or to far back and thing got dicey.
I put a 1 deg base edge bevel and 2 deg side bevel on these and detuned the rocker but I had to stop and do some extra detuning to the tips about 3-4 inches beyond the end of the rocker/reverse side cut portions of the ski. Once I did that it was like someone flipped a switch on these skis, they went from hooky and almost unmanageable to carving well at moderately fast speeds. The turn shape is initially long if just placed on edge and allowed to carve but will shorten up with addition bend in the ski.
All in all a success I think. I cant wait to get them in soft snow. I think they will shine there. I may do a bit more edge bevel work especially up in the rocker portions of the ski to smooth out the transition from running a flat ski to being up on edge.
unknownSat Jan 14, 2012 7:01 pm
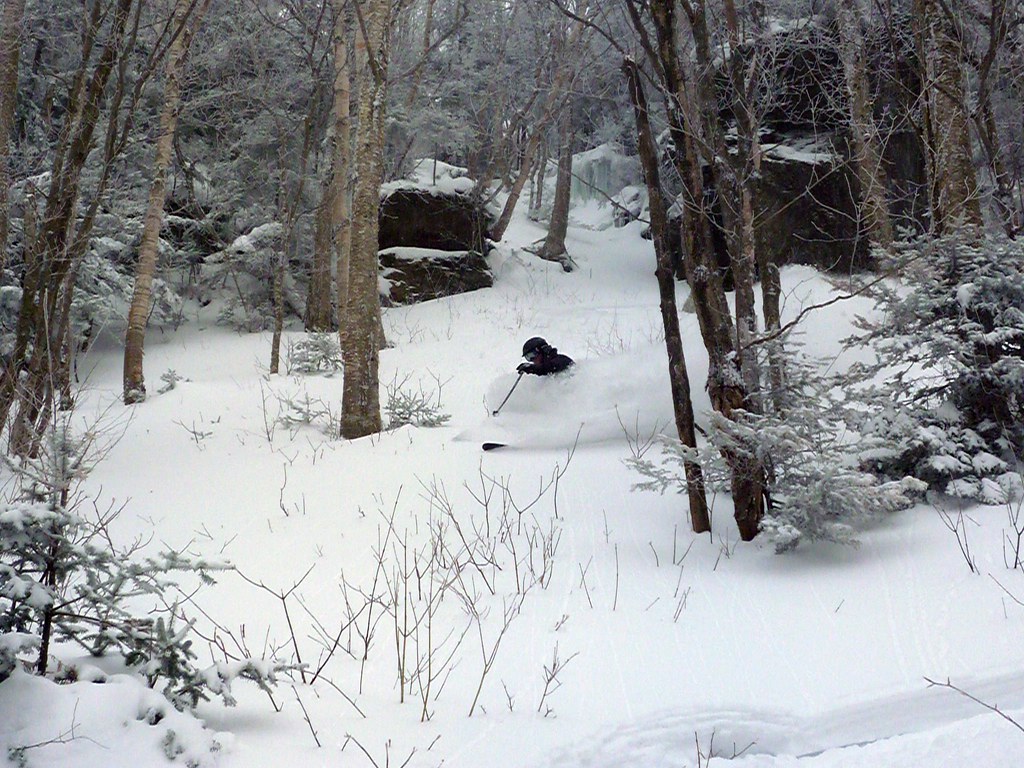
Vin and WhiteRoom skis in action today at Smuggs, VT.
unknownSun Jan 15, 2012 12:12 am
Nice! So it has snowed in New England.
unknownSun Jan 15, 2012 10:21 am
What a sweet shot with a great composition of the ice, rocks, trees, and pow! Looks like fun.
unknownTue Jan 17, 2012 6:46 pm
Great shot! looks like you had fun
unknownSun Mar 04, 2012 12:10 pm
Great stuff!
unknownMon Mar 26, 2012 12:31 pm
Saw the right most (full size, non mario) pair in person at Squaw on Wednesday and they looked even better in person! Good work!
unknownMon Apr 02, 2012 4:37 pm
Yeah that was my buddy who is out there with his family on vacation. Thanks.
He's even skiing one ski with a bad sidewall that I was sure would blow out.
unknownTue Apr 03, 2012 12:59 pm
Started cutting some new tip and tail molds to account for different lengths and rises. Cut a 8.5 cm rise over 35 cm length mold today. I'll also be cutting a 8 cm/ 30 cm tip. Tails will be 3.5cm rise over 25 cm length.
unknownTue Apr 03, 2012 1:50 pm
Just added six 4 way equal pressure clamps for core and sidewall construction. Woot. Can't wait to use them.
unknown
really nice looking skis!
I have done my first pair with veneer tops and they look beautiful but I would like to add one or more stringers like you do in yours. I have no experience with veneers and was wonderng if you would like to share the process?
I had planned on taping them togheter on the top side and remove the tape after pressing but the epoxy soaked trough the veneer on the pair I just finnished and I am worried that the tape will be really hard to get of.
unknown
PTTR if you google veneer jointing you'll find lots of info.
I clamp my veneers between 2 strips of MDF with one strip overlapping the other to be used as a cutting surface. Google veneer jointing jig. I use a veneer saw to cut the veneersinto strips. Once I have the strips cut I then clamp them between the MDF strips so that the MDF strips are flush and the veneer is overhanging by 1-2 mm. I use either my belt sander or my router with a bearing to trim everything to smooth edges for jointing.
I assemble e panel by taping my strips using paper first aid tape. This is the same tape i use to attch my tip and tail spacers. This is just placed on the back of the panel and is hidden in the final lay up, nothing to see, nothing to remove. Not much more to it that that.
Definitely do the research, there are some good videos out there to show you how to do this. Based on my success with this batch of skis I'm planning some more intricate jointing designs for this seasons builds.
unknownTue Apr 03, 2012 10:41 pm
Thanks!
Will Google. But your way sounds like a working and smart way of doing it.
Petter
