
Mon Apr 11, 2011 2:49 pm
THere probably is a thread for this already, but the search function suck and the google doesnt bring anything up;
Has anyone used PolyUrethane sidewalls yet? If so, how did bonding, and procedure go? and suppliers?
THere probably is a thread for this already, but the search function suck and the google doesnt bring anything up;
Has anyone used PolyUrethane sidewalls yet? If so, how did bonding, and procedure go? and suppliers?
yes, works fine. i pour them with PUR-resin into a channel i route out on the core blanks.
prior to that i used stripes of PUR-board that i glued to the core using polyurethane glue.
they're incredibly tough and bond very well with epoxy, but they're a pita when it comes to machining them.
http://lmgtfy.com/?q=polyurethane+sidewalls+site%3Askibuilders.com%2Fphpbb2
its so sinister :'(
no thread for this... :(
can elaborate a little bit more on the process to create the urethane sidewall?
do you just pour urethane resin onto the side of the core like this : http://www.skibuilders.com/howto/skicon/sidewalls.shtml ... ? does it stick?
Stop sucking please
Hi, my reaconing is polyurethane sidewalls are the way to go, that said I have not made a single ski or board yet so this is just my opinion based on other eexperience and research.
Polyurethane sticks like shit to a blanket (timber and epoxy), its easily poured into a channel. The key is to chose the correct material as there are so many grades of polyurethane for so many purposes. Try a waterclear version, its tough as - used for car and 4x4 suspension bushes. This can be tinted and comes in many hardnesses so a little trial and error might be needed there.
Cheers
hey chris
do you route the channel in the side of your cores after profiling or before?
Something like a router bit for making the groove of a tongue and groove joint, or a slot cutter? then make a dam on the upper and lower side the whole length of the core and pour it in?
my plan is to pour the sidewall before profiling, I'm using a 3hp router with 40mm 2 flute cutter same as Mike Magruder uses, so I hope it cuts the polyurethane ok it should. My polyurethane is 90A hardness water clear , so hopefully although its pretty firm it should cut well. This to me seems far far easier than using UHMWPE with no real disadvantages, time and results will tell eh? I'm finally pretty close to my first build, my profiles are being cncd right now and materials all coming, my profiling table is 1/2 built and is hopefully going to leap forward in the next 3 weeks.......yeah right! cheers
oh yeah I mean to say Tim, I am not pouring it into a slot in the side of the core but into a full depth channel in the top face following the sidewall end to end curvature approx -5mm inward and +2 outward, roughly....... cheers, Rich
looking back in the forum it looks like this is the trough method, but using polyurethane instead of epoxy means a durable well stuck sidewall with less hassle.......
Most polyurethanes become brittle at colder temps and shatter easily when flexed. It's a good idea to freezer test samples before putting a lot of time and money into something that will fail when it gets cold. Water clear PU is especially brittle when cold.
G-man
sure will be watching for that, although the specs looked pretty good when I checked it out a while back, will let you know
cheers
the stuff we use is called Adiprene LF950A with the E300 hardener. it has outstanding properties even at really low temperatures. only downer is that it's a brownish color and pigments don't look as good as with a clear system.
what resin did you get, richie?
we router a board-shaped groove into our core blanks with a 1/2" straight two flute router bit. the PU-resin is then poured into the groove. the resin we use needs to cure for 16h at 100C, that's what the hotbox i posted in another thread is for.
the cores are then planed on the underside until the sidewalls start to show. after that we cut the core profile into the upper side of the core.
that way you get a core with a seamless sidewall/tipspacer that sticks to the core really well.
i just wish the polyurethane wasn't that hard to machine...
I see what you guys mean! What I was thinking in hindsight seems a pretty stupid way to do it!
Plunge router and top bearing copy bit for the groove?
http://www.barnes.com.au/catalog/barnes_pdf/tds/Barnes%20-%20WC595.pdf
this is the brew I am using
cheers
Rich
@falls: way too sophisticated
i just draw the outline of the board on the core and follow it with the router.
@richie: that stuff is really expensive! i pay about 15,- EUR for each kilogram.
I am not using tip spacers, my core is full length and I just trim it 10mm inside the the finished shape. It will require doing one side wall at a time and then nose and tail seperately, lucky that stuff goes off relatively fast.
ah, so you're pouring the tipspacers as well! it'd be great if you could take some photos of your process and post them here (especially how you pour the tipspacers).
I definately will. The only reason I havent started a thread yet is I am doing bits and pieces when I can.
So far I have my cnc board template, 10 cores, core profiling bed, camber profile mould. I still need to build my press, buy the rest of my materials and get it all happening before our southern hemisphere winter. Today was the first snow dusting at the resorts so I am getting keen!
I was planning on doing the moat method but time constraints and the lack of having a large planer(this snowboard is 13" wide finished) I went this route. I also have been wanting to use base material as my tip fill so gave it a shot and I love the way it works and I get to recycle my scrap!!
has anyone tried planing this stuff? I've read through here a couple times but don't remember seeing it. I'm trying to think of the fastest way for me to do this as I'd like to give it a go.
have a look at the journal entry i just posted
we plane the stuff with a 13" delta planer all the time.
first a couple passes on the top to get everything nice and flush (with the pouring there are often spots where the PU is a bit thicker than elsewhere). then we flip the core over and start planing the underside until the sidewalls show completely and then a couple more passes to get to the final center thickness.
after that the core goes onto the planer crib and the profile is applied.
the PU is pretty tough stuff, so we have to make smaller passes to keep the planer from bogging down. wear on the knives isn't that bad though.
I ll run a test piece thru the planer tonight see how it planes my guess is it will plane alright.
hey nrg, looks like you missed my questions before. would be great if you could answer them
Just saw that
Funny we are bouncing around like this at the moment
I'm going to order some soon and do some experimenting. I want a more protective sidewall but don't want to deal with plastic strips. I also like the idea of being able to color it at will
I never contacted them I ordered a small batch of it and did some tests bending it cutting it then decided to go for it in a build and it turned out way better than I expected so I guess the test of time will tell, and the guy I built this board for is a park rat so it will get abused.
I used the 380 on my topsheet tests painted on with a paint brush just to test and definately need to use some type of roller instead and no I didnt use white pigment which I should have but I like what the outcome has so far gunna do some more testing of this soon.
put a sample in the freezer for a couple of hours at the coldest setting and try the bending tests again. that'll give you some reassurance on the cold temp properties of the stuff.
are you using the same resin to coat your paper?
@chrismp yep
chrismp, I was just checking out your thread and your mote method is excellent. I think that is the best way to pour the urethane.
Ok today I routed out a few cores so they can be urethane filled mote style. I can already tell this will be the best method. I have cores prepped for 3 different methods.
1. Mote style with unprofiled core
2. Trough method with profiled core
3. Trough method with unprofiled core
I will post pics and my experiences when I get the test pieces done.
cheers, one thing i always forgot to mention is that you need to keep the core level when you pour in the resin so it doesn't build up in one place. i do this by simply shimming the core blank and checking with an air level.
Copy that. I was planning on using tape to seal the edge with the trough method so it will fill without overflowing.
i was referring to the way i do it with the channel in the core blank. but i guess its equally important with the trough method.
main disadvantage of the trough method is that you need more resin to fill the whole sidecut radius.
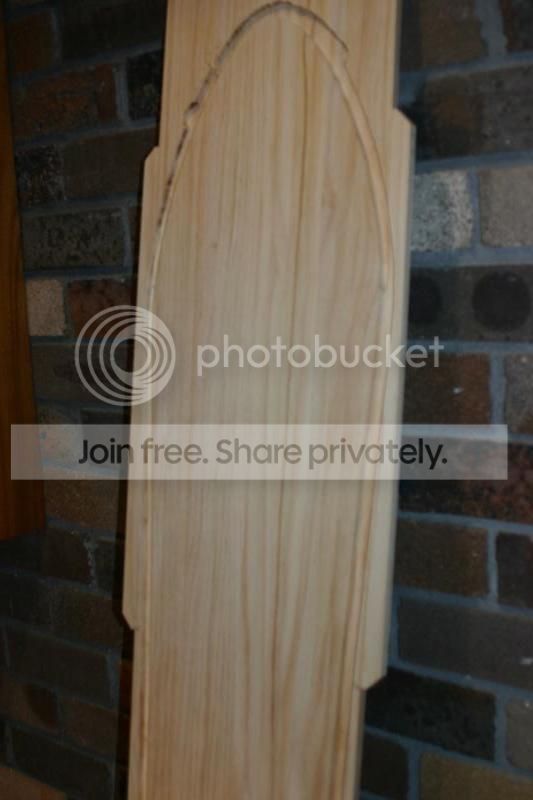
This is the unprofiled core routed for mote method urethane filling. I will make sure it is level before filling
Yes it will take more urethane to fill but the result will be worth it im sure. Trough filling looks like a PITA
I have a fair bit of casting experience making various parts for projects where I work. I like the trough concept and I think it can be streamlined to make quick and easy sidewalls. Perhaps look into TADCO urethanes, I've used 11D54 and 11D80 with good success. They can be dyed any number of colors, although I have only used black. They kick off fairly fast so you need to keep moving once they are mixed. A thick (1/2") silicone mat, cast from Silicones Inc. GI-1000 silicone can be spring clamped around the outside perimeter of the core forming a flexible and tight seal against the wood (you could use a sheet of aluminum with Stoner mold release, but you need to make sure the perimeter is sealed well, the urethane pours like water...) After a quick degas in a vacuum chamber I would stand the core vertically and fill the urethane from one sidewall until the urethane comes up the other side (should work because of the low viscosity of the urethane and since you cut the channel around the tip of the ski, just like a liquid column manometer). Wait for it to cure and peal off the silicone mat and you should have two real nice sidewalls.
I've dealt with Bryce Norelius from Sterling Supply Inc. in Minneapolis, (612) 331-5125, on several projects. He is very knowledgeable and can get you product at reasonable prices. Last time I ordered the 11D54 it was $35 for a 2qt kit, or $340 for 10 gal of 80331 (shore 75D urethane)
That would work well but in my case the swallow tail design would become an air trap if i were to pour it standing vertically. I could lay them down on the side and fill from the high point of the edge to avoid trapping air I guess. Your idea of the rubber is excellent, I could use 2 of my routed cores face to face with the rubber in between them, by clamping the 2 cores together the rubber is held firmly in place and would not leak.
Damn I think this could be a winner.
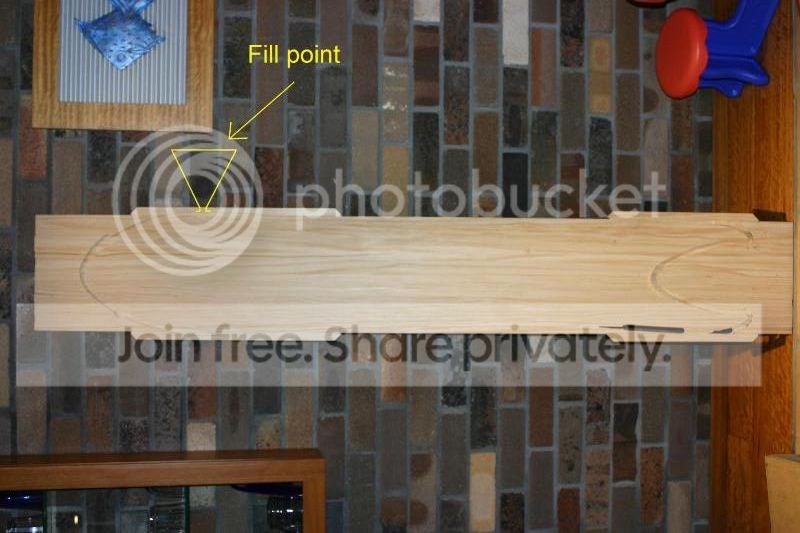
Please ignore where I routed right through the core. My tolerance was 0.5mm due to the fact I had already sanded the boards down to close to finished size before I decided to go mote style.
if you clamp the two cores together and pour one sidewall for both, how are you going to separate the two when everything's cured?
He will use a piece of silicone rubber between the two cores so one face of the sidewall is in contact with the non stick silicone surface. The silicone mat provides a good seal around the wood so the urethane doesn't leak out of the channel.
Correct ^
How does this stuff look?
http://www.dalchem.com.au/images/stories/datasheets/polyerethanes/rigid/tds/tc78_tds.pdf
i see! and what's the advantage of filling the channel this way vs filling it with the core blank lying flat on the ground? i never had problems with the resin leaking from the core blank.
Chrismp, I'm loving you're approach to PU. I was wondering whether you'd tried setting your recess at an angle - using some kind of V-Groove router cutter?
In that case there is probably nothing to gain. I guess I will try it sitting level like you have done. I just found a local supplier for the smoothcast 380 so its all go at my end.
like i said before, make sure the resin you choose can take the cold temperatures! some urethanes get brittle when they're exposed to cold temps. a quick call to smooth-on should solve this mystery.
Not so easy for me to call being in Australia. I sent an email and will post the reply if I get one. I have not seen any specs on any of the products I have looked at regarding cold temp performance.
i know...i've never seen it mentioned anywhere either. but a product specialist at the company that produces the adiprene i use told me to watch out for that.
Gozaimas
I think these guys might be the Australian distributor for Chemtura (the company that produce the Adiprene that chrismp uses).
Cheers falls. I will give them a call.