Archive › Equipment and Tools (e.g., ski press, core profiler, etc)
dyesub press retrofit - Page 2
Equipment and Tools (e.g., ski press, core profiler, etc) · 30 posts
hugocacolaMon Mar 21, 2011 1:38 am
Hey
You must contact Carruesco At ISO .. F.Carruesco@isosport.com
and you should contact ths person from LAES from Italy, they have a good Top SHeet for a very reasonable price comparing with iso... laesnpi@la-es.com
Good Luck
strangesnowboardingMon Mar 28, 2011 4:21 pm
sublimating onto polyester fabrics is the jam! we will be doing real athletic/shredwear with our board graphics on them.
no more cotton t's!!
also we solved the topsheet problem (for the moment) sublimating onto 100%polyester microfiber fabric that goes under a clear topsheet.
about to drop some serious coin on the real stuff from isosport but the shipping puts us into the summer, too late for this seasons graphics.
chrismpTue Mar 29, 2011 1:18 am
yay for t-shirts!
so the polyester fabric bonds well?
strangesnowboardingTue Apr 05, 2011 6:30 am
well shittt.....
gangsta by strangesnowboarding, on Flickr
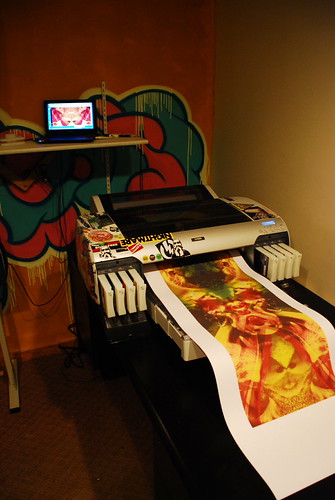
so after testing every possible option we still can not get the printer to spit out a whole graphic. it stops around 53in long every time, we have tried different graphics, different computers, different drivers. finally with a couple calls into sawgrass we discovered that their driver (powerdriver) simply can not handle the image size/complexity of our graphics in order to print the full 70in print.
we will be working on how to scale down/resize images so that we can print without tiling the images.
we used the standard epson driver and got a full print but the colors were really off (as i knew would happen). we are now testing with a RIP (multirip) to see if it can handle the print size/complexity.
I know that people are getting the full prints with the sawgrass driver so any help would be appreciated. what PPI settings are you using? how large are your files? who else is using rips to print and which ones will be worth the cash? how complex are your images (full color or just a few gradients?) computers frustrate me especially when im so close to getting it right.
otherwise everyone is stoked, more and more art is getting done and submitted to our office every day, and we are actually getting to put them on snowboards. we have ordered a small quantity of PBT from lindsay (action sports tec) to test on prior to the huge order from iso.
i will post some more pics once we have the topsheet in house and or can print the whole damn snowboard.
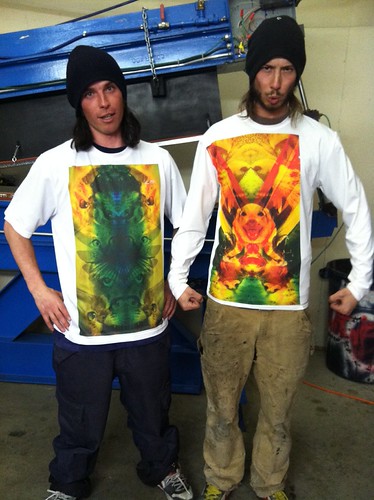
nightmare shredwear by strangesnowboarding, on Flickr
heres the new hotness, and a reason to use all the half prints that we have been forced to mess with.
strangesnowboardingTue Apr 05, 2011 10:15 am
in good fashion we got it figured out after i posted this morning. doh.
our programmer buddy came over and worked out some kinks with the MULTIRIP program, installed some new PDF readers, flexed fingers and the printer spat out the whole graphic.
conclusions: the sawgrass driver (commercial versions at least) will not support complex colored files of any size (or PPI setting) you need a RIP and some other magic to get snowboard size graphics. the powerdriver is meant for at most tshirt size full color images, or large areas that are only one color number.
live and learn. one step closer.
BrazenThu Apr 07, 2011 11:50 am
Weird. I just use the Sawgrass drivers and have no problems with high-res full color full-size graphics. Everyday. I guess I just got lucky.
strangesnowboardingFri Apr 29, 2011 1:00 pm
so one month later we have some promising results. i will share some top secret pics (must be my flickrfriend to view them original size)
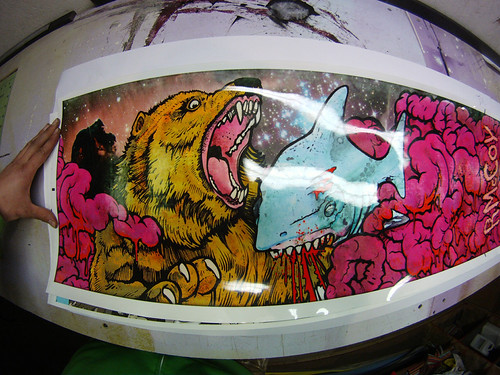
r.mccoy2 by strangesnowboarding, on Flickr
rmccoy promodel (this one is a snowboard now!)
http://heavyshred.blogspot.com/2011/04/sneakpeak.html
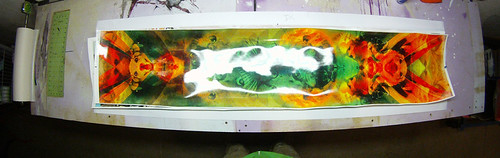
catsanddogs by strangesnowboarding, on Flickr
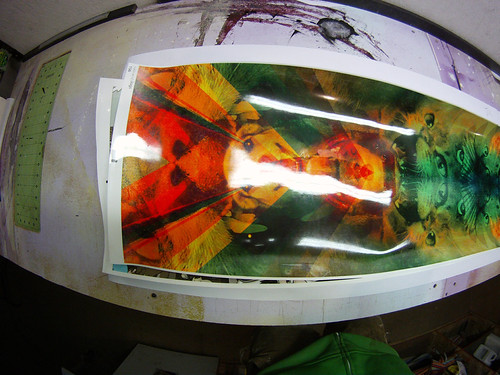
catsanddogs2 by strangesnowboarding, on Flickr
cats and dogs! the colors are off on this one but it still looks rad. too much red....
we have one more but i better not post it here with kids around.
these were all done by artists that we commissioned to do work and i am really impressed with the results. the PBT topsheet and print make the snowboard look like a legitimate product standing next to other brands.
couple questions/concerns/learning curve stuff i will share:
how much dye is everyone getting into the PBT? ie. how light is the transfer paper? there is still a good amount of dye on mine, to the point where we can sublimate twice without that much loss of clarity. we are not exploring this to do 2topsheets but rather to use the topsheet transfer again onto a tshirt/underaromor/something.
has anyone experienced "resublimation" when you press the board? my contact paper was dyed faintly after we pealed it off of the board.
our temps and times and pressures:
375F, 2min, high pressure
temp is the most important variable, higher temps lead to faster times (2 minutes) and less shrink (3%).
pressure is the most important constant, get it right and keep it there.
we are still working out the kinks in the press setup but the end is near!
chrismpFri Apr 29, 2011 1:35 pm
where's that damn "like" button when you need it?!
awesome work!
RichukFri Apr 29, 2011 1:55 pm
Blown away by the graphics!!!
The guy who took briefed me on the process suggested that the transfer paper would look as though you could re-print - but he wasn't an expert. Brazen mentioned 150 ppi recently. I haven't looked into it yet. Mine don't quite look as you describe.
Don't know if this helps - photobucket will re-size:
image no longer available
Not come across re-sublimation, but your aware of ghosting and have added a layer of paper between the transfer paper and the teflon sheet ; )
fallsSat Apr 30, 2011 11:50 pm
when I peel the masking tape style adhesive paper off the subbed topsheets from CODA after a heated ski press there is a faint image of the topsheet on the adhesive side of the masking paper. I think this is pretty normal.
I might guess that the hotter you press the more likely this is. I press about 80C
I'm also interested in peoples thoughts of how deep the ink gets into the PBT and whether this is effected by time/temp/pressure. When I ski my skis and they get damaged the white under the graphic comes through pretty quickly and makes the skis look old pretty quick. eg when you scratch the topsheet with the end of your pole
strangesnowboardingTue Jun 14, 2011 5:26 pm
so we started building again after a month or two off, still working but not in snowboard mode.
cleaned the shop, reset all the machines, ordered supplies, got some new hardware
, software, graphics, and we are back at it.
we switched the layering on the dyesub press up so that we have thicker aluminum against our heat plate, fixed some microleaks in the hoses, ready to keep working.
put one of the previously sublimated topsheets in a deck and the end result was brilliant. i cant wait to crank out more. they are looking way better with each generation.
for a fullsize pic go thru here--> http://heavyshred.blogspot.com/2011/06/untitled.html
last weekend of riding lifts at the resort! arapaho basin closes on the 19th. all the mountains have snow top to bottom for late summer backcountry camping expeditions.
hugocacolaTue Aug 02, 2011 1:29 am
Hi Tom
Can you help me with some info about where do you get the silicone pad for your Sublimation press??? Do you have some stock or do you know where I can get it???
Best regards
Hugo
knightsofniiTue Aug 02, 2011 3:52 am
yea when you peel the protective tape off the topsheet some graphic will come with it, i've seen that every time with tops subbed from 2-3 different companies.
I also know people are stacking multiple layers and subbing onto 5-10 sheets with one transfer. I dont know the specifics but will find out.
What is that an epson 4800/4880 series? How did you get it going right? I'd love to know the details because I can afford one of these today and really need to get up on printing/sublimating.
knightsofniiTue Aug 02, 2011 3:57 am
and if you can get it... ISO Coextruded pbt metalflake... so not only do you get those killer graphics but they're sparkly and pearly too.
If you cant, aside from the standard iso coex, there's Laes coextruded, that's whats on our boards and they're really good, cant tell the difference between them and iso.
hugocacolaTue Aug 02, 2011 5:24 am
hello doug aint searching for pbt, but the silicone sponge used on the press...
strangesnowboardingSun Feb 13, 2011 9:26 am
ok, after watching brazen fab up his sublimation press it got me in the mood to pull our other pneumatic press apart and tackle the dyesub conversion.
we originally talked to lindsay over at actionsportstechnology about getting the press that he developed, but after seeing pictures, it was just a smaller fixed cavity snowboard press. we have recently been using only the adjustable press for snowboards (see other thread) so i figured that a retrofit of our existing press would be the most cost effective solution.
we will be purchasing a 4880 and hacking it for bulk inks (not sure on what brand yet, but i have heard that sawgrass is the ideal solution and reasonably priced). i still have a ton to learn as far as color correction goes, as well as scanning and reprinting graphics. but most of that work will go to our graphics guy anyway, i just have to make sure that the printer and press actually function.
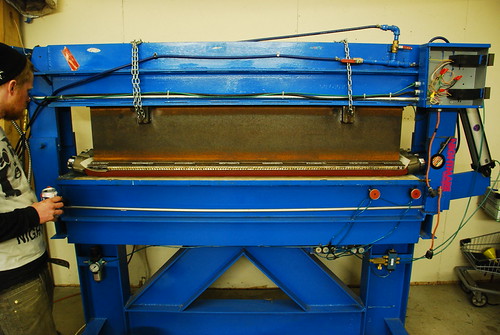
here is what i am working with and my plan for the retrofit.
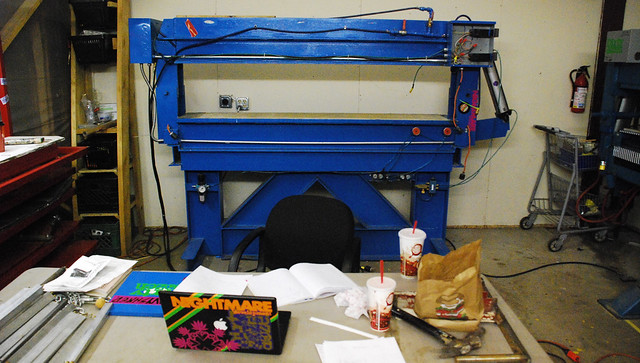
newoffice by strangesnowboarding, on Flickr
the major obstacle is welding up a removable "frame" to attach to the top of the current press cavity. we are looking for at most a 2" gap to load materials in.
i was thinking steel ibeams, or something really custom in aluminum, but that will probably depend on what materials i can get cheap from the welding/steelyard next door.
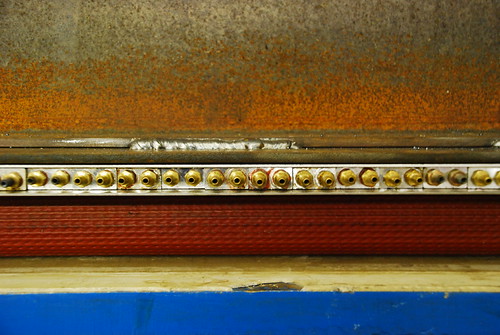
firehose will rest on the steel plate that is currently the bottom of the press cavity. above that i am tinking a large alum plate (a la brazen) or a cattrack (i already have the alum tube for this so it would be cheap).
then comes my first major question. what material will work as the best heatsink or insulation between the hose and the heater blankets?? i currently have been using heavy duty gasket material (silicone rubber) but i found a couple other silicone pad options.
http://www.tradekorea.com/product-detai ... sheet.html#
or
http://tw101592891.trustpass.alibaba.co ... rced_.html
i am not too worried about burning up our already insulated firehose but i want to be safe.
i already have the heater blankets, good to 450F, but will need to make sure that the PID situation can handle the current going into the blankets. can anyone recommend one that they have used all the way up to 400F??
i am currently running omega 1000tc top and bottom, but they may be broken (i cant get them to tune correctly) and am at the end of my rope messing with them.
thats all i have worked out at the moment, waiting until tomorrow to check out my steel/aum options so that we can move forward with this.
BrazenMon Feb 14, 2011 9:05 am
I used a .250 (right around this) 60 durometer silicone sheet, from diversified silicone if this helps. There is about a 50° difference in temperature over/under. Lower the temp the hose is exposed to, the longer the life.
hugocacolaThu Feb 17, 2011 2:12 am
Make Sure you have a 20mm thick aluminium plate to print the graphics, and make sure is a new one... more thickness better heat distribution
strangesnowboardingFri Feb 18, 2011 8:11 pm
alright, got some work done last night
and a bunch more changes i would like to make to the press, but after a pressure test last night im confident that we will be ready to sublimate once the printer arrives.
bit the bullet and purchased a 4880 and all 8 inks from sawgrass (there is a 500dollar rebate on the 4880 right now if anyone was looking, til march or something if i remember correctly). lots of coin down.
went and spent a couple hundred at the steelyard for some plate and 2 i beams. had my buddy come up with his wirefeed so the welds would look clean.
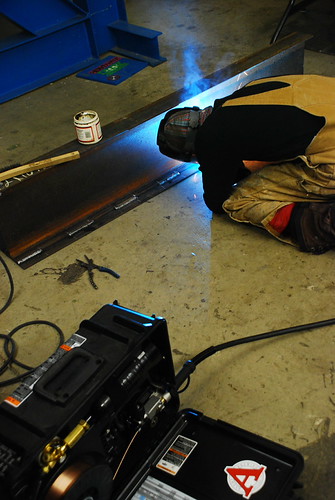
rastawelds by strangesnowboarding, on Flickr
couple hours of welding later and we had a heavy steel box that got put in our heavy steel press.
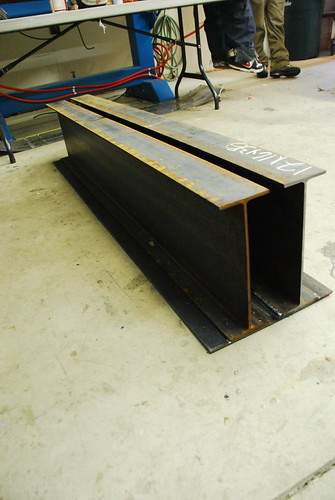
steel box by strangesnowboarding, on Flickr
almost finished by strangesnowboarding, on Flickr
squishhhh by strangesnowboarding, on Flickr
at this point i am missing a heavy alum. sheet and the heater blankets (and a couple sheets of silicone and Teflon.
first question-
should the heat be on the top or bottom? i would prefer the heater blankets to be on top so that they are not touching the hoses (or touching steel that touches hoses) and also so that i can load the graphic rightside up.
i will test both positions, but i feel like this is more of a preference.
i also think that i am going to have to switch out the firehose to a set that does not have the big metal endcaps. they really compromise the cavity that i have made and i think that they will cause too much wear/rub on the current hoses.
other than that pressure is consistent and flat, we have an area large enough for graphics (13x66), if i can get heat this week then we will be ready to go.
now to get some materials to sub on!
oh and the ram still lifts the top half even with all that extra. overbuilt makes sense!
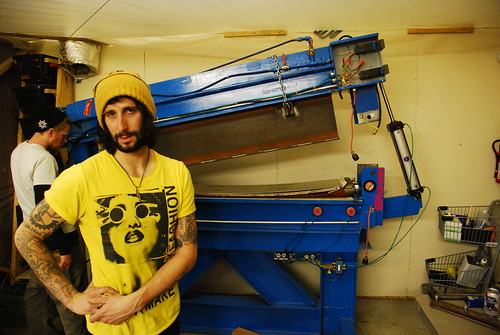
dyesub pacman by strangesnowboarding, on Flickr
knightsofniiSun Feb 20, 2011 9:52 pm
holy crap! I'm personally hoping to be able to make a sub press way simpler... but that's pretty damn neat!
However we might just make something that can be loaded in/out of our board press, I'm just worried about burning stuff up with the added temps.
One more thing i'm curious about: anyone who's already subbing got any tricks to mitigate the "shrinky-dink effect" that crown base goes thru after sub pressing? They get all wrinkly along the edges, and graphics can actually skew and warp. I've heard other brands dont do it as much like iso, but crown is way more available here.
fallsMon Feb 21, 2011 12:00 am
I reckon if you have the space build a stand alone press. You would prob do all your subbing first in a production run, but looking at the supply delays etc that people like on3p have experienced I reckon there would end up being more than one time when you found yourself swapping back and forward between the sub outfit and pressing boards. In my opinion would be a real pain. Plus ideally you want to do your subbing prep and printing/storage in a "clean" room.
The pressures aren't as high as pressing boards so the press could be smaller, lighter and cheaper to build.
RaccoonMon Feb 21, 2011 8:00 am
Hi,
Put your heater on the top and insulate it to prevent heat lost! (180C is very hot!!).
PBT material will shrink (about 5-7%) so 66" long is bit short...
Rac
BrazenMon Feb 21, 2011 8:15 am
I put my heater on the bottom, I kind of figured "why re-invent gravity?" since additionally, I use that blanket in the board press for now. I put the graphic on a sheet above the heater, face up then the topsheet, face down with another aluminum sheet then apply pressure <upward>.
strangesnowboardingMon Feb 21, 2011 8:20 am
thanks for the replies!
raccoon
i will def be putting the heat on top, and 66 was a compromise on size for the moment. i dont see us pressing over a 57 for now, and honestly if we can sublimate graphics in house i wont mind if they are a little short for the time being.
falls
as a cost effective solution, the retrofit was the way to go. we dont plan on using this press for snowboards any more (until "production" deadlines require 2 presses working at the same time), so hopefully we will not have to change out much. even then it is easier to get in and out than a new set of molds. we will also be using this press for skate decks once the molds are designed and cut.
both presses sit in an enclosed cleanroom within our shop, so im not too worried about it getting dirty.
the idea behind doing everything in house is that we will never have "production" runs of multiple graphics, shapes, etc. will have the ability to put whatever artwork on whatever board, and do it all in a timely manner.
i seriously doubt that we will be spending days sublimating the same graphic over and over, and when that time comes a standalone machine would be the best option.
anticipating the printer this week! will let you guys know how it all goes.
BrazenMon Feb 21, 2011 8:26 am
btw, pbt only shrinks 3-4% maximum.
strangesnowboardingWed Feb 23, 2011 8:49 am
a boxtruck came today with presents
brand new 4880, sawgrass inks, transfer paper
party all the time
having our electrician buddy check out the controllers and then we are ready to sublimate. i have some random materials laying around that we will try first until our topsheet gets here.
stay tuned for results. we have been looking thu all the graphics submitted so far and i cant wait to get them on our boards. really radical shit. be on the lookout for porn, gore, drugs, all the things that go hand in hand with this sport/hobby/lifestyle that we enjoy.
RaccoonThu Feb 24, 2011 6:53 am
Cool! did you make your graphics yourself? we are looking for some radical graphics for our custom snowkiteboards and kiteboards.
Rac
www.evasionkiteboards.com
strangesnowboardingSun Mar 06, 2011 7:40 am
so we tested heat and pressure last night.
bladders hold well at 40psi, small leaks around 80-90psi but im not too worried about that at the moment.
bladders ala headmonkey with 5" discharge hose.
managed to heat up our 3/4" alum press plate to 350f without much difficulty. no fires, melting or movement.
click for pics
http://heavyshred.blogspot.com/2011/03/ ... tmare.html
we are in the process of receiving graphics now, so will be running color correction tests this week as well as sublimation tests on various materials.
im stoked on our progress.
strangesnowboardingWed Mar 09, 2011 2:42 pm
so just tested our setup on some old topsheet we had laying around.
350 for 10 min at 13psi (from compressor)
not snowboard related,
we will be doing more tests on other materials (sticker vinyl, base, tshirts, hats, etc). snowboard topsheets will come out once we have all the graphics in house.
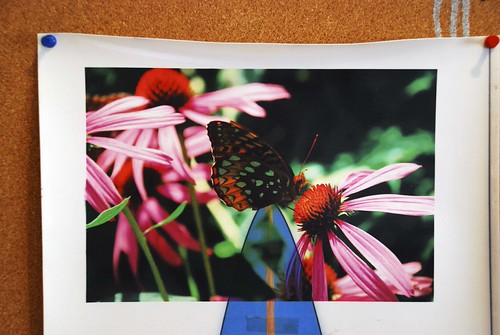
sublimationtest by strangesnowboarding, on Flickr
strangesnowboardingThu Mar 17, 2011 7:41 am
ok folks,
so over the last week we discovered that sublimation is not magic (unless you have more than ample supply of iso PBT topsheet). we tested various materials on both sides to see how they would work. i will list the failures first.
_ clear topsheet (unknown composition, treated on one side for adhesion). no go, tested at various temperatures and times, image will transfer but we lost all sharp lines and ended up melting the topsheet in a way that we would never be able to lay it up.
_ vinyl (white sticker vinyl) works to transfer the image clearly but the combination of heat and pressure takes away the "sheen" of the material. you end up with a pretty good full color sticker that is not glossy. (we have since determined that there is no vinyl that will hold up to this heat so sublimation on this material is not an option.
_ base materials (various crown products, all colored (grey blue, white). these worked as well as i have seen any sublimated graphics on snowboard base. harder to get temp and time down to reduce shrinking/warping. we ran these samples (printed on the snow side) through the grindrite and the image stays for many passes.
these materials worked very well and we will continue subbing on them.
PBT (old already been sublimated topsheets) this is the right stuff, comes out with great color variation, strength and sharpness. bonds in layup great.
does it need UV protection (im not too sure yet). we are surrently trying to source a large ammt of this. if anyone has any hookups at iso let me know, or at least the right person to talk to to get stuff shipped overseas.
65% or more poly blend fabrics. all your tshirt dreams came true! full color full print tshirts! sick and easy.
ceramic/plastic coated metal (like parking signs) works great! not snowboard related but will provide some paying work for people in the factory.
others to consider at this point. vinyl for signs (impregnated fabrics) i have heard works well and is great for banners.
im a little discouraged with crown at the moment and wish we had the right suppliers here in the US. bumps in the road but i think we are moving along at speed now.
