:: View topic - Ski building so far
Posts: 60 · 60 posts
unknownMon Aug 30, 2010 8:10 pm
Before I start, I would like to say thank you to everyone who posts on this forum and those who helped with building the website. It has led me to start this addicting hobby that I will keep working on for a while.
I started reading here about 4 or 5 years ago, and have been working on building skis (or atleast thinking about it a lot) since then. I am a junior at Western Washington University studying Manufacturing Engineering, and am lucky enough to live 40 minutes from my parents who have an awesome shop with every tool in the book.
I bought Scott's (iggyskier) old ski press, and it took me a little bit more than a year to set up all the other jigs and molds.
I guess I have to wait a day and have a couple posts before I can post pictures, so you guys will have to wait until tomorrow or the day after to see pictures.
unknownMon Sep 06, 2010 6:11 am
../
unknownMon Sep 06, 2010 6:13 am
My first pair of skis came out pretty good. They have a maple/poplar core with maple sidewalls. I didn't actually glue on sidewalls I just made the core wider than the base.
unknownMon Sep 06, 2010 6:14 am
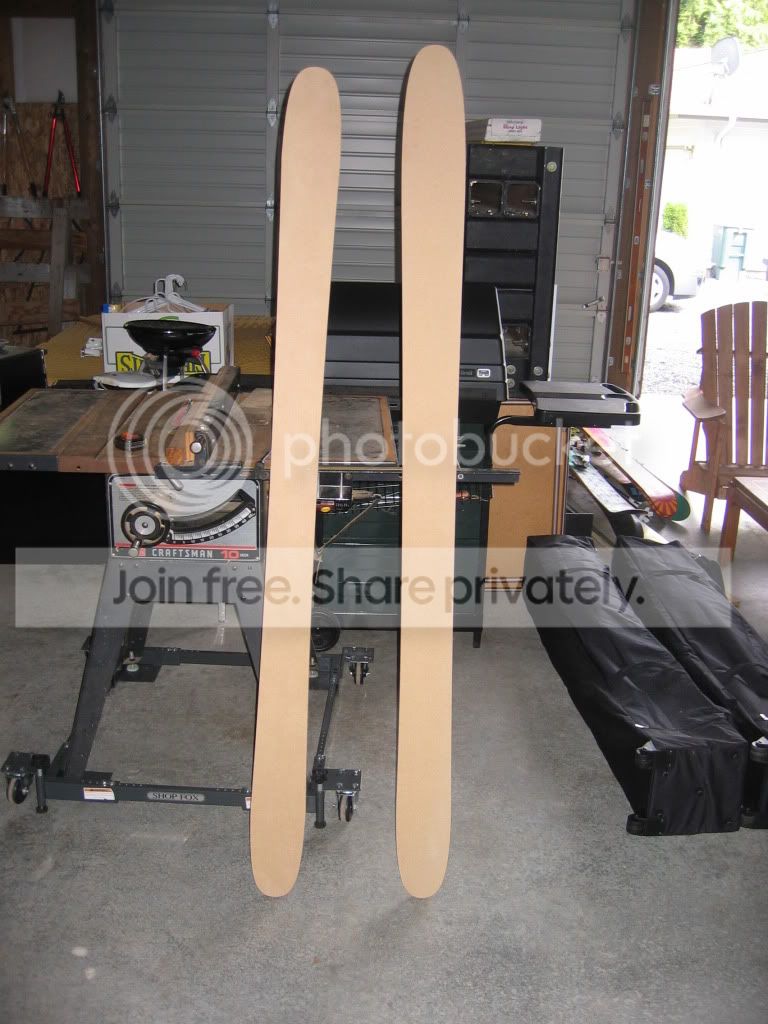
Here are the first ski templates I got cut out. One is a 185 that is 103 mm underfoot and the other is a 191 that is 120 mm underfoot.
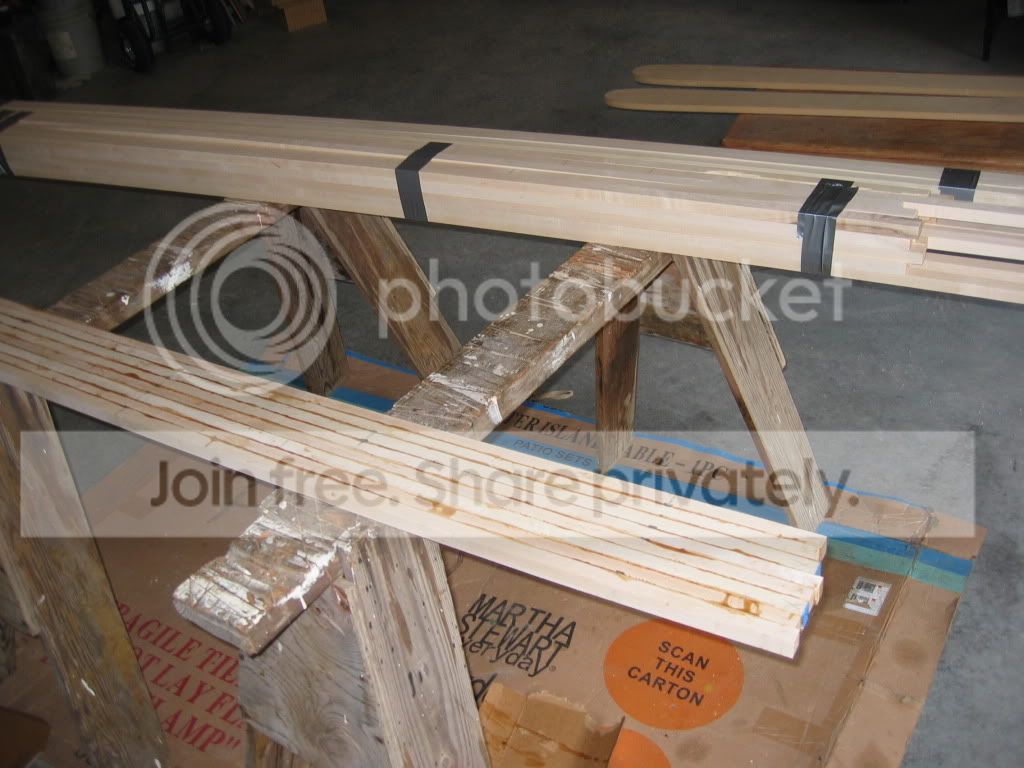
The first core I laminated next to some extra core materials. I used maple and poplar
I built a core profiler out of mdf, here are some photos of it
image no longer available
image no longer available
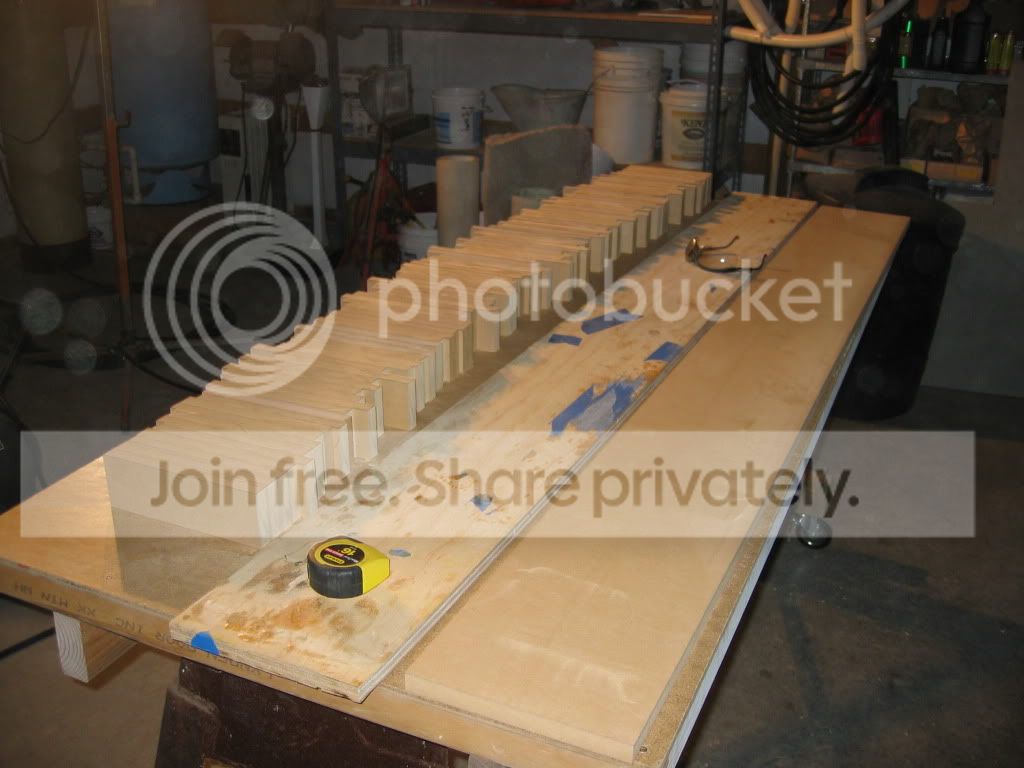
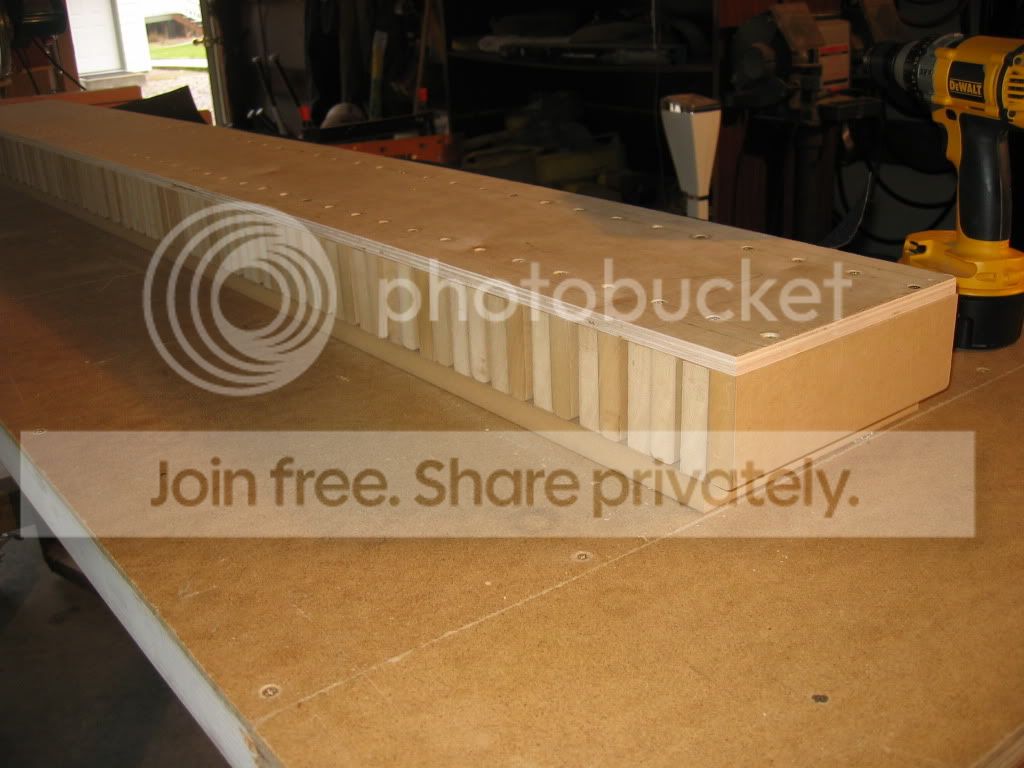
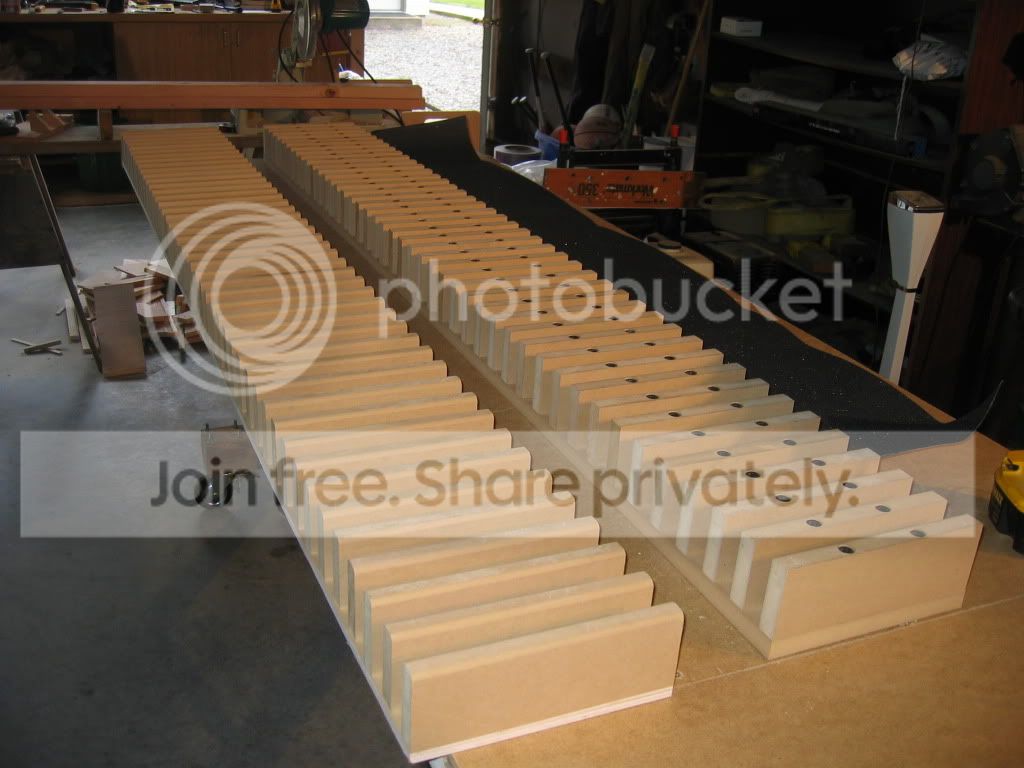
Here I profiled a fir 2x4 to test it, I also removed a lot of the mdf blocks to lighten the profiler so that it was easier on the planer
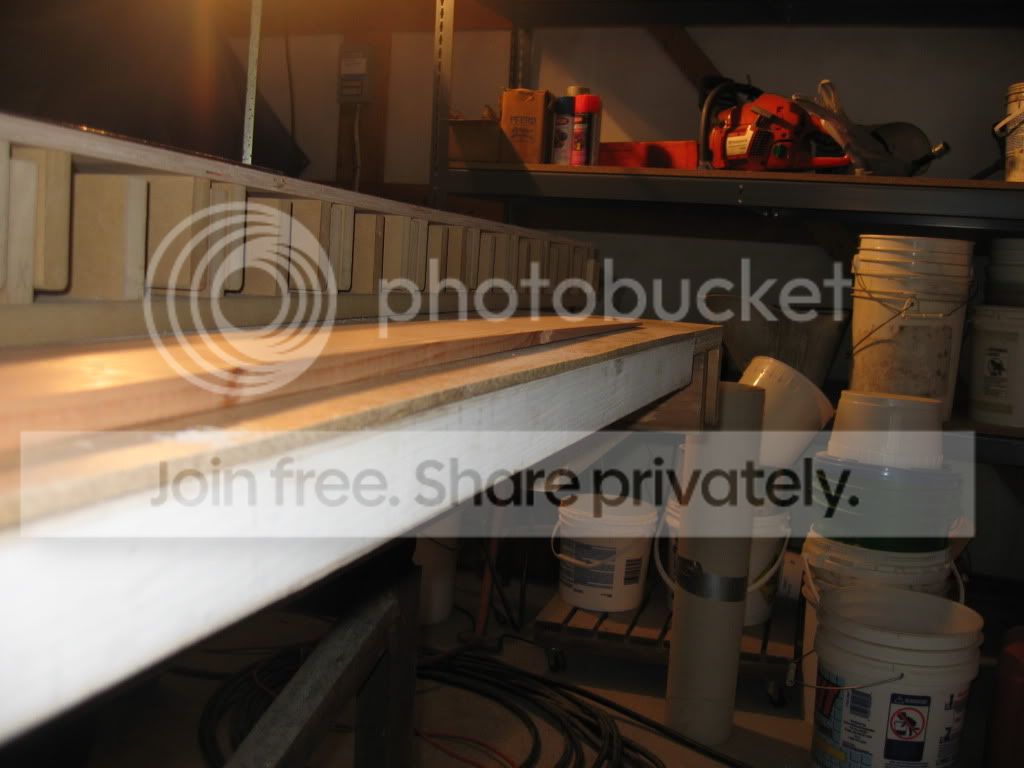
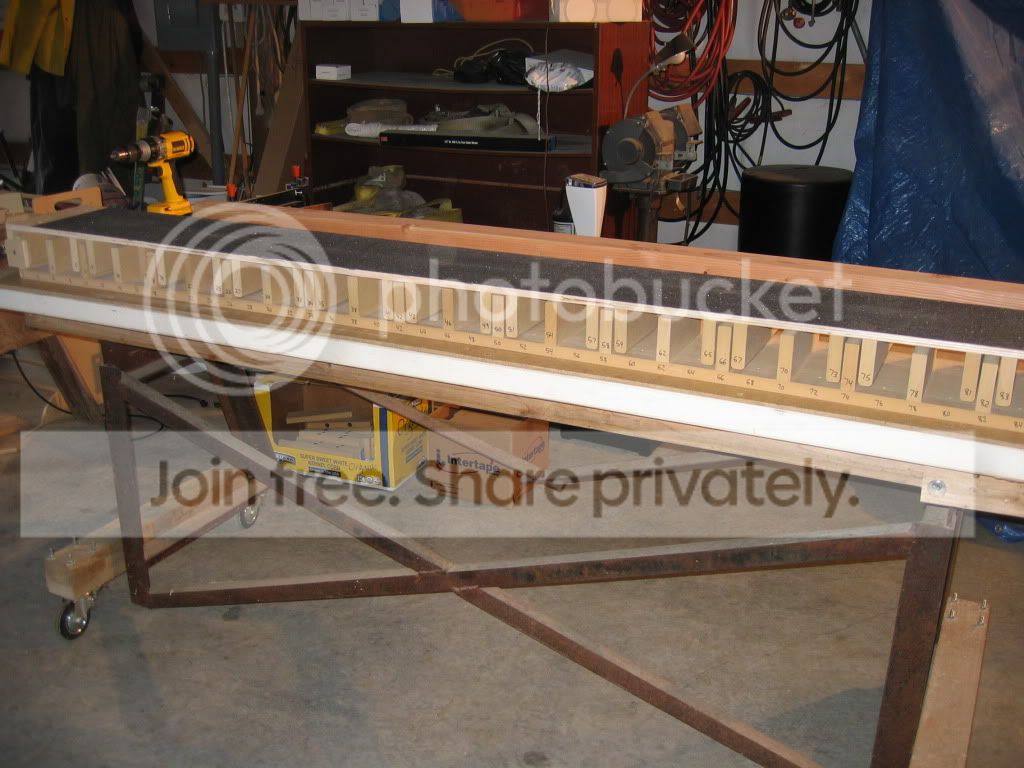
I ended up building some modified sawhorses to use as infeed and outfeed tables
image no longer available
Gluing edges onto base material for my first pair of skis
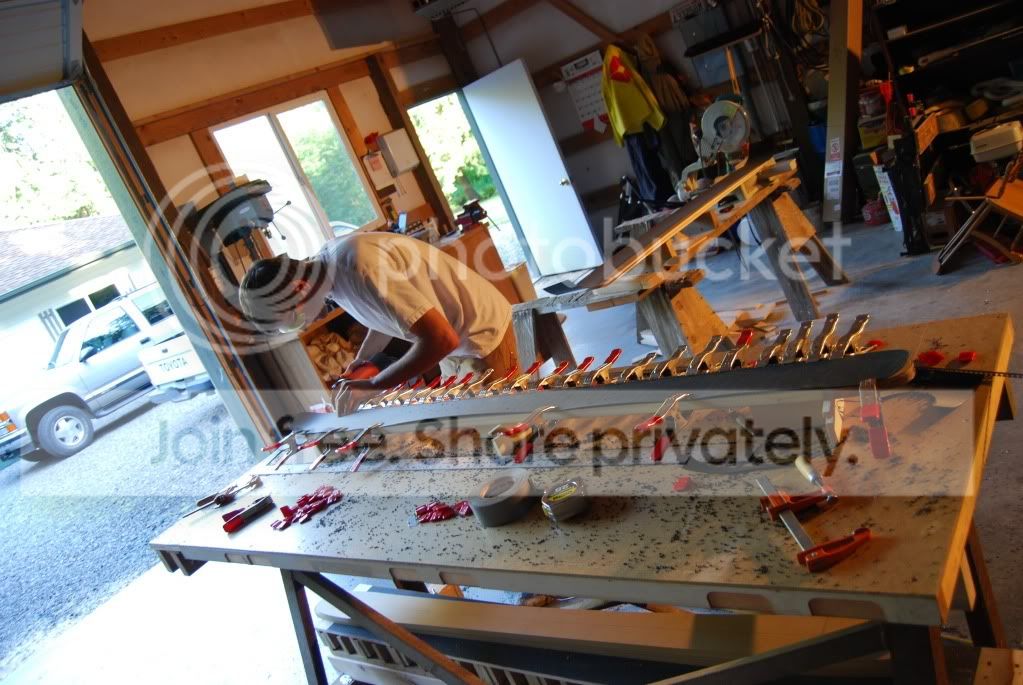
Materials ready for layup
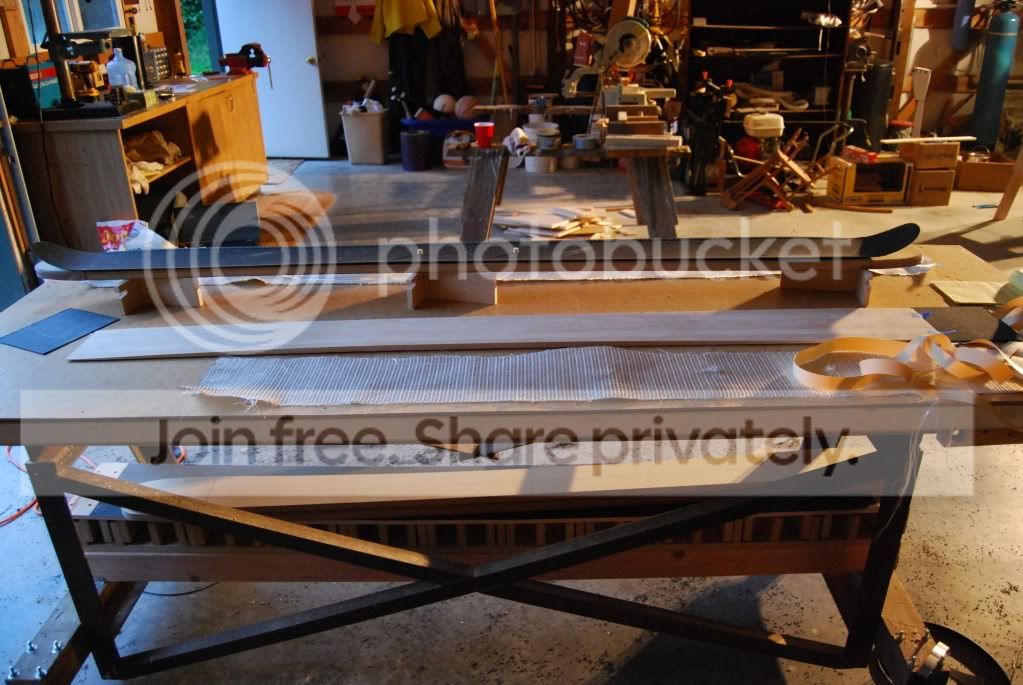
Layup
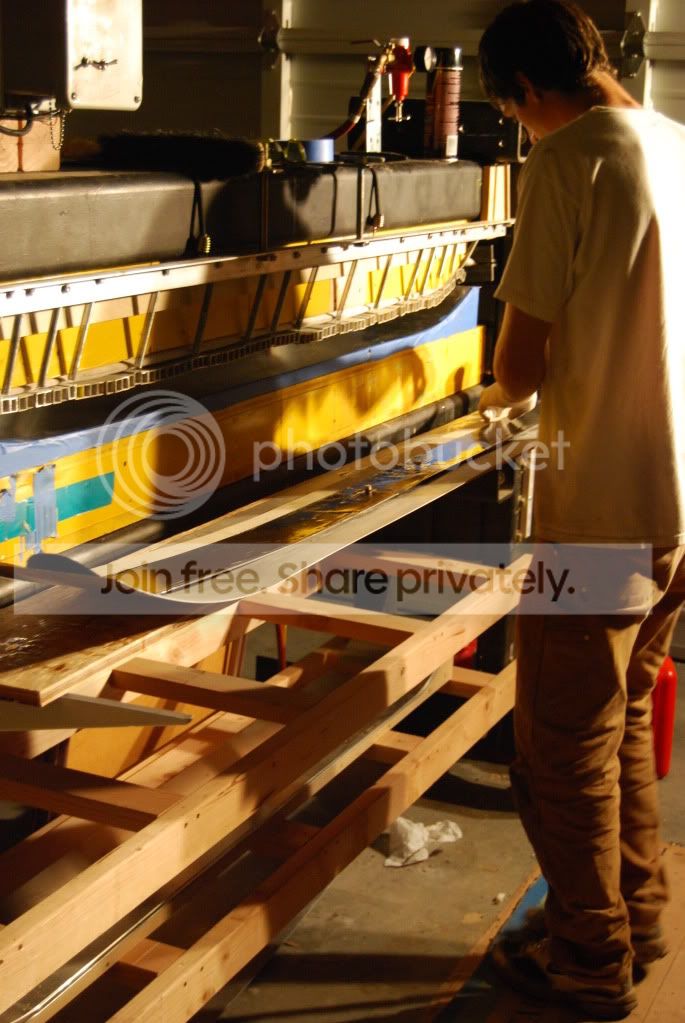
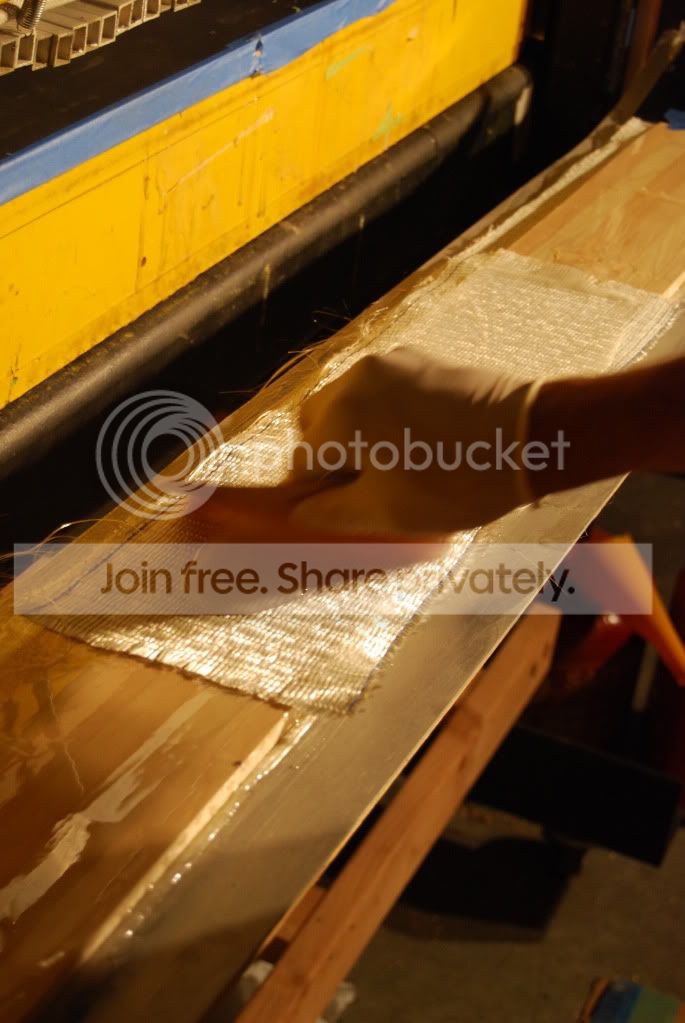
In the press
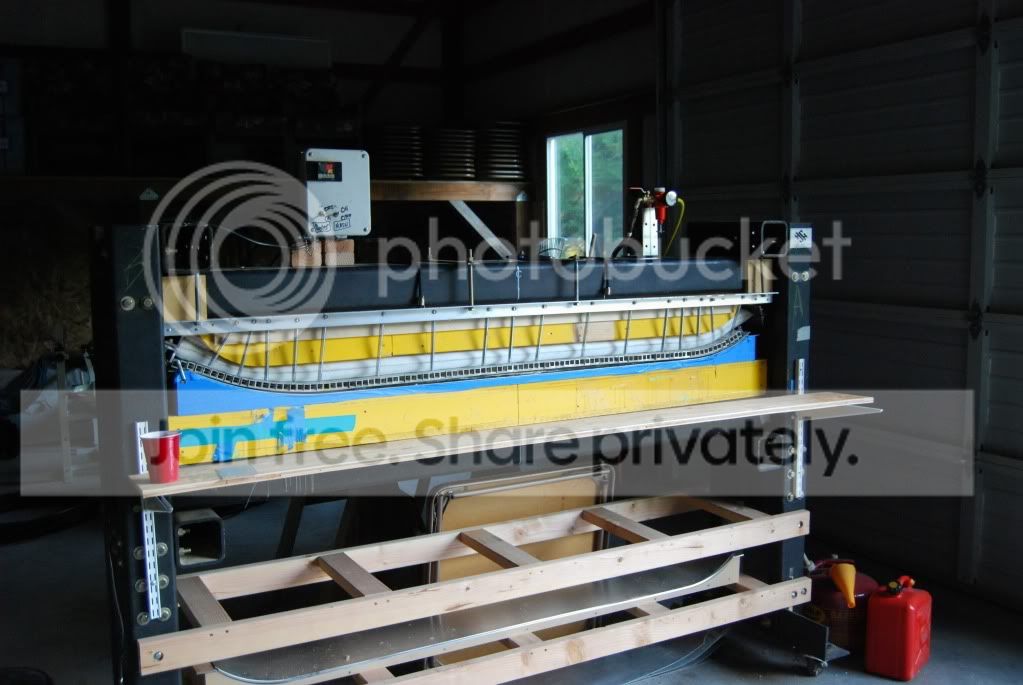
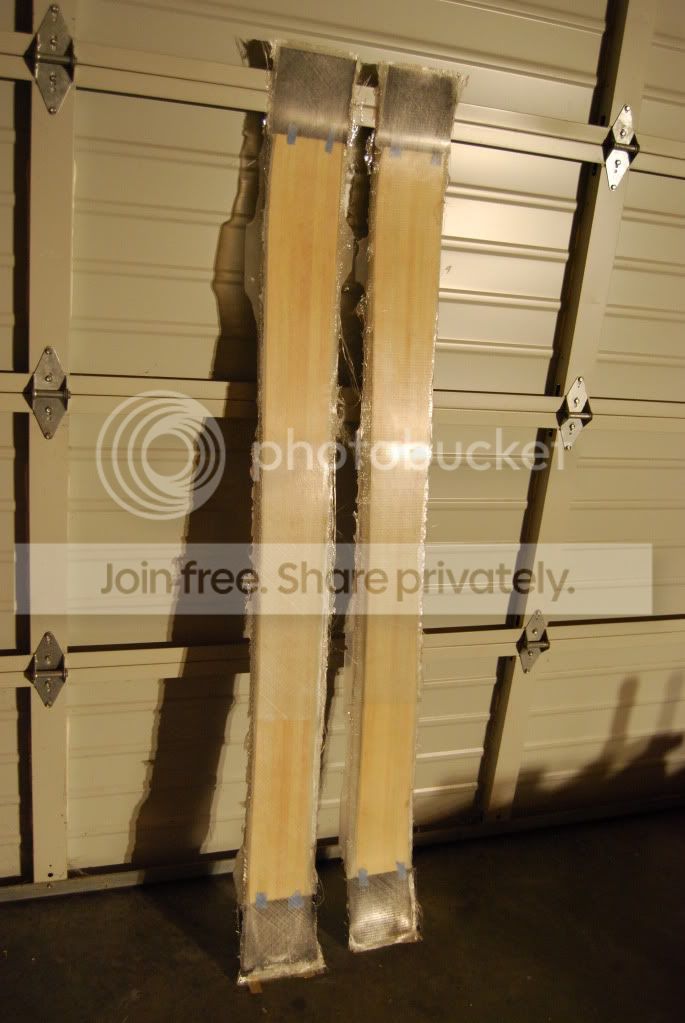
unknownMon Sep 06, 2010 7:42 am
Well done! Nice work!
What a nasty core profiler!
Did it run without difficulties through the planer? I know these DeWalt planers are strong bastards.
unknownMon Sep 06, 2010 7:49 am
Excellent work. I noticed you pre-bent the the tip/tail section. Was it difficult to get the core placed on the base? I see you also used dowels to keep the core from shifting. I guess you have been reading the forum
Way to go!
unknownMon Sep 06, 2010 11:32 am
The core profiler has been working ok, I am building a router bridge to replace it. At first I was having problems with the core not staying on the grip tape, but I think that was because my infeed table was a little bit too tall. The crib would stop moving but the rollers in the planer would pull the core through. I shimmed up the planer and now the core stays in place.
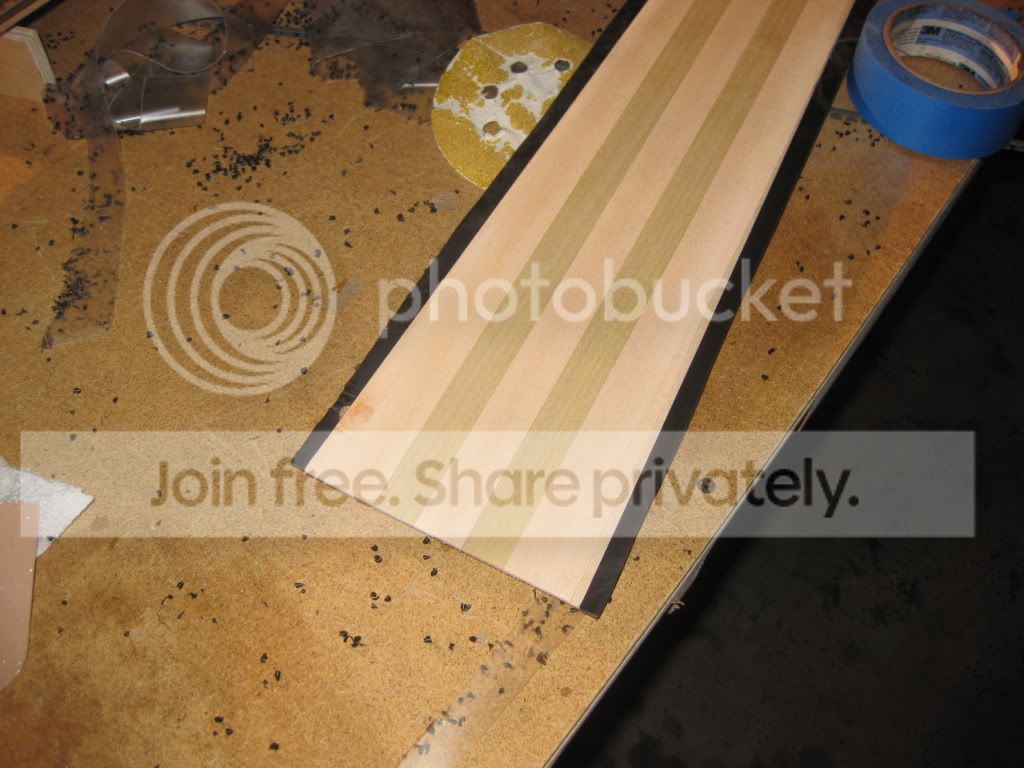
The planer was having some trouble pulling the whole crib through, and thats why I removed some blocks to lighten it. I still push with a little bit of pressure to make sure it doesn't get stuck. It worked pretty good for my skis with wood sidewalls, but the planer blades wrecked the plastic on the skis that I built for my friend Mitchell. Its kind of hard to see in this picture but if you look on the left sidewall the planer ripped out some chunks of plastic but left the core smooth. I am hoping that a router bit will leave a smoother finish.
unknownMon Sep 06, 2010 3:01 pm
I know the feeling...:-|
I'm working on a different approach with the planer. I haven't tried it yet. So I have nothing to show. Check my journal later this week.
Cheers
unknownMon Sep 06, 2010 8:39 pm
I didn't actually prebend the tip and tail sections, that's how they came off the roll from the skibuilders store. The base naturally wanted to curve that way. I didn't wrap the edge material all the way around the tips, and that is why it is still warped there.
It was pretty difficult to get the core in place. I am leaving about 3 mm of excess sidewall over each edge, and on both pairs that I have built so far it shifted in enough on one section of sidewall so that the edge had nothing above it. I was trying to use dowel markers to line up the core, but I ended up having to drill out the holes in the core larger to make them fit easily into the dowels on the base. I didn't want to have to mess around during the layup to get everything lined up, I wanted it to fall into place.
For my next pair I plan on gluing dowels to the cassette or aluminum skin in order to line up the core.
unknownSat Aug 27, 2011 2:18 pm
Like I was saying above, I am pretty satisfied with how my first pair of skis came out. They have
Black p-tex base from ski builders
Rubber foil over the edges
A layer of 22 oz fiberglass
Maple/poplar core with 3/4" strips. The pattern was M-M-P-M-M-P-M-M. Like I said above, I left the core wide for the sidewall. The thickness in the middle was about 10 mm.
A two foot long piece of fiberglass used as a binding mat
Another layer of 22 oz fiberglass
I didn't put a top sheet on the skis, the top layer of glass seems to hold up alright after 1 day of skiing.
I used QCM epoxy and resin.
I pressed the skis at 80 degrees celsius at 50 psi for 45 minutes, and then shut the heat off. The first ski I left in the press for an additional 60 minutes, the second ski was more like 30 minutes. They seemed to come out the same, no camber or rocker changes. You can tell on the first ski I used more resin on top of the core, as the top layer of glass is less textured than the second ski.
I think the final shape is 145-120-135. I didn't use the template that I took a picture of above, I drew it up in snowcad and somehow ended up having the skinniest part of the ski 20 cm back from center. I drew up a new shape in catia (solidworks) at the lab at school and had a local cnc company cut it out. They are charging $80 per shape.
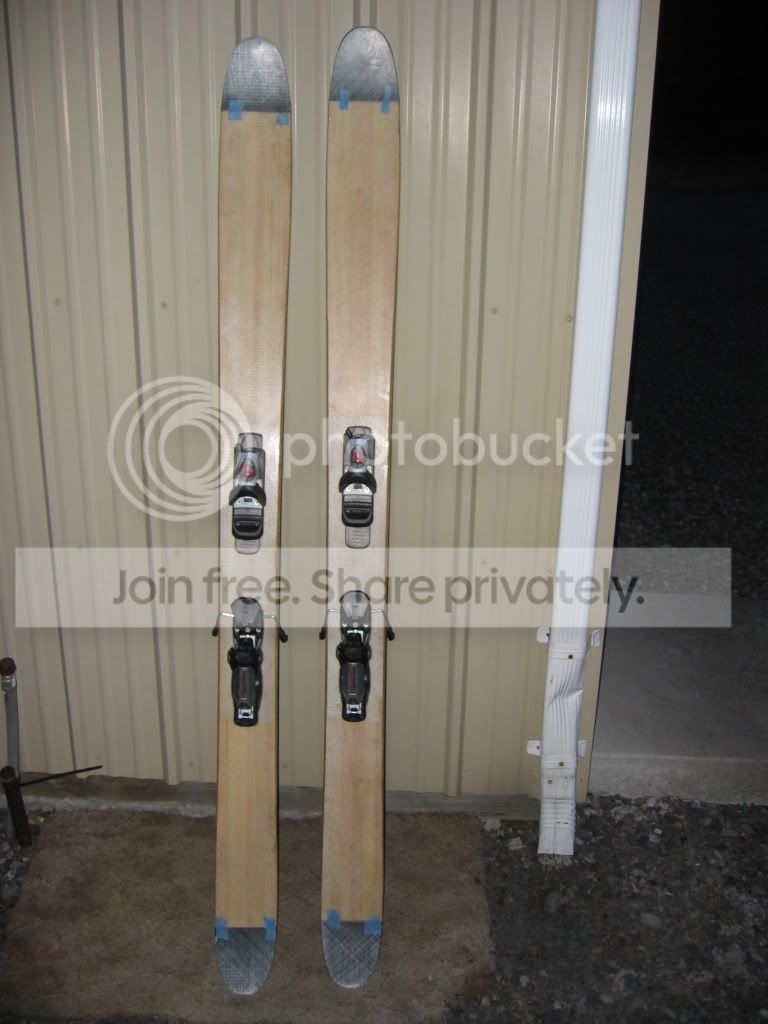
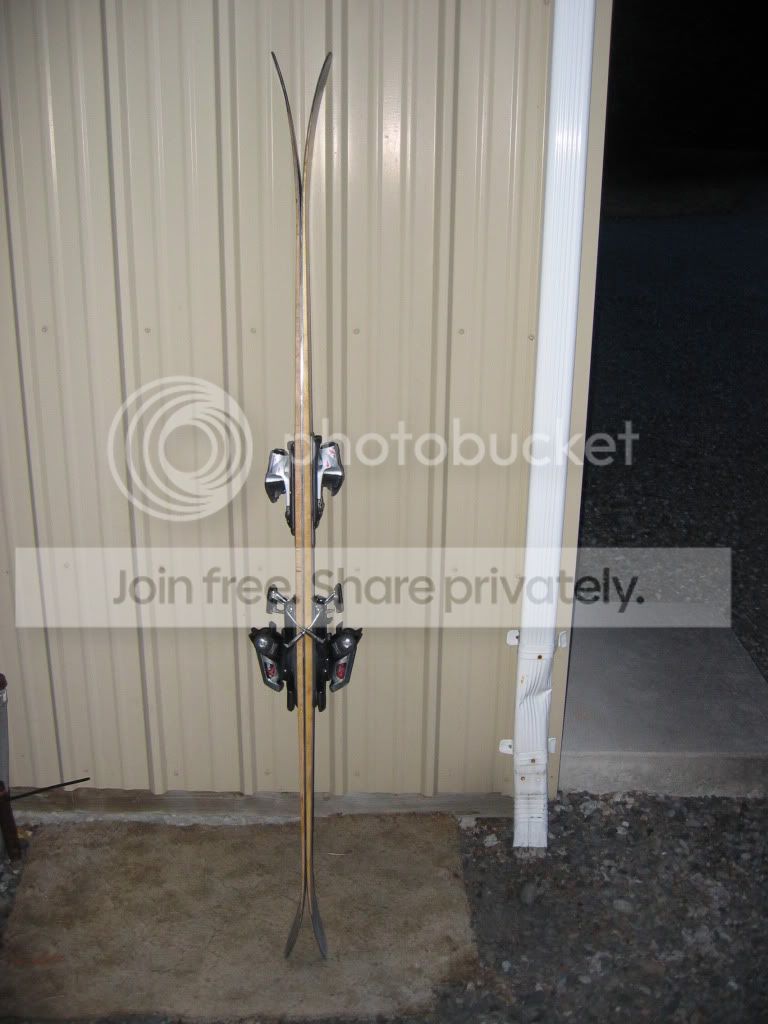
image no longer available
For the sidewalls, I used a laminate trimmer with a tilt base to angle them at about 23 degrees. I used a router bit that had a top mounted bearing, and I just ran the bearing along the edge. The first pass I made I didn't sand/grind the edge smooth, and every little bump showed up on the sidewall. I finished this sidewall with a marine varnish. You can see a small spot of fiberglass where I didn't get enough epoxy, I will probably just put some glue over that.
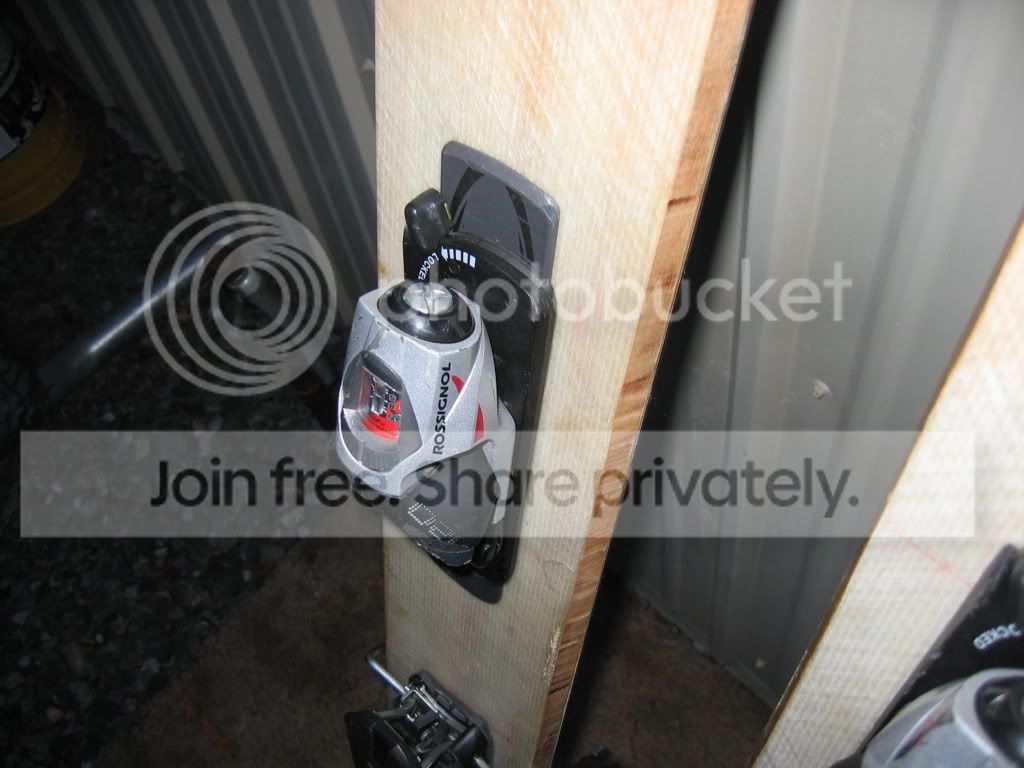
The other sidewalls came out much better. I cleaned up the edge first, then cut the sidewall at 15 degrees, then at 23 degrees. This was less taxing on the router bit and left a smoother finish. I coated this sidewall with epoxy mixed with acetone. I like this finish more, it is harder and probably more waterproof.
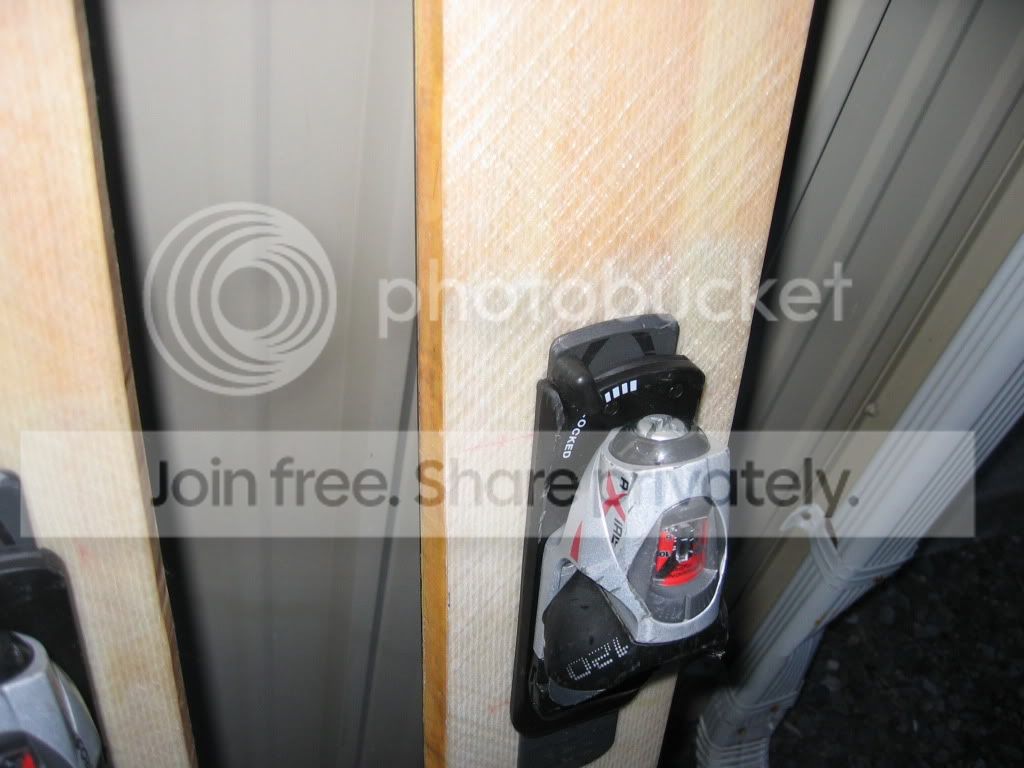
I really like the shape of these skis, I was trying to design something that would be an everyday fresh snow ski for skiing at Mt. Baker. I might even build another pair with more rocker, less stiffness, and less weight and put dukes on them.
I got to try them out in July, which was really fun even though I was skiing over small ponds and large partially frozen suncups. I think I will love these skis no matter what they feel like because I put so much work into them.
unknownSat Aug 27, 2011 2:33 pm
Wow, great job man, those look great. I am thinking about setting up a flat camber with a similar rocker profile to what you have (maybe more tail rocker with more of a gradual rocker up front like the Moment Night Trains) and I have been reading about how much the ski relaxes after pressing. I was wondering if this means that for flat camber you should press with around 2-3 mm of camber in the press, or can I just use a flat mold? I guess if you have a pic of your mold that would be great. Thanks.
EDIT: after going back and looking at the picture during pressing, it looks like you do have some camber in your mold, so did your ski turn out flat? Or are they just pressed together in the rocker shot? It kind of looks like there is some camber in the shot of them sitting on the table.
unknownSat Aug 27, 2011 5:08 pm
Well, the first pair of skis that I built were pretty fun, but a little bit stiff.
Since then I have built 8 more pairs of skis, 3 for myself and 5 for friends. I also built some skis with one stratight edge that can be locked together for downhill riding. I am told this is called splitboarding, but I keep telling my roomate that I built him skis.
I really like this forum, I was able to fix problems with my skis and build them better than before without ever asking for help.
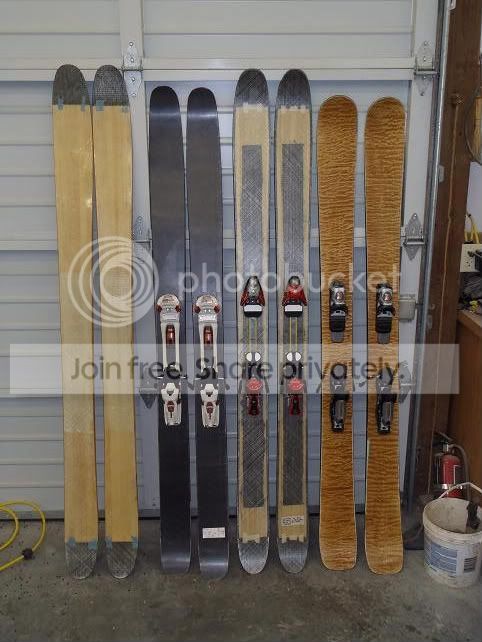
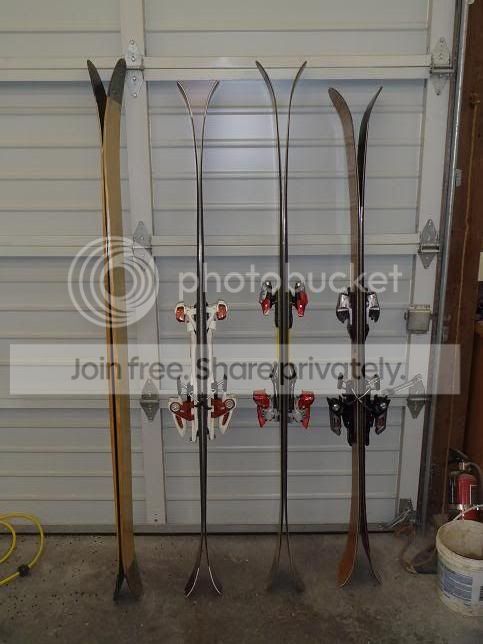
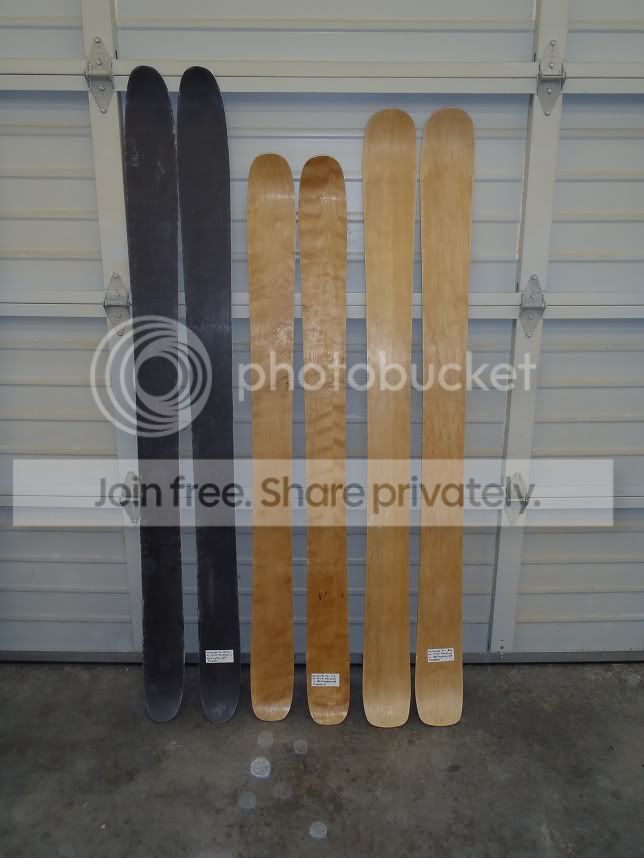
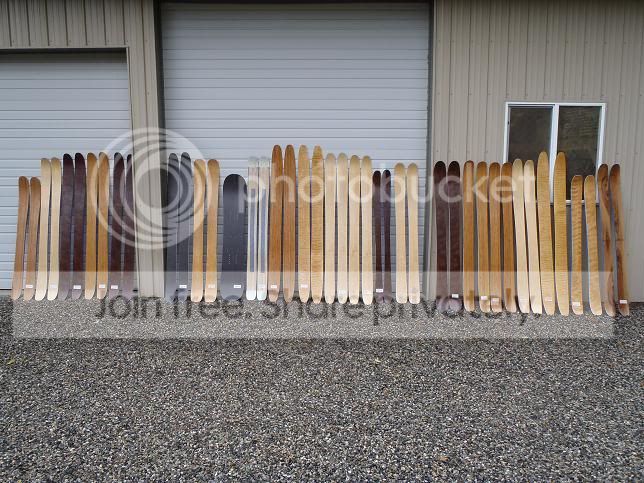
From left to right
These are the 1st pair of skis I built, explanation above
These are a rocker/camber ski that I built for touring. 187 cm long, 116 underfoot. They came out ok, the bases arent flat, not enough sidecut, and they are too short and tapered for what I was using them for. I will probably sell them this fall. There is also more uni carbon below the carbon fiber topsheet, and the tips are a bit too stiff, they sink and dont come back up in heavy snow. But they are pretty fun to ride is slush/soft resort conditions. They have a bamboo and poplar core.
These skis were really fun, skied them a bunch this year. Its the same ski shape as the 1st pair I built, but with more rocker. 191 cm long, 145-120-130. Pintail design is really fun on pow days. All poplar core made the tips softer, and the carbon fiber stiffened them underfoot. These skis like to go fast. Didn't put a topsheet on these, just triaxal glass. For other peoples skis I finished them with a spar urethane, but mine I left bare to see how they held up. They were pretty good, no delams or breaking down of epoxy, but I really only skied 1/2 a season on these.
I had a lot of fun on these this year also, and had pretty good reviews from other people that skied them also. They are 183 cm 155-124-144. They smash everything in their way with the big rocker and flatbase underfoot. Maple poplar core. Quilted maple topsheet that came out looking really good. These skis were really fun for when I was following around snowboarders through skinny chutes and weird billy goating situations.
I will try to get some more pictures of the other skis, there are a few other ski shapes out there that I have built that were liked.
I told too many people about ski building/too many people saw me up on the mountain, and it turns out I am building 20 pairs of skis before winter. I have 3 built but not cut out yet, I will post more pictures of the skis and shop rennovations later.
I have been tagging all of the new skis with a piece of paper like these
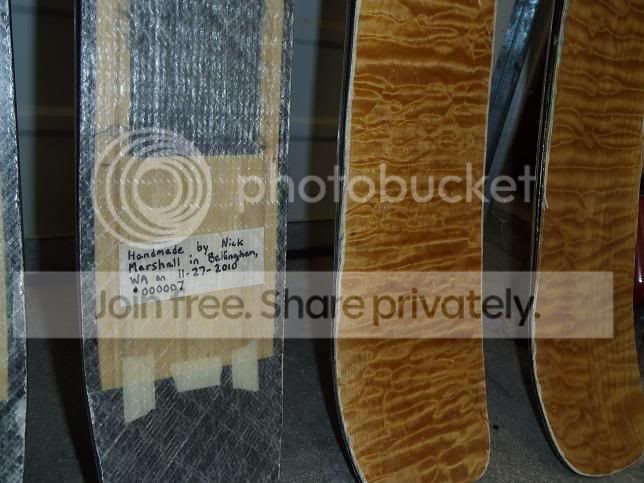
Usually it says "Handmade for (name) by Nick Marshall in Bellingham, WA #0000__"
If you see any of them in washington, montana, or british columbia let me know, I like to hear what people think about my skis.
I will post some pictures later of the other 3 pair that I built last week.
unknownSat Aug 27, 2011 5:56 pm
Also, my roomates and I filmed a bunch with go pros this year and dain put this edit together. I am the only skier in the movie, except the double back was my friend jim.
http://vimeo.com/24753272
unknown
Now THATS what I love to see! So great, keep it up!
unknown
Woo Hoo! Living Large!
unknownThu Sep 15, 2011 10:35 pm
First three pair out of the press
First pair is for mitchell, 192cm, maple core with carbon fiber topsheet
Second is for Tia, 170 cm, maple+poplar core with birch topsheet
Third is for Ben, 183 cm maple core with maple topsheet
They were pressed out of order, because they were heading off to college and wanted to see the process. I am almost done prepping all of the other skis, and then hopefully I will be able to build a pair everyday, and maybe take a break when I have to change the ski size in the press.
All the cores are cut out, and ready to be glued up one at a time. I wanted to make big core blocks and re-saw on a bandsaw, but my dads bandsaw isnt big enough, and most of the cores are different. I have poplar, maple, bamboo, ash, and aspen going into the skis, some with one solid wood and lots of combinations too.
Cores and sidewalls-
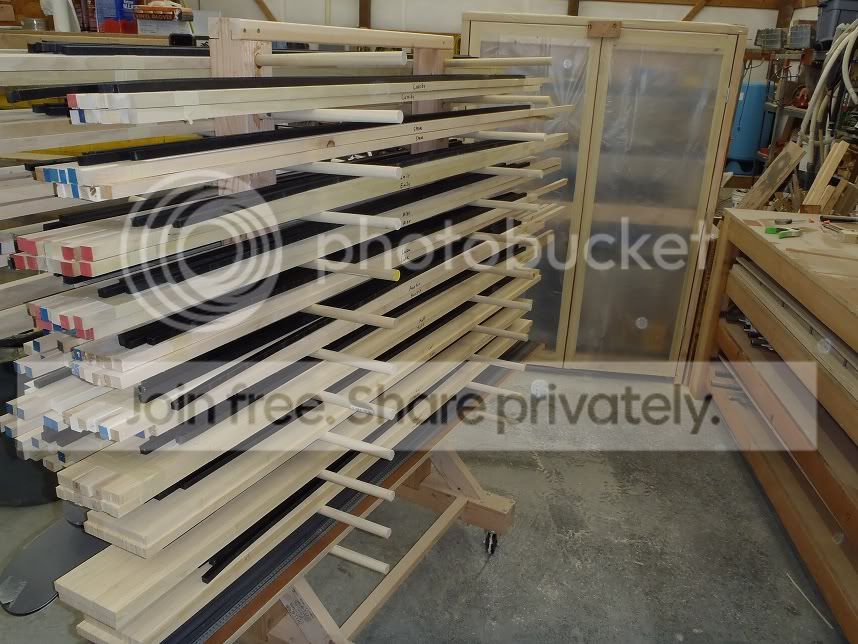
Right now I am at 3/21, and once they are all done I wll post all of the specific info about each pair to a wordpress website so it will be easy for all of the skiers to review their skis, and you guys can read the info also.
unknownThu Sep 15, 2011 10:35 pm
(double post)
unknownFri Sep 16, 2011 3:16 am
Wow, someone's been busy.
unknownFri Sep 16, 2011 2:16 pm
How do you like the solid-wood core approach? I've made a bunch of skis this year that way. I can't decide if I like it -- pros and cons. For one, I've found that the cores will warp a bit after profiling if I leave them alone too long before layup. Lamented cores are more consistent, but takes time to make.
unknownSat Sep 17, 2011 3:52 pm
Un-lamented cores cause way less grief
sam
unknownTue Oct 11, 2011 1:02 pm
What I said was a little bit misleading. My solid wood cores are all one type of wood, with 7 stips of wood about 3/4 inch wide laminated together. The only solid wood cores that I dont laminate are the bamboo cores, like you can see in the bottom of the picture. They came out of a sheet of bamboo plywood that looks pretty consistent.
unknownTue Oct 11, 2011 11:48 pm
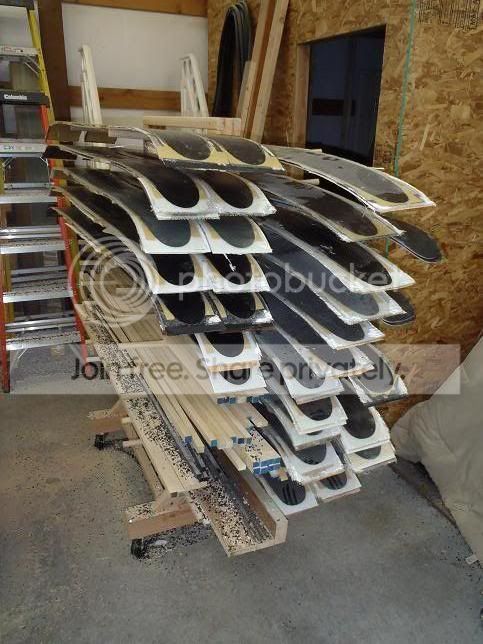
Ski rack is looking a lot better
One more set to go, stoked!
unknownMon Oct 24, 2011 8:54 pm
Looks like you've been hard at work, nice job!
unknownTue Oct 25, 2011 2:59 am
@ n.marshall -- OK, now your cores design make sense. Thanks for clarifying.
Nice quiver of skis, btw! Looks like you're in business!!!
unknownTue Oct 25, 2011 4:06 am
Here's a few notes on how I built the skis. Most of these ideas or processes have already been posted here, I just thought I would let you guys know what worked well for me and what didn't.
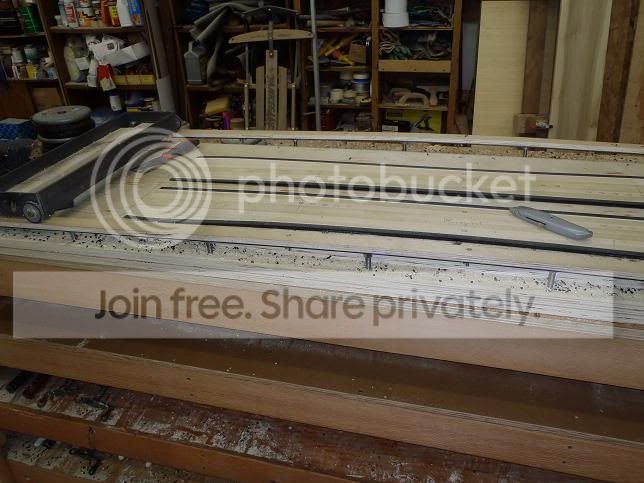
I profiled all of my cores on an adjustable router table. I saw one in a layup video (I think it was from kingswood skis) and tried to copy it.
It works great in the sense that the uhmw sidewalls dont explode off, like I was getting with the planer. I also liked doing two cores at once, as it was a bit faster than one core at a time.
It wasn't so good because if I didn't hold the router completely steady, the cores could be off by as much as 0.3 mm. I think I could fix this by routing one core at a time, and switching out the adjustable rails for solid wood ones.
The rails were thin pieces of steel supported by bolts. The bolts threaded down into lock nuts that were hammered and superglued into place on the lowest piece of plywood. On top of the steel rail was a piece of 1/2 inch plywood, a smooth surface for the wheels to rolll on. I secured the cores to the table by hot-gluing in 4 spots on each sidewall.
I think planers are a lot better for dimensional accuracy, but I would rather have my cores off by a little bit and have plastic sidewalls. With solid rails and a new carriage, I should be able to get them in tolerance.
(Eventually I want to buy or build a cnc, which seems like the best way.)
Check out the k'nex wheels on the carriage haha-
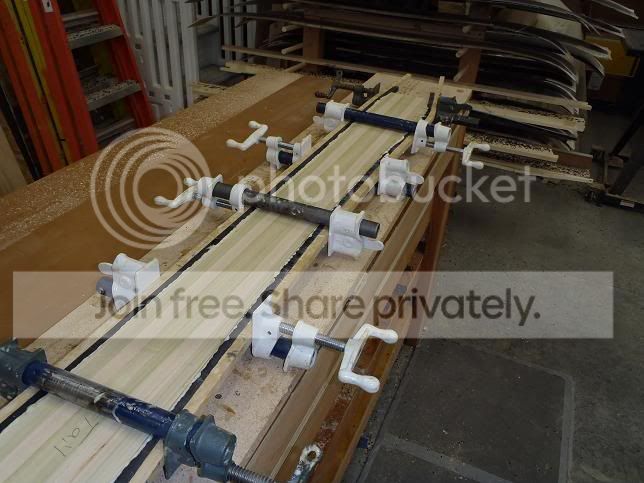
All of my cores were glued up using pipe clamps, which I like since they are easy to use. I used gorilla glue to hold the sidewalls onto the core
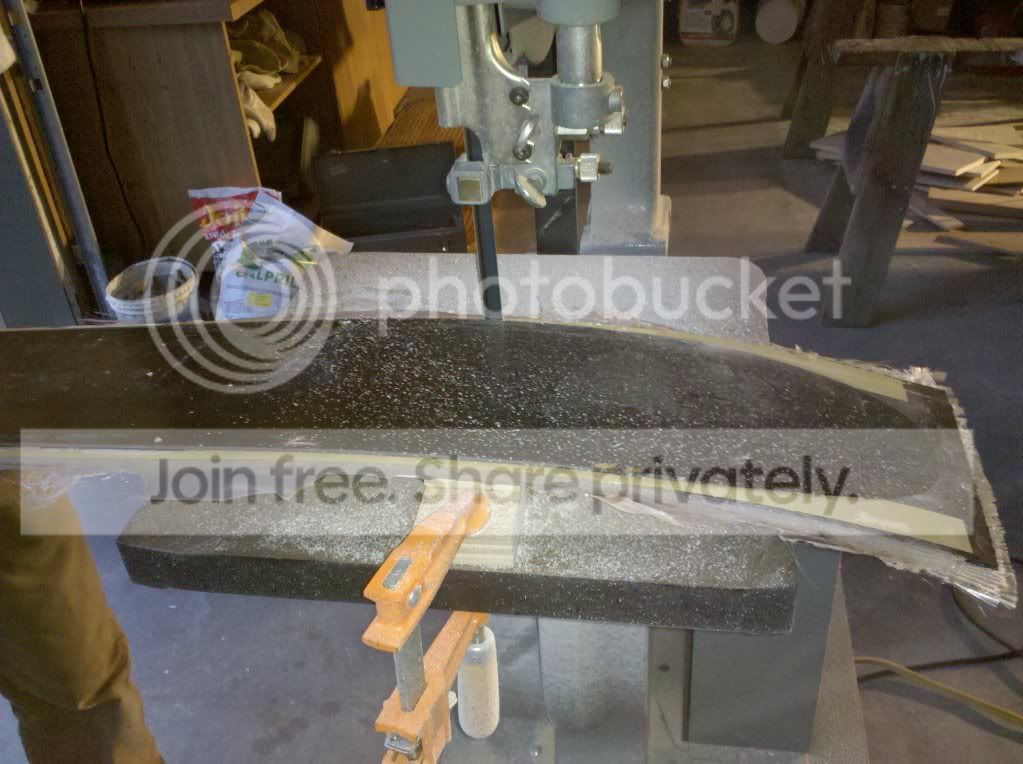
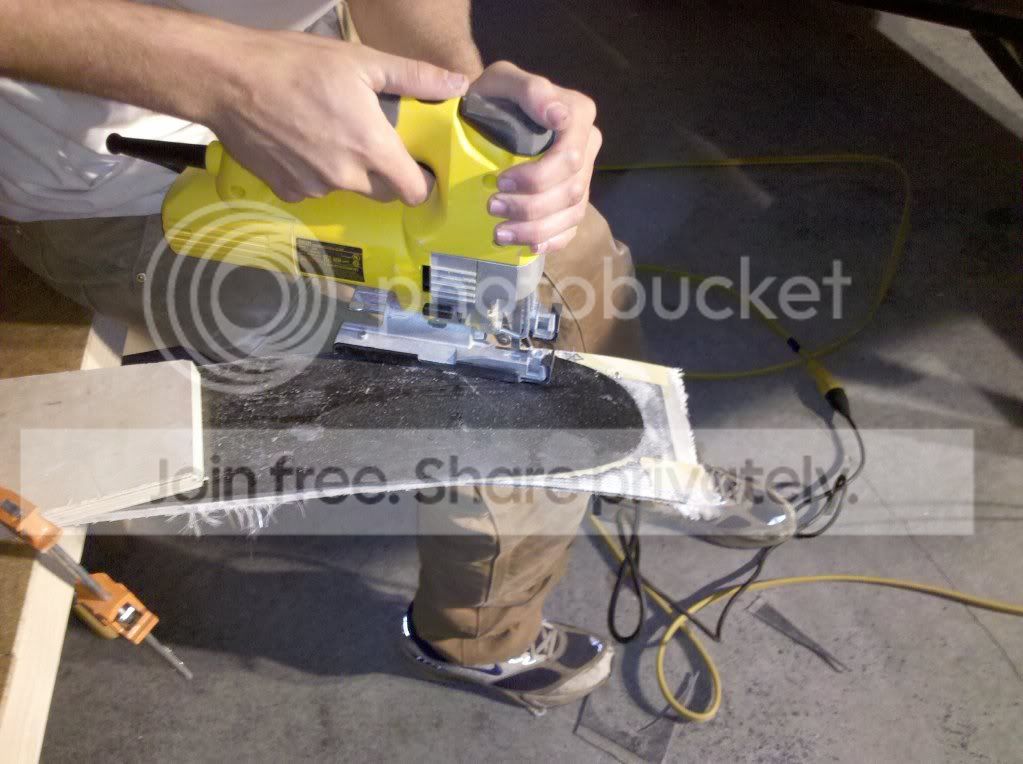
I cut out the skis with a bi-metal bandsaw blade, 10-14 variable pitch tooth. The metal blades last longer than the wood ones for cutting out skis. It is hard to get a perfect cut, and when there is epoxy left on the ski edge I usually clean it up with an angle grinder with a sanding disc. I like the edges to be smooth so that when I cut the sidewall bevel the router bearing has a smooth surface to roll on, resulting in a clean, consistent sidewall. Also, I like to deliver my skis to the local shop where they grind the bases and edges epoxy-free. The uhmw sidewalls eat up the grinding discs pretty fast, so I started cutting a bevel into the skis on the bandsaw. I added a little shim to the block of wood that the ski sits on -
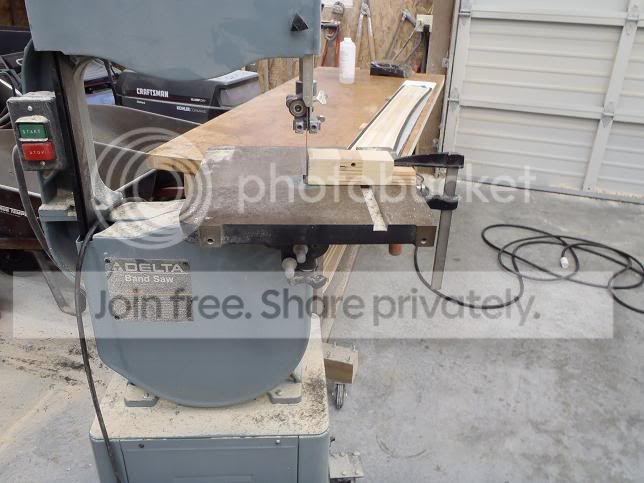
This also makes it a little bit easier on the router.
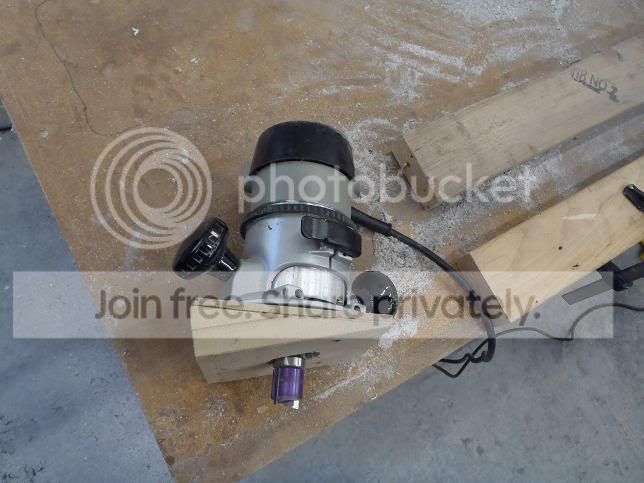
I have never tried cutting the sidewall bevel on a router table, I am too scared to screw up a ski at that point. Last summer I used a laminate trimmer and got the sidewalls to about 20 degrees in two passes. Since I had to bevel 88 sidewalls this time around, I didnt want to have to cut it in two passes, so I built a new base for the heavier duty router I was using. A little bit more efficient, worked pretty good.
Last summer I put epoxy on top of the wood veneer topsheets, and this year I experimented with prefinishing the topsheets with spar urethane. It worked good for the thicker veneers, or the ones that were darker where you tell that the epoxy bled through. For the thinner veneers, they turned out kind of blotchy
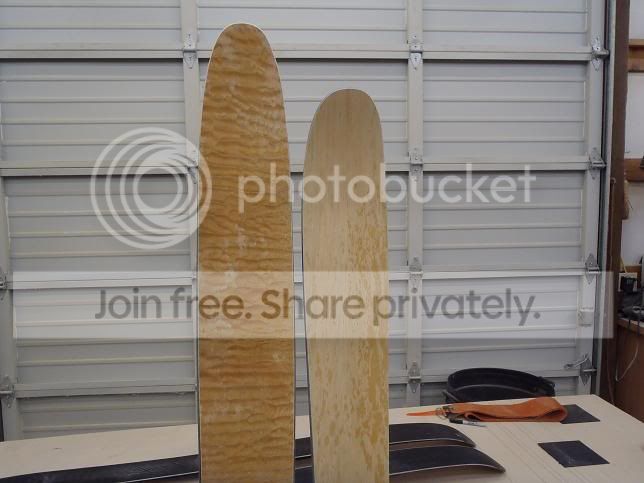
I put a spar urethane finish on tail of one of the skis, and it did not help. I am now trying to spread a thin layer of qcm epoxy and cure it at shop temperature in late october, a huge PITA. For these veneers it would have been easier to put epoxy on the topsheet in the press, and sand it flat later.
I had really good results with these veneers-
http://www.veneersupplies.com/categories/Veneer__Products/2-Ply__Wood__Veneer/
They are really expensive, but they dont let any epoxy bleed through and seem to hold up better for skiers that like to hit their skis together.
From now on, if the customer wants a hard, durable topsheet, I am going to put epoxy on the topsheet in the press. If they wanted a better looking, smoother topsheet, I will brush spar urethane on the topsheet before it goes into the press and put no epoxy on the top. Either way, the topsheet gets sanded and more coats of finish once it is out of the press.
Twenty two pairs in a few months, stoked! All thats left is a few topsheets to finish, waxing the bases, and then they are off to the customers.
unknownTue Oct 25, 2011 4:36 am
Wow, you've been crankin' out the skis. Did you have a separate template made for each one of those skis? Or do you have some other way of shaping the skis? You have so many shapes and sizes.
unknownTue Oct 25, 2011 11:29 am
Quality - inspiring. Good luck with the new venture!
unknownTue Oct 25, 2011 1:26 pm
the last photo kinda reminds me of ON3Ps first batch of skis. and look where they're now! way to go!
unknown
I cut out all the templates by hand. I built 12 different shapes of skis this summer, with 8 new shapes to test this winter.
The cnc guy that I was using was charging $80 per shape, and for the people that wanted custom shapes, they wanted to pay less and have me shape them. The cnc is obviously more accurate, but I was able to get them all within +/- 1 mm at most.
I would draw up the shape in snocad, and print off the split pdf template. I would cut the pieces of paper in half and tape them onto a piece of mdf that was about 6 feet long by 3 inches wide. Basically I was cutting out a template that was half of one ski. I would bend a piece of wood (1/2 inch x 1/2 inch maple, clear, no knots), making sure that it followed the sidecut of the ski, and screw it in place on the mdf. Then rough cut along the line with a bandsaw, and a finish pass with a router bit, using the wood as a cutting guide for the router bearing. The wood was too stiff to bend the curvature of the tips and tails, so I would cut that with the bandsaw and clean it up with some 80 grit sandpaper. Now you have a piece of wood that is a ski template, but cut in half down the center. I would then get a piece of mdf that was about 6 feet long by six inches wide, and draw a straight line down the center. Then take the half template, screw it to the new piece of wood with the straight edge of the half template on the straight line of the 72"x6" piece of mdf. Rough cut with the band saw and finish cut with the router. Unscrew the half template, add marks to the other side of what the desired tip, waist, and tail widths are, and attach it to the other side. Same process with the band saw and router.
The whole point of making a half template is to ensure that the skis have the same sidecut on its right and left edge. When making the half template, I would measure off of the straight edge to the sidecut edge to make sure that the tip, waist, and tail dimensions are 1/2 of what they need to be. Here, you want to get the width right on because if you are off by 1 mm here you will be off by 2 mm when you flip the half template over later. It is ok if one of the measurements is off by a mm though, they all just have to be relative. If you are shooting for 75-65-70, and you end up with 73-63-68, you can make up that difference when you flip the half template over on the final template. You also need to make sure that the straight edge on the half template is perfectly straight, otherwise these measurements will be off.
It worked pretty good for all the new ski shapes. It was cheaper than the cnc, but very time consuming and I made a lot of mdf dust. The first template that I made last spring didnt come out to the dimensions that I wanted, but with some practice, you can get them really close. Once I got going I was able to cut out a ski shape in about 3 hours. So, it comes down to what my time + an almost perfect template vs. cnc time + a perfect template. A lot of the new ski shapes were ones that I wanted to have in stock to build for people later, but I think as time goes on I will be less willing to cut new templates.
Like I said above, I just need to buy or build a cnc.
unknown
You'll get a better result (almost perfect) if you use a piece of PE or even a strip of wood:
http://skibuilders.com/phpBB2/viewtopic.php?t=2405&start=0
unknownTue Oct 25, 2011 3:02 pm
Thanks for the info. I made my templates basically the same way (using a piece of wood as a guide on the paper template) but I did the entire ski. Then trace out the routed template on my table, flip over the template, line it up and on the tracing and sand where needed until both sides matched, time consuming.
My last template was cnc'ed for $50. I'm going to have more cnc'ed and hopefully get a price break. Should be able to 7-8 templates from a sheet of mdf. MDF isn't that expensive but I know the guy needs to make a buck too.
unknownTue Oct 25, 2011 5:03 pm
You'll have a better result if you spend $3 at your local fedex or kinkos and have them print a full size paper template. The split template method tough to get lined up correctly. Then spray adhesive it to some MDF and then shape.
unknownTue Oct 25, 2011 6:11 pm
Actually that's how I did my templates, printed at Staples, sprayed adhesive on to mdf, rough cut, then finished w/ a router using a strip of wood as a guide on the template. Placement of the strip of wood is critical. Still takes some fine tuning after but you can get good results.
unknownTue Oct 25, 2011 10:05 pm
Exactly. I sharpen the pencil that I am using for and spend lots of time clamping the wood down before sinking screws into it.
unknownWed Nov 09, 2011 1:20 pm
After doing this batch of skis, I would rather not start a business. I like the problem solving side of ski building, not the repetitive manufacturing side.
unknownWed Nov 09, 2011 1:21 pm
Thats a great idea, I will have to try that next time around.
unknownWed Nov 09, 2011 1:51 pm
Do your guys' split templates print out different than what you put into the program? I use a tape measure to get the right width's and lengths, and the paper just for a guide.
unknownWed Nov 09, 2011 2:35 pm
Make sure your printer isn't set to scale your image, I've ran into this before.
Otherwise they should print to scale.
When taping together the split template I stretch a length of black thread from one end of my table to the other (really tight) and use that to line up the center line.
Tape each piece to the table then to each other.
I use a scrap of the printout to measure the lines that run across the paper to make sure the ends are the correct distance apart.
Then spray glue that to a piece of 1/4" hardboard to make the pattern.
I usually cut out both sides and around the tip, then decide which side is easier to sand.
This gets screwed to the mdf at the intersections of tip tail and middle.
Trace one side with the router then flip it and use the same screw holes to hold it down for the other side.
Once in a while the tip/tail need a little sand after but in most cases turn out good.
I can't believe how fast your pumping them out by the way.
Looking good!
Thanks for posting.
sam
unknownWed Nov 09, 2011 3:20 pm
How flat do your guys' bases come out? Is there something that I should do differently or should the guys at the local ski shop spend more time grinding them down?
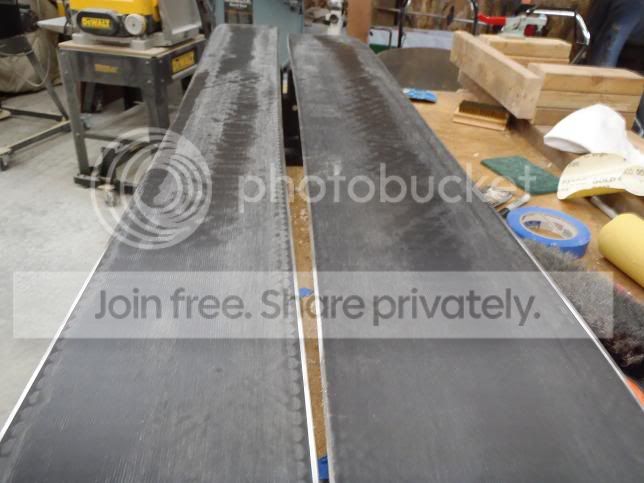
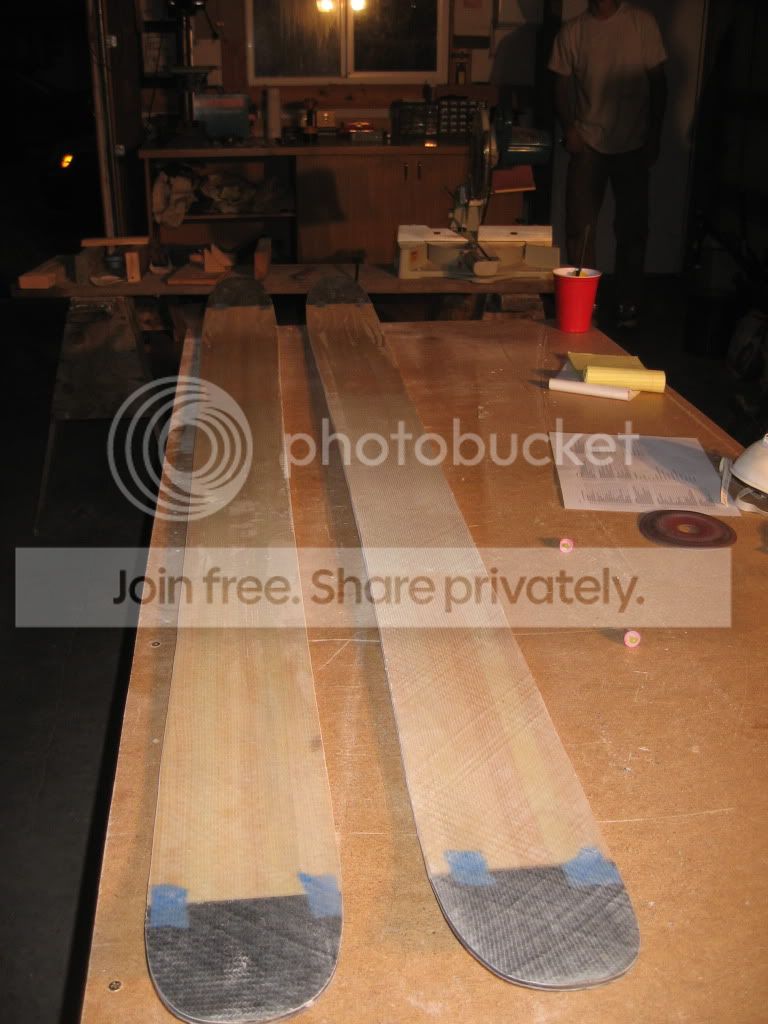
That was after they tuned them up. The skis look a lot better with wax, but still not the quality you see from new skis in a shop.
I finally posted up pictures and descriptions of all the skis here
http://cascadecustom.wordpress.com/reviews/
Hopefully the skiers review them so you guys can get the info also.
unknownWed Nov 09, 2011 4:23 pm
My first though is are you routing out your sidewalls to accommodate the thickness I the edge teeth? I use a .9-1.1 mm rabbet.
Second thought is do you apply pressure before turning your heat on?
I pressurize for 10 Min prior to heating to allow the epoxy to squeeze out and just sort of flow though the glass. I think it might allow everything to flatten better.
I just got my last 3 pair back from the shop and after wet belt sanding and stone grinding they look pancake flat.
unknownThu Nov 10, 2011 3:07 am
Last fall, I cut a rabbet about 1 mm deep. My skis came out a little bit base high, and the shop people told me they were afraid to grind through the base, even though they only did a couple of passes. That's why this year I only cut a rabbet of about 0.6 mm, so the skis would come out edge high and it would be more visible how much material is being removed. I think next year I am going to go back to cutting a deeper rabbet, since those bases came out looking better.
Usually I would turn the heat on before doing the layup so that it was fully heated up before the ski goes into the press. My idea was that I am laying up one ski at a time, and I want both skis to enter the press at the same temperature.
I have done it the way you explain, and when I layup one ski, put in the press, the heater reads 20 degrees celsius, then turn the heater on, it goes up to 80. Let the ski sit for thirty minutes, turn the heat off, it slowly cools down to 40 degrees. Pull ski 1 out, layup ski 2, put in press, heat reads 35 or so, then turn on the heat. So one ski started at 20 and one at 35 which I was afraid could affect the rocker/camber.
Now that I think about it, your way makes more sense. Press it flat, then turn on the heat so the epoxy kicks.
unknown
Could be a few things, like Vinman is saying ... just wondering how much pressure are you using? Looks like telegraphing through the base, which is a surprising - too much pressure and heat?
As you are making skis for friends, it's probably worth asking what you have done to resolve the dry fibre issue?
Have you double checked your mdf mould - too much heat and pressure and they will suffer quickly, particularly if the AL sheet is under 3 mm? This might explain why you have so much epoxy remaining on the edge set. Equally, it could be the rebatting - too much and it allows for pooling of epoxy?
I'm assuming the edge set and the base material are well matched?
Once you've worked out how to balance your materials, you'll get it down to three passes and then you are done.
Hope some of this helps you resolve this issue.
Vinman - Have you considered staged pressure and heat ramping? A less viscous resin will wet out fibres aid bonding. What is the thickness of you tines, rabetting at 1.1mm is a lot ( i think). Do you want a slightly lower pressure in this area?
unknown
1.1 is a bit much. I measure the thickness of the edge teeth plus the thickness of the VDS. My rabbets are more like .9mm. I adjust based on how flush the teeth are with the raised edge of the rabbet.
After I pressurize for 10 min I turn on the heat and let it ramp up to temp without any steps. I will manually control top to bottom heat differential wit my separate on/off switches for my blankets. I try to keep things within 5 deg F while both blankets ramp up to temp.
I press at 60psi
unknown
doesn't look like they ground them enough. You have to remember most shop guys aren't used to grinding fresh skis. Anytime they get a ski it has been through a robot like 5 times already.
Or the epoxy is kicking in the base prior to enough pressure being applied.
Or edge rabbit issues.
If i didnt know any better I would say you were not using a cattrack. Its iggys press what say he?
unknown
I have been running 50 psi, since that what it seems like most people are doing on here. Maybe I will try building skis with less, it doesn't seem necessary for them to be under that much pressure.
dry fibre issue? not sure what you are talking about... if you are referring to the white spots on the base those get darker and it all looks consistent once I wax them. I just have the shop grind them down but not wax them so I save a bit of money.
I started doing a 0.6 mm rabbet since thats what I measured the thickness of the edge tines+vds to be. When the ski is finished you dont want it to be edge high, so that is a reason to cut the rabbet a little bit deeper than the tines.
I know that some of the spots of the middle of the base is from using too much spray adhesive to hold the base and edges in place, but other than that they should be flat throughout.
MontuckyMadman-
Yup using a cat track. After cutting the edge rabbet I would check it by hand to make sure that the depth felt consistent throughout.
Do you press your skis and then slowly ramp up the heat? I want to try it out, see what the base and epoxy does.
unknown
Sidewall rabbet isn't deep enough. .025, and pay more attention to filling the edge tangs with epoxy/vds during layup.
unknown
Sounds you're taken care of all the obvious stuff I was talking about.
On your first page, there's quite a bit of whiteness around the tips, a bit of fluff when cutting out the tips, whiteness over the CF tape and when you have double up for the binding plate, it's turned it opaque - which is unusual.
As you are putting a lot of effort into this and getting some great results, it seems a shame not to raise it. May be is just the camera? I'll photograph something later and post the result.
Later: https://picasaweb.google.com/110483720088812033371/Einhell?authuser=0&authkey=Gv1sRgCJy4zYHHsc_P8gE&feat=directlink
unknownThu Nov 10, 2011 9:45 am
Yeah I have noticed that too, I was guessing that I am not getting the fiberglass fully wet out in those areas?
I have used qcm's emv-0043 resin and eca-032 for almost all of my skis. In my opinion, its has a pretty high viscosity and it takes a litttle bit of work to get it into the glass. Sometimes it was hard for me to tell though because the more I tried to worked the epoxy around it went from clear to white....Has anybody else seen this?
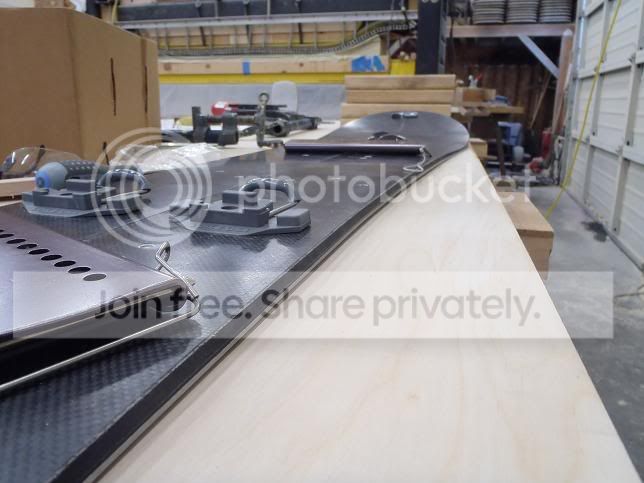
A fellow snowboard builder recommended resin research to me, he said he had really good results with it. I built my skis and a splitboard out of it, and it is definately a lot easier to work with. Much lower viscosity, wet out the fiberglass really fast. Im a little bit skeptical because its designed for surfboards, but if my skis hold up this year I am going to use it for everyones skis next year.
It left a really nice finish on the topsheet of the splitboard. I didn't see the dry fiber. This is what it looked like out of the press-
unknownThu Nov 10, 2011 3:41 pm
About that woven carbon topsheet, so it's a structural composite layer wet-out with epoxy, looks great and I bet it holds up well. Did you use some sort of peel-off plastic layer to achieve that smooth surface? I've been using printed cotton fabrics with clear plastic topsheets which really just add dead weight and get all beat to hell too. I may do this using Texalium for that high-tech metal look on a future pair of skis.
Good work man.
-S
unknownThu Nov 10, 2011 8:38 pm
We use the same combo of QCM products. From the best i can tell when it turns white during layup, its the epoxy going off for whatever reason.
Only way we have avoided it is by working faster
-Jacob
unknownFri Nov 11, 2011 12:11 pm
Not so fast. I don't think it's the epoxy "going off" that causes the white appearance. My experience is that it can become white looking when over worked, too much squeege motion trying to encourage fabric wet-out. The white color is actually micro air bubbles or foaming. It can lead to really ugly top sheet graphics and probably a weak composite bond.
So the best solution is to work slower, at least with the squeege.
-S
unknownFri Nov 11, 2011 12:41 pm
yeah, I'm with SHIF
If you try too hard moving the epoxy around it goes white and frothy.
It does make fabric graphics look crap.
I think that trying to layup in a warmed environment where your epoxy is nice a thin, or using a resin heater or heated table is a really good idea to improve your process.
I think it leads to faster wetout, better wetout and also reduced layup time. Richuk has also shown that using a heated table and preheating your composites reduced the amount of epoxy he was using by 25% (and when you are building 20+ pairs that's real $)
unknownFri Nov 11, 2011 1:18 pm
I agree with SHIF and Falls - micro bubbles! I'm guessing people who are using lower viscosity resins don't see this issue so much.
Epoxy is 'going-off' once it's past it's pot life - usually this means it has started to gel, however, epoxy does increase its viscosity during the time in the pot, but it doesn't suddenly switch from one state to another. Not unless you're sitting it on a hot plate.
unknownFri Nov 11, 2011 3:32 pm
I really like the idea of pre-heating composites and resin, thanks Richuk. I have warmed resin in front of a heat lamp before, but never the composites.
There was no peel layer on top of the carbon fiber. Just a smooth, clean, waxed cassette.
unknownFri Nov 11, 2011 6:51 pm
What temps are people using to heat composites, resin and hardeners?
I try to get my shop air temp above 70f before a layup to help with this.
I can see that a thinner epoxy would wet out faster and would equal using less total epoxy but Does heating the separate epoxy parts cause it to kick faster? Is there a threshold temp for this?
unknownSun Sep 23, 2012 12:48 am
Vinman, the link posted above should answer your second question, but if you want to look at it in more detail the data you want from your supplier is 'epoxy evolution'.
Because everyone is using different epoxy, I think the question is what viscosity achieved at 40 degrees C (the temp I use currently), the data suggests 320 Mpa.s is what I have been working with (viscosity at prescribed temps should be on the data sheet too)
unknown
Thanks Rich. I will probably try warming my resin and FG for next weeks build. I'm building a 95cm pair for my 5 yr. old son.
unknown
warm the epoxy not the hardner and warm the dry composite not the wetted fiber. If you do warm the wetted composite dont do it for very long. It wont kick but it will gel and not squeeze out when you press.
The resin should all be at least 70F it works much better.
unknown
Bumped into your mate up at Porters ski field today, I saw him carrying the ski's through the car park and then found him up the hill and cornered him for a chat, wicked ski's really cool! Great to see your product all the way down here too.
