Archive › Journals: Log Your Ski Building Progress
Happy Monkey's process
Journals: Log Your Ski Building Progress · 43 posts
Head Monkey
I've started documenting my entire process in (hopefully!) great detail on my web site here: MonkeyWiki, a guide to snowboard construction I figure people here might be interested in this. If anyone has any questions, feel free to ask in this thread and I'll post an answer, and update the site to reflect it as well. This will take me some time, we took about 370 pictures over the course of the last custom build, and that doesn't even cover the entire build, but it will all get there eventually.
Edit: updated link.
ben_mtl
Thanks a lot Mike, it's very informative ! I can't wait to see the other steps of your process !
Everything seems to be well thought, efficient and precise... congratulations !
Head Monkey
Thanks ben_mtl.
New sections on bases, edges, and nose/tail spacers, and on finishing wood veneer top sheets have been added today. There's an RSS feed for the News blog there, and I'll post a note to that blog whenever I make an interesting update to Making a Monkey. I'll post here, too, after every few updates.
KevyWevy
those are some sweet clamps you use for the gluing the cores! pretty expensive?
so why do you place an ash stringer in with the ptex sidewall?
thats quite the set-up you have there!
would you be willing to help some fellow builders out with some CNC work for a mold?
twizzstyle
> KevyWevy wrote:
would you be willing to help some fellow builders out with some CNC work for a mold?
What he said. Sent you an email Mike
Head Monkey
> KevyWevy wrote:those are some sweet clamps you use for the gluing the cores! pretty expensive?
Here's the clamps I use to join slices into core blanks, and to re-clamp when inlaying sidewalls: http://www.woodcraft.com/Product/200032 ... ystem.aspx Currently on special for $19.99, normally $26.99. I have 7 of them in total, and find that adequate. You make the clamps whatever size you need. You'll also find that you need to add spacers on either side of your core since the minimum clamping thickness is something like 3/4" or so, that's the odd white and blue bits you see in the pictures between the clamps and the core.
> KevyWevy wrote:
so why do you place an ash stringer in with the ptex sidewall?
I started putting in ash when I was making capped boards. There is really helped with the durability of the edge, and it gave what we felt was a bit damper ride. I've kept it in the boards ever since because I like the way it makes the boards feel when carving on hardpack, just seems a little less chattery.
> KevyWevy wrote:
thats quite the set-up you have there!
Thanks!
> KevyWevy wrote:
would you be willing to help some fellow builders out with some CNC work for a mold?
Yup. Let's chat.
shopvac
HeadMonkey, thanks for taking the time to make the detailed journal. The photos are very good quality too. Nice work. I like how you put the ash and ptex right in that slot. That is too cool. If I snowboarded I would definitely want one of your boards! I didn't know you could use polyurethane glue for the ptex sidewalls. If I ever start thinking about doing ptex sidewalls I will keep this in mind.
Head Monkey
> shopvac wrote:I didn't know you could use polyurethane glue for the ptex sidewalls. If I ever start thinking about doing ptex sidewalls I will keep this in mind.
Well, you kinda can
I did a number of bonding tests with it a long time ago. You must sand and flame, just like you would to bond with epoxy, and even then the bond is quite weak. Handle with care until laminated!
ben_mtl
Hi Mike,
I have questions for you, might seems stupid and all but I was wondering how do you prepare the wood for your cores.
What I do (for ski cores) is I buy some rough wood (ash, poplar, maple), work it through surfacing machine / planer to get smooth planks 3/4" thick. Then I glue 3 planks together (6ft lg x 6in wide x 3/4" thk each).
I then rip this assembly in 1/2" strips, bookmatch and bond them 2 by 2 to have a ski core. I then cut it to shape with a router + template, attach the sidewalls (maple) then run it through the planer to have a flat core ready for profiling.
Here is what doesn't work well : I have big problems glueing the planks together at the first step, I often end-up with a poor bonding with weak spots (not enough glue)... first it's a mess to spread the wood glue in a uniform coat on such a large surface (Titebond 3), then when I clamp everything (16 clamps) I'm sure there are spots where I don't have enough pressure.
- How do you do this ?
- On my last run of cores I used a professional thickness planer and I suspect the finish of the planks (first step) is actually too smooth and it causes problems for bonding. Do you think sanding slightly with coarse grain sandpaper the surfaces I will apply glue to would help ?
Next step : cutting slices !
I do it on a table saw, it does a pretty descent job considering my (non-)skills but I would be curious to know how you do this step : table saw ? band saw ? I found the table saw to generate lots of waste as the blade is quite thick...
I guess that's it for now !
Oh no ! for a step ways further (layup), since I'm using a new resin which is medium viscosity (5000ish cps) I have problems with the VDS rubber getting "pushed" outside the skis when pressing, I believe It's because I put too much resin and the resin flowing outside the skis takes the VDS with it. If there is any trick with this step I'd love to do it... but I guess it's just practicing !
Also (waw, lots of questions finally) I saw 2 schools for the layup process : some prepare all the fabrics and apply resin on the different layers prior to assembly on a separate table, others place the triax (or other component) in place and then pour resin and spread, the add the next layer and so on (like in the skibuilders short clip)...
I thought the first method would be interesting because it gives time to the resin to fully impregnate the fabrics before it's in the ski but it requires more space, more resin (from what I experienced even if the extra resin flows out of the ski under pressure), it's not that time reducing (lack of experience I guess)... anyway I'd love to have your thoughts on that.
Thanks !
sammer
ben...
not to hi-jack this thread but,
I've been making my cores using an almost identical process as you
I use a vacuum bag to laminate the 3 planks together with epoxy.
I try to do a couple at a time
hope this helps
sam
Head Monkey
Ben_mtl,
I'll make a section on my site about making the core blanks sometime in the future. Until then, here are the answers to your questions. I don't have any pictures of this right now, sorry.
1. I use wood that's machined to 2.5" wide, ~7' long, and 3/4" thick. From that I can make 4 slices for two cores. It's much easier to work with a thinner stack, faster to glue up, and most importantly, easier to apply even pressure. I use pipe clamps with 2"x2"x12" cauls, alternating top and bottom along the length of the stack. You don't need a ton of pressure, just even pressure. Your problem is probably your glue drying before you really get pressure applied. I used to have that problem when I used yellow glue. Use polyurethane glue, like Gorilla Glue or similar. It has a much longer working time that normal yellow glues (typically only 5 min). It looks like the Titebond 3 has a 10 min working time, which is good, but I believe the poly glues are even longer. Apply it by taking the cap off the bottle, and pouring a bead directly on a plank, then spread with a spreader just like you're laying up a board. This goes much, much faster than using a brush or even rolling.
The clamps: http://www.woodcraft.com/Product/208032 ... Clamp.aspx
A few pics here: http://www.happymonkeysnowboards.com/Mo ... ipe_Clamps
2. The best surface for gluing wood is the smooth surface fresh from a good thickness planer, jointer, or hand plane. You want the pores of the wood open and clean, so you get good penetration of the glue. If you sand, you'll drive dust down into the pores and clog them, actually yielding a weaker bond.
3. I cut my slices on a band saw. The kerf is smaller, and it's much, much safer. I'd highly recommend that over a table saw, though of course the table saw does have its place. Unfortunately, this can be tricky. Resawing on a bandsaw is a skill that takes practice, and it requires a well setup bandsaw. I'm not going to go into all of that now, detailing that is a whole lot. See my overall note below instead.
4. The VDS getting pushed out is odd, you may be using too much resin, or it may simply be shifting during the rest of your layup. Check carefully as you go. If it really is getting pushed out then use less resin. You don't want pools of the stuff lying about as you put the next layer on. Scrape it all off at each layer.
5. I lay my fiberglass layers out on a separate table covered with plastic wrap. I mix my epoxy, then dump half of it onto the two glass layers and spread it out evenly. Then I get to work on the other parts. When I need a layer of glass, I go grab and lay it onto the laminate. If I've missed a spot I'll touch it up at that point, and move on. I like this because it takes half the epoxy mix and gets it into a thin film as quickly as possible, which slows it down.
If you're making your own cores, you're a woodworker, whether you want to be or not. Welcome to the club
Subscribe to finewoodworking.com, and start reading. Really! How to resaw well, how to setup a bandsaw properly, what blades to use, how to setup a table saw properly and be safe using it, a planer, a jointer, effective clamping, glues and proper glue application, etc. It's all out there, and it's all a well studied problem. I don't have a collection of links for you right now, but I'll make a note of it and start collecting good ones, then add them to the site at some point.
Good luck!!
doughboyshredder
I was lucky enough to get a step by step on core construction at the monkey cage, and I was overwhelmed. Mike does an absolutely incredible job building his cores. They really are works of art.
> use less resin. You don’t want pools of the stuff lying about as you put the next layer on. Scrape it all off at each layer
I use a serrated piece of scrap tip fill for the last spread on the base, vds, and core. This leaves the right amount of resin in an even spread on the plastic and wood without pooling up.
image no longer available
Just like that.
ben_mtl
Thanks a lot to all of you for those answers ! very very informative and helpful as usual !
Sammer -> I'm thinking of using my press to laminate wood planks... just need to find the time to make a flat mold that will go over the fixed camber part of my mold.
Mike -> I won't thank you for each and every advise you gave... just a huge "thanks" for another great post !
For the VDS I really think the problem is having too much resin. Since I switched to this new resin, which is way thicker, I use a lot more resin. I never experienced problems with VDS shifting with my old resin system (West) and I'm pretty sure the VDS is in a good position when I stick the cassette in the press.
doughboyshredder -> I'll make a scaper like this one and give it a try ! thanks !
Back to the original topic, can't wait to see more of the process !
Head Monkey
I've made more updates to Making a Monkey: Fibers, Epoxy, the final steps to prepare for lamination, added a new sub-section called Builders Corner, with information on routers, bits, trimming sidewalls, press heat control, and thermocouples.
Builders Corner also includes something that I hope many others will find valuable: my construction checklist, which is a spreadsheet that we print out for each build to track our progress from beginning to end, and to make sure we don't forget anything along the way.
doughboyshredder
You kick so much ass.
Your site is really developing in to the be all end all of educational tools for the next generation of builders. If I start to question something I find myself saying "how'd head monkey do it?". Going as far as listing part numbers and suppliers is really awesome.
Thanks!!!!!
I think I just ordered over a thousand dollars of aluminum. I didn't even ask how much it was going to be, but I got a lot of skins that I am picking up tomorrow.
ben_mtl
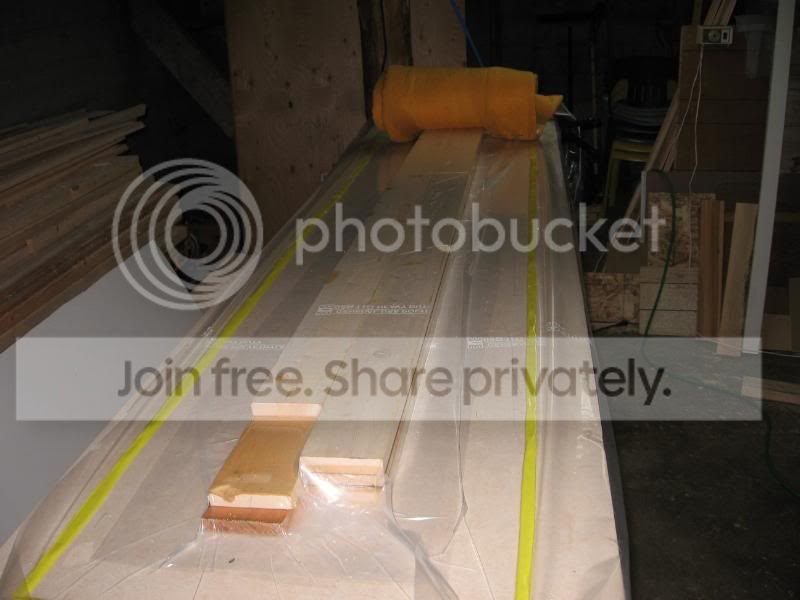
I would say it's a template to cut the curve in the veneer...
Head Monkey
Yes, the curved MDF with the holes is indeed a template to cut curves in the veneer. It's a 21m arc or so, with holes to make it a bit lighter and easier to handle. A sharp eye will note the holes are not along the centerline of the form... a mistake I corrected in subsequent templates.
> Vinman wrote:Quoted from an email from Trevor at Vectorply
"For hand lamination, the ideal fiber content (fiber weight fraction) is in the 50% to 60% range (50% to 40% resin), ... [snip]"
Vinman, that's really interesting, thanks! I have a similar range in my head from a composites book that I read long ago, but I've misplaced it. It's gotta be in this house somewhere and when I find it I'll add a reference.
> Vinman wrote:
My buddy in a big time snowboard op r&d says 38-40% is what they try for.
To clarify, is your buddy saying they aim for 38-40% fiber or resin? I'm assuming resin but want to confirm since that seems quite low for fiber.
And Rich, thanks for the link, I'll give it a read!
knightsofnii
id say for home builders, err on the side of more resin
Richuk
The figures quoted by Vector ply are a reflection of the process employed, with one process being more efficient than another.
So the question remains what resin/fibre ratio provides for the best mechanical properties relative to the purpose and process being employed - that get's you to the factory recommendation. There's a Never Summer video on the site that shows their approach to this issue.
Video:
Plastic tips/mini nozzles are available for Super Glue. They will define the size of the droplet, according to the viscosity of the glue being used and you'll have no more issues with too much glue. They also help will accuracy - especially in the cold. Super Glue, is moisture cure and if you are in a moisture rich climate, you can bond quickly by applying the heat (allow the soldering iron to slowly warm the tine), it speeds up the reaction. Only useful to know when you are mid layup.
Head Monkey
Well, I haven't updated this in a while. I'll see about tossing a few pics and details in here of my efforts over the past few years. I haven't been building nearly as much, but I'm still into it
Here's a 30x time-lapse of me adding edges to a base:
And here's a 30x of building a core from blank to finished core, with application of sidewalls along the way:
LumberJacked
Over-bending the edges.... Is this done because minor adjustments are easier for re-straightening than for bending? Am I on the right track here?
Head Monkey
> LumberJacked wrote: ↑Sun Mar 10, 2019 7:34 pm
Over-bending the edges.... Is this done because minor adjustments are easier for re-straightening than for bending? Am I on the right track here?
Correct.
mammuth
You cut full depth (during profiling) in one pass? May i ask which router bit and feed speed you use
chrismp
Here's the info on the bits HeadMonkey uses including speeds (not feeds though): http://www.happymonkeysnowboards.com/Mo ... outer_Bits
Head Monkey
Thanks for linking the bits and speeds chrismp!
For feeds during core profiling:
- Lead in, center shallow area, and full-depth nose/tail areas: 50 IPM
- Those little transitions between loops, which are done at full depth: 20 IPM
I'd actually like to run much faster in the shallow areas, but I've never gotten around to programming that in. I'd also like to run the last loop slower where it begins to engage with the sidewall material, as this is a danger zone for tear out. Maybe one day I'll do it, but honestly the (mostly) constant feed rate of 50 IPM works well enough for me.
mammuth
Thanks for reply! Didnt see that you updated the monkey site too. Great!!!
Did you try that with ash or similar hardwood too? I do ask because we go a quite conservative route with cuts around 2mm deep for profiling (mainly ash - chrismp could answer that he did the postprocessor setup). But our feed rate is higher i believe.
How long is it for you to profile a core?
Head Monkey
My cores are poplar with 2cm ash edge stringers, and then PTEX sidewalls, so the last couple of loops are thru ash. Feeds are just fine.
It takes about 30min to profile a core for me.
doughboyshredder
for less than I paid online metals for 6 skins I got 18 skins and drops from alaskan copper.
Thanks again for the tip!
SRP
Thanks for all the great info., not only in this post and on your website, but all the insightful reply's over the years at skibuilders. The new info. on the website would have made things much easier if it had been available a few years ago when I got started. Scott
Head Monkey
I'm glad you guys are finding this helpful. It's my pleasure... honestly.
Doughboy, glad you got hooked up with Alaskan. Those guys are great.
ben_mtl
Hey Mike, it's me again for another stupid question...
I looked at your press pics and noticed something interesting on your bottom mold (the one which gives the camber). From what I see it's made of MDF ribs (no spacing between them) with a thick metal (Aluminum ?) plate over it. I was wondering what's the advantage of this metal plate compared to an MDF sheet ?
Also I don't remember exactly, and can't check from work (stupid safety policy with Internet), but I found you use a lot of Aluminum sheets over your MDF mold : one under the blanket (why ?), one on top (OK), lower cassette, layup, upper cassette, Al sheet, top blanket, another Al sheet (not sure of this one) and then bladder... could you explain why all those ? I can understand the one over the bottom blanket to protect it and have a smooth surface to slide the cassette on... but the one between the mold and bottom blanket is a mystery...
I have a pretty similar mold setup and I noticed that my camber mold is slightly concave (meaning it would make convex bases on my skis). I had a small problem of convexity on my last pair but there are some factors other than the mold that could explain that : edge recess too deep, skis pulled out of the press when still hot. Yesterday I took the camber mold out of the press for an inspection. That's when I found out the top surface is concave but I also noticed the bottom side is slightly convex... meaning when under pressure it might get flat.
I had big trouble having my ribs CNC cut... I know they're far from being perfect but I have no money to have them re-cut for now but I believe they're good enough so when I add 2 sheets of 5/8 MDF on top of them (1 fixed full length + 1 between tip & tail molds) I should end up with something pretty flat anyway...
Head Monkey
The extra thick piece of aluminum is 1/4" thick, and the length and width of the camber block. It's an experiment. It's there to smooth out the top of the camber block, as an alternative to sanding it perfectly smooth. Even though the ribs are CNC cut, they're hard to line up and get perfect, so there are a few small ridges and valleys. I only added it recently, and I think it might be overkill, I need to do a few more experiments to see.
The extra skin along the bottom, between the mold surface and the heat blanket, is to protect the blanket. There is a tiny gap between the 3/4 MDF along the length of the camber and where that meets the nose and tail blocks, and I don't want the blanket to get pinched or pushed into that gap and cut it.
The extra skin along the top, between the cat track and the heat blanket, is for the same reason: guard against pinching of the blanket in the track.
Head Monkey
I've added information about how I trim flash, cleanup sidewalls, base grind, and cleanup inserts here: Overview of cleanup and finishing. I've also reorganized the site a little bit, hopefully there aren't too many broken external links! I'll go through my recent posts on this forum and update any links I see that may have accidentally changed.
Also, for those that are interested, I've stopped selling snowboards to the public as of today. A bit of an explanation can be found here: www.happymonkeysnowboards.com. I will continue to build a couple of boards a year for me and my homies, and to contribute to our community of snowboard and ski builders.
MontuckyMadman
Hi, I was reading your blog and I noticed this>
image no longer available
could you tell me about it?
Did you build it?
Thanks
EricW
I was wondering the same thing.
rockaukum
While we wait for the resposne. I'd say it is a Fontaine Ski Tuner grinder. Just my guess based on the looks.
ra
MontuckyMadman
> rockaukum wrote:While we wait for the response. I'd say it is a Fontaine Ski Tuner grinder. Just my guess based on the looks.
ra
Oh yeah, are the cheaper then the grindrights?
This look light duty and portable, no?
nevermind
http://skibuilders.com/phpBB2/viewtopic ... 34caf95dda
wow that sucks
http://snowboarding.transworld.net/1000 ... agreement/
Head Monkey
I've moved all of my information about snowboard construction off of my blog and into a new wiki: http://www.happymonkeysnowboards.com/MonkeyWiki
I find that a wiki is a much easier way to organize and edit information that needs to be updated over time, which is a great description of my snowboard construction info. The wiki has very rich history so you can see updates to this stuff over time. As blog posts, the date never changed when I modified the post which was really unfortunate. With the wiki you can see everything that has ever changed over the entire wiki, or on a single article, at any time. Check it out here: http://www.happymonkeysnowboards.com/Mo ... /Main_Page
I've left all the old blog posts so there are no broken links, but each one has changed to a stub that points over to the wiki. That way there's not old out-of-date information in the blog, which would be confusing. I'll find all of the links to the old posts here on SkiBuilders and update them to point to the new content sometime soon.
Note: while I've use real wiki software (MediaWiki) this is not necessarily a wiki in the traditional sense: I'm the only one who can edit it
I copied each of the old posts to the wiki directly, then updated them from there. Many of them have new/updated information here and there, look on the history page for specific articles to get a feel for what might be different.
Finally, one thing I really like about the new format is it gives me the ability to stub out future content that I've always wanted to add. If you see a placeholder you'd like to see me add sooner rather than later, drop me a PM and I'll try to do it.
Head Monkey
I missed the questions about the base grinder. Sorry guys, I left you hanging for a while on that one!!
Rockaukum was right: it's a Fontaine base grinder, made by Fontaine and sold by Wintersteiger. 15x49 belt I believe, 240v, friggin' 4hp motor on the thing. I'll get some more pics sometime soon and put up proper info here: http://www.happymonkeysnowboards.com/Mo ... se_grinder
Head Monkey
Information on my base grinder is up here: http://www.happymonkeysnowboards.com/Mo ... se_grinder
A few notes here to help with forum searches: Fontaine 1404 base grinder, which was sold by Wintersteiger as model SNB 55. Supplies from SVST. Coolant is Kool Kut Ski Grinding Coolant. No autofeed. Ghetto side edge guide built out of scrap.
Head Monkey
Edit: double post after server errors.
