big ear snowboards' cloth press
Posts: 40 · 40 posts
chrismp
finally we have some first pics documenting the progress on our cloth frame press.
but first off a huge thanks to montucky madman who will be supplying us with the cordura bags! thanks mate!!
now a couple of pics:
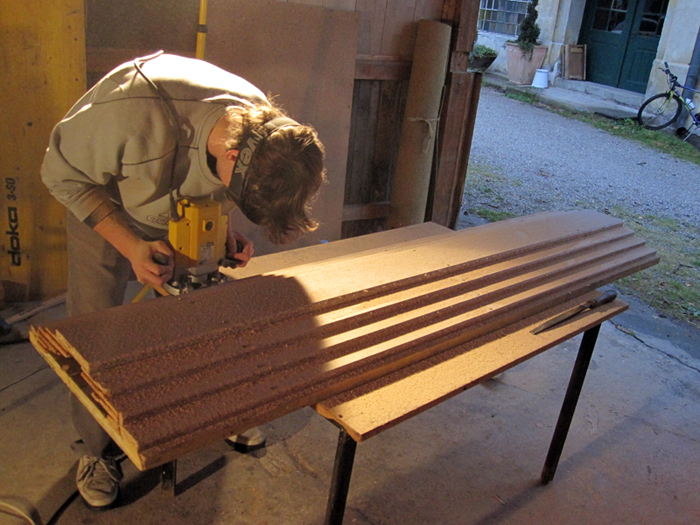
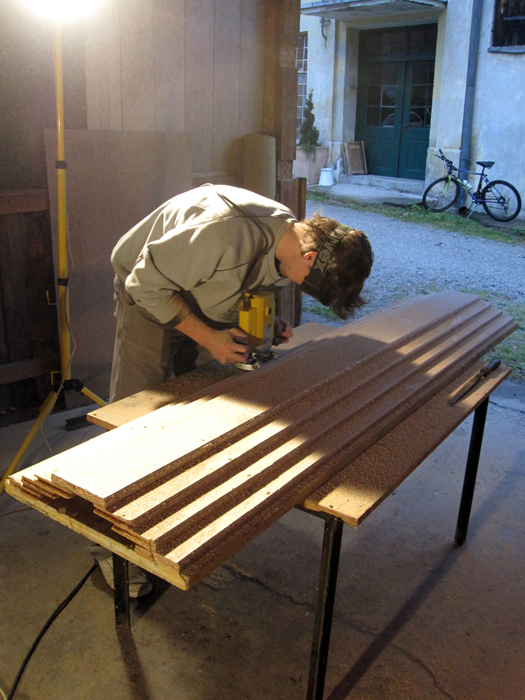
in the first two pics you can see me routering our top construction to get rid of any sharp edges that could rip the cordura (not that this stuff could be ripped easily). of course the pyramid is supported by the occasional cross bar beneath it.
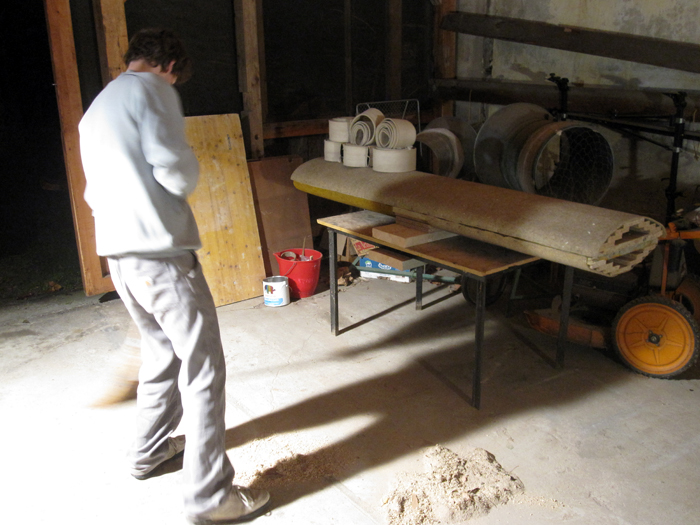
third photo is me cleaning up the shop and in the back you can see part of our press. the lower part is mounted to the table with the wooden bar beneath it as a spacer. i'll get some more detailed pics of that soon.
we've covered the whole pressure distributors in a thick fleece to add some more insurance against ripping our cloth bags.
the rest of our press is pretty much ready to go as well. molds are nearly finished. we just need to get some sheet metal to make a cassete/heat spreader and do all the wiring for our super special awesome heat blankets (carbon heaters baby!).
unfortunately both of us are pretty busy with university atm, but we hope to have our first boards in early december.
i'll post updates whenever we make some progess worth the mention. stay tuned.
cheers!
shopvac
Looks a lot lighter than ours. Nice work. Can't wait to see some skis. The cordura is amazing stuff. Huge props to Montucky for hooking people up.
thefreshpimpofbigair
Im really diggin the round organic shape your press is taking. All sorts of images came to mind but makes me think of smokin a huge fatty.
KevyWevy
you guys aren't worried about the voids in the middle? seems like you would need some supports in the middle.
chrismp
@kevy: they do have supports in the like every 20cm, just not on the farthest points outside...we figured we could save some weight without losing strength.
@biggy: it will be smokin once we have our heating blankets ready
KevyWevy
ah. thats what i was wondering.
definitely best to keep the weight as well as the material cost down!
chrismp
UPDATE:
of course we've been working on the press last weekend as well and it's nearing it's completion
finished the top and bottom molds and the bladders. nothing too fancy. we're doing some rockered boards similar to the capita flatkick shape. that means the boards will be flat underfoot and have a few millimeters of straight rocker till the tip/tail and then the straight tip/tail rise after a short curve.
here's a pic:

today the parts we needed to complete our heating blankets have arrived, so we hope we can show you some pics of our finished babies after next weekend
if they work like we hope they do, then this will be the cheapest heating solution out there.
we'll have our templates and cores cnc-milled, so i went to the university of technology and they gave me instructions on what they need the cad-files to be like. took quite a bit of time to get used to the software they have, but i finally managed to get the shapes to what they need
chrismp
i have a decision to make whether to run the woodcore full lenght or just cut it off at the beginning of the nose/tail bend and put some layers of vds and fibreglass in there as a spacer.
what are you guys experiences on this?
webboy
> chrismp wrote:today the parts we needed to complete our heating blankets have arrived, so we hope we can show you some pics of our finished babies after next weekend
if they work like we hope they do, then this will be the cheapest heating solution out there.
So you will post pics of your heating solution? That would definitely be appreciated by everyone I am sure. Can you please describe how they are made as well? (My apologies if you posted details somewhere else that I haven't seen.)
chrismp
sure, i'll do an in depth write-up as soon as its finished and working!
unfortunately i'm sick atm so we won't be able to work on it this weekend.
what we're going to use are thin heating foils made by Frenzelit in germany called Hicotec TP: http://www.frenzelit.com/1473_HICOTECsupsupTP.html
they sent us free samples to use for our project (i was told the price for one unit thats 50cm wide and 225cm long would be about 15-30 EUR).
basically its a carbon foil that has copper strips attached to the sides with some cable connectors.
unfortunately our blankets don't have an insulation, so we bought some thin plastic foil used for heated vacuum molding (up to 225°C) and wrapped it around them.
for temperature adjustments we're using phase control dimmers (one per blanket) that are capable of handling up to 4000W at 230V.
they cost us about 60 EUR including shipping.
here's a pic:
image no longer available
the dimmers are needed to keep the blankets from overheating (>140°C) which would melt them down in seconds.
temp measurements are taken by a very simple industrial thermometer that reads up to 110°C (a PID would work as well, i guess).
with this combination we'll have to watch over the temp the whole time we're pressing, but that wont be too long since the sicomin epoxy we're going to use has a cure time of 30-10min at 70-100°C.
we've spent another 40 EUR for the rest of the parts including the thermometer, some potis, switches and other small parts.
when they're up and running i might be able to arrange a group order at Frenzelit for you guys since they have pretty high minimum orders...that'd be for fully insulated blankets then.
CFO
Hey Chrismp,
Any luck with your project? Did you manage to get the desired profile you wanted?
knightsofnii
WAH-POW! haha what great marketing, love it!
Idris
Any luck with the heating project?
knightsofnii
> chrismp wrote:i have a decision to make whether to run the woodcore full lenght or just cut it off at the beginning of the nose/tail bend and put some layers of vds and fibreglass in there as a spacer.
what are you guys experiences on this?
I would run at least a couple cm of rounded narrower nose/tail part in the tips. Why? if you just cut off the core and butt up square tip fill to it, you have that seam going straight across the board at a point where a lot of flex and vibrational stress can occur during nose/tail presses, or bumps, etc. Having a nice rounded seam will give the board more meat across the board there during longitudinal flex.
chrismp
@idris: the heaters are working great...last time we pressed it was about 0°C in our shop and we got the press up to 80°C in about 15 minutes.
@knightsofnii: thanks man. we settled on using a full length woodcore with approx. 2cm wide tipspacers made of polyurethane d44.
the polyurethane works great out of the box and the next step will be pouring our own sidewalls/spacers.
we still didn't get the chance to cover our process with photos since we were always in a hurry to build a new board right before leaving for our next holiday to do some testing. but i'm pretty confident that we'll have a detailed write-up by the middle of march.
webboy
I admit I have not searched elsewhere, but do you still plan on doing a writeup on your heater solution? I am still super curious.
chrismp
no need to search elsewhere yet
i just haven't gotten around doing it. i know it's taking way too long already now, but i hope i can get it done within the next month.
verdict so far is: they're working great, but they're still really ghetto with some self made electrical insulation (that probably can be dangerous).
webboy
Any info on an alternative like yours would be great, so no worries if it takes time.
chaka
Hey , we are anxious to read more about your heating system. Those isolated carbon sheets on Frenzelit´s web look great.
Please tell us more.
chrismp
i know i'm like silly late with this write-up! sry guys.
i cant access the heating blankets right now for photos since they're locked up at a friends house who's away for the holidays.
still here's a short version:
we got these as free samples. keep in mind that frenzelit usually sells them in huge quantities to the industry, we were just lucky that they had some scraps lying around that fitted our needs...just without the insulation.
i don't know what thei minimum orders are, but i'll talk to them soon.
basically the blankets act as a huge resistor that produces heat. if you just hook it up to some 220v it'll burn through all the power it can get and soon melt down (like really soon! we had to shorten one blanket cause we smoked part of it).
controlling the voltage with transformers would've been way too expensive so we started searching for ways to control the wattage with dimmers. took us some time to find some that could take the power, but finally we found the M028n by Kemo that can take up to 4000watts at 220v.
bought two of these plus some fuses and potis for finer control over the Kemo as well as a thermometer.
hooked everything up and they work like a charm. we got our press from 0°C to 90°C in about 15min.
only "problem" remaining is the insulation. we simply wrapped them in some polyamide vacuum foil thats able to take up to 215°C...works fine when the blankets are not touching anything that conducts electricity.
means you shouldn't touch the aluminum sheets in our press
you'll get small electro shocks (nothing too bad but i don't want to find out what happens if our ghetto insulation rips).
chrismp
found a pic of our assembled press on my hdd
the heat blankets aren't in the press in this one though...
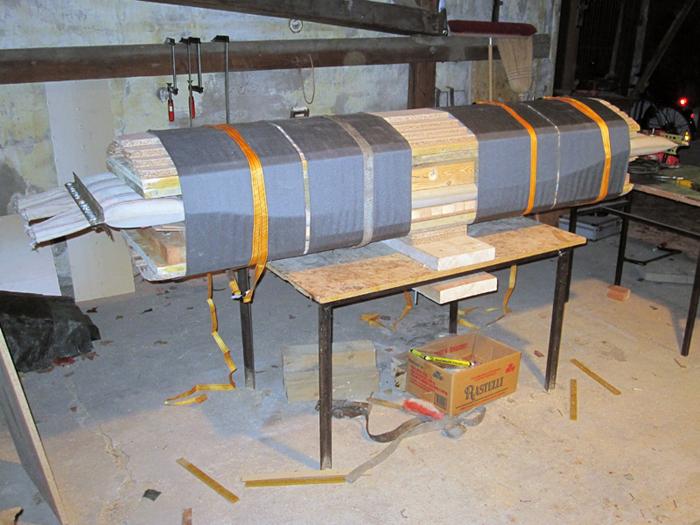
HUGE THANKS TO MONTUCKY!!!
i guess he's getting busier sewing bags as i post this
webboy
Thanks, let us know what they say...
chrismp
minimum orders on the heat blankets are 1500m
but there's a problem with them anyway. they're really thin and fragile like paper. plus i almost burnt one due to a rip in the insulation.
that's mainly the reason why i'm going to try and build a silicone heat blanket. i should have all the materials for some tests ready by this weekend
on another note, i've had some troubles with impressions on my boards. there's always a channel across the width impressed into the top. most of the times it's on the nose and on the last board it's also where the tail rocker starts.
i've had this problem no matter what type of material i use to protect the cassettes from epoxy (first couple of boards i used polyamide film and on this one i used parchment paper).
i place the parchment paper right on the board and above that are the aluminum sheet, heat blanket, mdf sheet and the cattrack.
there's no sign of these dimples on the aluminum.
here's a couple of pics:
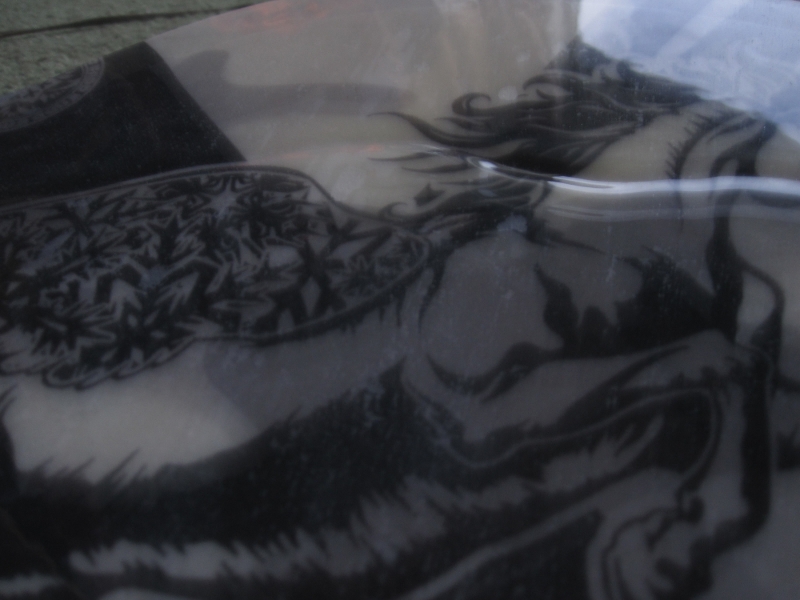
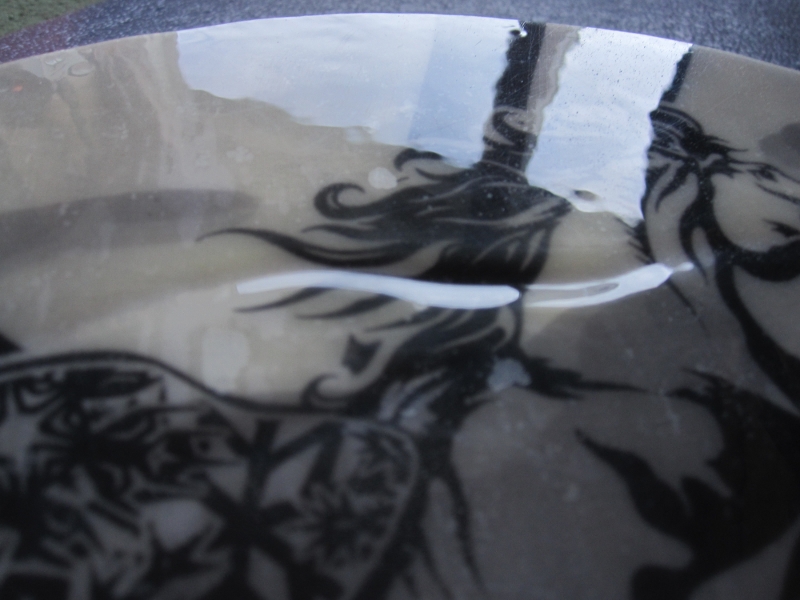
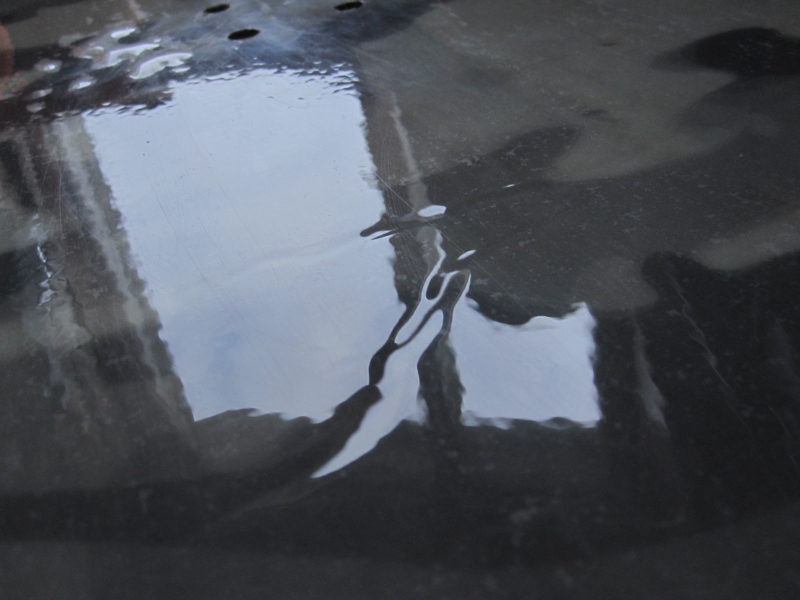
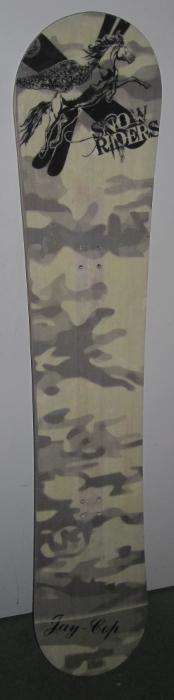
the graphic was printed with my epson 2100 on white canvas. we added some white pigments to the epoxy on top of the core, but you can still see part of the core shining through. there's a regular uhmpe topsheet on it.
doughboyshredder
wax your cassette sheets. Anything else will cause ripples
chrismp
> doughboyshredder wrote:wax your cassette sheets. Anything else will cause ripples
thanks, i already suspected that it was that.
btw, that graphic wasn't my idea. it was a commission for a friend.
Dr. Delam
Second that. I got rid of the parchment paper and no more wrinkles.
WhitePine
Chris - I was wondering how your boards turned out before you added heat blankets to your press. Did they turn out ok or do they have durability/delamination issues?
I'm considering doing something similar-ish to your design but I probably won't add heat blanket initially. Do you think I'll have issues?
Also, remove the curved piece of wood from your press that covered the pyramid portion?
chrismp
we've used heat blankets since day one, so i have no experiences on that topic. but i think many of the other guys using this kind of press (shopvacs,...) are pressing without heat and they do just fine.
what piece of wood do you mean exactly?
WhitePine
The one covering the pyramid in the 3rd picture you posted on page 1 of this thread. It looks like it was there to prevent any sharp edges from contacting the fabric. It's not there in all the subsequent photos.
chrismp
ohh, thats no wood, thats felt fabric
we removed it cause it wasn't really helping and made it kinda hard to slip the cordura on.
chrismp
2mm sounds doable. the concern i have with building a rectangular box around the core is that you would need quite a bit more resin than just filling up a channel.
amidnightproject
> chrismp wrote:2mm sounds doable. the concern i have with building a rectangular box around the core is that you would need quite a bit more resin than just filling up a channel.
Yea I considered that. It has me thinking of making it a larger copy of the skis shape. That way it's not boxy and Im only leaving the amount of sidewall I need and not a ton of extra. Just enough to leave a smooth edge when cutting the flashing off.
My concern with leaving excess core and routing out the channel is wasting to much of my raw core material. I'm using bamboo and 4x8 sheets are expensive so I try to maximize the number of cores I get.
chrismp
well, i guess then you'd just have to calculate which way is cheapest for you...
MontuckyMadman
hey chris, how do you deal with heating to 70c and ball milling or shaking the pre polymer to get it all melted and even? You just mix it with a drill? That would put allot of air in it i bet.
what a pita
doughboyshredder
> MontuckyMadman wrote:hey chris, how do you deal with heating to 70c and ball milling or shaking the pre polymer to get it all melted and even? You just mix it with a drill? That would put allot of air in it i bet.
what a pita
I don't understand what you guys are worried about.
Every board I have ever built the epoxy was mixed with a drill. Yeah, it gets foamy, and has a shit ton of air mixed in. That has nothing to do with having air bubbles in your layup. Air bubbles in your layup are caused by voids of epoxy due to improper wet out.
Picturing people mixing their epoxy gently to keep any air out of the mix makes me laugh.
MontuckyMadman
You missed what we are talking about. This is for cast polyurethane sidewalls not epoxy.
The solid structure is impaacted by voids.
chrismp
sry for the late reply. i just heat the resin in the microwave until its warm to the touch. that turns it liquid. then i add the hardener and mix it with one of those plastic knives. this introduces some bubbles but its not that bad. then i pour it into the channel in the core blank and let it sit at room temp until its cured.
cam.smith
I looked through the thread already but could have missed it. Do you have a problem with that deflecting horizontally? Also are those lvl's?
doughboyshredder
> MontuckyMadman wrote:You missed what we are talking about. This is for cast polyurethane sidewalls not epoxy.
The solid structure is impaacted by voids.
my bad, I was kind of responding to a different thread at the same time.
carry on...........
chrismp
@cam: we don't have issues with deflection. the cordura bags work great as a press frame. it's just not possible to load the press with just one person, thats why we're building a new steel frame press.
the wood used in the press is a couple sheets of formboard with a pyramid shape made of particle board on top of them. since the spacing between the cordura is so small it doesn't deflect in between the bags.
