Archive › Journals: Log Your Ski Building Progress
Soul Skis - Page 8
Journals: Log Your Ski Building Progress · 75 posts
Dr. Delam
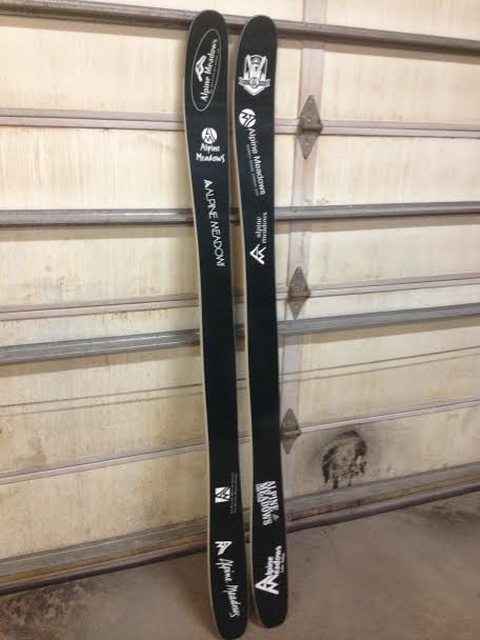
Towards the end of last season I felt like making something completely experimental. I based my design on the Praxis Concept ski which has three main points of snow contact in the sidecut and camber profile. Reverse sidecut and reverse camber right underfoot. The idea is that the ski slides and carves equally well. Slarving we call it.
I drew up the sidecut in my CAD program which took quite awhile and I wasn't really sure how much magnatraction to give it. I never skied the Praxis ski or even saw it in person but just guessed how much sidecut deviation to give it. Skis measure out at 131-108-124 with an effective radius of 22 m, 186 cm long.
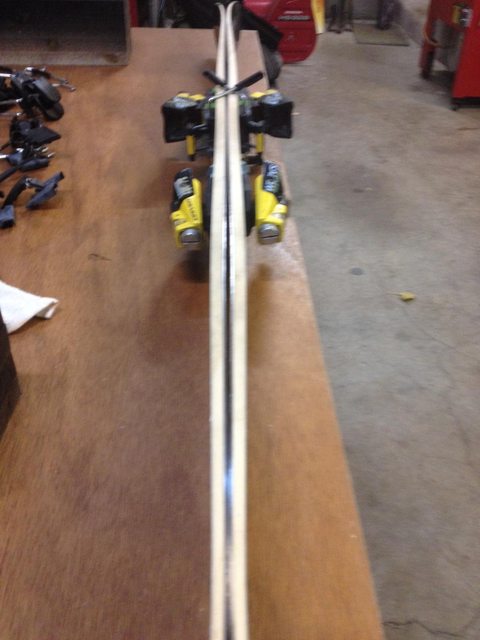
I shimmed my mold with scrap pieces of base material to make the two camber sections fore and aft of the binding mount area. The camber sections are about 2.5 mm of camber relative to the center of the ski and the overall camber is 4 mm.
Cores are all bamboo which made the build that much quicker. The bamboo is definitely softer flexing than most of the hardwoods I usually use.
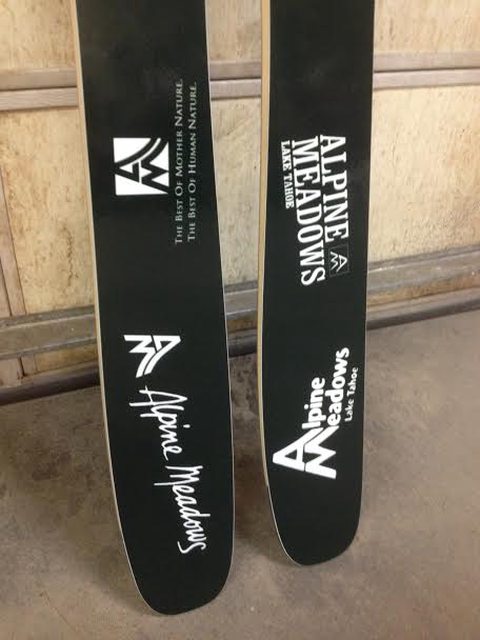
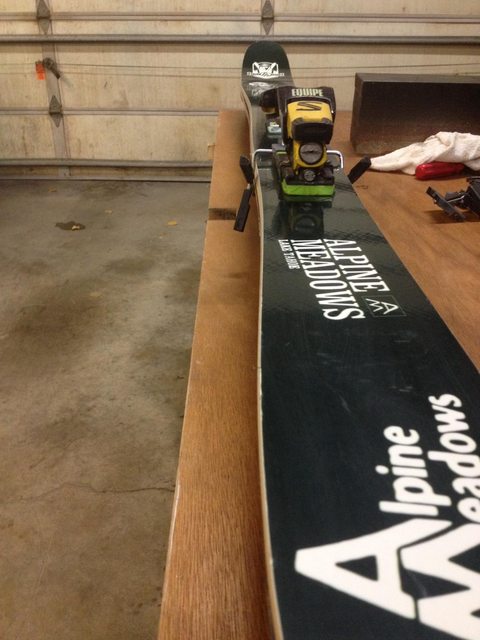
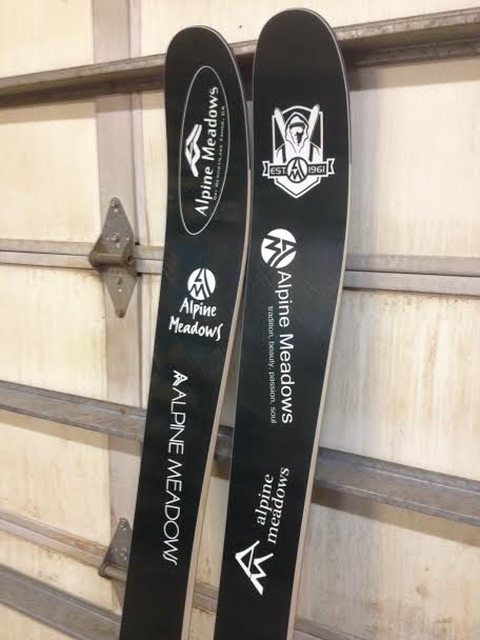
For the graphics I used old logos from the Alpine Meadows ski area dating back to inception. The new owners of Alpine killed off their logo all together and are trying to make it Squaw Valley. So these graphics are basically a big FU to the clueless corporate ski world who are trying to erase decades of skiing history.
So now on to the ride report. I only got to ski these in May, June and July on old spring(summer?) snow so I didn't get to try them in a variety of conditions. I found that they didn't carve as well as I had hoped. They definitely gripped and released easily off piste and were fun and playful. At high speed they were stable on a few laps down the Chimney. But on groomers they didn't lock into a carve like a normal ski. Possibly less magnatraction would solve this and different placement of tip and tail rise relative to the sidecut.
I have a few people that want to buy them based on the custom graphics alone so I think they are being sold. I doubt I would ski these again over the other skis in my quiver. I do plan on using the same graphics for a more conventional ski for my next build.
gav wa
I make a lot of boards with magnatraction, never made skis though. But anyway, as far as boards go that is way too big a reverse sidecut. Most boards are now going for milder magnatraction, apart from some lib tech boards (lib tech actually made some skis with their magnatraction, i don't think they were well liked tho).
So it is better to start with a sidecut that would already hold a carve ok in good conditions and then add some mild bumps or irregularities.
You also have a big section of rocker in the middle of your ski which is also reverse sidecut so that will really get skiddish on hardpack. That same sidecut on a full camber profile would probably be fun to ski.
Magnatraction can also be negative bumps too, draw a sidecut and then draw over it in 5 straight lines, the corners will be behind the sidecut, the straights going in front of it. Round out the corners nicely and you have 5 point Magnatraction.
barnboy
Hey, those look TASTY!
I made a pair almost identical about 5 years back now and skied 'em till the wheels fell off.
Looks like your underfoot bump stays within the width(s) of your tips and tails yes? If so... you're good. I found as an East Coast guy the bump added a lot of stability when traversing/skiing iced out faces.
Spent a season in Wolf Creek on 'em too and (in my mind anyhow) they definitely helped with floating.
It's amazing how completely unnoticeable it is when arcing turns.
Nice work!
You're gonna love 'em!
Dr. Delam
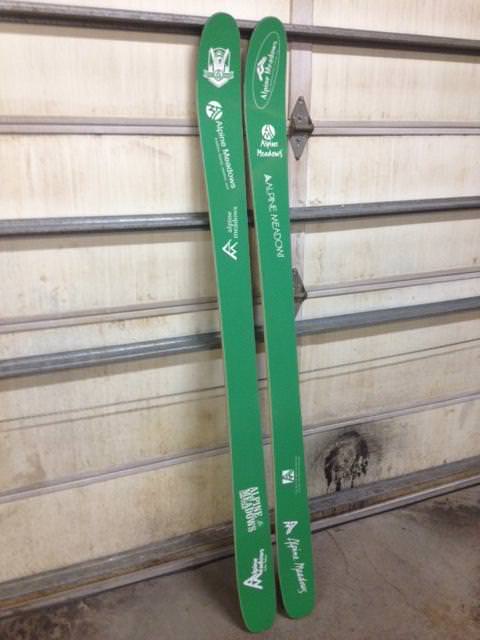
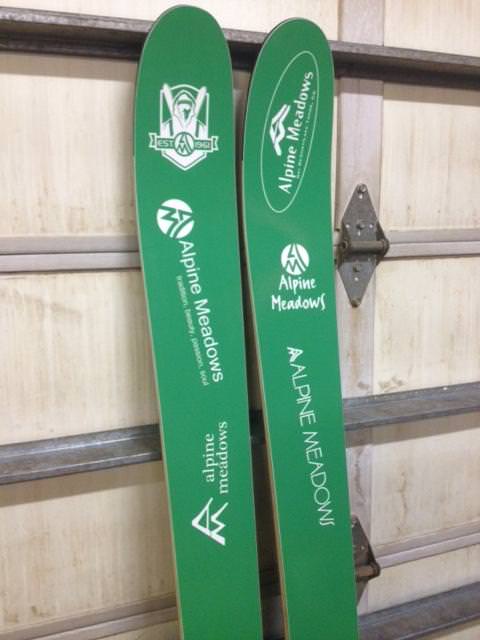
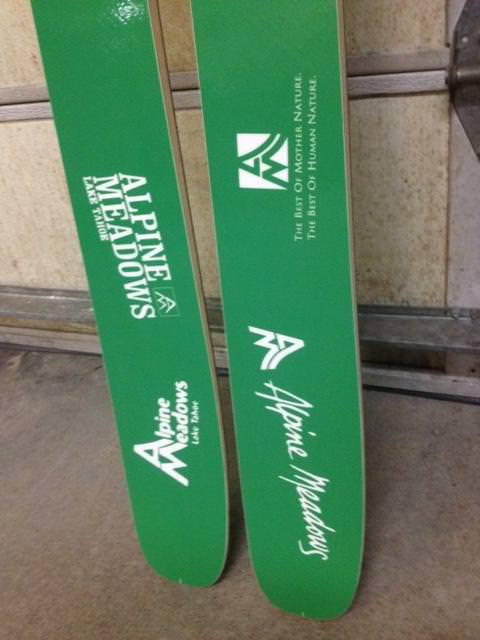
I decided to sell the last pair of Alpine Meadows Graphic skis so I came up with a new more traditional shape. I needed a pair of narrower carving skis for the hard snow that we have been experiencing thus far in Tahoe.
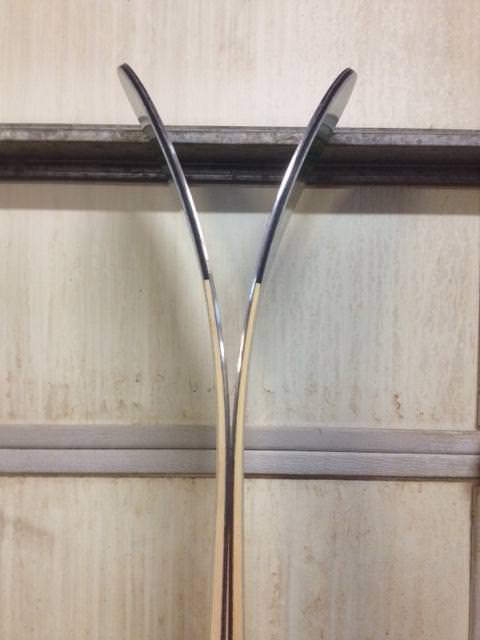
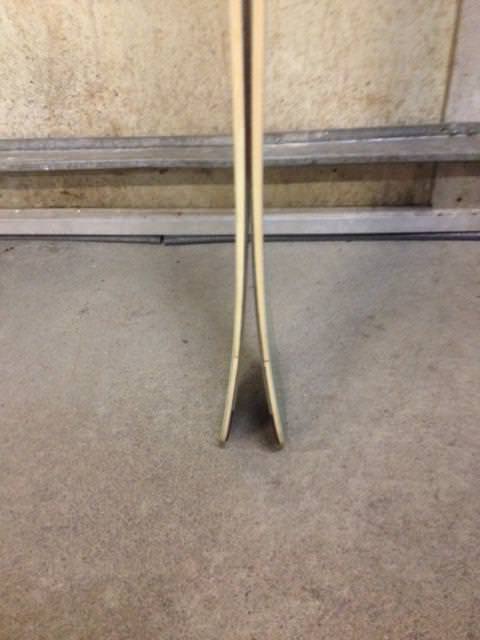
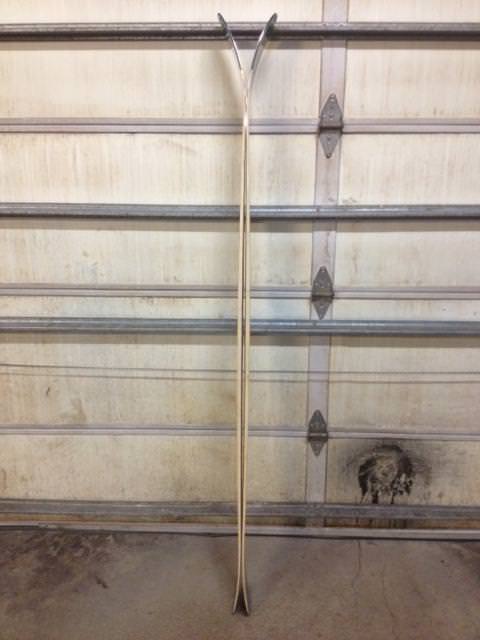
Specs are 185 cm, 136-106-126, 17 m turning radius. Tip length 29.5 cm, tail length 25 cm, tip rise 8 cm, tail rise 2 cm.
Cores are all bamboo and the plywood sheet I have is 12.5 mm thick and I wish it were thicker. I still think this is too soft underfoot for this stock of bamboo. This is going to be my last pair of skis I make for myself with bamboo except for maybe a park ski. I could probably stiffen them up with some carbon or some other layer but I like to keep it simple and control stiffness with the core thickness. I beefed up the tip and tails in my profile and made the tail taper to 4.1 mm and the tip to 3.7 mm. I used some bamboo for the tail spacer and for the tip I used 2.5 mm UHMW tip fill with some added layers of glass to beef it up.
I took them out today in 4 inches of new on top of hard manmade and old snow and they carved beautifully. I left the edges really sharp and they gripped really well even with only about 4 mm of camber. I've usually skied my trashed park skis when the snow is firm and icy and it's nice to have some tighter radius skis with edges again.
vinman
amazing work as always DD
Dr. Delam
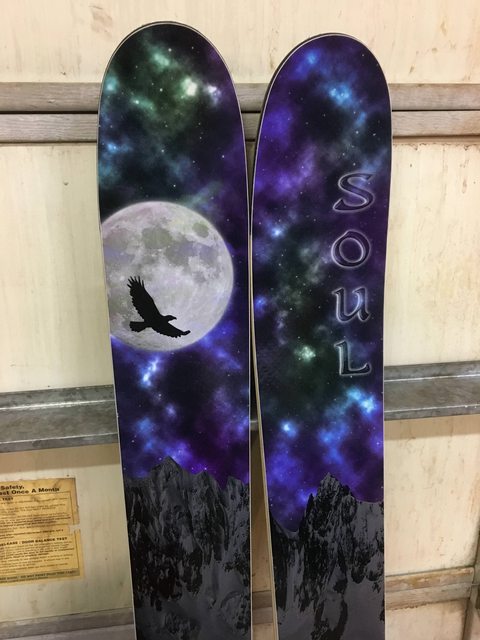
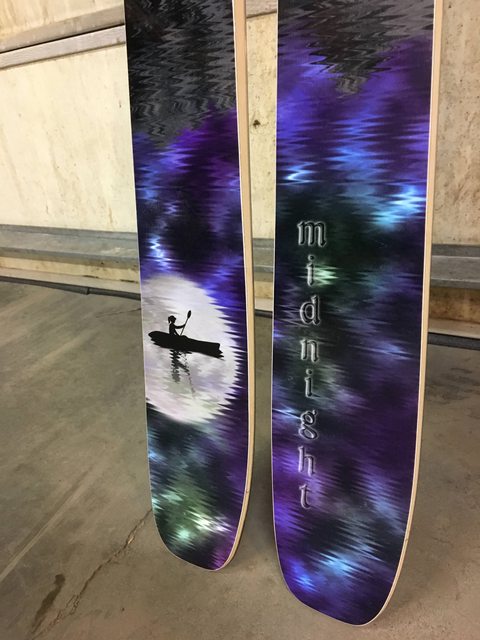
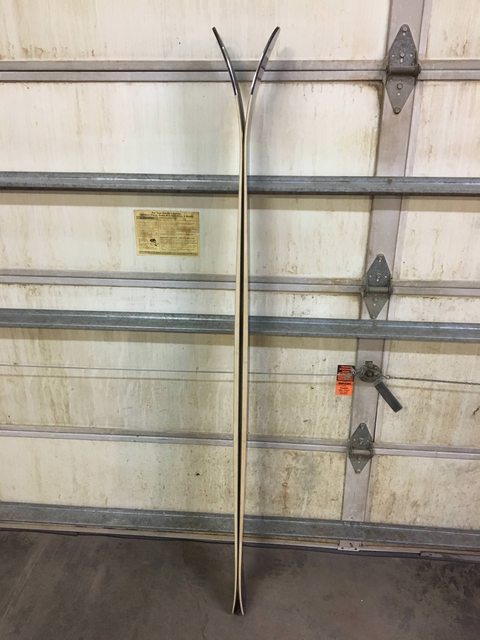
Here's a pair I made as a birthday present for my sister. I based them off the Salomons QST 92 that she skied and liked.
Length 161 cm, 120-92-110, 15 m turn radius. All bamboo core and sidewalls with a separate section of bamboo as tail filler and regular UHMW tip fill. I used bamboo as the tail filler since there isn't much tail rise and I figured it would bend fine without breaking. I probably could have used the whole core to the end but it makes layup easier if the core sits flat in the mold while I layup. Core dimensions were 3.5-12.5-3.5. I doubled up some 2.0 and 1.5 tip fill to match core thickness and it worked well. I stapled the two together after epoxy and also stapled them to the core. Everything stays nice and tight.
Tip rise is 7 cm using a 50 cm radius mold with a length of 28 cm. Tail rise is about 2 cm using a 104 cm radius mold, length 20 cm. Camber came out to about 3 mm heating 180 F bottom and 140 F top.
Sidewall is profiled at 7.5 degrees and left untreated. I tried using some Linseed oil on another pair with bamboo sidewalls and it didn't seem to penetrate much at all so I just left them as is. I find that if I am diligent about drying them off after skiing, they stay looking great.
I spent quite a bit of time designing the graphics on photoshop and am pleased but when printed they came out a bit darker than the original graphic.
I am always a little nervous making skis for someone else, especially since these were a complete surprise gift without any skier input. I was stoked to hear she loved them.

vinman
I personally love the tip rocker-camber-tail flare profile. I think it is the most versatile and makes a good do everything camber profile.
SHIF
Love the graphics. Brilliant concept with the full moon reflection.
Akiwi
Very nice, I see you had fun with the graphics. Great idea! Love the shape, and the tails look sexy.
Dr. Delam
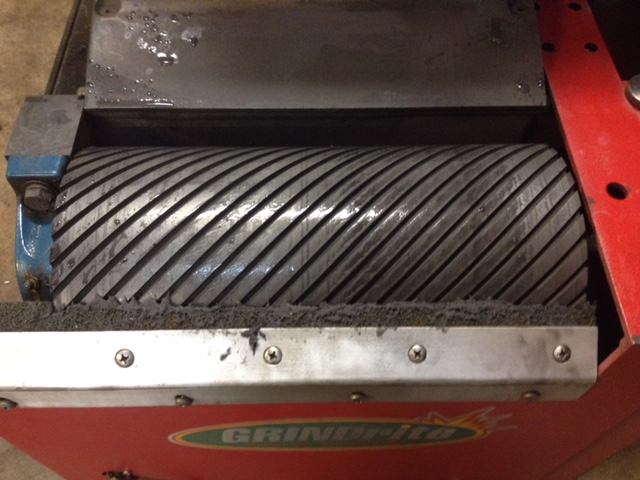
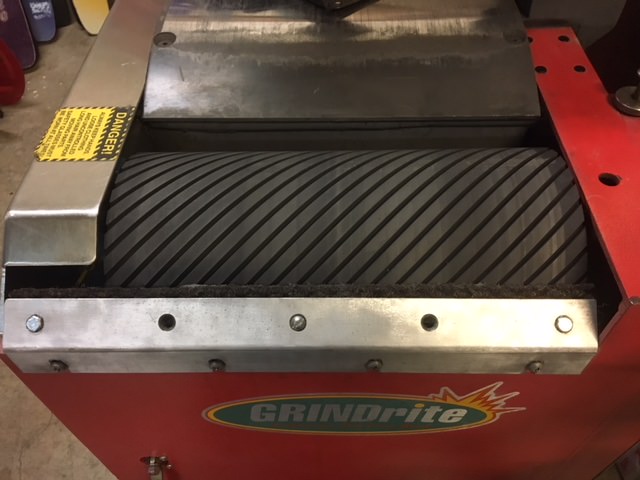
I finally got around to getting my contact wheel for my Grindrite ST600 resurfaced. Whether it was designed way too hard from the factory or just got hardened over the last 20 years or so, it was time to get it done. The wheel felt almost as hard as the steel platen.
I wasn't really happy with the results I was getting with the hard wheel. Belt seam marks, weird lines running down the skis from whatever crap was getting on the wheel, and just plain not grinding the base edges after they had a nice base bevel.
I sent it off to Contact Rubber Corporation and the turn around was about a month. It wasn't cheap but well worth it. They charged $480 and I also paid $80 for shipping as the thing weighed about 65 pounds in the crate. The durometer is about 40.
It was also a bit of a pain in the ass just removing it and reinstalling it as I had to remove the whole mount to get the bearings off.
The first pass on a pair of skis I knew I made the right decision. I saw sparks coming off the edges! The finish is super clean now and I can barely see the belt seam marks. I think it is just a good a finish as the $30,000 Wintersteiger that I occasionally get to tune on.
My next project for this machine is to build some type of side edge attachment. Anybody come up with something functional? I also need to figure out how to minimize the overspray. I find that when the spray is adjusted for complete belt coverage I get quite a bit of a mess on the garage floor.
skimann20
Got any before and after pictures? I'd be interested in seeing it.
Dr. Delam
Not much to see. It basically looks the same except the new one is way softer and isn't all glazed like the old one. After I removed the old one I saw a sticker on it from Contact Rubber and realized they made the original so I was glad to see that they were the experts in the field.
skimann20
Looks like some nice new "tires" you got there. I'm sure that will help a ton with the finish of the base.
Dr. Delam
It sure is cool riding up the lift with someone and telling them that you made the skis that you are skiing on. Everyone is amazed that you can actually make a great pair of skis in your garage. Thanks to skibuilders.com and all the contributors on this site, I have made some skis that peform better than I ever imagined. There have been times when I have thought about abandoning the process but I am so glad I stuck with it.
I started getting things rolling with my coworker and friend Three31. He took care of getting the press set up and assembled so you can check his postings for pics. We got a heat blanket and controller setup from Heatcon. We each made different molds to start out since I like skis a little shorter.
For my first pair I had the idea of a tip rocker only ski. I didn't like the wheely effect of the spatula when landing airs so I wanted zero camber for the rest of the ski. For sidecut dimensions, I wanted to combine a regular ski with a reverse sidecut ski and came up with zero sidecut from tip to heelpiece and taper in the tail. 125-125-120.
I stuck with a simple approach of aspen core with wood sidewalls, fiberglass, fabric graphics and clear top sheet.
The first ski had a bit of core shift since it was super tight fitting the mold into the press frame. Too much shoving and lack of a dry layup test run. There was a gap in the sidewall that I filled with a glue gun.
It turns out that I really didn't like the way they skied anyway so no big deal. They skied well in pure pow but felt too unbalanced with just tip rocker in the chop. I figure if I made the tail considerably narrower or put sidecut underfoot then they would be more user friendly and balanced. I even tried moving the mounting point but still wasn't too impressed.
image no longer available
For my next pair I wanted to stick to a more traditional shape. I based my dimensions on a ski that I used to have, the Igneous Fat Fall Line. I wanted a little wider and went with 127-102-112, 185 cm. Again, I stuck with an Aspen core, fiberglass, vds, fabric graphic with a painted stencil logo and clear top sheet . This time I tried sidewall material from skibuilders. I abraded the sidewall but forgot to flame treat and once I hit a rock things went downhill from there. I really liked the way they skied but they only lasted about 20 days before they really started to delam above and below the sidewall.
image no longer available
image no longer available
I needed to replace my Atomic Powder Plus since their days were numbered from landing on too many rocks. I loved the shape but wanted a twin tip for easier billy goating maneuvers and wanted a little rocker for slarvability. I stuck with the same dimensions of 135-115-125 for the shape. I used a zero camber mold and used top heat only to achieve a continuous tip and tail reverse camber of about one cm. I went with a vertical grain wood fir core 2-12-2 and didn't use any sidewall material. The graphics are fabric from Joann's with a clear top sheet. I love these skis. I have about 40 days on them so far and they are holding up great, even after hitting numerous rocks. Not only are they great in pow, but they blast through corn and are easily managed on groomers. I hope these last a long time. My only complaint is that they sometimes seem too light and chatter a bit on the really firm snow. I am not sure of what I would use to dampen them up so any suggestions are appreciated.
image no longer available
image no longer available
My wife saw how much fun I was having on my skis so she wanted a pair for herself. I figured something light and soft would be best for her so I went with a poplar core 2-11-2. I gave her skis more sidecut than mine since that is what she is used to. The dimensions are 140-115-128. They came out softer than I expected but she loves them. In my core profile design I had the taper start too early so that is why I think the tips and tails are so forgiving. She really isn't a high speeder or straightliner so as long as she doesn't break them they'll be fine. For this pair I decided to not do a full wrap on the edges. I never enjoyed trying to make perfect bends in the tip and tail. Other skis that I have owned without full wrap edges have always held up fine and after a dozen days so are these. I used three31's adjustable mold with zero camber and did top heat to achieve a slight reverse camber of one cm. She picked out the fabric from Joann's and she is having a blast on her skis that I gave her for Christmas.
image no longer available
image no longer available
My son is still growing so he was due a new pair of sticks. He likes the park as much as I do so I wanted to make him something that was versatile enough for all mountain skiing and park. The dimensions I decided on were 114-88-104 with a length of 163 cm. I went with a poplar core again and this time I added an extra top layer of glass to stiffen them up some more. The edges stopped 5 cm past the contact point and I am now never doing full wrap edges again. My son is a huge AC/DC fan so I came up with the idea of making AC/DSKIS. I picked up some red fabric from the store and designed the logos and got some artwork on the computer. I printed it on iron on transfer sheets and it worked great. It came out clean and is nice to have it ready to go before layup. I used black tip and tail spacer and you can see where it is darker there. Should have used white. I used three31's cat track and heated it up in the oven prior to layup. I was trying to achieve zero camber with just a bottom heat blanket and it worked well. They came out with maybe a millimeter of camber which is acceptable in my book. They came out with a concave base which I wasn't too pleased with. I am still at a loss why this happened since this is the first time this has occurred. I hand tuned them as much as I could to achieve some degree of base edge bevel and can say that I only really notice it when tracking totally flat on a groomer. I had to try them out of course since my son and I have the same boot size.
image no longer available
image no longer available
Other random bits of info that I want to pass along: I have been using QCM 49 resin and 408 hardener and it has held everything together great except for the one pair where I didn't prep the sidewalls. I usually press at 180 degrees at 50 psi. I have been cutting my tip spacer straight across at the start of the tip and tail radii. My least favorite part of ski building is profiling cores. When cutting out templates a downward cutting blade makes seeing your line much easier since the paper doesn't curl up and dust exits out the bottom. I have found the Bosch progressor for metal blades the best for cutting off flashing. An old version of Turbo cad can be found on ebay for super cheap and is easy to use for templates. Make sure you have a ton of quick clamps for edge attachment and don't pull them off one side until the other side is done or your base can banana out. Making skis perfectly factory flat has been a challenge. I prefer base high over edge high any day though. I prefer to do a vertical sidewall with a slight step above the edge using a straight router bit. Working as a ski tech for 20 years I have seen the most edge and sidewall damage with angled sidewalls. I have had good luck with Bosch tools and use their table saw, trim router, jigsaw and I also love all my Makita stuff including planer, compressor, and drills . Harbor Freight has a real nice digital caliper for about 15 bucks which is super accurate especially when profiling cores. I got my .04 aluminum for the molds from Onlinemetals.com but their prices seem to have gone up quite a bit since my last order.
Thanks to everyone who contributes here. This site is awesome and I couldn't have gotten this far without it. Time to design the next pair!
shopvac
The skis look great! Thanks for such a detailed overview and all of the helpful hints at the end of the post. Do you think you will try and work with the P-tex material for sidewalls or are you happy with using wood? We have only used wood and so far we don't have any problems but we only have <20 days on our skis.
For the skis that you mentioned were too light and chatter, how about adding in a little more dense wood with the fir to make them heavier and hopefully more damp. My brother demoed a couple pairs of Moment skis earlier this year and they were all really light. They all got tossed around in crud and on harder snow. We really didn't like how they skied overall. I think it was because the skis were way to light for downhill skis. If we were hiking or skiing in the backcountry a lot then I am sure we would have liked the lightweight feel, but since we are mostly skiing at a resort the super lightweight skis are not necessary. We like to use a 50/50 mix of poplar and ash in our cores. If you want a little bit lighter ski you can use more poplar and vise-versa.
MontuckyMadman
this is fugging awesome way to go man.
Dr. Delam
I finally got around to making a planer crib for profiling my cores. I never thought I could have a core profiled in 5 minutes! I should have done this from the start.
I used brad nails to secure the spacers to the bottom frame so it is easy to pop them off and change them if necessary.
I didn't have any grip tape so I used a glue gun at the tip of the core to secure it to the platform. This helps when entering the planer since the tip wants to rise up making it a little harder to slide it in the planer.
I was also thinking of counter sinking some screws near the core's apex to secure it down. I could then use these screw holes for standoffs on the base during layup to keep the core from moving.
I was hesitant to only use grip tape since I still think the core might move when I am carrying the crib to refeed it. I think I would be checking it every time I sent it through just to make sure.
My test core came out pretty darn good. It came out to within a tenth of a mm of my design specs. Time to get some cores ready for the real deal.
image no longer available
image no longer available
dbtahoe
Dr. Delam,
It's your neighbor to the south east. What's the distance between the feed rollers on your planner? You didn't have any problems with chipping?
I used self adhesive skateboard deck grip on my crib to hold the core in place and it worked great. The only way I have found to resolve the leading and trailing edge from lifting (and chipping in my case), is to leave 4" of drop on both ends and extending the flat section of the crib so that the core reaches the pressure of the exit roller before the feed roller starts pressing the core down to create the profile.
Obviously depending on the design of your planner, this may or may not apply.
Dr. Delam
The distance between the rollers is 5 1/16" so I made the crib and test cores long enough to accommodate the snipe at the ends. I didn't have any chipping at all on my doug fir and MDF test pieces. My only complaint is that if I didn't glue down the tip I had to press it down to feed it in the planer. It is just a little awkward to do when you are holding the sled in your other hand.
Snipe is an inherent problem in all planers due to the distance between feed rollers. Some are better than others and getting used to your planer helps too.
If you run your cores long and cut off the snipeage you should be good.
Keep sharp blades on hand too. If your planer starts getting louder or your ran some prefinished bamboo flooring, replace those knives.
dbtahoe
Try a hot glue gun. It holds well and you don't have to worry about wrecking your blades.
shopvac
How much wood do you guys take off on each pass or how many passes do you typically need to do to take your core down from start to finish? I profile the same way and we usually take off a very small amount each time. I think we probably take off 1mm each time for a total of 10-12 passes since we start with a core blank that is roughly 13-14mm thick and we profile down to 2-12-2. Does anyone take off more on each pass? Just trying to get a feel for how others are using their 13" planers. I have the rigid 13" model (sells for $350 or so, nothing too fancy). Also, we use the thin carpet double sided tape to hold the cores down. No problems with that but I would like to try the grip tape someday.
Dr. Delam
You could probably take a little more off than that on each pass but I did about the same as you. Your planer manual should give the recommended material removal for a given width of stock and type of material. My manual says 3 mm max for material under 150 mm wide. When in doubt, go with more passes. It doesn't really take that long to do a few more passes unless you are doing them in bulk.
The Ridgid Planer is actually a really good planer and well worth the money. My boss has one and I have used it a lot. One reason I chose the Makita over the Ridgid is that the Makita auto locks the height and the Ridgid you are supposed to manually flip the lock lever. I always forget to relock it when using the Ridgid and it never seems to move anyway.
I am getting some new core material soon and am actually looking forward to making cores. I never thought I would say that. Plus, my dog loves to sleep in the planer shavings.
Dr. Delam
Today I finished up a pair of skis that I had been planning for some time. I wanted to build a pair of skis as a tribute to my father. He was my hero. He was the one who got me on skis at age 2, took me skiing every weekend growing up, took me out west to show me the goods, and bought me my first set of tuning supplies. It is pretty much his fault that I am a ski addict so I at least owe him a pair of skis in his memory.
I call the ski the "Billy" for two reasons. First, my dad's name was Bill and second I love to billy goat around on rocks.
image no longer available
I based my dimensions on the Soul Ride skis which had sidewall bonding issues and needed to be replaced. I made a new template though so I could avoid the full tip and tail edge wrap and I wanted to change the tip shape to more rounded.
I used a poplar blank for the core from the local Home Depot, then shaped it and attached maple sidewalls for some edge beef. Before profiling, I drilled two holes in the core that were to be used later for dowel standoff locating pins. I then put two screws in my planer crib to fit in these holes to keep the core from moving while planing. I screwed them in so the heads would be below the finished planing depth of course. This worked out well as I never had to check to see if the center was aligned and no need to buy grip tape. I didn't like the hot glue method either that I tried since you can't switch cores easily. I planed to 2.2 tip and tail and 12.4 core apex. This was my first pair of skis where I used the standoffs to keep the core locked in. It works great and offers peace of mind that everything is in place without the need to make all the materials super wide.
In my layup I did my usual VDS, bottom layer 22oz glass, core, top 22 oz glass, fabric graphics, and clear top sheet. But this time I put a little extra "Soul" in my Soul Skis. I sprinkled some of my dad's ashes in the ski while laying it up. This way they are guaranteed to hold together!
I did have issues during the layup. It was a hot day and the sun was coming around and hitting the garage. I could feel the epoxy getting hot while putting the graphics down. I believe it heated up the bottom layers and had an effect on my camber. I was trying to achieve a flat ski with a zero camber mold, bottom heat, and preheated cat track. During a previous layup this worked great for zero camber. But this time I ended up with about 3/4 cm camber. I also used a hardboard masonite like material under the cat track which didn't transfer the heat very well to the top layers. I need to buy some more aluminum but it is expensive. This was another affirmation about how important it is to keep all of the variables consistent which isn't easy when working in a cold garage in the winter and a hot one in the summer.
For the next ski I started earlier in the day before it got too hot and no problems with the epoxy. I didn't preheat the cat track this time so I could try and match the camber to the first ski. It came out pretty close but maybe 2 more mm of camber.
I haven't ground the skis yet but they seem to be a little edge high like the last pair I made. I did an edge relief in the core and gave it ample width just in case there was some incidental core shift which there wasn't. I checked the relief depth with some scrap edge and it was right on. I don't know what else to do here. Maybe I'll go deeper next time and see if that helps.
For the graphics I wanted something bold that would stand out as my dad wasn't afraid to stand out. He sometimes skied in goofy bright colored outfits or a rainbow colored wig. I picked out some tye-die fabric that seemed to be right up his alley. For the logos and pictures, I used the iron on material printed with my inkjet. I remembered how much my dad liked Snickers bars so I chose the Snickers logo and font.
image no longer available
My dad had a heart attack while riding a chairlift at Okemo, VT. It was opening day and I guess he was too excited to make the first turns of the year. He was on a chairlift to heaven.
I sure am glad that I made these skis and can't wait to mount them up. Whenever I am skiing I can just look down at them and I'll instantly have a smile on my face. Thanks for the great memories dad. This one's for you.
image no longer available
plywood
those are some nice graphics! 40 years since woodstock, eh!
dg
really touching backstory to that too - lovely stuff !
dan
Three31
Those skis turned out great! Great write up too.
Dr. Delam
I think I figured out why my last couple pair of skis came out edge high.
I recently got some new materials and I could instantly tell that the base material was thicker than what I had been using. I got out my digital calipers and took some measurements. The old base material is 1.18 mm thick and the new stuff is 1.4 mm. The depth of the edge is also 1.4.
So when the edge flange is sitting on the base, the bottom of the edge is not flush with the bottom of the base but .22 mm lower. Thus, railed skis. I guess I'll just grind 'em but I wish I just had the right thickness base material to begin with, especially the way I like to hit rocks!
Dr. Delam
I had some free time last week and finished up another successful build. This pair I made for myself and I call the Nuke.
The skis have a 20 meter sidecut with dimensions of 138-115-129. I gave them 36 cm tips with 5 cm rise and 32 cm tails with 2.5 cm rise.
For the cores I used oak under the binding screws, fir in the middle, more fir outside of the oak, poplar outside of the fir, and then bamboo sidewalls. I profiled to 3.2-12.75-3.2 and these guys are stiff. They are about the same stiffness as my Soul Surfers so I think they will charge hard and take whatever I throw at them.
I gave them just a few mm of camber under foot so they should be fairly versatile for hardpack and pow.
The graphics I designed on Photoshop again and the topsheet was printed by Chad at CODA. They are a prone to chipping if you tend to bang your skis together a lot. I have heard that nylon is better than PBT for chip resistance.
I figured out what was going wrong with my thermocouple. The end wires had some adhesive residue gummed up from duct taping it to the aluminum causing it to not read properly. I just cleaned it up and no more error messages on the controller.
I was pleased with my prediction of the amount of camber I would be getting. I set the top blanket at 150 and the bottom at 180 to get just a few mm of camber.
I mounted my bindings 2 cm forward of where I usually design them to be. I tested about 25 different pair of retail skis last month and played around with the binding positions on a lot of them. I came to realize that I like them a little more forward now.
Tomorrow these will touch snow so we'll see how they do. Conditions should be a little bit of everything so it will be an ideal test day.
image no longer available
image no longer available
image no longer available
image no longer available
image no longer available
Brazen
The bamboo sidewall looks great on those. Very nice
Dr. Delam
Thanks. I really like using the bamboo for sidewalls. The router gives it a real clean finish and the bamboo is very consistent. You don't see grain variation like you do with some woods. It also has a decent janka hardness and takes impacts pretty well.
I skied these today and was blown away. They were so incredibly solid and I got to ski them in pow, slush, windbuff, a few bumps, and carved up some groomers. They are the closest thing to a do everything ski that I have built. This pair is going to be skied hard until there is no more ptex or edges left on them.
n.marshall
> Dr. Delam wrote:
I mounted my bindings 2 cm forward of where I usually design them to be. I tested about 25 different pair of retail skis last month and played around with the binding positions on a lot of them. I came to realize that I like them a little more forward now.
I have been messing around with this as well. How many cm back from true center are you? Depending on snow conditions, tip/tail width, what you will be using the ski for, and what binding you are putting on the ski are all things that can affect where I want the mount point to be.
Dr. Delam
On this particular pair I went back 7.4 cn from center. I calculate it as a percentage of total ski length and have been mounting in the 45-46 % range for boot center, 49% for park skis.
falls
Dr. Are you saying 45-46% from the tail, ie. 55% from the tip. That's what my latest design is - narrowest point at 55% of total length.
Are you placing the narrowest part of the sidecut at the same place as boot centre?
The pair of mine I have skied the most are a 186, with boot centre at about 6cm back from true centre. I think I like being a bit forward of the traditional mounting point especially with some tip rocker to keep them up.
falls
Dr. Are you saying 45-46% from the tail, ie. 55% from the tip. That's what my latest design is - narrowest point at 55% of total length.
Are you placing the narrowest part of the sidecut at the same place as boot centre?
The pair of mine I have skied the most are a 186, with boot centre at about 6cm back from true centre. I think I like being a bit forward of the traditional mounting point especially with some tip rocker to keep them up.
Dr. Delam
Yes, I am measuring from the tail here.
I don't always put the narrowest part of the sidecut at the boot midsole but it is usually fairly close. If I want a higher taper angle(tip width vs. tail width), I offset the sidecut more so the narrowest part is back of the boot midsole.
SHIF
> Dr. Delam wrote:... If I want a higher taper angle(tip width vs. tail width), I offset the sidecut more so the narrowest part is back of the boot midsole.
Have you considered using a dual radius side cut to create more taper in the ski design?
A shorter radius from the mid boot forward (~22m) and a longer radius aft (~26m). This narrows the tail about 3 mm on a 186cm ski. The 4FRNT MSP has a shape like this. I plan to build a similar design but wider overall, 133-101-119.
Cheers,
-S
http://www.backcountryfreeskier.com/4fr ... e-ski.html
Dr. Delam
I built a couple pair of skis with dual radius sidecuts but I like my single radius designs much better. They feel more predictable and have a larger sweet spot.
If the radii are fairly close it's not that noticeable but I think mine were something like a 10 meter difference. They felt very hooky and quirky and were very sensitive to where I was pressuring the ski.
To simplify things and get a consistent turn radius back, I reverted to single radius sidecuts.
Multiple radius sidecuts definitely work but I know that I can't go wrong with a single.
I skied the Scott Dozer this year, which actually had a zero sidecut portion underfoot and that thing carved awesome. I didn't get to ski it off piste though because it was bone rattling frozen crud.
Dr. Delam
Tonight I just finished up a touring ski to add to my quiver. I call this one the Soul Searcher and got new Dynafit bindings, Dynafit boots, and some new Black Diamond skins for them.
image no longer available
I went with a length of 180 as opposed to my usual 185 all mountain size. The skis have a 23 m turn radius with dimensions of 129-112-120.
The cores consist of fir, poplar, oak, with bamboo sidewalls and a profile of 3-12.5-3. They are nice and stiff but not too heavy.
I gave the tips 7 cm rise over 34 cm and the tails 4 cm rise over 30 cm.
image no longer available
image no longer available
At first I wanted to go flat camber on these but at the last second I changed my mind. I have only toured on regular camber skis and thought that a flat ski might not skin as well. So I gave them about 2 mm of camber. We'll see how they do.
I stuck to my usual layup of VDS, 22 oz glass top and bottom, CODA graphics, 45 psi, with bottom blanket at 180 and top at 160.
We should have a nice long spring touring season if it ever gets here. It is still snowing in the Sierras and winter is hanging on tough.
image no longer available
image no longer available
Brazen
Beautiful. Every pair you make seems better than the last.
Dr. Delam
Thanks Brazen. I have been enjoying looking at these for hours at a time while skinning up the last few days.
Dr. Delam
I was able to finish up some cores today for the next build for my wife. I used a strip of fir in the middle, couple strips of oak under the binders, then poplar with bamboo sidewalls. For me, making cores is still the most time consuming part of the build since I make them all individually and not from blocks.
image no longer available
I also got my graphics shipped from Coda. I spent way too much time on these too but I think the wife is pleased.
image no longer available
image no longer available
Snow is forecasted this week in the Sierras too. Bring on winter!
falls
always love your work dr!
look forward to seeing these finished
Dr. Delam
Thanks Falls!
Another successful pair was pressed this week. This one is called the "Sprite" and is for the wife.
Cores are profiled to 2.8-11.5-2.8. I added a layer of glass in the tip and tail area for the 2.2 tip spacer to match the core ends.
I used my 74 cm radius mold for the tips and 149 cm radius mold for the tails. The tips are 32.5 cm long with a 7 cm rise and the tails are 30 cm long with a 3 cm rise.
image no longer available
image no longer available
Ski dimensions are 133-115-127, 20 m turn radius, and 172 cm length. I gave them a little less tip and tail taper than my last few pair.
image no longer available
image no longer available
image no longer available
I used my 7 degree wedge under my router to profile the sidewalls and used the drum sander bit on the router to polish the whole perimeter of the ski.
I set my top blanket at 170 and the bottom at 180 to achieve just a hint of camber. It's barely noticeable but should increase slightly in the cold.
Speaking of cold, it's in the twenties right now and the top of Squaw just got 22" last night. Let's hope for another strong early season like we had last winter!
If anyone in Tahoe is going to see MSP's La Nina in Squaw, hit me up for an adult beverage at the bar. My name tag will say Dave for those who just know me as Dr. Delam.
Dr. Delam
I have been trying to keep my building for just family but when someone waves some cash in front of you and you have the week off, it's hard to resist. A good friend of mine threw some money in my face to build him some skis so I couldn't turn it down.
image no longer available
image no longer available
image no longer available
He wanted a pair of my Surfer pow skis so I was able to use my old template. I just updated the graphics a little and threw some surfer images on there. I really dig the Dragon coming out of the wave and wish I had it on my skis.
image no longer available
As nasty as my hardener smells, I think I am beginning to like it. I pop open the can, smoke comes out and I start salivating like Pavlov's dog.
I am also salivating because it just snowed 6 inches in the last 4 hours. No alpine skiing for me yet but I am going to take out my touring gear and mess around on the golf course.
Dr. Delam
No snow and blocked out ski pass = time to build some skis.
I finally got around to making some park skis as a Christmas present to myself. The park is the only thing worth skiing right now as we are still riding on 100% manmade. Driest December in something like 80 years.
image no longer available
image no longer available
I call these the Soul Session. 17 meter radius, 170 cm length, 105-85-101, 30 cm tips and tails with equal 5 cm rise. Core is fir, oak, poplar, and bamboo sidewalls, 11.8 mm thick tapering to 2.8 tips and tails. 22 oz glass top and bottom.
Nobody wanted to buy my clear topsheet so I figured I would use some of it instead of some custom graphics. I also had some leftover tie dye fabric that I used. $ has been tight lately with lack of snow and thus lack of work. I also figured that these skis are going to get thrashed on hard and I consider them disposable. My edges always break underfoot from rails.
We'll see how these hold up.
FrontierSkis
Skis look Awesome, keep up the good work.
Really liking your ski shapes, and the Coda graphics are great.
Dr. Delam
I just built another pow ski so it has to snow this winter. Ski specs are 140-122-130, 30 meter turn radius, 185 cm.
image no longer available
I am trying out some different core and sidewall material this time. I threw some center stringers of Honduran mahogany and sidewalls of Philippine mahogany and got all the wood for the right price (free). The rest is oak, poplar, and pine at 3-12.5-3 thickness.
image no longer available
I am also trying out some nylon topsheet material that a local manufacturer kindly printed for me for cheap. This has to be my cheapest build to date with material cost about $75.
image no longer available
I call this one the WTD which is just my dad's initials. This pair is another tribute ski and I sprinkled some more of his ashes in the layup for extra soul.
image no longer available
Tip rise is 7 cm and tail rise 2.5 cm with about 2 mm camber underfoot pressing at 160 F top blanket and 180 bottom blanket.
image no longer available
image no longer available
I also used a different hardener this time, the QCM 32, which was a little more viscous than the 408 I had before but wet out fine.
I moved the narrowest part of the ski farther back than I usually put it so I'll have to see if I notice the effect.
Everything went perfect on this build and I am super stoked to get winter rolling and try them out.
vinman
As usual, looks great Dr. My rocker shapes are similar to your. I've got some mahogany in all of my skis this year also. Your Dad would be proud.
Dtrain
Wow. these look awsome. Very cool idea with the ashes. Keepin' the old man involved in what you love. I tip my hat to you Doc.
Dr. Delam
Another memorial ski but this time for my good buddy Kip Garre who was killed in an avalanche along with his girlfriend Alison in 2011.
Kip was not only an amazing athlete and great friend but a classic joker. The graphics are of him skateboarding in a devil outfit flipping the bird and getting everyone fired up.
image no longer available
image no longer available
image no longer available
image no longer available
This is going to be a dedicated touring ski for me. I put some of his ashes in the layup and if I can carry just a little bit of his infectious energy and spirit with me in the backcountry I will be a happy man.
On a technical note, I used a nylon topsheet here and I think it might have different expansion properties versus PBT. With my heater setup at 180 top and bottom I was expecting flat camber. But I got similar camber as my last pair pressed at 180 bottom and 160 top. When I built with PBT topsheets equal top and bottom heat would get me flat camber.
Anybody else experience changes in camber by using different topsheets?
OAC
Get fired up!
My personal feeling/experience is that the particular wood core one put in a particular ski(pair) has their own "life" and "decides" if they want to be cambered or not...
I only use heat, same time and same temp., from the top for the moment, which should indicate camber all the time, but still mixed results...
Dr. Delam
I just finished up a pair of park skis for my son. I did the nylon graphics on photoshop with a few pictures that he drew and a few other random ones that he chose. This is my attempt at a brick wall background with graffiti. I lost track of how many hours spent on these graphics. So many pictures and multiple layers per picture to achieve a graffiti effect.
Skis are single radius, 17 meter, 114-88-109. Cores are fir center stringer, oak under the binding holes, poplar, and red balau sidewalls profiled at 7 degrees.
Equal tip and tail rise at 5.5 cm and they have 2.5 mm of camber.
Press parameters were 180 bottom blanket, 160 top blanket, 40 psi for one hour at temp using Forest/QCM epoxy.
The only thing wrong with this build is that I don't get to ski them. My son's boots are two sizes bigger than mine so no go without remounting. I'm trying to convince him that he is in too big a boot since his foot is only a half size bigger than mine.
image no longer available
image no longer available
image no longer available
image no longer available
image no longer available
vinman
The texture effect is cool. As always, great job.
Dr. Delam
As usual, I am late with my wife's Christmas present. But considering we hardly have any snow, I really don't want her taking these out just yet anyways. Lots of rocks and hardly any terrain open.
This pair is a new hard snow ski for her. She really liked the other hard snow skis I made for her but she wanted new graphics. Go figure. So I made these similar but a little narrower with more sidecut.
17 meter radius, 125-100-115 dimensions with oak, poplar, fir, and red balau sidewalls. Skis are fairly stiff with core dimensions 3.1,11.8, 3.1. 22 oz glass, vds, pbt CODA topsheet, nothing fancy. I usually try to weigh the cores before pressing but I spaced that. Doh!
image no longer available
image no longer available
I pressed at 40 psi with the blankets at 180 bottom, 160 top, and got about 2.5 mm camber. Tip rise is 6.5 cm and tail rise 2.5 cm. QCM/Forest epoxy which I think I will never change. All of my skis seem indestructible.
image no longer available
image no longer available
Whoever is getting snow, please send some to Tahoe. This is our third shitty year in a row and it is getting old. I've had my moto and mountain bikes out way too much this winter and zero days in the backcountry or on my snowmobile.
MadRussian
Inspirational. Great graphics.
Hope someday I can turn up something that nice-looking
Dr. Delam
Thanks guys. I appreciate the praise.
MadRussian, if you haven't played around with Adobe Photoshop and Illustrator, I highly recommend using them for graphic design. They are incredibly powerful and I learn something new with every project. You will spend hours and hours learning and experimenting but it is a lot of fun once you get familiar with the functions. There are countless tutorials on youtube and various forums. Keep at it and I am sure you will be amazed at what you come up with.
MadRussian
> Dr. Delam wrote:Thanks guys. I appreciate the praise.
MadRussian, if you haven't played around with Adobe Photoshop and Illustrator, I highly recommend using them for graphic design. They are incredibly powerful and I learn something new with every project. You will spend hours and hours learning and experimenting but it is a lot of fun once you get familiar with the functions. There are countless tutorials on youtube and various forums. Keep at it and I am sure you will be amazed at what you come up with.
I haven't played with Photoshop yet. Currently I work on production process to make sure skis came out right. Maybe in the future when I take care all of the problems. With every build punchlist become shorter one thing for sure before to go with graphics I will try wood veneer
Dr. Delam
New Vortex Park skis for me. 17 meter radius which has been super fun carving on groomed runs. These are 180 cm and a little longer, stiffer, and heavier than my other park skis so these are better for taking them outside the park.
Cores are poplar, oak, fir, and batu sidewalls, profiled to 3.2-12.5-3.2.
Tip and tail rise equal 6 cm, dimensions 116-90-110, skis weigh 8 lbs. 6 ounces, 3 mm camber.
QCM 43 resin, 32 hardener pressing at 180 bottom heat, 160 top at 40 psi.
7 degree sidewall bevel, nylon graphics done with photoshop. 22 oz glass top and bottom with an extra layer over the uhmw tip fill.
I felt bad trashing these on some rails the first day but got over that quickly.
image no longer available
image no longer available
image no longer available
image no longer available
vinman
DD, so sweet, love your stuff!!
skidesmond
Beautiful! The ski dims sound beefy, they should carve very nicely outside the park.
Dr. Delam
You guys are too kind. I have been having a blast on these. Just what the Dr. ordered.
Dr. Delam
New Soul Jah all mountain twin tip skis for my son. I haven't done anything drastically new with my building but I did make a new tip mold with a tighter radius for more tip height. I'm also trying out oak for the sidewalls this time.
Skis are 180 cm, 19 m radius, 133-108-125, with a few mm of camber.
Cores are pine center, balau under binders, and poplar with oak sidewalls. Core profile is 3.2-12.1-3.2. I also made the tips spacers longer than usual to help maintain tip height.
Skis came out awesome but the colors were a little off. Wherever the black is has a greenish tint to it and the red looks a little too pinkish. It doesn't show up so much in the pictures but it definitely looks different than what was on my computer monitor when I drew it up.
Time to grind and mount these up so I can test these out before I give them to him.
image no longer available
image no longer available
image no longer available
image no longer available
image no longer available
vinman
Great stuff as usual
Dr. Delam
Thanks Vinman. If you find yourself at Stowe or Smuggs keep an eye out for these as that's where my son will be skiing. But first we are off to Snowbird and Jackson Hole next week! Fired up!
Dtrain
Those cores look sick dr.
Dr. Delam
Another pair of park skis for my son. He broke his tails landing switch on his last pair so this pair I used new tip and tail molds to make the tip height much higher measuring about 8 cm.
image no longer available
image no longer available
image no longer available
image no longer available
I used the same template for 17 m radius, 114-88-109, 175 cm and beefed up the core thickness a bit.
I opted not to do a rabbet on the sidewalls due to the fact that the birch was tearing out badly when profiling and I was afraid that the core would have been ruined. There was a big chunk missing right near the end of the core just past where I was going to do my cutoff and it was too thin where I would start the router and feed in. So instead I just cut the fiberglass to fit within the edges to level it out. The bases came out just a little edge high as the fiberglass definitely compresses some. With some grinding and hand beveling they are looking pretty damn good. The VDS got squeezed out but just underfoot which I surmise was the result of not having fiberglass over it. Won't be doing this technique again.
I was going to use a cork layer but like a dumbass I ordered the wrong stuff and got a cork/rubber mix. I did a test scrap layup and the layer was probably bonding well enough but I didn't want to chance it so I didn't use it.
The only real issue I had with these was getting the graphics perfectly centered. It's a lot easier with two people so I struggled a bit by myself and had to pull it off and reposition. In doing so the tip spacers gapped out a little from the core. Only cosmetic really but I know its there. Next build I plan on putting a small scrap attached to the sidewall and stapling the tip spacer to it. A little extra step but guaranteed tight to the core.
Graphics were some some sketches that my son drew up with a couple Native American patterns thrown in. I had Chad at Coda print up the graphics and I stopped by his place to pick them up after skiing Kirkwood and got to see his shop. Kirkwood has been ripping!
image no longer available
MontuckyMadman
Cork rubber mix sounds awesome. from Where?
Dr. Delam
Here's where I got mine from. http://www.cleverbrand.com/default.aspx?CN=3D9103C82BC2
I was unsure if the rubber would bond so I didn't use it. In my test piece there were parts that bonded very well and others not so much.
I'm going to try just the plain cork that I just ordered.
Akiwi
> Dr. Delam wrote:Here's where I got mine from. http://www.cleverbrand.com/default.aspx?CN=3D9103C82BC2
I was unsure if the rubber would bond so I didn't use it. In my test piece there were parts that bonded very well and others not so much.
I'm going to try just the plain cork that I just ordered.
Where were you intending to put the cork layer? I assume you would be using it for the damping properties.
And I also assume it would be within the sidewalls somehow.
Dr. Delam
I am using the cork for vibration damping and simple filler. I cut it out to fit between the edges going right on top of the base. I also put a layer on top of the plastic tip spacer to match core thickness. This is my first pair using cork so I'll have a follow up after I ski them to see if I can notice anything different.
DtrainThu Apr 09, 2020 11:09 am
Downloaded this imgur app. How are you posting photos doc. I tried but just puts the link in. Not the image.
That graphic is sick by the way
Dr. DelamThu Apr 09, 2020 11:40 pm
Dtrain, did you try the BBCode? That's what I used for the link.
When you say "your Photobucket is gone" are you not able to access the pictures on your account anymore? I still see them in your journal. Is that the only place you have them stored? When I open the image in a new tab, it doesn't have the Photobucket watermark. You could always resave them that way if necessary.
I always say I'm going to build more skis in the summer but that's when I usually work the most and too much fun in the outdoors to be had. Good on you for the ambition and drive for 12 boards. I am lucky if I build one pair a year now. I curse myself every year for putting it off as it's so much easier to do wood working and base cutting outside without having to worry about the dust and mess. Plus it's so much warmer outside in the summer than a cold garage in the winter! I am definitely doing a tribute ski for my beloved lab, Milo, who I had to say good bye to a year or so ago. Every time I started working on the graphics, I got bummed out but I think it's time now.
