:: View topic - HOSE-MAN's JOURNAL - chronicling my ski build
Posts: 55 · 55 posts
unknownThu Oct 06, 2005 11:16 am
I thought it might be nice to share my build with you all.....
I am just finishing the aquisition phase of the project, just begun the fabrication phase & looking forward with anticipation to the lay-up phase.
Aquisition: I have found that the reasonable and sometimes minimum purchase quantities available from most suppliers will provide for about 5 pairs of skis. The 10M minimum Durasurf from Crown Plastics pretty much set the trend. I sourced the rest of my materials with the 5 pair quantity in mind.
Ski Press:
Steel - $117.00 from a local recycler - 16 in I-beam, 4x5 angle
Castors - $12.00 $3.00 each from Harbor Freight
Fire Hose - Free scrap from work
Air couplings & bladder ends- $? Not purchased yet from Home Depot
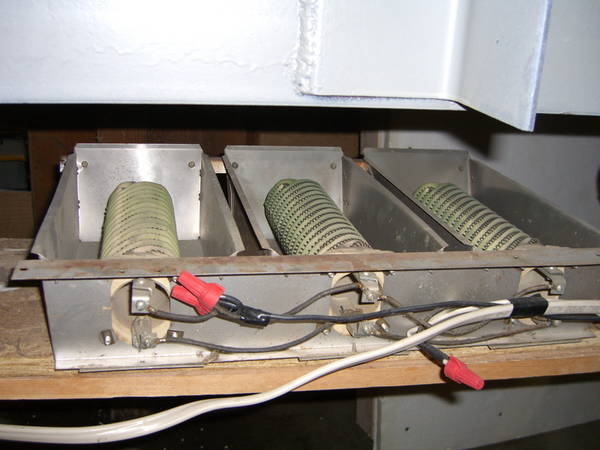
Heater coils - $Free salvaged from home converted to gas heat
Thermostat for heater coils - $? intend to aquire one from a discarded kitchen oven.
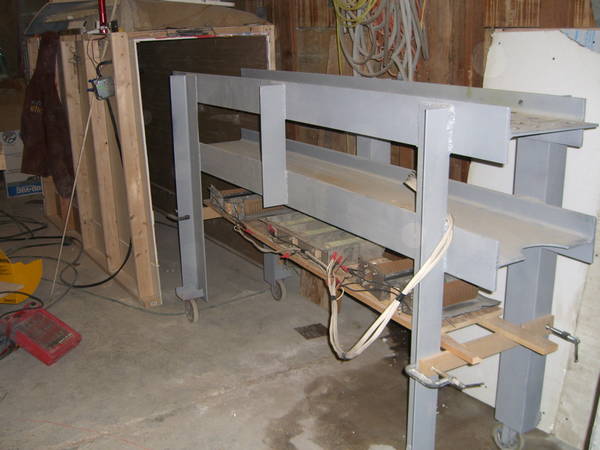
See this thread for my press design. It is all welded together. Ready for paint. Pictures will be posted in a few days.
Core profiler & ski mold:
I have not purchased anything for the profiler or mold yet. I expect to purchase all the materials for them at the Home Depot. I will be making a big, fairly expensive trip there very soon for lots of dimensional MDF, sheet MDF, and assorted hardware items. I already own the planer & router I will use in these processes. I will need to purchase a couple of specific router bits though. One for the profiling & one for sidewall finishing. The planer is relativly new & shouldn't need new knives for a while.
Ski Materials:
P-tex - $70 (shipped) for 10M of orange durasurf p-tex from Crown Plastics.
Edge Steel - 20 lengths - Snowboard materials supplied the edges, rubber & a 140cm snowboard core i will use for son's skis for $161.30 shipped
VDS Rubber - 70M roll
T-nut inserts - $49.03 - 150 inserts from Camax including 1 lb of the detection powder used to locate the magnetic caps on the inserts for drilling.
Cosmetic Fabric - $6 - local fabric store. Some blank white fabric for my 8 yr old son to draw his own graphics (JEDI light sabers was his latest idea) Orange plaid for one pair. Pink camo for my wife's & oldest daughters.
Core - $??? will purchase from local hardwoods retailer. Maple for sure & possibly some fir or even bamboo if I can get a hold of some.
ABS - $??? Sidewall & tip spacer materials will be purchased from local plastics supplier.
Topsheet $??? 0.010 UHMWPE possibly, wood veneer probably for one pair, and one plastic retailer mentioned something he called flexible PVC. I think that the isosport topsheets are this a flexible PVC. There is a more accurate trade name for the flexible PVC but it seems that I didn't make very good notes on that conversation, so I don't know the proper name. I still have some R&D to do on the topsheet before I decide what to buy. Suggestions anyone?
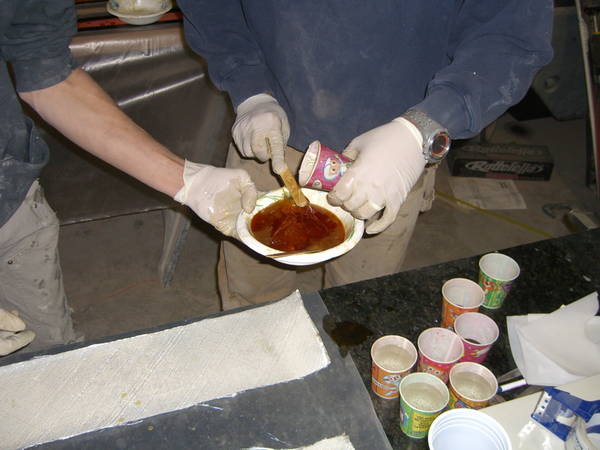
Epoxy - $75 approx for 5 quarts shipped After much research and discussion with a couple different chemists in the industry I decided on the QCM Epoxies. Resin EHV-0050 with hardener ECA-408 4-1 mix ratio. 40 min pot life but fast cure in heated press.
Fiberglass - $inside deal Vectorply 22 oz and 19oz triaxial E-TLX-2200 and E-TLX-1900
unknownThu Oct 06, 2005 3:09 pm
Ski Design: There are some skis which have dimension I am interested in copying. I want to make some PM Gear BroModel shaped skis & some Salomon Pocket Rocket shaped skis. I have some PRs already but am curious how the garage build ski of the same dimensions would ski.
Currently I am compiling some data on existing ski dimensions in order to try to establish some baseline information. Things like taper & turning radius are variables that seem to vary quite alot even within the same ski catagory. I hope to be able to share the data soon.
There are some things like wood species and core thickness that are going to have a significant impact on the character of the ski which I cant gather data on. I am sorting through the ski build on this site as well and trying to draw some conclusions about core geometry that will help me settle on a usable core profile.
I would be interested to hear what conclusions the Kams & Kelvin have reached through their trials.
unknownThu Oct 06, 2005 7:39 pm
hose-man. very nice. thanks for posting your thoughts. i'd like to see photos of your press. i'm excited to see your press in action, too, as i'm curious about the strength of the I-beams as you have them configured. keep us posted with your progress...
btw, Little Kam, Kelvin and i have been thinking more about how to make this site more user friendly, as well as figure out a good way to display the work of others. at some point it would be nice to have a gallery that shows off skis made by others. anyway, we'd like to ask about ideas for improving this site and how best to handle showcasing the artwork of others... to keep from running off on a tangent, please provide your comments in the following thread.
unknownThu Oct 06, 2005 8:55 pm
Photos are in the Digi camera, just the camera is still at the shop. I probably won't be able to get them up 'till next week, but I'll try for sooner.
Thoughts on the suppliers I've used so far.....
Camax was great except they don't process credit cards, so check must be sent then product will ship.
Snowboard materials was always available on the phone & eager to share information which was very helpfull, but when the order was placed, it didn't ship for a week or so, & even then, I only received half the edges I ordered. Lindsey @ snowboardmaterials.com is a great resource & I understand that there is a source delay on the 84" edges he sells, so don't think that I'm not recomending him, just sharing experience. I will order from him again.
Durasurf aka crown plastics was a really easy transaction. I wanted orange base material & they sold me the color I wanted off of a remnant roll for the same price as black.
QCM was very accessible. I had some specific questions about which epoxy/hardener combo to use & was able to speak to the chemist (Roy) who formulates this stuff and he really educated me about their products. The order was placed two days ago. Shipping was slightly inflated because the hardener carries a Haz-mat label.
unknownFri Oct 07, 2005 12:20 am
gret work hoseman, I'll be following it closely.
I myself am just in the process of pricing out the whole project.
If you would like more info on the Bro Models, I can get it for you. a new, softer Bro in the 177 length is in the works as we speak.
just let me know what you'd like to know
I can also post some information on different wood species and their properties. It's an area of my studies so I have a few pertinent texts.
unknownFri Oct 07, 2005 5:21 am
unknownFri Oct 07, 2005 10:44 am
Howz about core info? wood species & dimensions on both the soft, stiff & super stiff. I'm struggling to get a handle on those factors vs. skiability. Thanks!! -J
unknownSun Oct 09, 2005 11:28 pm
Thanks for putting up your build log. Our cores are 12 mm in the middle and have a straight taper towards the tips and tails, which are about 2.5-3mm. There are flat spots in the middle about 20cm and at the tips and tails about 12cms. We basically just guessed on a bunch of these dimensions and it worked out pretty well. It gives a nice round even flex, and is on the soft side, compared to something like the teledaddies. I would like to try different core profiles, but haven't had the time.
-kelvin
unknownSun Oct 09, 2005 11:38 pm
image no longer available
unknownMon Oct 10, 2005 10:46 pm
so there's the ski press frame. All the welding is not yet complete, but all the parts are attached. The salvage I-beam are of unequal length, and the castors are recycled from another project so it is a good thing that looks don't matter when it comes to ski press frames.
unknownTue Oct 11, 2005 6:38 am
man, all of these new frames kick my frame's ass. is it for a pair of skis or just one? i like the idea of having a press raised higher off the ground. i didn't realize until now that I have to walk around like a gorilla to use my press.
unknownTue Oct 11, 2005 5:19 pm
The I-beam is 16" wide, so the usable width inside the frame is about 15". I anticipate pressing a pair at a time. I have two short pieces of fire hose, but one of them may be a little too short. If it is, then I may only press one at a time until my Fire Dept has more to "dispose of".
unknownSat Oct 15, 2005 8:09 pm
very nice hoseman! thanks for sharing...
unknownSat Oct 15, 2005 8:16 pm
I've been charting ski dimensions in excel in an effort to help me decide what dimensions to shape my skis. I've compiled as many skis as I feel necessary for the data I'm after. Since I don't have anywhere to post excel file for you all to use, I will email it to K, K, or K in hopes that they can host it somewhere & post a link for you all to use. Having the data in excel is nice because you can sort by any column & compair the changes.
Here is a chart that I created from the data which shows how as the waist width gets wider the tip/waist difference diminishes a little, and the waist/tail difference decreases significantly. I conclude (like you all already knew) that as a ski gets wider, it needs less sidecut & more taper.
image no longer available
In order to have the tail represented acurately below the waist on the chart I took the waist width & subtracted the (tail-waist) value.
Unfortunately there is some data which would be tremendously helpfull, but is largely unavailable. Sidecut radius is only occasionally available and only applys to one length of the same model of ski. The running length and widest tip point to widest tail point measurement would be nice to know too. But tip/waist/tail is really all we get.
unknownSat Oct 15, 2005 8:17 pm
My epoxy arrived so the onlythings I still need are all the wood products & the ABS & topsheet plastics.
Linsey at Snowboard materials told me that the isosport topsheet materials is called PBT & is .024" (0.6mm) thick. I have not called any local suppliers to see if they can get it yet. I know I can get UHMWPE in .020" thickness up to 6" wide on a roll. That would be mostly clear & reasonably durable. The UHMWPE is my back-up if I can't locally source the PBT.
unknown
hose-man. write up a brief article about your thoughts and send it our way along with the Excel file. (see the format under "articles" section ). we'll be glad to post it. it's interesting information..
send to leangkk "at" yahoo dut com if you like.
unknownMon Apr 24, 2006 1:03 pm
Hi guys! Im posting some pictures of our progress with the mold.
We have almost finished it. It consist on a mix between clamp and neumatic press. We dont have air compressor so we decided to blow air into de hose, close the air valves and then apply pressure by clamping the two molds with the bladder inside to do a uniform pressure.
Here are the pictures until today 24/04/2006
1. Drawing the line to saw the wood
image no longer available
2. Sawing it
image no longer available
3. Sanding the mold
image no longer available
4. Cutting the tubes to clamp the mold
image no longer available
5. Painting them
image no longer available
6. Drawing the holes
image no longer available
7. Drilling the holes
image no longer available
8. Glueing the mold
image no longer available
9. Because of the bad quality of the saw the different strips didnt make a flat surface so we dediced to put a slim metal sheet (1mm thick) but we had a lot of problems to bend it (even with the torch) but finally we got it
image no longer available
10. Cutting the sheet
image no longer available
And this is all at this moment, Ill post you some more pictures when we continue with the process!
unknownMon Apr 24, 2006 1:34 pm
Great pictures, I can't wait to see some more. You might want to sand down your mold so the pieces fit together as close as possible be for you attach the metal to the top of the mold. My first mold had some small imperfections that I thought would be covered up with sheet metal like the method you guys are using and the imperfections could be seen as high and low spots in the base. I also used vaccuum pressing so there was not a lot of preassure on the skis in the mold. The high spots can be removed with a base grind, but the low spots are there for good. Even with a few low spots (1-2mm) in each ski they still worked pretty well. I am looking forward to the pictures of your hybrid pneumatic/clamp press, it sounds like a good idea.
unknownThu May 11, 2006 4:15 am
nice idea with that combination pneumatic/clamp.
Sounds easy to build. I only built a clamp press. But yours seams to be better!
I am looking forward how it works!
unknownThu Oct 20, 2005 9:00 pm
PLASTICS? What a headache! I need some help from everyone here after todays trip to a local plastics wholesaler. I went with the intention of buying the ABS sidewalls, tip spacers & topsheet materials I need. I left without having purchased any materials and with more questions than when I went in. Maybe you all can help me.
First, the easy stuff, -ABS for sidwalls:
Judging from other people's posts, and the sidewalls available at Snowboardmaterials.com the ABS sheet I buy should be 1/4" thick. Is this the standard haircell on one side, smooth on the other, extruded ABS that I was looking at today? Just need some affirmation here because I am really clueless about plastics.
Little harder.... What to use for a tip spacer?
I've read that some people use ABS for the tip spacers. Anyone using UHMWPE? Either way, what is a good thickness? Looks like KK&K's cores plane out at about 3mm (1/8") I suppose that the tip spacer would be the same.
Impossibly hard. What to use for a topsheet?
I notice that the KK&K are using p-tex as their topsheets now. Is this Durasurf? or a UHMWPE for a industrial plastics supplier. The supplier I visisted with today can supply rolls of UHMWPE at 0.020" (0.51mm)thickness. This seems like it would be a good top sheet. I have not compared it's price to the thinner p-tex available from Crown Plastics (Durasurf).
---or----
Would a product like Isosport be better? I called Linsey at Snowboardmaterials.com and tried (with as much tact as I could muster) to ask him what the common name for Isosport is. I believe he said it was PBT. The closest the plastics supplier could think of was called PETG. It is a little like Lexan as best I could understand. It is only $15 for a 4x8 sheet, so I asked them to bring one in. Lastly, I was intrigued by polycarbonate, it seems like an ideal material, but I see that KK&K suffered a delamination problem with it, and the supplier warned that I would likely have a negative reaction the the epoxy. Specific chemicals are recomended for gluing it. I took some sample pieces of the polycarbonate just to do some of my own testing.
unknownFri Oct 21, 2005 12:09 am
i definitely feel your frustration about getting the plastics. i've simply given up driving around to my plastics stores only to encounter sales people that just don't have a clue as to what they're selling. plus i'm tired of my hands looking like swiss cheese after rumaging through all their stock.
i buy all of my sidewall and topsheet material from Durasurf from now on. it's just easier. i don't have an exact measurement for the topsheet material but i think it was half as thick as the base (approximately 0.5mm). as for the sidewall material it comes it 1/2" thick sheets. I think the thicker you can find the sidewall material the better. It'll give more room for error when laying up your core.
a note about the isosport topsheets. all three of us have had major problems with them. you have to keep in mind that these are designed for snowboard use and do not withstand the abuse that skis tend to have on each other. every single pair of skis i've made with the isosport topsheets have chipped significantly on their first day out and end up looking like junk real quickly. i'd recommend getting something stronger like that UHMWPE stuff your supplier has.
tipspacer isn't too much of a big deal in my opinion. i've ran out of my ABS stuff so instead of ordering more material i'm just going to use leftover base material. i'll have to double up the layers to get the right thickness but i'm sure it'll work fine.
you can also use fiberglass as your tipspacers. we did that with the Kananas and for the most part they turned out pretty well. it's just a little tricky getting the fiberglass pieces to stay exactly where you want them.
i think kelvin can tell you more about the polycarbonate stuff. we've only used them on the kung paoders, which are a part of kelvin's quiver.
unknownFri Oct 21, 2005 4:47 am
Through my travels if have found that ski companies can be slightly misleading with their given dimensions of skis. You already pointed out that width dimensions are only truely given for one length ski.
Here is something else to chew on. Under closer investigation of a pair of 190 Volkl Explosivs (2004), the cord length of the ski is only 186 cm, Tip-waist-tail seemed good though. I got shorted over an 1.5" of ski that I paid for. This indicates to me that there may be some inaccurate published measurements of high production skis, maybe a marketing scheme.
This also makes me wonder how they are giving the radius of sidecut for the ski as well. I had figured an equation that took some liberties to calculate given Rsc from supplied dimensions of skis to back out Rsc for shorter versions. It works pretty well when verified against volkl and atomic, Mid-fat and fat skis. I will be back to post it when I find it.
unknownFri Oct 21, 2005 7:25 am
how do you measure skis? ski lengths are with the bends. The height of the ski is about 2cm. shorter.
unknownFri Oct 21, 2005 9:16 am
I've been going to Tap plastics and they are pretty helpful.
For the sidewalls we are using 3/8" abs. 1/2"would be better but Tap does not stock 1/2". For the tip spacers, we use 1/8" abs. As Kam mentioned, it's easier just to get it from the same place, and the next time I order base material, I'll probably get all the other stuff as well.
The UHMW that you can buy off the shelf is a little different from the ptex from Durasurf. 1.) Durasurf stuff is sintered (which doesn't matter for the top), 2.) it is abraded and ready for bonding. For some reason, doing it at home with a sander doesn't do nearly as good of a job as the durasurf.
Isosport makes a bunch of different topsheet materials. I think the stuff from snowboard materials is ISOCAP, which is designed for cap skis. This is probably why it chips so easily is a sandwich construction. They do make ISOTOP which is meant for sandwich construction. You can contact http://snowboardmfg.com/index.htm for ISOsport material. I talked to them a long time ago and can't remember the exact pricing, but I think it is expensive.
Polycarb looks great out of the press, because it is really clear and shiny. It did not bond well and delaminated pretty quickly. It's hard to abrade things at home with a hand sander. Maybe if you had a sandblaster, that would work better.
-kelvin
unknownSat Oct 22, 2005 4:14 pm
I'm not sure that I agree. I think that the filler in the tip might have some impact on how the ski busts through crud. If the filler material is supple, it will to readily flex but may create a marmonic & lead to chattering or dampening issues. A tip that is to stiff may lift the body of the ski and fail to initiate solid edge contact. I don't know this for a fact, I am just guessing.
More plastics questions.....
What dimension is the 1/2' thick ABS that durasurf is sending you? Surely you are not shipping 4x8 sheets.
Is the ABS you are using for your tip spacers just the standard smooth on one side, hair cell on the other ABS sheet?
Sounds like the p-tex top sheet is the way to go. I was just hoping for something more transparent.
unknownSun Oct 30, 2005 9:09 pm
it's true that tipspacer can have an affect upon performance issues such as crudbusting, lift, etc. but i try to address these issues into my core rather than into the tipspacer material itself.
from durasurf, the tipspacers are made from UHMWPE and come in a white color. the minimum sheet size you have to order is about 6" x 72" and you're supposed to rip the strips yourself.
for my old ABS material it was smooth on both sides.
unknownWed Nov 02, 2005 10:01 am
I posted this in the general "heated press" thread when I guess I should have put it here. Best of luck and all. To quote myself...
You said you were taking the heating element out of an old heater for your press, which seems like a good idea to me. How are you mounting it? I had a kinda crazy idea about making your own silicone blanket. You could lay out the wire in some regular pattern and than cast silicone around it. Doing a little googleing it seems that ordinary silicone caulk is rated to 400 deg F and you should be able to thin it with xylene [nasty stuff, but at any hardware store]. I was thinking: lay out the wire in a shallow mold; cast a layer of silicone as thin as possible and let cure; flip it and lay a very thin layer on what was the bottom. Holding a vibrating back massager to the bottom of the mold should make it level out pretty well. It seems silicone doesn't like to bond to silicone that's allready cured so that might be a problem if you're not gentle with it.
unknownWed Nov 02, 2005 10:06 am
Things have been slow going lately for lack of free time to spend on the ski project. Yesterday I did get to do some shopping. I purchased the wood for the wood cores. About 12 board feet of maple and 8 board feet of poplar. I also scored a sample walnut veneer that is large enough for one pair of skis for free.
PLASTICS (agian)
I found a clear plastic that I will be trying out as a topsheet material. It is called PETG. The thickness is .020" and was only $15 for the 4x8 sheet. It is crystal clear but a little bit softer than I expected it to be. Even if it bonds well it may still be damaged easily by edge contact from the other ski.
As far as the ABS for sidewall & tip spacer goes, I have decided to order them from Durasurf(Crown Plastics) Along with some black ptex for bases and clear for topsheet if the PETG doesn't workout.
EDGES: I found a pipe bender that with a few small modifications will function handily as an edge bender. Pics will follow soon.
unknownFri Nov 11, 2005 9:36 am
Describing this will be difficult, so I will go capture some images of the heaters & their intended destination. Basically I am going to remove the heating elements from the radiant heater & mount them underneath my press. They will have to heat the steel which will distribute the heat & in turn heat the press area. Quite a bit of electricity will likely be consumed to accomplish this, but the initial investment is $0.00 so it's worth a try. I have not sourced it yet, but I intend to use the temperature regulator system from a conventional kitchen oven to keep the heat right. A probe will have to be embedded into the imediately above the ski to sense the temperature.
unknownSun Nov 13, 2005 4:32 pm
just got done with the order from Durasurf. The top sheet material is 0.030" I ordered the minimum order of 10m. I ordered DuraJet base in black this time, also 10m. Side wall material is sold 13" wide, 3/8", 7/16" and 1/2" thick and as long as you want it. I ordered a 6' length. I elected to not order tip spacer material because it had the 10m minimum order & I would never use that up. I will get some ABS from the local plastics distributor.
edit for spelling
unknownSun Nov 13, 2005 7:52 pm
hose-man, your article is up! http://www.skibuilders.com/articles/skidimensions.shtml
unknownMon Nov 28, 2005 1:02 pm
I love the table of dimensions, glad you put in all the man hours on it. All die-hard number lovers will love the publication by John Howe, "The new skiing mechanics."
John currently builds his own salomon/freeride skis out of Jay, Maine. He formally worked for Head skis as an engineer. If you want to see how his brain works with ski design I recommend purchasing his book.
All though his designs are not as contemporary as ours, in a sense they are with radical sidecuts and tapers. Just a suggestion.
unknown
Is that near you? and, Have you visited? or, is that you?
I took a look at a web site a while back that had a bunch of info about the book. It may have even been John's website. It was interesting, but didn't hook me well enough to buy it.
unknown
How much did the side wall material cost?
unknownTue Nov 29, 2005 8:00 am
I'll check my receipt....
unknownSun Mar 05, 2006 10:46 pm
Snow started falling & I got a little side tracked. Lately we haven't had much new snow & it's been warm, then cold so the snow sucks and I remembered that I have a little project to work on.
My bother now lives nearby and has been involved in the process. He is this skinny guy you may see in a picture.
We've built the camber bed and the tip and tail blocks for the cassette. We just flexed a strip of MDF to create the radius which has about 15mm of deflection over 170cm of running length. We sampled some of the ski's we own and this seemed like a good intermediate camber amount.
The flexed mdf strip is clamped in place to trace the radius.
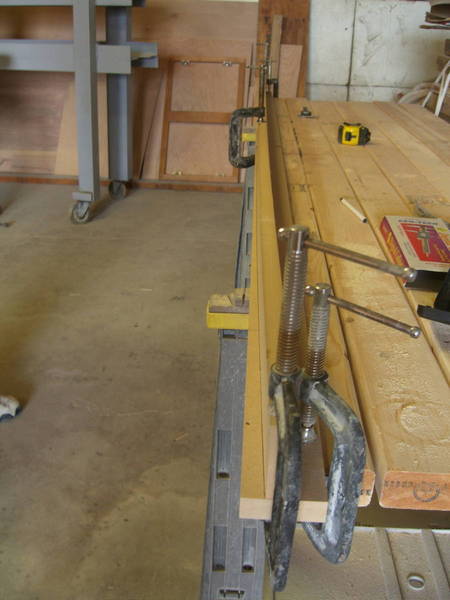
That line is then cut to create our template for making all the other camber strips (that guy is skinny)
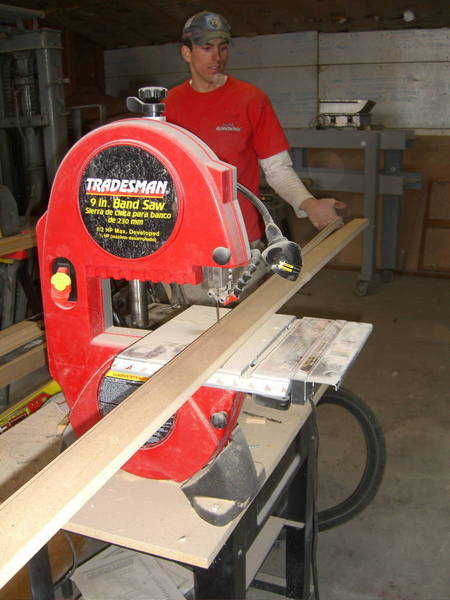
This guy isn't as skinny. Smoothing out the radius of the camber template.
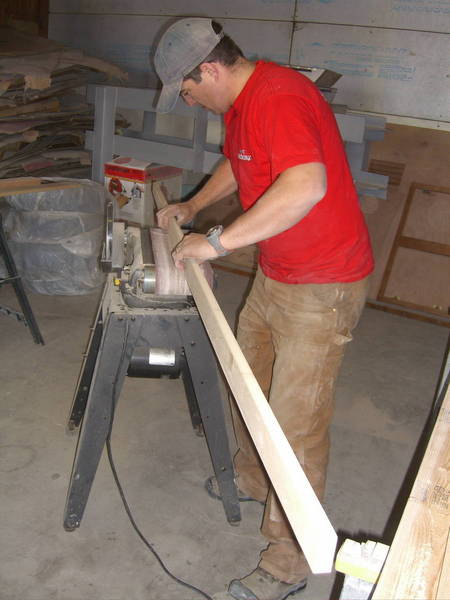
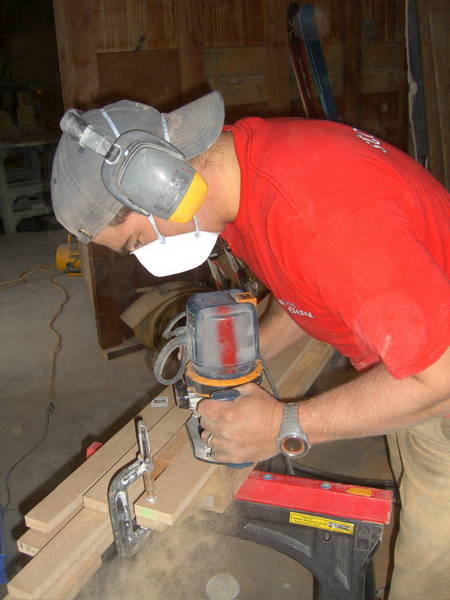
We clamped a strip of MDF over the template piece and routered it with a flush cutting bit. Repeating that several times created the strips for our camber bed
unknownSun Mar 05, 2006 10:50 pm
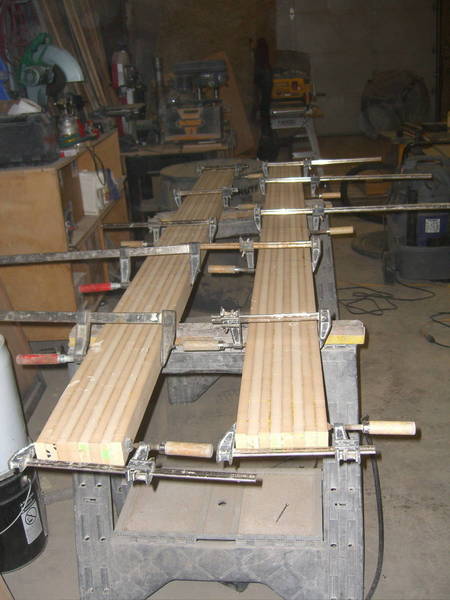
gluing the camber strips together
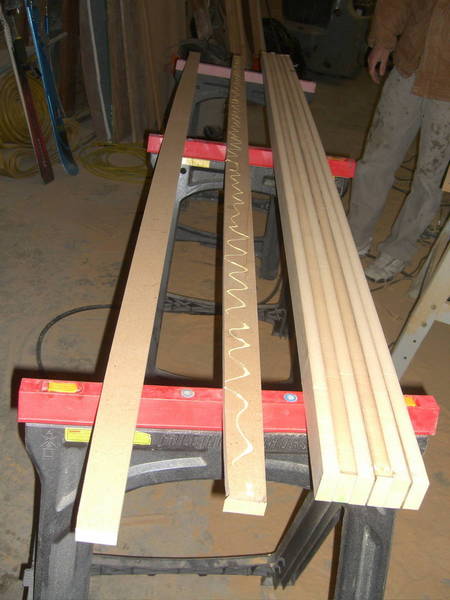
the two camber beds for our two ski press clamped up letting the glue dry.
unknownSun Mar 05, 2006 10:57 pm
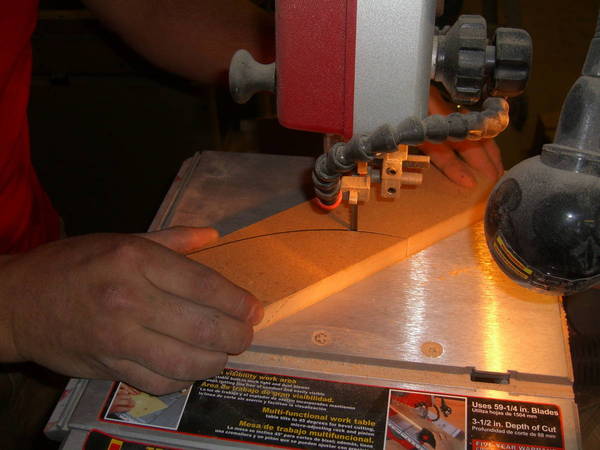
Determining the tip radius was a little tough. We ended up using a section of a oval from a bathroom sink template. The tip/tail shape we use is slightly progressive.
all the tip bock pieces glued and clamped together (4 sections)
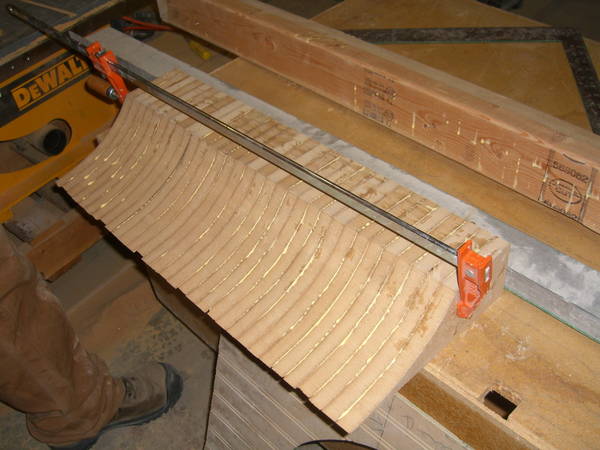
Once the glue dried the strips were all a little uneven so some sanding was in order.
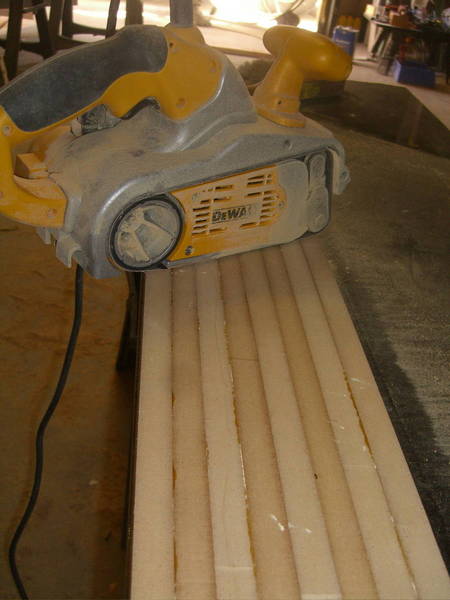
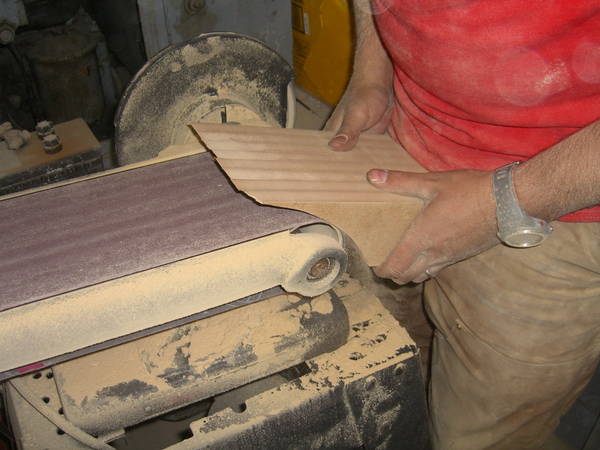
edited to fix spelling error
unknownSun Mar 05, 2006 10:58 pm
Here are the main components of the lower cassette for the press:
We still have make a way to secure the tip and tail blocks, but leave them adjustable too.
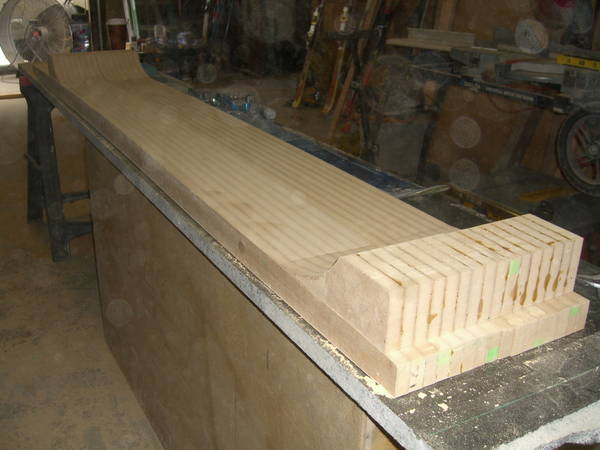
unknownSun Mar 05, 2006 11:06 pm
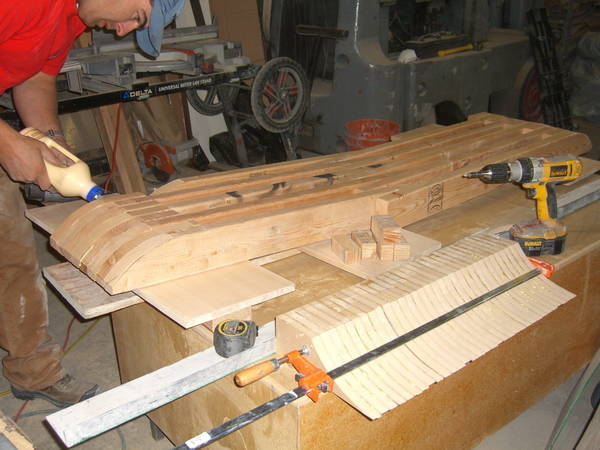
Next is the upper portion of the cassette. This just takes up space so that the pneumatic bladder has something to press against. It needs to be roughly the same shape as the lower cassette and adjustible because we want to make skis of different lengths.
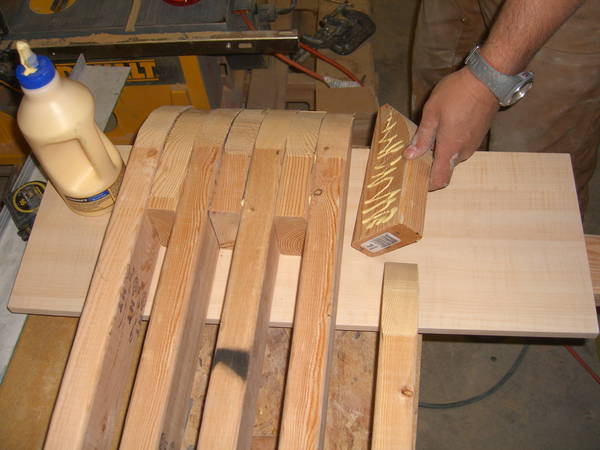
The interlocking legs of the upper cassette allow the length of the unit to be adjusted to fit whatever length we set the lower section at.
unknownSun Mar 05, 2006 11:11 pm
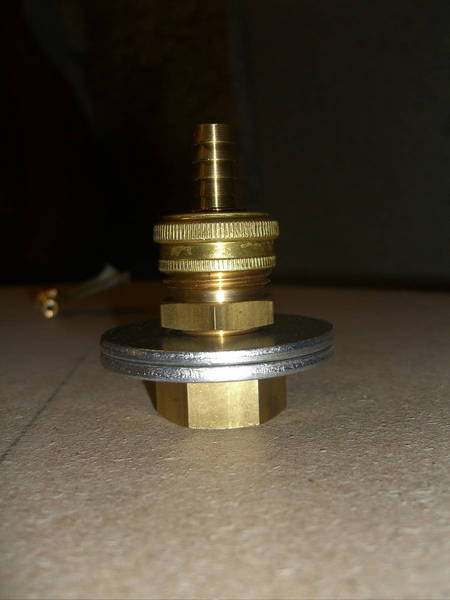
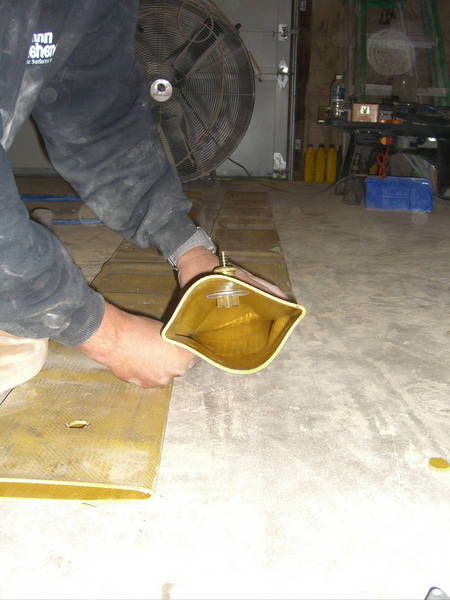
Brass fittings and washers make up the through-hose fitting for getting air into the bladders. All are available at HomeDepot or Lowe's.
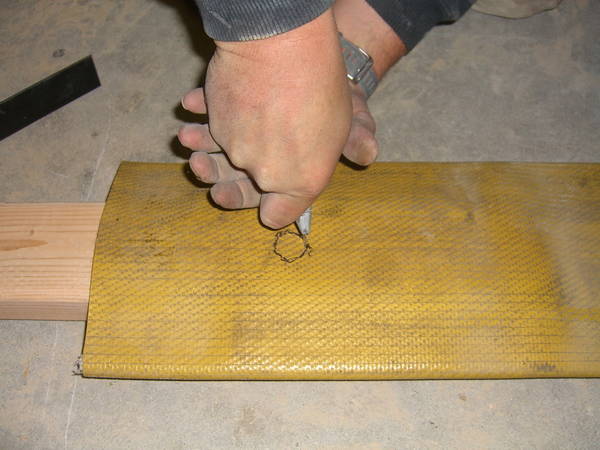
Cutting the hole:
coupling is in place. Silicone caulk was applied to both sides of the coupling before assembly.
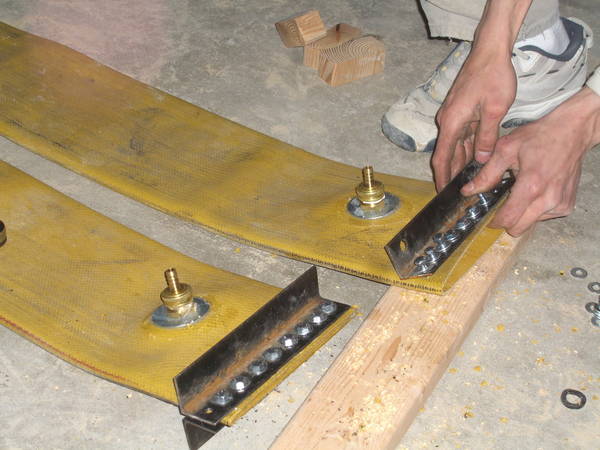
Clamping the hose ends. Loads of silicone applied here as well.
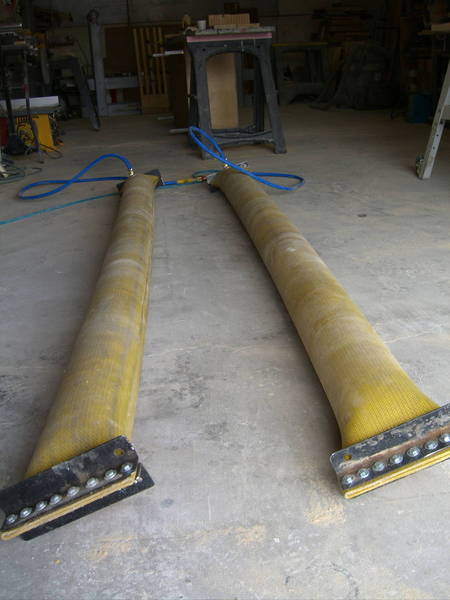
24hrs later we tested them. No leaks up to 80psi
unknownMon Mar 06, 2006 9:53 pm
nice work hose-man!
unknownMon May 01, 2006 8:54 pm
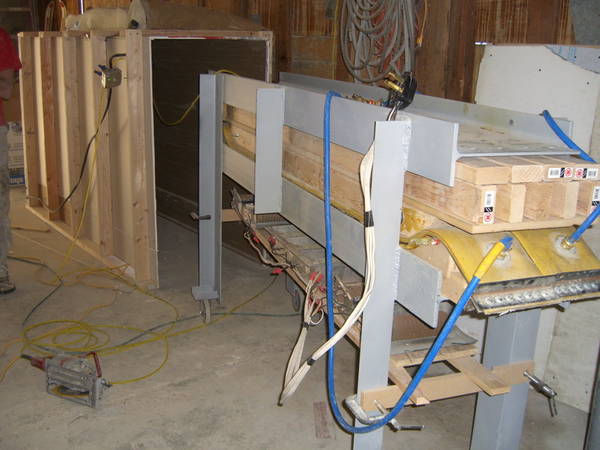
A week ago we built an oven to enclose our press frame and placed salvaged resistance heating coils inside. We easily reached a temperature of 190 degrees F which should be pleanty for our epoxy combination. You should see my electrical meter spin while the heater is on though. It consumes 10x the electricity as our normal consumption. These dang skis just got more expensive. I have some images of this ghetto version of a heated press, but they're not with me.
We planed the cores for the first pair of skis this week. We used the thickness planer method that Little Kam described in his article. We had a little problem with the ends of the core chipping badly.(pic will follow soon)
unknownMon May 01, 2006 9:06 pm
We also did some test laminations with our epoxy in the press oven to make sure the temp was right. We did several blocks of different combinations of materials to test their adhesive qualities. Some worked. Some didn't.
Again, pictures will follow.
unknownTue May 02, 2006 9:06 am
Hi hose-man. Nice work really!! We have the same hose as you but in our way to build our press as cheap as possible (all the materials weve used come from our building work) we have used a inner tube valve from a bike. I hope it will work because they are built to work up to 65 psi. I dont know if it will withstand more pressure but well check it. If not I think we will have to buy valves like you have used.
So us more pictures because it could give us ideas.
Here are the valves.
image no longer available
unknownSat May 06, 2006 8:00 pm
We are getting very close to being able to press our first skis!!!
Here's what's been going on lately........
Our first core is alternating strips of Maple and Poplar. The planks are glued together & now I'm planing them to get them square. Very nice effect with saw dust on the camera lens don't you think?
image no longer available
Now strips are being ripped to glue together as a symetrical core, just like they described in THIS article.
image no longer available
Once the core strips are all laminated together we planed the cores using the thickenss planer method that Little Kam describes HERE. Our results were good, but we experienced some chipping of the core as the end of it ran under the knives of the planer. We had better success with the second core when we glued the core to the jig so that it couldn't bounce up into the knives & be chipped. Planing wood that thin is difficult. Luckily all the chipping was outside of the finished area of the ski core so nothing was lost.
image no longer available
unknownSat May 06, 2006 8:23 pm
My first shape is going to be the same as my 185cm salomon pocket rockets. My thinking is that this is a familiar shape to me & I will be able to guage the flex character of the core profile we've chosen compared to a known ski. Our core is 10mm this under foot with the underfoot platform extending 12cm ahead of center and 20cm toward the tail. there is a linear taper to 2mm at the end othe the running length of the ski. Kam and Kelvin should recognize this profile since I've stolen it from the dimensions they list on many of their skis.
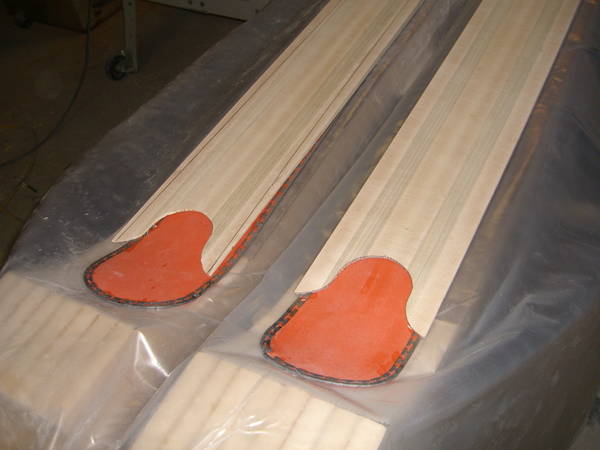
Preparing the base was a snap. I just clamped my Pocket Rockets to the ptex and used a utility knive to cut the shape out. Once i had this slightly oversized ptex form i carefully trimmed the with of the metal edge off the entire perimeter of the base. Occasionally checking the shape against the actual ski. Then I used one base as a template to trim the other.
image no longer available
Next came bending the edges....
image no longer available
We used a torch to wreck the temper on the steel of the edge & then used a combination of techniques to round the ends over. First we used a modified pipe bender to put a basic radius in the metal edge
INSERT IMAGE OF MODIFIED PIPE BENDER HERE
unknownSat May 06, 2006 8:35 pm
We did some test laminations with some of the different components we have procured to see what will work & what won't. I've been looking for a topsheet material that is clearer than Ptex but bonds well to the rest of the ski. You can see in the images below that it is very clear, but didn't bond very well.
Test laminations for a wood veneer topped ski....
LEFT: wood veneer. no top sheet. a polyurethane would be applied after the ski is complete. some epoxy seeped onto the top of the veneer. I don't think that is a big deal. This would be a viable way to finish a ski, but not very durable.
CENTER: experimental top sheet. (cant remember what the plastic is called, but its not a polycarbinate, because the Kams & Kelvin already ruled that out) This material was flexible, very clear, but very smooth on both sides. It did not bond well. With a little effort the layer could be peeled up off the ski. This did however reveal a very nice, epoxy saturated wood veneer that could be a satisfactory finish for a ski. The top right corner of the test block has the clear plastic cut away. The horizontal scrach is the result of scoring with a utility knife to try to guage durability, and the impact marks on the top right are attempts to simulate edge impacts and asess durability. The epoxy saturated veneer seems fairly durable. This may be the way to go.
RIGHT: This is the veneer under "clear" ptex. Good adhesion, good durability, doesn't look so good.
image no longer available
unknownSat May 06, 2006 8:47 pm
More test blocks. This time with fabric graphic layers.
LEFT: White lightweight fabric under clear ptex with blue spray paint top left, green grease pencil center right, and red sharpie bottom left. The white fabric turned transparent and the wood is visible beneath it. The red sharpie bled with the epoxy. The spray paint would work fine & the grease pencil marks didn't bleed, but still just look like grease pencil marks. The ptex was accidentally aplied upside down so it didn't bond very well.
CENTER: Pink Camo Canvas under the ultra-clear plastic. The plastic did not bond well at all. In fact, it's not even on the test block in this picture. The epoxy saturated canvas that remained is attractive looking and seems durable to impact and cutting type abuse. The color did darken somewhat, due to the dark amber color of our epoxy.
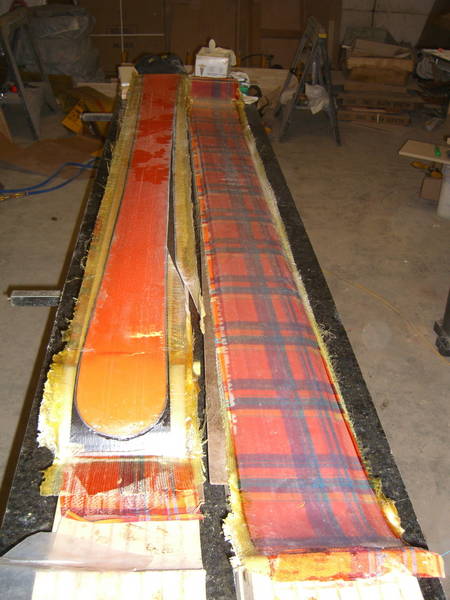
RIGHT: Lightweight orage plaid fabrick under "clear" ptex. Again, the ptex was upside down so it didn't bond well. In this case, I think that the colors are contrasting enough that the ptex could be used over this fabric with satisfactory cosmetic results. I peeled the corner of the ptex off so that I could test the durability of the epoxy & fabric on their own.
image no longer available
I should mention that these test laminations were all just blocks of pine, then a layer of epoxy soaked fiberglass, then the graphic layer, then more epoxy, then the top sheet. The only exception being the raw wood veneer which didn't have anything on top of the graphic layer.
unknownWed May 10, 2006 8:49 pm
Pressed some skis today!!!!! I have a lot to say about it and several photos, but no time for the words, or mechanism for uploading the images here at the firestation.
I am very excited.
unknownFri May 12, 2006 11:53 am
Me too!
unknownTue May 16, 2006 2:49 pm
Great Pics. I really like your oven. What are your heaters off of? Can't wait to see the skis all trimmed out and here how they work.
unknownTue May 16, 2006 10:22 pm
What's up with having both concave and convex ends on the cores? Just wondering why... Good work!
unknown
I saw that you had a valve similar to a bike or a car, do you fill up the hoses and seal them? and do they actually stay sealed or do you have to keep pumping them up?
Also, what pressure does that put on the skis?
I am using hydraulic pumps and I am pressing at approx 8000 lbs, I am pondering making another press but I am thinking of using fire hoses and a compressor but I have fears of it leaking air and things becoming ruined.